PRESERVING WOODLAND COLLECTABLES
My first tip is to have realistic expectations while preparing for and ARTventure with your kids-
When doing arts and crafts with babies and most toddlers, remember to complete a craft’s cutting and drawing before handing a craft basket.They can not do either. They can scatter art supplies on contact or sticky paper but not put them in an exact spot. They can not put paint or glue on a paper or other surface. You can put dots on paper.
I never have and never will prepare pretty sectioned art trays with tons of supplies for babies. It’s just not safe. I will prepare for their craft in stages, in small manageable baskets with just what they need. You just don’t give a baby sequins or glitter at the time that you want them to paint. They will grab at everything in the tray and want it all at once. At the very least they are a huge distraction. So I hand them a basket for the first stage while the rest of their baskets stay out of reach until needed.
Other Tips:
Put small items for art in spice containers with screw on lids not snap on lids.
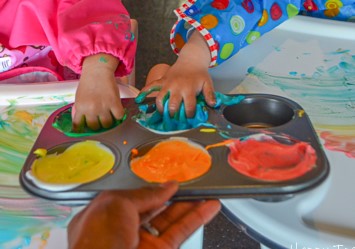
Use edible homemade paint or a non-toxic brand for painting with no worries.
Use thick watercolor paper or cardstock (or recipe cards) so you don”t get the waffle effect like on computer paper.
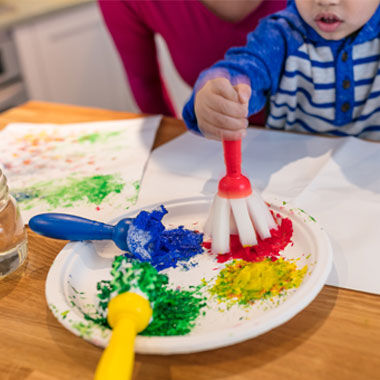
Use short fat paint brushes and don’t expect a proper grip.
Hope was very determined that her artwork was to be hers from a very young age. She was very into her freedom in creative expression; even when using nature in her artwork. It was lucky that I was versed in open-ended process art. When working with babies and toddlers artistically, the adult needs to be careful to let them create joyfully in their way. You know that your little one is not going to cut or draw so put those plans away until they can. They need to get those fingers moving and develop their fine motor skills. Let them develop them with playdough, felt boards and pieces, blocks and magnetics. Art expectations need to be about what they can do at that moment with the supplies they can handle.
Place the supplies they need and tools that are both familiar and unfamiliar with them on a tray. Make sure everything is prepped so it is ready for them to grab and do what they can do for toddlers. Cut or create what you need to do prior to setting out your tray of supplies. Some days you can take some of their time and work on a skill outside other times they just wanna have fun.
Some days you will need a second set of everything so they can see how you do the tasks. They will (most likely) join you and adapt it to their skill level or interest level. They will relate to easy and quick two to three step projects and will often want to feel you at their side. When you want to make a project together, ask them if they mind you helping.
Most of Hope’s early baby art was impromptu and we just used what we had at home… Natures bits, scrapbook supplies and household items. To her everything in the world was produced to be in her artwork.
I would sometimes cut out biggie patterns of large shapes for the season or holiday. That was the extent of my plans. She could smear finger paint (or what ever I was using in the kitchen that day), crumple it, bite or taste it, slap or smash it, use it for a mat for playdough, dip it, poke it or pound it, see what would roll off or stay on paper as a stain, kiss it, tenderly give it to a friend or put it in water: or even take it outside to watch lady bugs and rollie pollies crawl across it. The lower kitchen cupboards and refrigerator is where she always looked for inspiration as to what to do with it. So I would sneak in something new for my Curious George to discover every now and then.
I think of the time she put a pan on a piece of paper and leaned on the pan as if to smash it like playdough. I laughed so hard when she picked it up and it was the same as when she put the pan on it. Her face was so funny. So she tried it again and again until she got bored and moved on to another activity. When I gave her a sippy cup that day she enjoyed dripping the milk on construction paper because she loved watching the construction paper get dark.
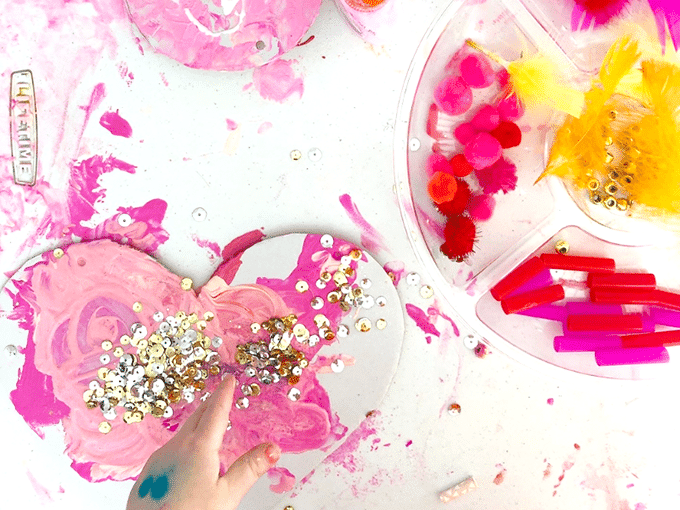
I of course had her make it into art and handed her a cotton ball to smear it with. She seemed pleased with herself so she went to the frig and knocked on it, to get me to open it. Then she experimented with other products until most of the food on lower shelves was tested.
I included this story because I want you to remember that they often just want to experiment and learn on their own. It was always like an adventure to her. (And they also want to do it on their schedule -when they choose to do it.)
One thing to be prepared for is the splatter--getting it in their eyes and on her clothes. I just grabbed a clean kitchen towel and had her do it outside with just her diaper on.
Don’t teach or plan very much. They will find a way to use the supplies they want in the way they want. They might even come up with a new way of using those supplies that you didn’t think of.
Use Splat mats or newspapers when doing something like this inside your home. The Kool-Aide was beautiful to add, but I had to plan ahead to keep my floors from being stained. I had a large wet sponge in the sink close by.
They will repeat what they found to be fun with other supplies. Why mess with success, right?
Take pictures-lots of them. Projects using food do not store well or last very long: even in a Zip-lock or plastic container. In fact little silver bugs will munch on everything in the container.
Letting your children try their way will allow them to become independent and creative thinker’s as they grow.
Art is like play when introduced to your little one. We are there to make sure they enjoy it and that it is safe.
IT IS THEIR ART when they do it. IT IS OUR ART when we do too much off it.
They will learn without us “teaching”. Hope learned first that different substances react differently on an art surface or medium. Then she learned that changing the surface materials meant different reactions as well. And she did that on her own terms.
Art is not a life skill that they learn by being instructed how to do it. It is meant to be fun and something they discover and enjoy. They will remember an experience and it sticks with them to expand and build on the rest of their days.
Using food in their early art allows them to learn from the art process much earlier than if we waited to use store bought supplies. Anything can be used as a medium or a tool in a child's world. Let them explore and experiment, without having to scold them for putting it in their mouth.
Art is a little bit of science and magic. Mixing up the combinations of mediums and tools is science as they explore using them together. But creative magic can be seen as they experiment and it comes out beautiful and unique to their abilities.
Even if it looks like a scribble or a mess: it is what they intended it to be when picking up their tool or choosing their medium, to them. So leave it out and tell them you“liked the way they are using new things” or that you “love to see their creativity” in that project. Encourage them rather than saying anything that would discourage them.
ONE MORE THING: Everything I paint looks like a still photograph. Hope puts in how she would enjoy that scene...as in wind blowing through the leaves in the tree, ripples in a stream so you can almost hear the babbling sound of the water, snow on a tree branch so you want to reach out and grab it and make a snowball.She put magic in her paintings because she wants you to enjoy the journey of looking at her artwork. She is more creative and has more of an imagination than I do. I do art to complete the project. That's it. I enjoy watching her create much more than creating something myself. She adds in magic. I use science. As in what colors create a visual balance, how hard I should press with the tools and what direction I should move the tools; in consume my thoughts-I’m Dyslexic. I think that is why I strongly encourage the use of open-ended process art. (There is no expectation that I fail to meet in process art.)
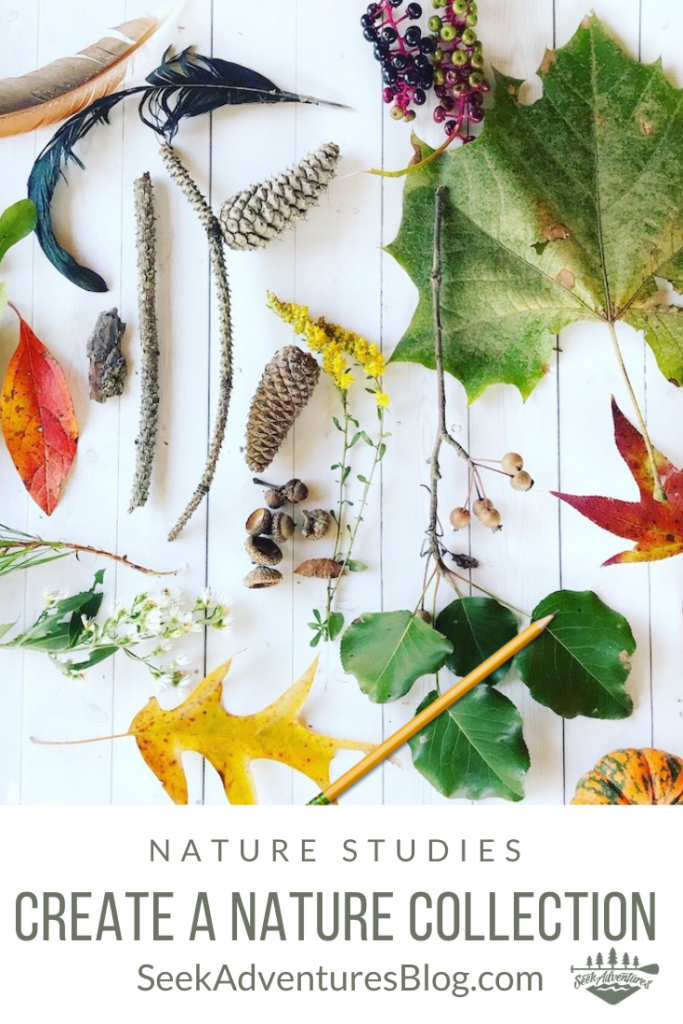
Simple Nature Collection
On to art that uses what you collect from nature…
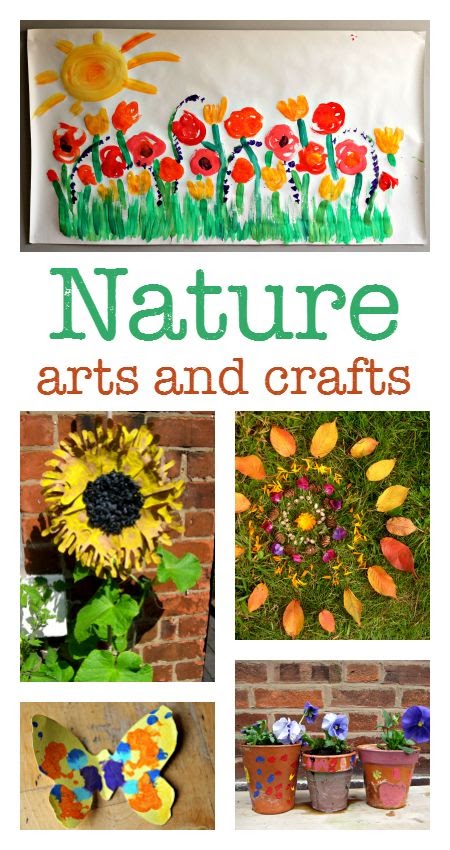
Nature Crafts for Kids are a fun way to get little hands busy while connecting them with the great outdoors. This collection of creative projects uses leaves, twigs, stones, and more to spark imagination and encourage exploration. Perfect for rainy days or sunny afternoons, these crafts are easy to follow and bring nature’s beauty right into your home.
When my twins were little, one of our favorite things to do in the summer was head to this quiet, woodsy park just down the road from our house.
We’d pack a little bag of snacks, bug spray, and magnifying glasses, and just wander.
They were curious about everything.
Tiny bugs on tree bark, weird-looking mushrooms, smooth rocks, bird calls—all of it felt like a new adventure.
I didn’t plan fancy activities or crafts.
I just let them explore. And honestly?
Those simple nature walks gave us the best memories (and tired them out by nap time, which was a bonus).
If you’re looking for nature-inspired summer activities for your own kids that are actually fun, and don’t require a trip to the craft store, here are a few ideas we’ve loved over the years.
If you’re looking for easy ways to keep your kids busy this summer, nature has you covered. These outdoor activities are fun, low-prep, and perfect for getting everyone off screens and into the sunshine.
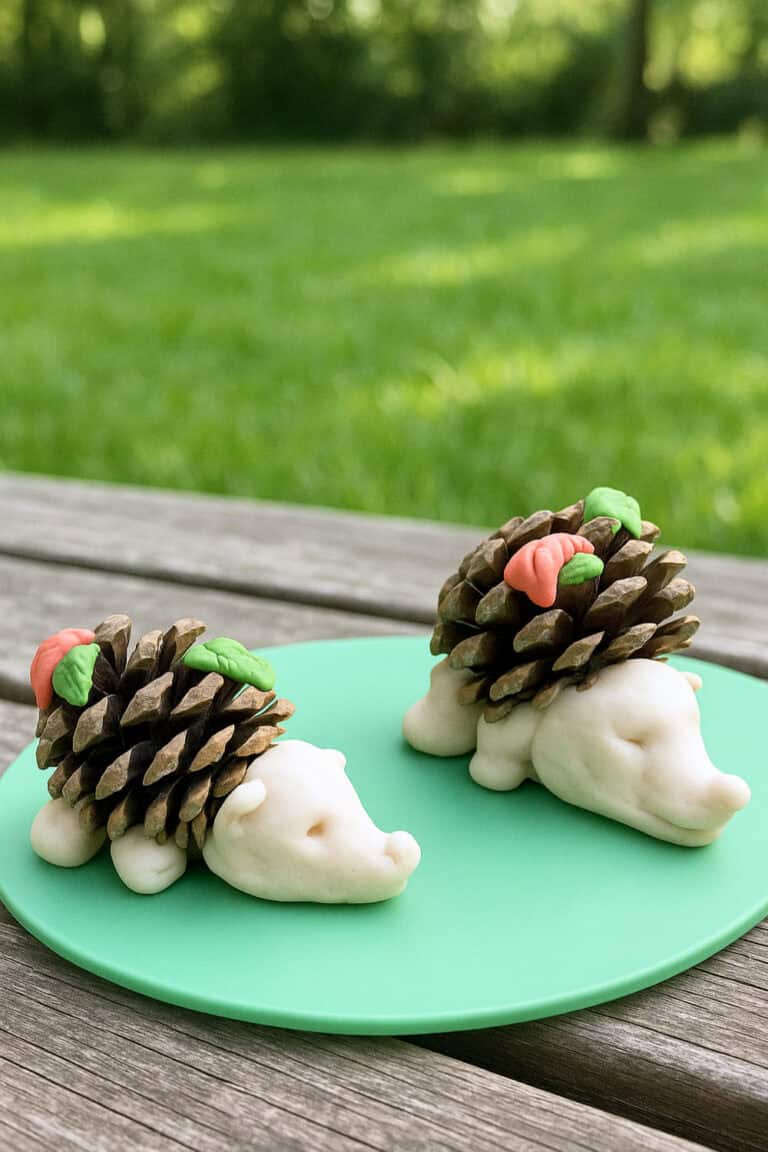
Here’s a simple step-by-step guide for making Pine Cone Hedgehogs using salt dough and natural materials, perfect for a fun summer craft day!
Materials:
Pine cones
Homemade salt dough (recipe below)
Food coloring (optional – for decorating with leaves)
Pencil or knife (for details)
Oven (or let it air dry)
Make Your Own Salt Dough:
You’ll need:
2 cups flour
1 cup salt
Up to 1 cup water
(Optional) Food coloring
Instructions:
In a bowl, mix the flour and salt together.
Slowly add water a little at a time, kneading until you get a smooth dough.
If you want colorful details like leaves, divide your dough and add a few drops of food coloring before shaping.
Craft Steps:
Prepare your pine cone:
Find one that looks like hedgehog spikes – flat and open is best.
Make the hedgehog face and feet:
Use your salt dough to shape a rounded snout for the face, and small rounded shapes for the feet. Press them gently into place around the pine cone.
Add details:
Use a pencil or knife to mark eyes, a mouth, or nostrils on the face. You can also shape tiny dough leaves and color them for a fall touch.
Let it dry:Air dry for a couple of days, flipping to dry evenly.Or bake at a low heat (around 200°F or 90°C) for a couple of hours until hardened.
Display:
Once your hedgehog is dry, display it on a shelf, or add it to your nature table for fall.
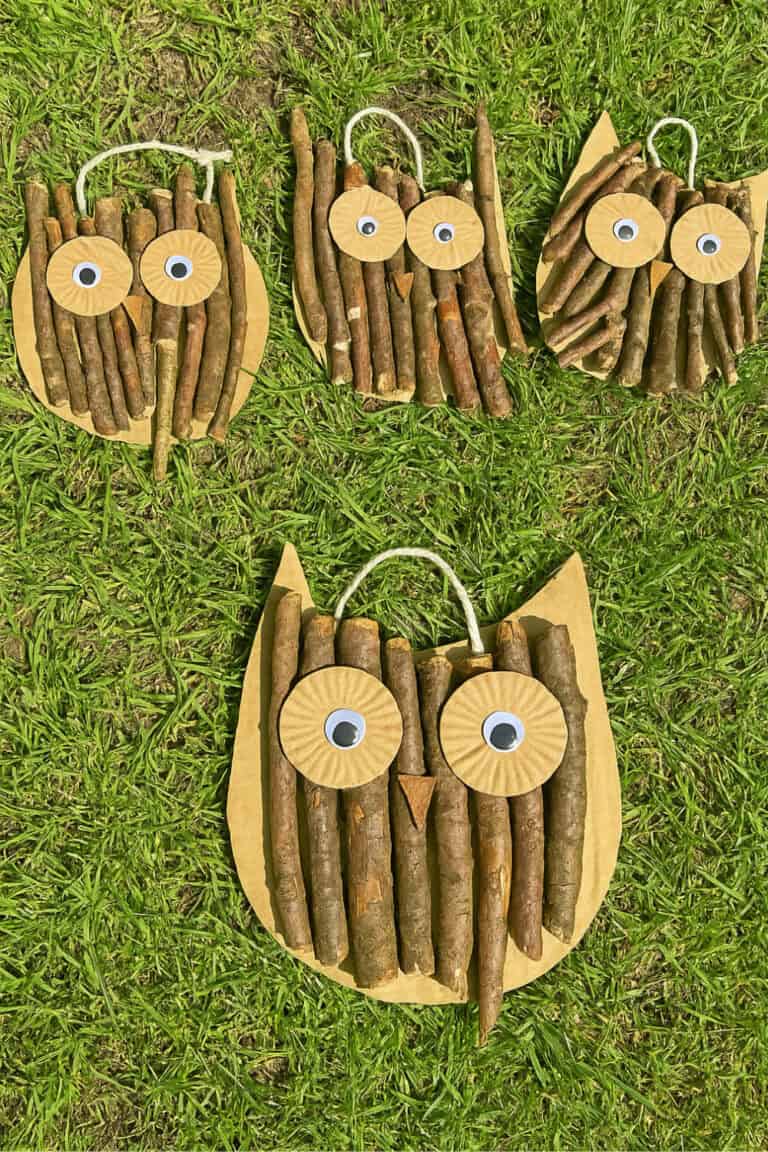
Here’s how you can make these adorable and cute Stick Owls, a sweet outdoor craft that blends nature collecting with creative hands-on fun.
This activity is perfect for little ones and takes a few days to complete, making it a great slow-paced project for a sunny week.
Make Your Own Twig Owl Craft:
Straight sticks or twigs (collected on a nature walk)
Cardboard (we reused an old delivery box)
Scissors
Pencil
White glue (PVA glue)
Circular object (like a plastic Easter egg) for tracing eyes
Scrap paper (to create an owl template)
String or yarn (for hanging)
Googly eyes (or paper circles)
Go on a nature walk!
Let the kids collect all kinds of sticks. Don’t worry if some are bendy or twisty—they’ll quickly learn which ones work best for crafting. The straight sticks will be easiest to glue down securely.
Make your owl shape:
Fold a sheet of paper in half and draw half of an owl shape. Cut it out and unfold it for a perfectly symmetrical owl. Trace it onto cardboard and cut out as many owl bodies as you want.
Prep for hanging:
Before adding any sticks, punch a hole at the top of the cardboard. This is much easier to do before the owl is covered in glue and sticks.
Glue the sticks:
Let the kids apply a generous amount of PVA glue onto the cardboard owl. Arrange straight sticks to fill the body, trimming if necessary. You’ll need to let this layer dry fully—ours took about 3 days to complete, as we worked in stages.
Add the eyes:
Trace around a small round object (like a plastic egg) onto cardboard to make the eyes. Add googly eyes or draw on your own, then glue them on once the sticks have dried.
Hang them up:
Thread a string through the top hole and hang the owls in a tree or on a porch. They look adorable swaying in the breeze!
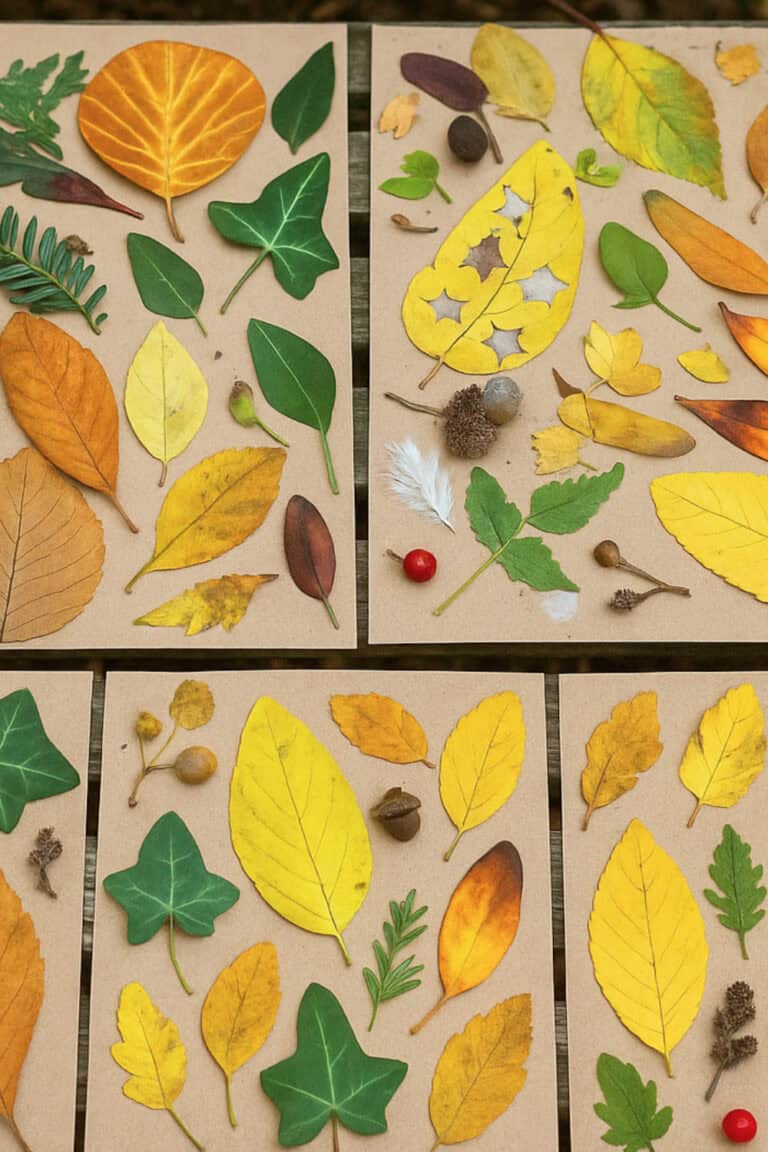
If you’re heading to the forest this summer, this is the perfect hands-on activity to bring along.
It turns a simple walk into an adventure where your kids can explore, collect, and create.
You’ll end up with beautiful, one-of-a-kind nature boards that capture the colors and textures of the season.
Cardboard (cut into small boards, one per child)
Double-sided sticky tape
Child-safe scissors (one per child)
A shape hole punch (optional)
A small bag or basket for collecting nature finds
A mix of fresh and dry leaves, petals, twigs, feathers, etc.
Prep the Boards:
Before you head out, cut pieces of cardboard into manageable sizes—one for each child. Stick strips of double-sided tape across each board so they’re ready to go once you’re outside.
Pack Your Supplies:
Give each child their own pair of scissors so they can help cut tape or trim leaves. If you have a hole punch with fun shapes, bring that too—it adds a creative twist.
Go Explore and Collect:
Let your kids wander the forest path and collect anything that catches their eye—dry leaves, fresh green ones, feathers, petals, tiny pinecones, or even textured bark.
Create on the Spot:
As they find treasures, they can press them right onto the tape. Some kids might want to create patterns or themes, while others just love sticking as they go.
Make It Meaningful:
Encourage your kids to use the shape punch or scissors to create stars, hearts, or shapes with their leaves. One fun idea is to “leave a trail” of cut shapes behind for other kids to spot.
Take Breaks and Display:
If you stop for a rest or snack (or to feed ducks like we did!), prop the boards on a bench or log. They’ll look beautiful filled with all the natural textures and colors.
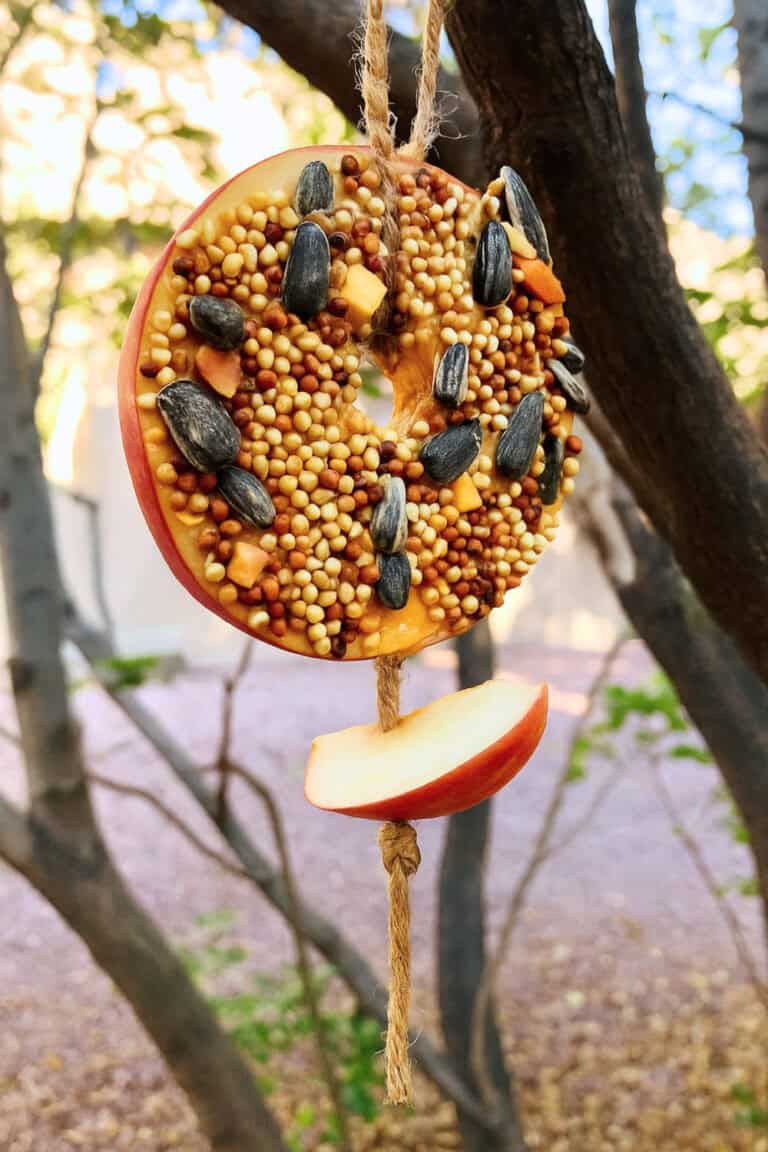
Looking for a fun, quick, and bird-friendly nature craft? This apple bird feeder is an easy summer activity you can do right in your backyard or after a forest walk.
Kids and preschoolers will love making it and even more so watching the birds come enjoy their treat!
Materials:
1 apple (or more, if making multiples)
Birdseed
Peanut butter
Jute cord or natural string
1 straw (for poking holes)
Steps:
1. Prep your supplies
Clean your apple, get your birdseed and peanut butter ready, and lay everything out on a clean surface. Cut your jute cord into pieces long enough to hang from a branch.
2. Slice the apple
Slice your apple horizontally into round, donut-like rings. Each slice will become a little feeder. Using a straw, poke a hole through the center of each slice (this is where your string will go).
3. Spread the peanut butter
Use a butter knife or spoon to spread a thin layer of peanut butter over each apple slice. This will act as the “glue” for your birdseed.
4. Coat with birdseed
Press the peanut butter-covered side of each apple slice into a bowl or plate of birdseed. Make sure it gets fully coated—sunflower seeds, millet, and cracked corn all work well.
5. String it up
Thread your jute cord through the hole in each apple slice. You can hang them one by one, or add two or three slices to one string for a stacked look. If you’d like, tie an extra apple slice at the bottom for weight.
6. Hang and enjoy
Find a tree branch or a place in your yard where birds like to visit and hang your feeder. Now just wait and watch—your local birds will love it!
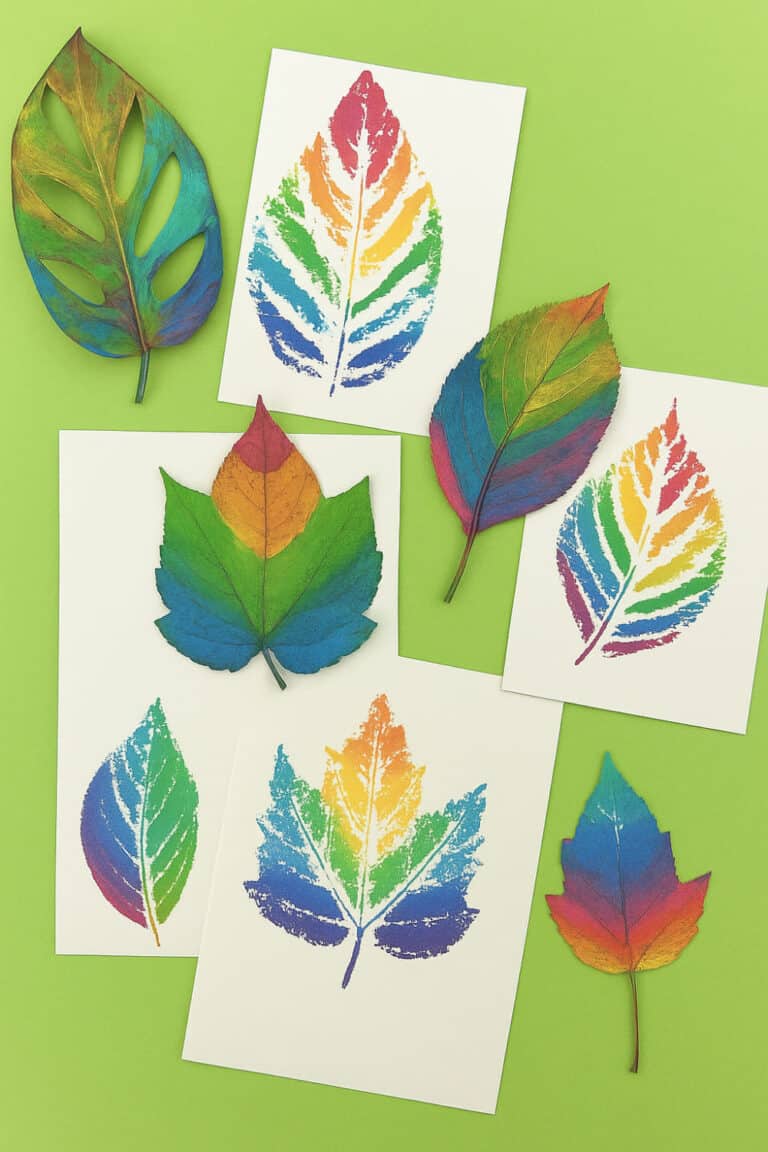
This is such a fun and vibrant summer craft that lets you turn real leaves into colorful works of art.
It’s simple enough for little kids, but the end result is so pretty that older kids (and even you!) will love making them too.
All you need are a few paint markers, some leaves, and paper to get started.
Materials:
Real leaves (flat ones with deep veins work best)
Watercolor or thick art paper
Paint markers (rainbow colors or any set you have on hand)
Instructions:
1. Paint the leaves
Use your paint markers to color inside the veins of the leaf—focus on the center parts and avoid the outer edges. Try rainbow stripes, alternating colors, or your own pattern.
2. Press onto paper
Place the painted side of the leaf onto your watercolor paper. Press down evenly all over to make sure the paint transfers clearly.
3. Lift and reveal
Slowly peel the leaf off the paper and you’ll reveal a gorgeous, colorful leaf print with all the fine vein details.
4. Touch up if needed
If any areas didn’t transfer, you can add more paint to that part of the leaf and press it down again. Or just use your marker to fill it in directly on the paper.
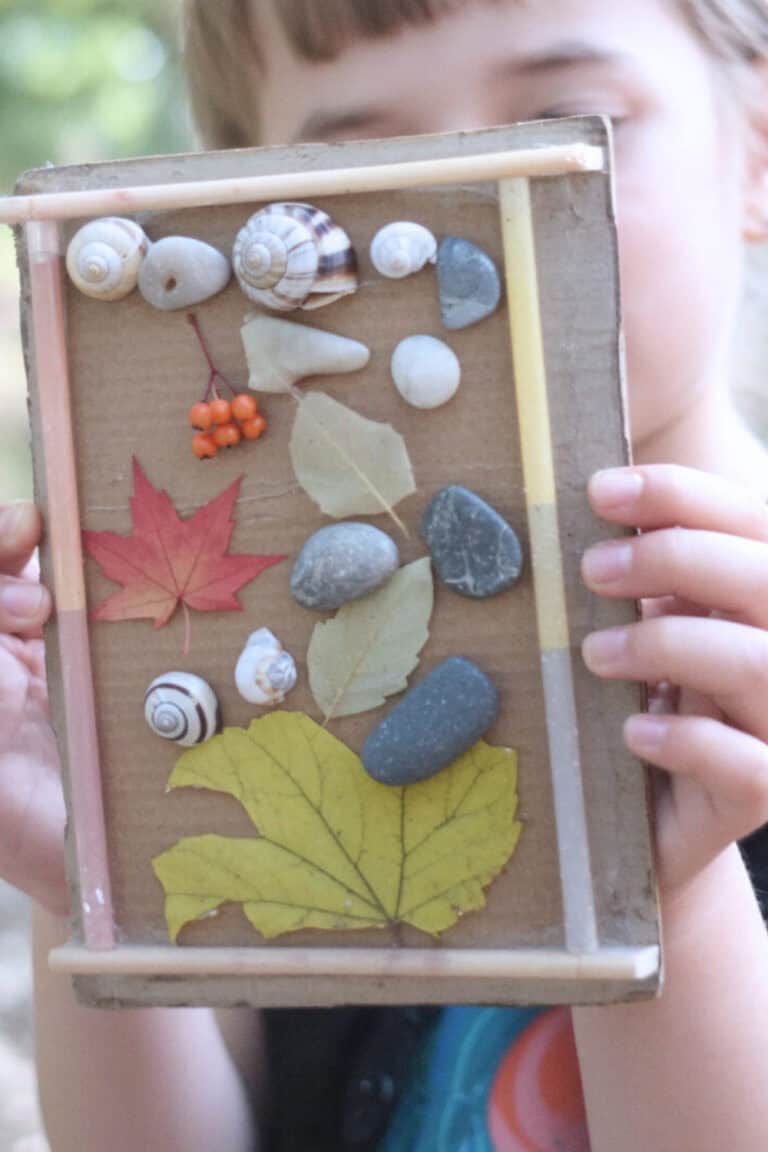
This simple nature frame is a great way for kids to turn their favorite finds from a nature walk or camp trip into a one-of-a-kind keepsake.
With just a piece of thin cardboard and some glue, you can help them build their own mini masterpiece filled with leaves, stones, shells, and anything else they gather along the way.
Materials:
Thin cardboard or paperboard (like a cereal box)
Glue (school glue or tacky glue)
Optional: mounting putty to help place items before gluing
Optional: hot glue gun for faster bonding
Nature treasures (leaves, shells, pebbles, sticks, berries, etc.)
Tools:
Scissors
Bag or container for collecting items
Instructions:
1. Go on a nature walk
Head out with your kids and give them a small bag, container, or basket to collect anything that catches their eye—flat rocks, snail shells, fall leaves, seed pods, tiny twigs, or dried flowers.
2. Prep your board
Cut a rectangle from a piece of cereal box or similar thin cardboard. This will be the base of your collage. You can also cut thin strips from the same cardboard or use natural materials (like twigs or straws) to create a frame around the edge.
3. Arrange the treasures
Before gluing, have the kids arrange their items on the cardboard until they like how it looks. You can use mounting putty to temporarily hold the items in place while they plan their layout.
4. Glue it down
Once they’re happy with the design, glue each item in place. For heavier items like rocks or shells, a hot glue gun (with adult supervision) can be helpful. Let everything dry completely.
5. Optional frame
You can finish it off by gluing four sticks or straws around the edge as a rustic frame. This gives it a fun, polished look.
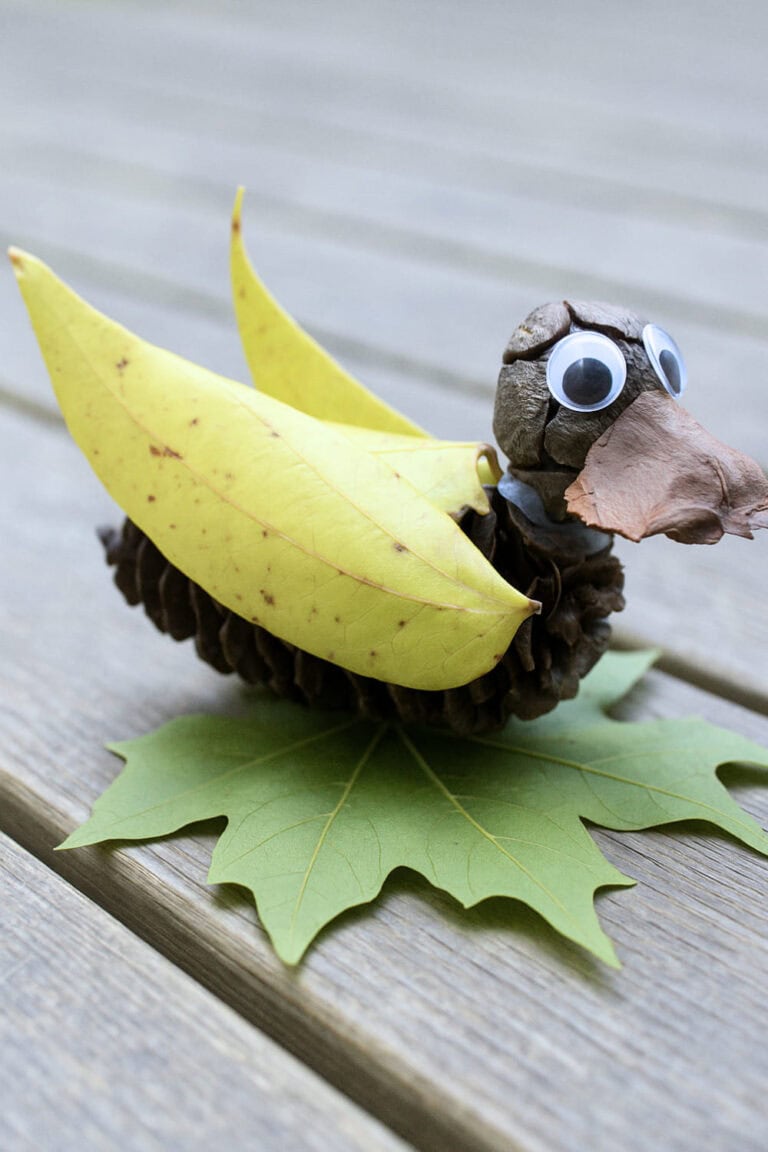
This cute duck made from pinecones, leaves, and seed pods is a perfect example of what you can build with a DIY nature craft construction set.
It’s a fun, eco-conscious craft that encourages imagination and open-ended play, plus, every duck will look totally unique depending on what nature treasures you’ve collected!
Materials:
Pinecone (for the duck’s body)
Round seed pod or nut (for the head)
A wide leaf (for the wings)
A flat, curled leaf or petal (for the beak)
Large leaf (for the base or “feet”)
Googly eyes (or printable paper eyes)
Blu-tack, sticky tack, or glue (to attach pieces)
Optional: a tray to hold all your collected nature items
Instructions:
1. Gather your nature treasures
Head outside and collect a mix of pinecones, seed pods, twigs, leaves (both fresh and dried), petals, stones—anything interesting! Make sure your pinecone is sturdy enough to act as the duck’s body.
2. Build the duck’s body and head
Take your pinecone and attach a small round seed pod to one end using sticky tack or glue—this will be the duck’s head.
3. Add the beak
Choose a small, slightly curled leaf or flat petal to act as the beak. Tuck or glue it under the head (seed pod) so it juts forward like a real duck bill.
4. Stick on the eyes
Attach googly eyes (or eco-friendly paper eyes) to the seed pod to bring your duck to life. Sticky tack makes this easy to adjust.
5. Make the wings
Use two long, curved leaves to create the duck’s wings. Secure them gently to the sides of the pinecone, angled upward or outward.
6. Set it on a leaf base
Place the finished duck on a large green leaf as a final touch—this acts as the duck’s feet or simply a display base.
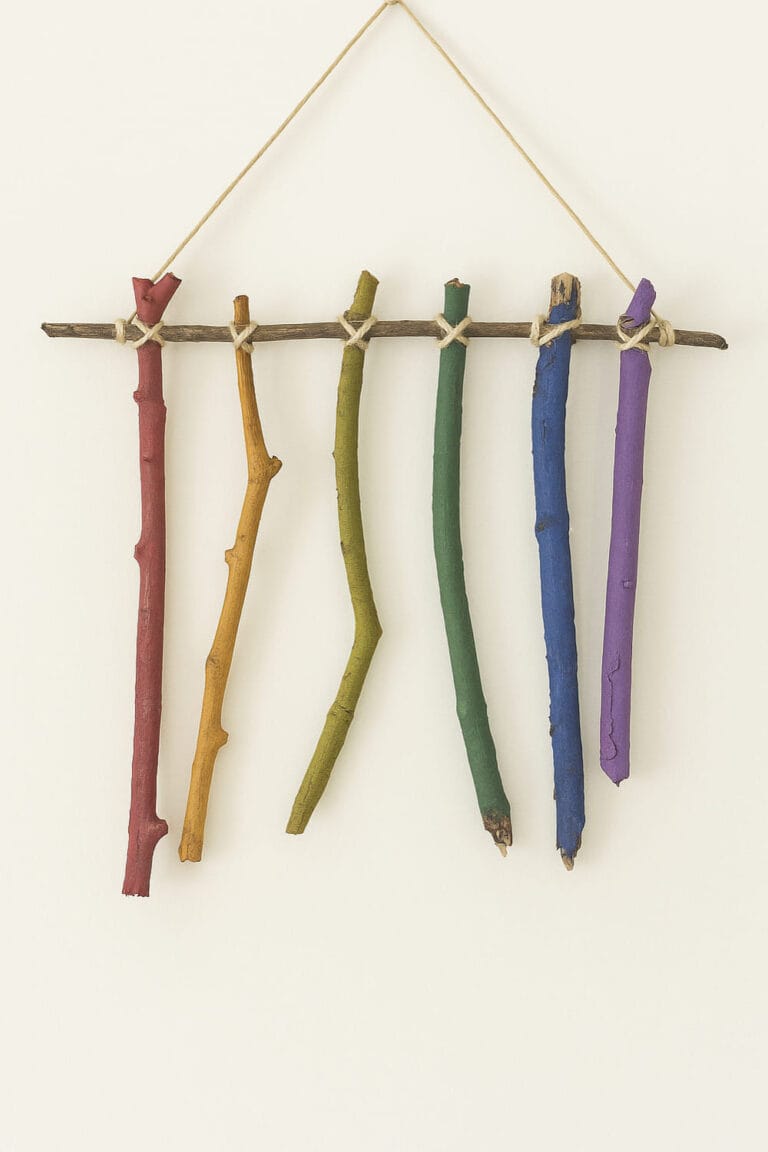
This colorful twig wall hanging is such a fun way to mix nature and creativity.
It’s great for decorating a playroom, classroom, or any space that could use a little color—and it’s an easy project to do with kids using items you probably already have at home or in your backyard.
Materials:
Twigs (1 for each paint color + 1 extra for the top hanger)
Acrylic or craft paints (choose your favorite palette—rainbow, pastels, neutrals, etc.)
Paintbrushes
Hot glue gun
String, hemp cord, or twine (for wrapping and hanging)
Instructions:
1. Paint the sticks
Start by giving each stick a solid coat of paint. If kids are helping, make it easy by giving them one stick, one color, and one brush at a time. Set the painted sticks aside to dry completely.
2. Lay out your design
Once dry, place your painted sticks in a row underneath your unpainted stick (this one will act as the top support). Line them up in your desired color order and trim the bottoms if needed so they hang at a similar length.
3. Attach with hot glue
Use a hot glue gun to secure each painted stick to the unpainted top stick. You can glue them directly in place and then reinforce by wrapping string around the joints. Flip the piece over and add extra glue to the backs for extra hold.
4. Add a hanging cord
Cut a piece of string or hemp and glue or tie it to each end of the top stick so your art is easy to hang.
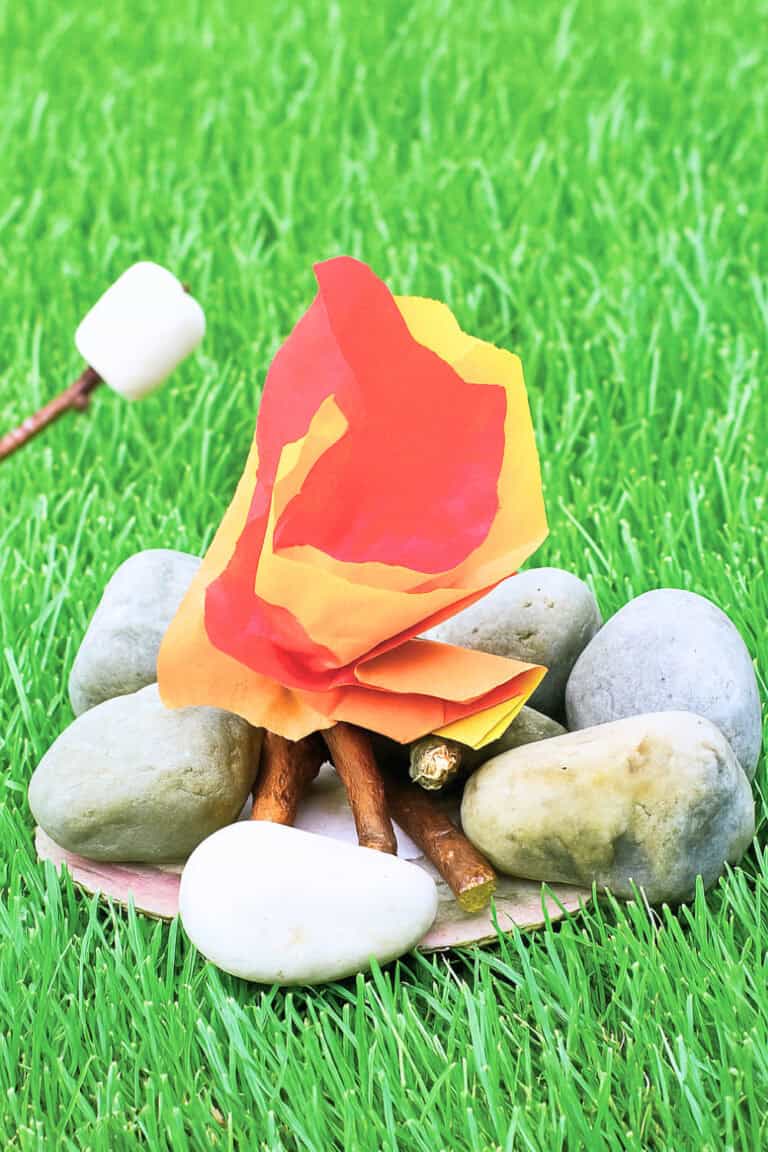
Learn how to make this cute mini campfire craft using natural materials you can find outdoors. It’s not only a fun and creative project, it also doubles as a simple counting and learning activity for young kids.
Perfect for summer days, camping themes, or just some imaginative backyard play!
Materials:
10 small rocks
A piece of cardboard
Twigs that you can cut or snap into 10 smaller pieces
A bunch of small leaves (or colored paper)
Red or orange paint (optional)
Glue
A marker or pen
Instructions:
1. Collect your supplies
Head outside with your child and gather 10 small rocks and a few twigs. You’ll also want to collect some small leaves or petals for the flames.
2. Cut the base
Have a quick chat about flat shapes like circles, squares, or triangles. Let your child choose one, then cut your cardboard into that shape to act as the base for your mini fire.
3. Number your rocks
Ask a grown-up to help write numbers 1 through 10 on each rock. Mix them up and then glue them around the edge of the cardboard in the correct order—say the numbers out loud as you go!
4. Count and cut twigs
Pick a long twig (or two) and talk about size and length. Cut or break it into 10 small sticks. Count each piece to make sure you have enough.
5. Build your campfire
Add glue to the center of the cardboard and arrange the twig pieces like firewood.
6. Create the flames
Paint your leaves in red, orange, or yellow tones, or skip the paint if you’ve found bright leaves naturally. Once dry, crumple or layer them slightly and glue them on top of the twigs to look like a little flame.
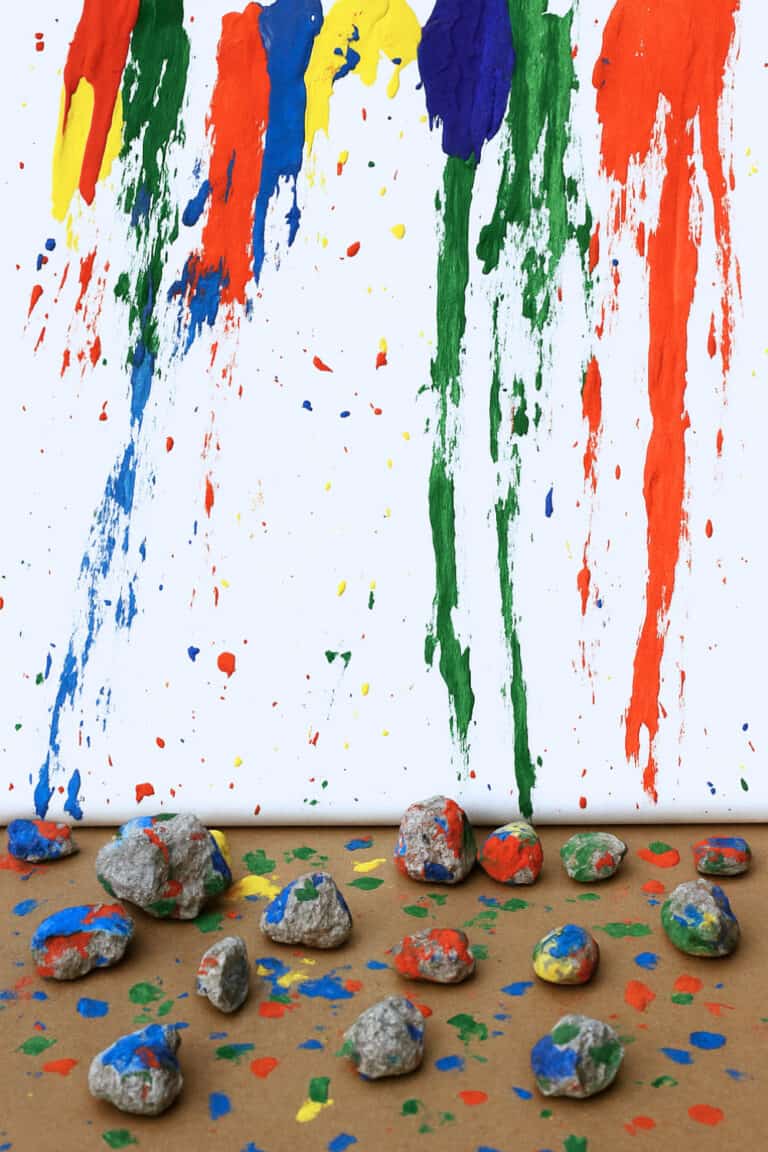
This big, messy, and colorful activity is a fun way to explore art and science at the same time. It’s perfect for outdoor play, group collaboration, and introducing kids to movement, gravity, and textures, all through rolling painted rocks!
Materials:
Large piece of white paper or sturdy cardboard (poster board or packing paper)
Washable paint in various colors
Paintbrushes or squeeze bottles (optional)
A folding table (or similar surface that can be tilted)
A picnic table or another prop to create an incline
A large bin of small to medium-sized rocks
Bowls or containers for individual rock sets
A piece of cardboard or tarp for the “landing pad”
Tape (to secure paper to the table)
Optional: smocks or old clothes (it gets messy!)
Steps:
1. Set up your painting surface
Tape your large sheet of paper or cardboard securely to a folding table. Prop the table at an angle using something sturdy (like a picnic table) to create a ramp for the rocks to roll down.
2. Place the landing pad
Set a large piece of cardboard or a tarp underneath the bottom of the ramp to catch rocks after they roll down. This helps keep them from getting lost in grass or dirt.
3. Prep the rocks
Gather a big bin of rocks, and then give each child their own bowl of rocks to use. This gives them space and helps with clean-up and collection later.
4. Practice rolling
Before adding paint, let kids practice rolling, sliding, or gently tossing the rocks down the paper. Talk about motion, gravity, and different speeds and angles. Use this time to review safety and taking turns collecting the rocks together.
5. Add the paint
Once everyone is comfortable, squirt or brush small blobs of paint along the top of the paper—one color per section or mixed together. Then let the kids roll their rocks through the paint and down the paper. Watch as the rocks create colorful trails and splatters!
6. Continue the process
Keep adding more paint as needed and take breaks to gather rocks at the bottom. Kids can reuse the same rocks over and over.
7. Let it dry
Once you’re done, let the paper dry completely. Remove any stuck-on rocks, and then hang the artwork proudly—indoors or out!
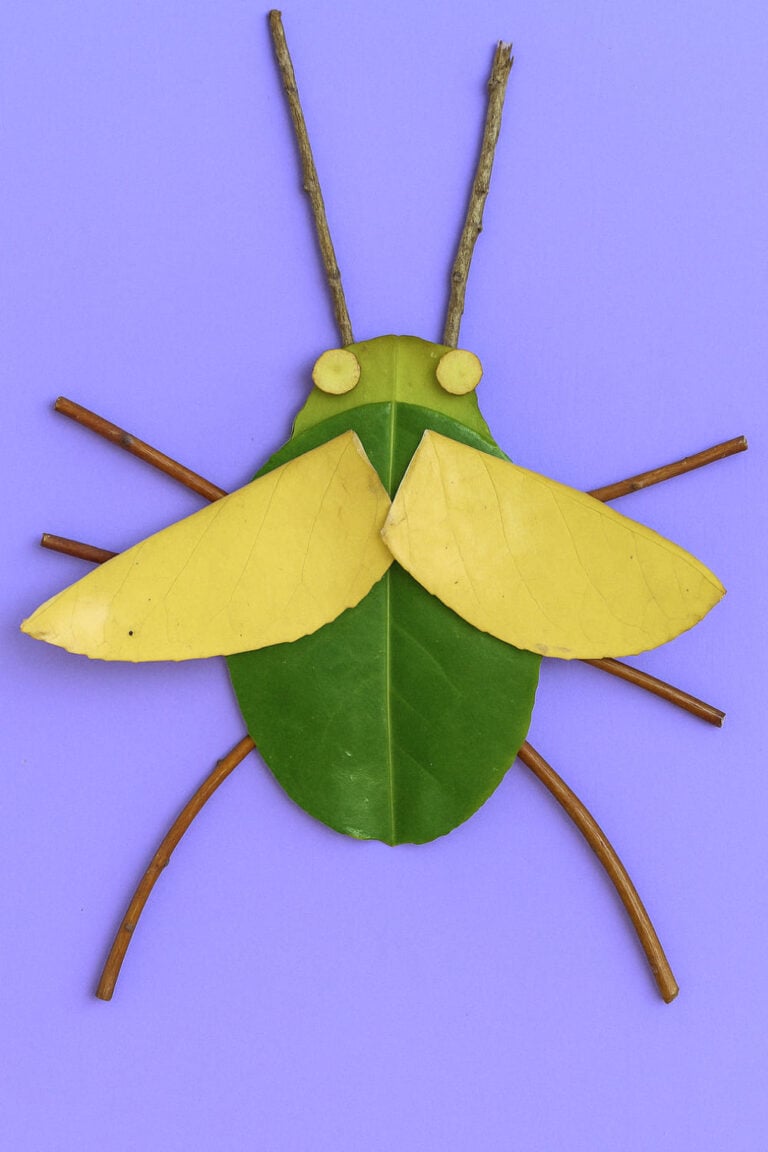
This creative craft combines painting, nature play, and recycled materials to help kids create their own imaginative insect artwork.
Perfect for an afternoon of outdoor fun and indoor crafting!
Materials:
Heavy cardboard cut into squares (recycled from boxes – doesn’t need to be perfect)
Acrylic paint (any color for the background)
Paintbrush
Tacky craft glue (stronger than ordinary glue) or blu-tack as an alternative
Mod podge (for sealing the final piece)
Hole punch (for making eyes)
Leaves, sticks, and twigs from the garden – in various shapes and sizes
Steps:
1. Paint the cardboard base
Use acrylic paint to paint your cardboard square. Let it dry completely before moving on. This will be the background of your insect artwork.
2. Design your insect
Lay out different nature items on the painted square to create an insect shape. Try using a big leaf for the body, smaller leaves for wings, and twigs for legs or antennae. Move things around until you’re happy with the design.
3. Glue everything down
Carefully remove each item one by one and glue it in place using tacky craft glue. Blu-tack can work in a pinch, but tacky glue holds better, especially for heavier pieces.
4. Add details
Punch a hole in a leaf and use the little circle as an eye—or find a naturally round seed or leaf for this part. Add it to your insect’s head.
5. Seal with mod podge
Once your glue has dried, paint a layer of mod podge over your entire insect to help everything stay in place and give it a finished look.
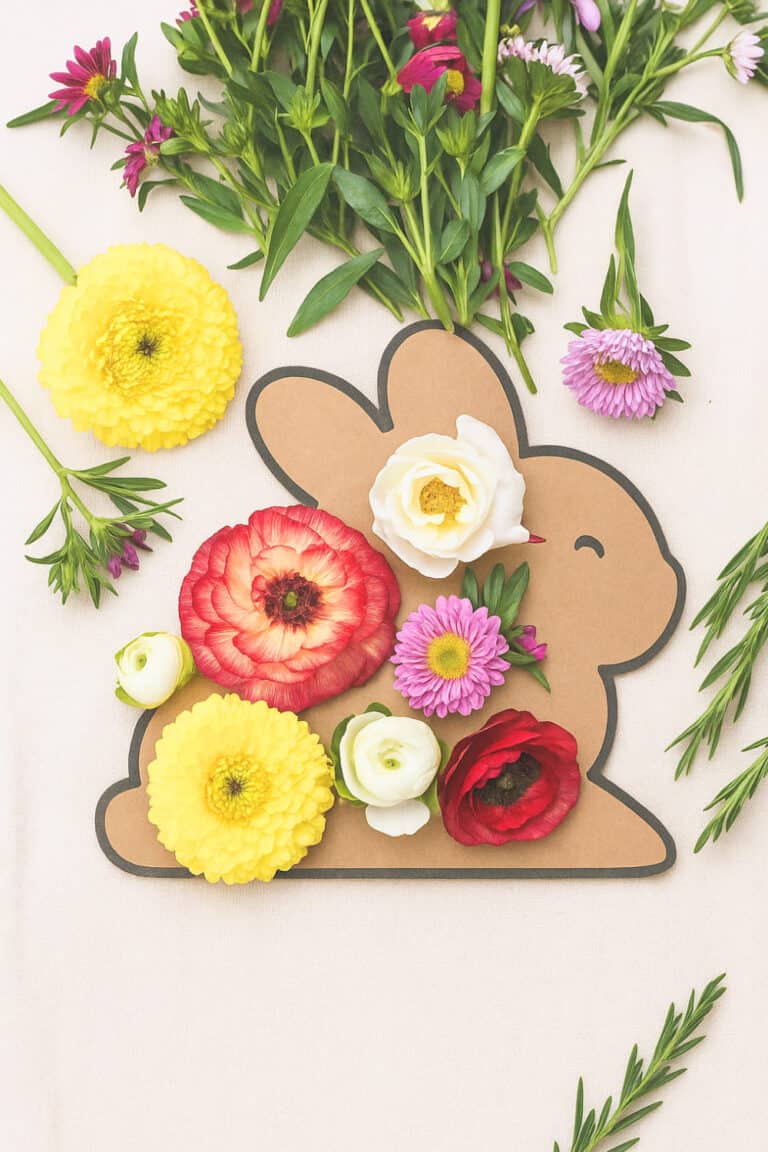
Let your kids turn nature into art with this easy flower animal craft using cardboard and fresh blooms. It’s a hands-on way to get creative after a nature walk, using flowers and leaves to decorate cute animal shapes!
Materials:
Fresh leaves, flowers, herbs, or greenery (collected from outside)
Cardboard (reuse old boxes or packages)
Scissors
Black marker
(Optional) Hot glue gun for long-term display
(Optional) Phone or camera to snap photos
Instructions:
Step 1: Create the Animal Shapes
Cut cardboard into animal shapes like bunnies, foxes, owls, or dinosaurs. Fold the cardboard in half before cutting to make symmetrical animals easier.
Step 2: Add Details
Use a black marker to outline the edges of your animals. Add features like eyes, whiskers, beaks, or tails to give them personality.
Step 3: Decorate with Nature
Let your kids arrange and layer the flowers and greenery over each animal shape. Encourage creativity—use yellow petals for feathers, or tiny buds for scales or fur.
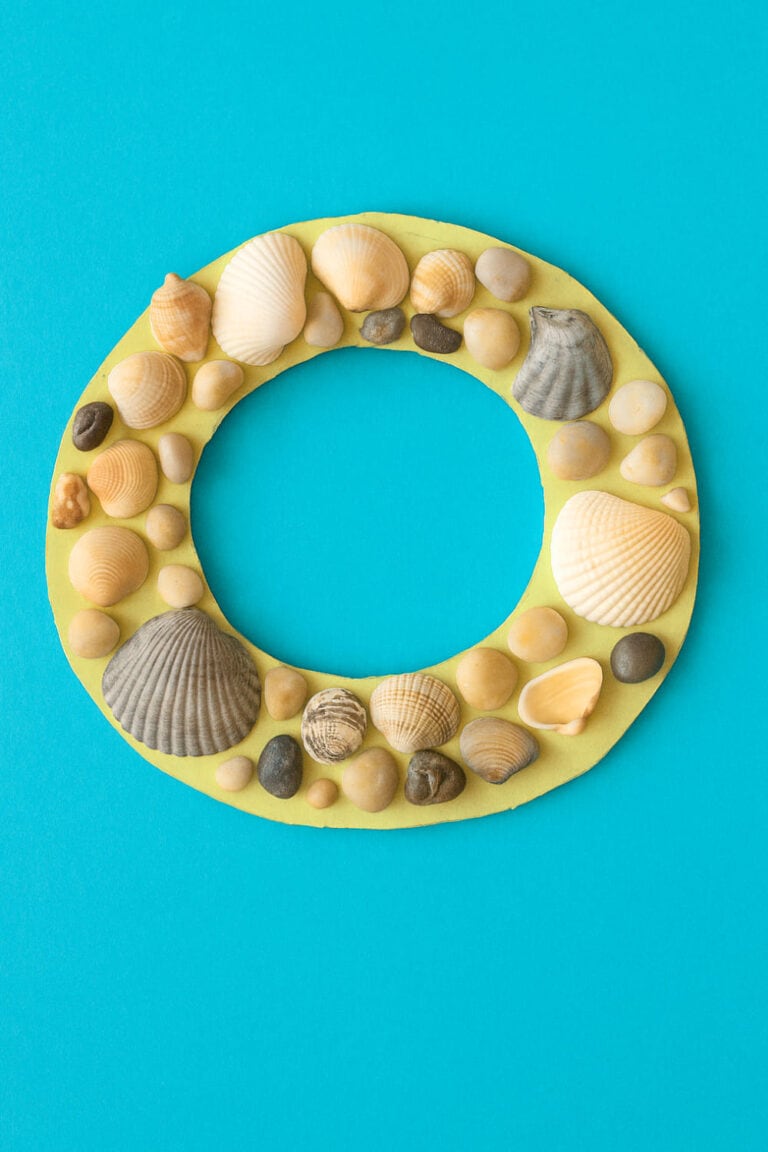
Turn your beach finds into a cute DIY seashell wreath that kids will love making. It’s the perfect summer craft to remember your seaside adventures and get creative with natural textures!
Materials:
Cardboard
Yellow paint or paper
Seashells and small beach pebbles
Glue
Scissors
Steps:
Cut a ring shape out of cardboard to form the wreath base.
Paint or cover it with yellow paper and let it dry.
Arrange seashells and small stones around the ring, then glue them down.
Let it dry completely and hang it up as a beachy summer decoration.
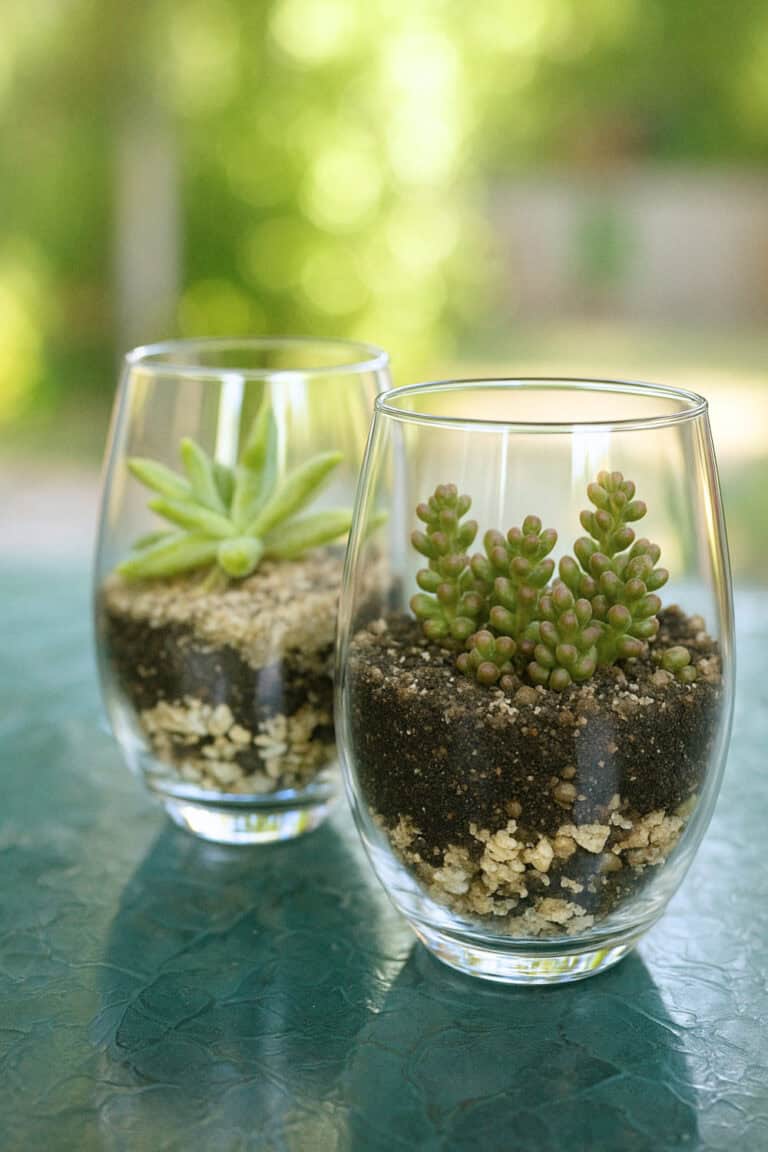
Making a succulent terrarium for a kid summer activitiy is an easy and fun way to bring a little greenery indoors.
It’s the perfect hands-on activity for kids or adults who love plants and simple DIYs.
Materials:
Clear glass cup or stemless wine glass
Small gravel or pebbles
Cactus/succulent potting mix
Succulents
Sand
Decorative rocks or mini landscape pieces
Steps:
Start with drainage – Pour a layer of small gravel into the bottom of the glass. This keeps excess water away from the roots.
Add soil – Spoon in a layer of cactus or succulent potting mix right over the gravel.
Prep the plant – Gently remove the succulent from its plastic container. Brush off some of the old soil so the roots are more visible.
Plant it – Nestle the succulent into the potting mix and gently press soil around the roots to keep it in place.
Top with sand – Sprinkle a thin, even layer of sand on top of the soil for a clean finish.
Decorate – Place small rocks, shells, or other decorative items on top to personalize your terrarium.
If you need more summer activities for your kids, check out this list of even more nature-inspired crafts.
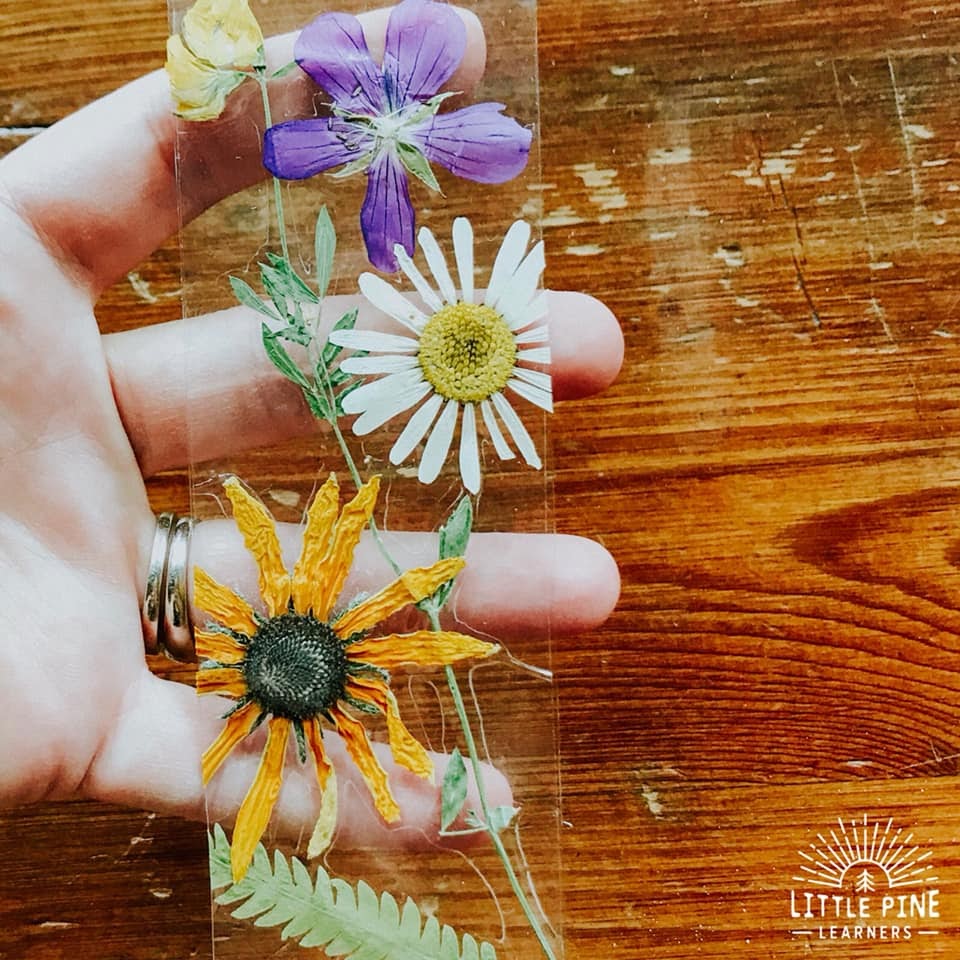
Press flowers in a heavy book for a few days, then glue them onto cardstock. Cover with contact paper or laminate to make beautiful summer bookmarks.
Tie flowers, leaves, and grass to the ends of sticks to create your own brushes. Dip them in paint and let kids explore different textures on paper.
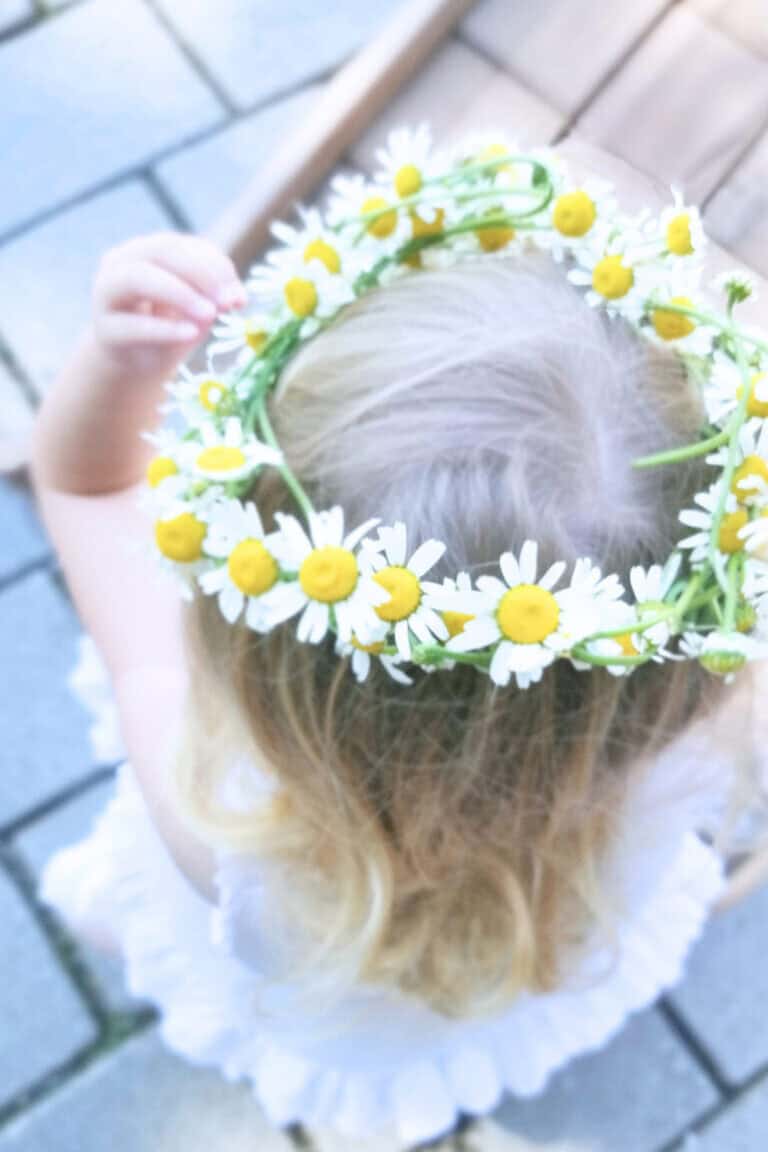
Make a simple flower crown by twisting floral wire into a circle and wrapping fresh flowers and leaves around it. Use floral tape to secure everything.
Press leaves, shells, or flowers into damp sand to make pretty prints. Spray lightly with water to hold the design, or take a photo to save it.
Use sticks to create a simple maze, shapes, or letters on a flat surface outdoors. Let little ones run toy cars through the paths or trace the letters.
Fill a big tub or bowl with water and toss in flower petals, herbs, leaves, and even citrus slices. Give kids ladles and spoons to stir their pretend “soup.”
Use paper plates or clear contact paper to sandwich leaves, petals, and bits of grass. Hang in a sunny window to catch the light.
Paint rocks or craft sticks with plant names and decorate with flower or bug designs. Use them to label your garden or plant pots.
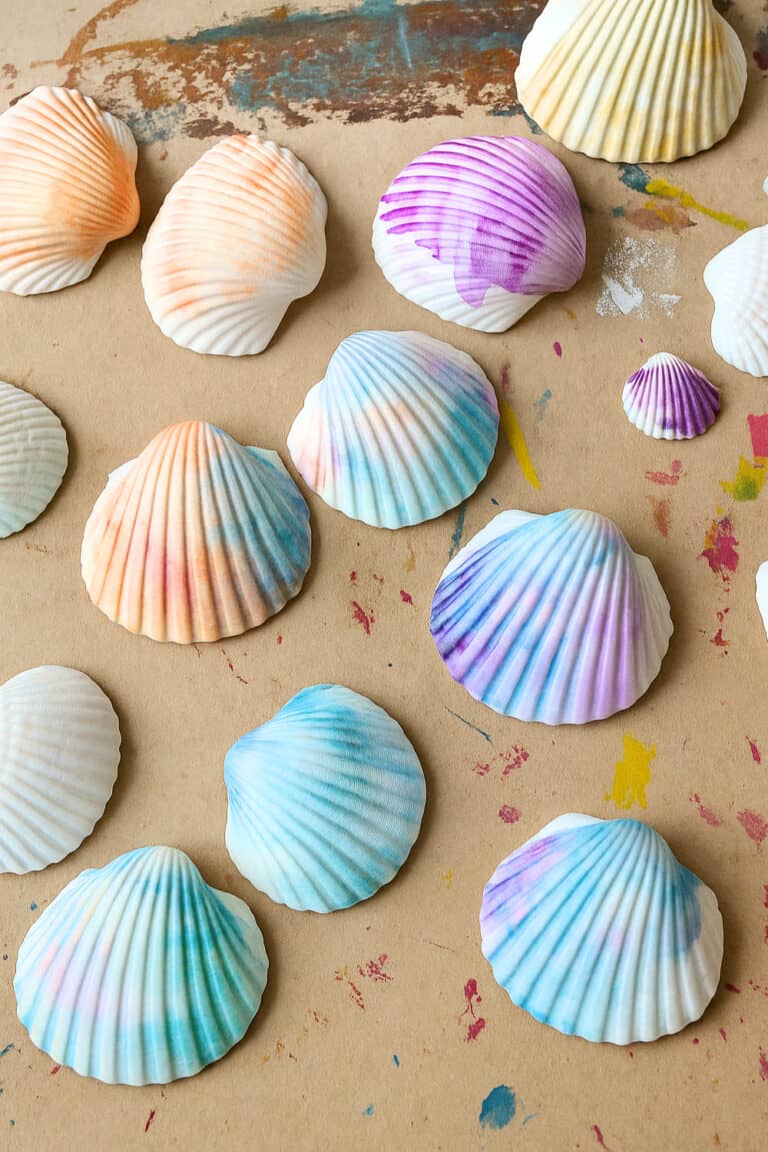
Collect shells from the beach and use paint pens or small brushes to decorate them with patterns, animals, or colors. They make great keepsakes or play pieces.
Set up an outdoor play kitchen with bowls, old utensils, and dirt or mud. Kids can mix in leaves, petals, and sticks to “cook” up nature dishes in the backyard.
Create a checklist of natural items like “a red leaf,” “a smooth rock,” or “a feather.” Head outside and let kids find and collect each one to learn more about their environment.
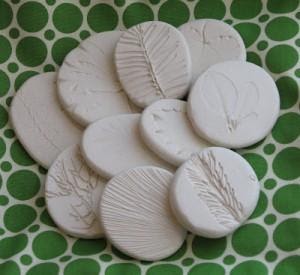
Flatten air-dry clay into small circles and press in textured leaves or flowers to leave an imprint. Let the clay dry, then paint the patterns for a fun nature keepsake.
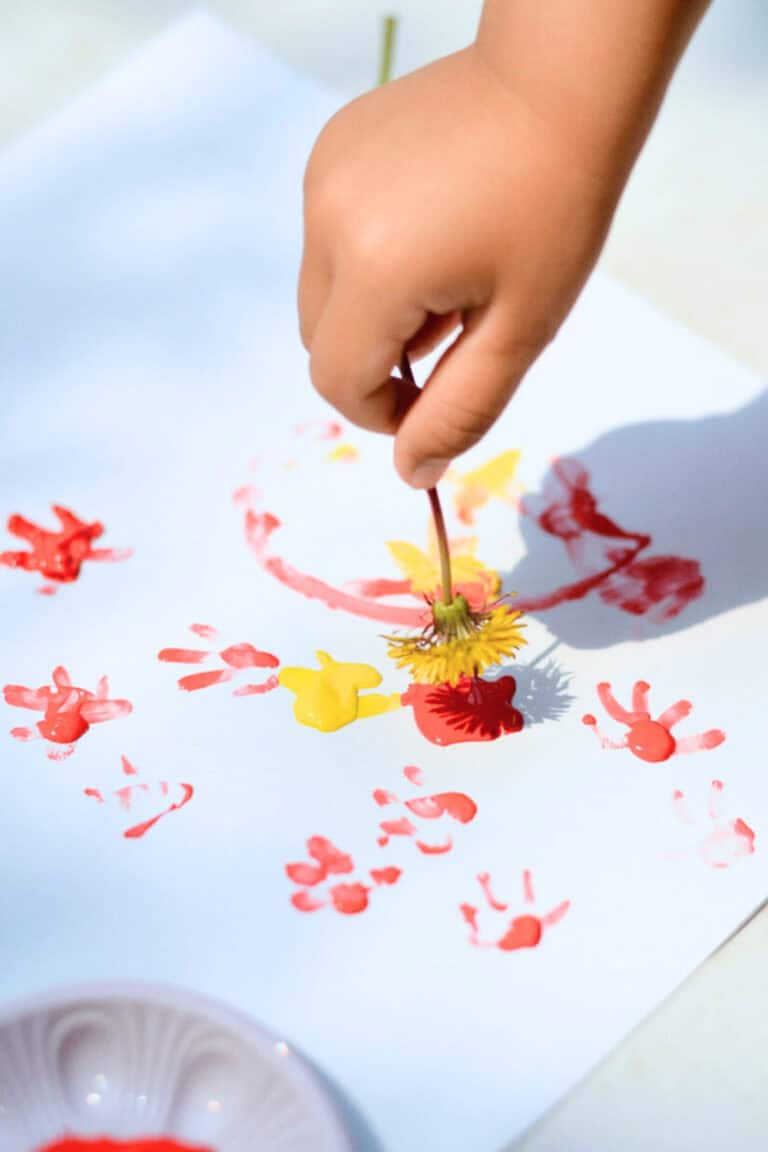
Use dandelions as paintbrushes by dipping the fluffy flower tops into paint. Stamp or swirl them across paper to make fun and messy art.
Fill clear cups with layers of soil, moss, small plants, and tiny natural treasures. Add a small rock path or twigs to build a magical mini garden scene.
Set up bowls of water and let kids add petals, herbs, and leaves to make pretend magic potions. Give them spoons, scoops, or funnels to stir and pour their creations.
Take paper and crayons outside and hold the paper against different tree barks. Rub the crayon sideways across the paper to reveal fun textures and patterns.
I hope you found some fun nature-inspired activities for your kids this summer! If you need more help, check out my other ideas like science experiments to try, chalk ideas for toddlers and fun outdoor activities to set up.
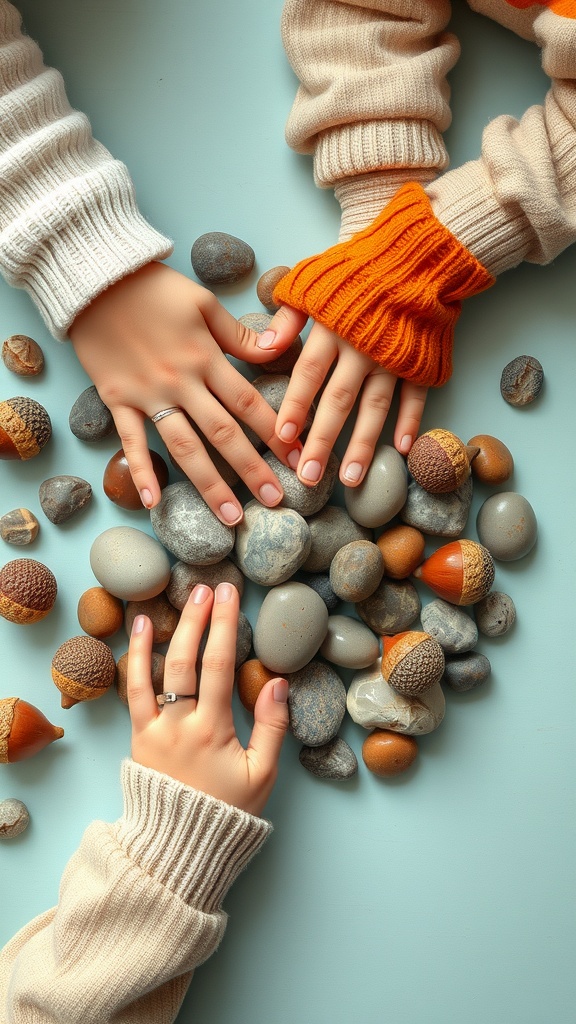
Making acorn cap hats is a fun way to engage kids with nature. Gather some acorns and their caps, which are often found under oak trees. The variety of shapes and sizes can lead to creative designs.
Start by collecting a handful of acorns and stones. Place the caps upside down on a flat surface. Kids can use glue to attach small decorations, like tiny leaves or bits of yarn, to personalize their hats. This adds a touch of whimsy to their creations.
Once the hats are ready, children can use them for imaginative play. Maybe they’re dressing up forest animals or creating their own woodland stories! This craft encourages creativity and connection with the outdoors.
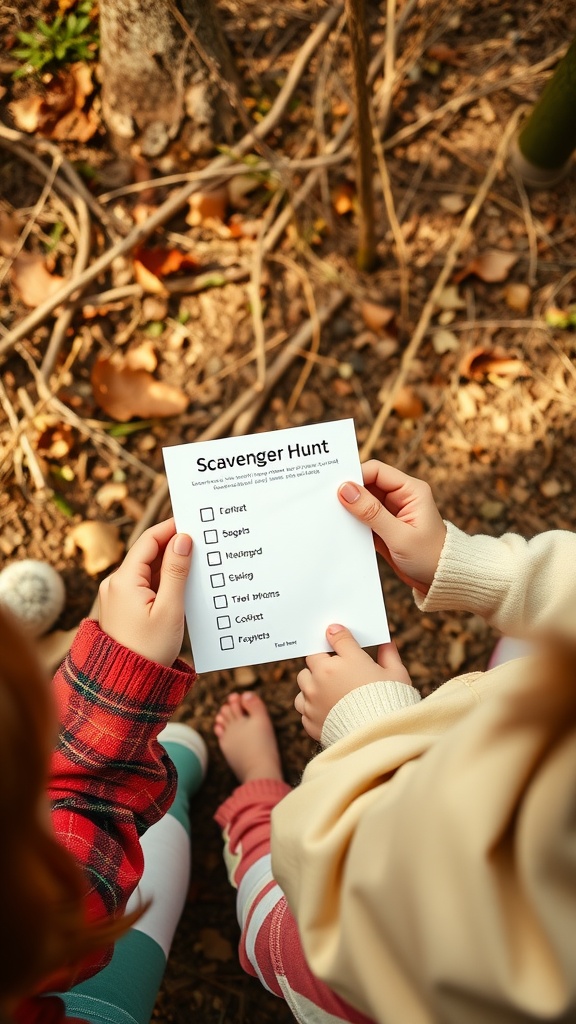
A nature scavenger hunt is a fun and engaging way for kids to connect with the outdoors. The image shows two children holding a scavenger hunt checklist, ready to explore the natural world around them. This checklist likely includes items like leaves, rocks, and flowers, encouraging kids to search and discover.
With a simple list in hand, children can start their search. They might find unique shapes of leaves or different textures of bark. Each found item adds to their excitement and sense of accomplishment. This activity not only fosters curiosity but also encourages teamwork and observation skills.
Parents can easily set this up in a backyard, park, or nature reserve. Just print out a list or create one together, and let the kids lead the way. It’s a great way for families to spend time together while enjoying nature.
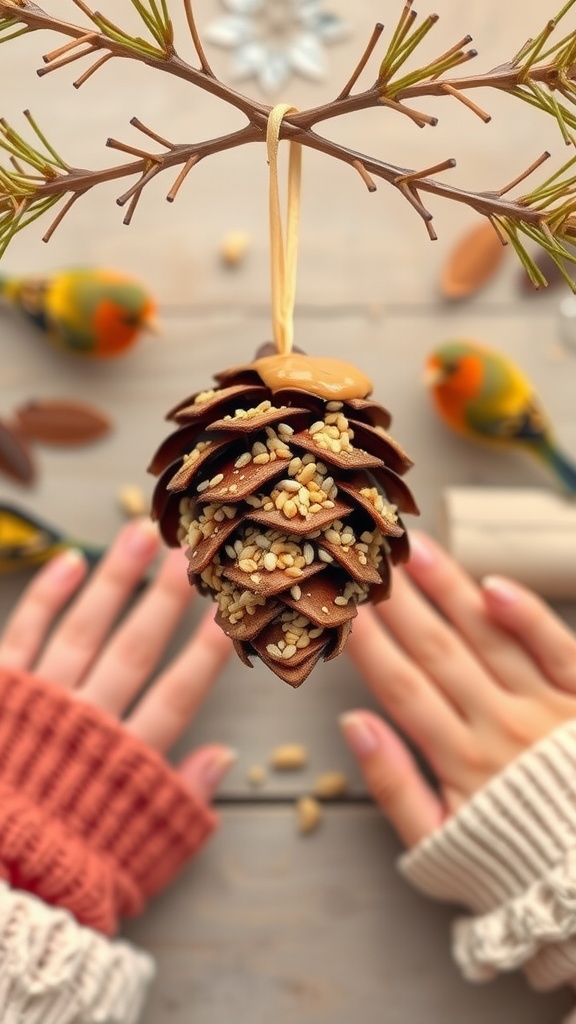
Pine cone bird feeders are a fun and simple way to connect kids with nature. These DIY feeders offer a chance to create something special while learning about local wildlife. Kids can watch the birds come and go, bringing joy and excitement.
To make a pine cone bird feeder, gather a few materials. You’ll need a pine cone, peanut butter, birdseed, and a piece of string. Start by spreading peanut butter all over the pine cone, making sure it gets into all the crevices. Then, roll the gooey pine cone in birdseed until it’s well-coated. Finally, tie the string around the top for hanging.
Once it’s ready, find a nice spot outdoors to hang the feeder. It’s great to hang it near a window so kids can easily observe the birds. Watching the birds enjoy the feeder can spark conversations about nature and the environment.
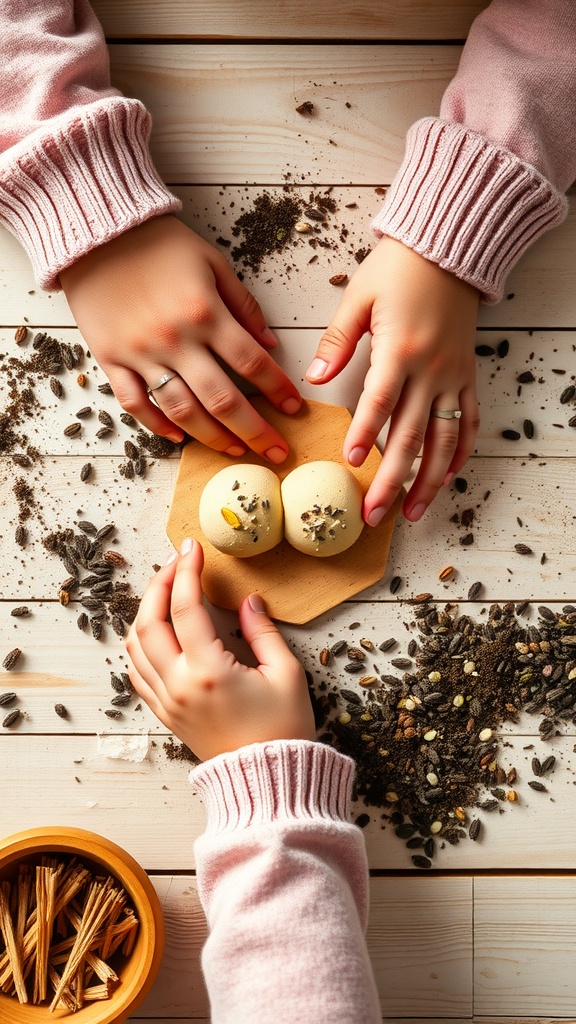
Making seed bombs is a fun and easy activity for kids. These little balls are a great way to spread greenery and help nature. You can see hands working together, mixing seeds and soil, which shows the teamwork involved in this project.
To create seed bombs, you’ll need some simple ingredients: seeds, soil, and a bit of water. Start by mixing equal parts of soil and seeds in a bowl. Once mixed, add water slowly until the mixture holds together. Then, shape the mixture into small balls and let them dry.
Once your seed bombs are dry, find a suitable spot to toss them. Areas that need greenery or wildflowers are perfect. Kids can learn about plants and nature while having fun. Plus, they will love seeing their hard work bloom into beautiful flowers!
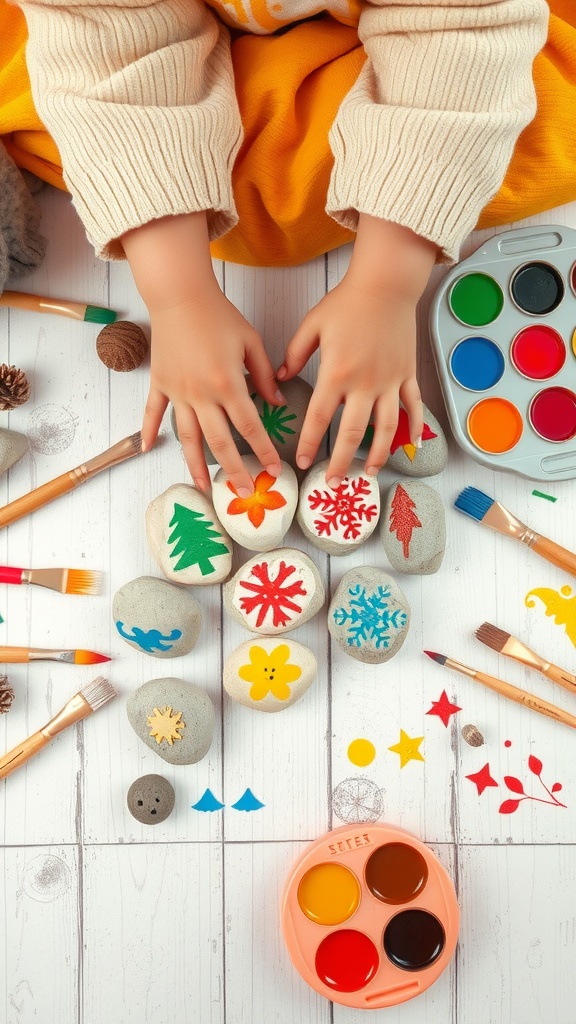
Rock painting is a fun and colorful craft that kids will love. In the image, you can see a child’s hands getting ready to paint smooth stones. These rocks are blank canvases waiting for imagination to take over.
The vibrant colors of the paints invite creativity. Bright greens, blues, yellows, and reds stand out against the neutral tones of the stones. This variety allows kids to express themselves freely.
Surrounding the rocks are brushes and small paint palettes, perfect for mixing colors and adding details. Kids can create anything from simple dots to intricate designs. Nature themes like flowers, trees, and animals are popular choices.
Rock painting is not just about the final product. It’s a great way for children to develop fine motor skills and learn about colors. Plus, it encourages outdoor exploration as they can find the rocks themselves!
Once the rocks are painted and dried, they can become garden decorations, gifts, or even a part of a scavenger hunt. The possibilities are endless!
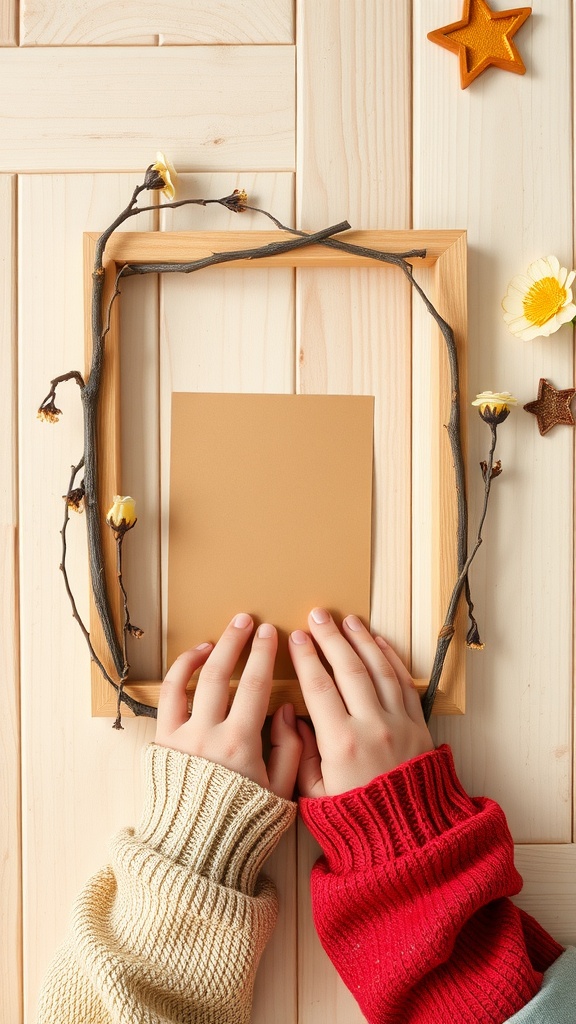
Making twig picture frames is a fun project that brings nature right into your home. In the image, you can see a lovely frame decorated with twigs and little flowers, creating a beautiful rustic look. The simplicity of this craft makes it perfect for kids!
To start, gather some twigs from your yard or a nearby park. You’ll want to choose twigs that are sturdy and not too thick. After that, you can lay them out around a pre-made wooden frame or create one from cardboard. The kids can help arrange the twigs however they like, making it a personal touch.
Adding some small flowers or leaves can enhance the natural vibe. Kids can glue these onto the frame for a colorful touch. Once it’s all in place, you can insert a favorite photo or artwork, making it a perfect gift or decoration for their room. This hands-on activity encourages creativity and gives kids a chance to connect with nature.
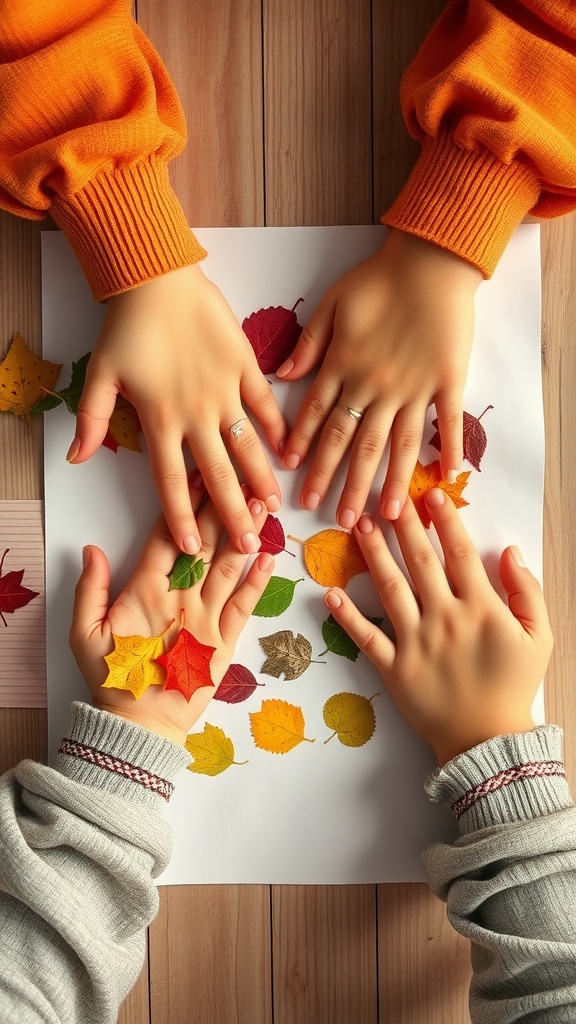
Leaf rubbings are a fun and easy way for kids to connect with nature while expressing their creativity. In the image, you can see hands of different ages gently placing colorful leaves on a sheet of paper. Each leaf has its own unique shape and color, showcasing the beauty of autumn.
To make leaf rubbings, start by gathering leaves from the outdoors. Choose a variety of sizes and colors for the most striking results. Lay a leaf flat under a piece of paper, then use a crayon or pencil to rub over the paper. Kids can use different colors to enhance their designs. This process reveals the intricate details of the leaves, making for lovely artwork.
Leaf rubbings are not just an art project; they also offer a chance to learn about different types of leaves. Kids can experiment with textures and explore how nature changes with the seasons. Plus, working together in this way can help strengthen bonds and create lasting memories.
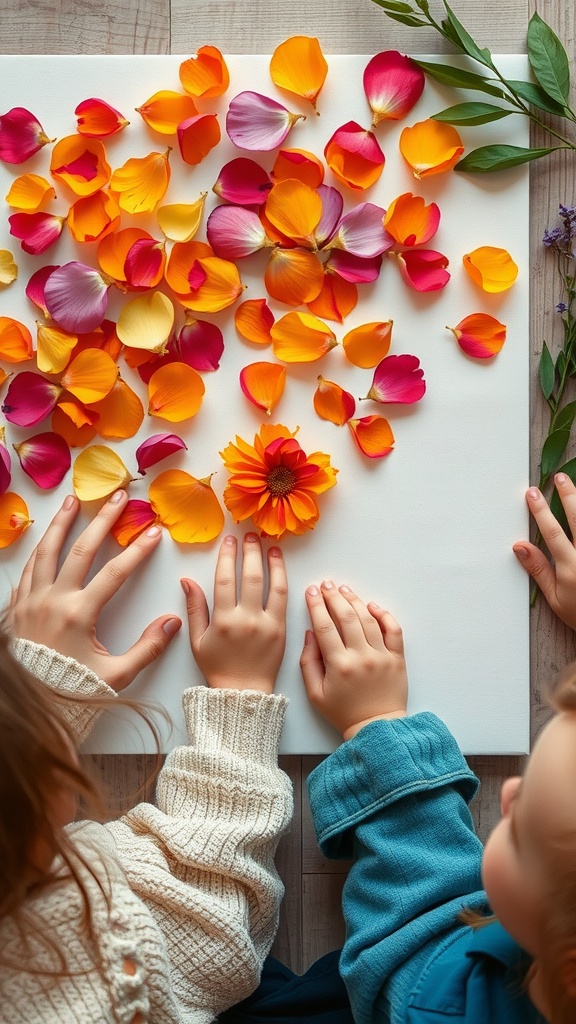
Creating a flower petal collage is a fun and colorful way to bring nature indoors. This activity is perfect for kids who enjoy arts and crafts. Using fresh flower petals, children can make beautiful designs while developing their creativity.
The image shows two young children working together, their hands gently placing vibrant petals on a blank canvas. The vibrant mix of colors—from sunny yellows to deep pinks—creates a stunning visual effect. The children’s excitement is evident as they explore different arrangements and patterns.
To make your own flower petal collage, gather various flower petals, some leaves, and a sturdy piece of paper or cardboard. Kids can choose their favorite colors and shapes to create unique designs. Simply glue the petals onto the paper and let everything dry. This simple project not only encourages artistic expression but also teaches kids about the beauty of nature.
After the collage is complete, display it as a decoration or gift it to family and friends. This hands-on experience fosters teamwork and enhances motor skills too. So, get outside, collect some petals, and start creating!
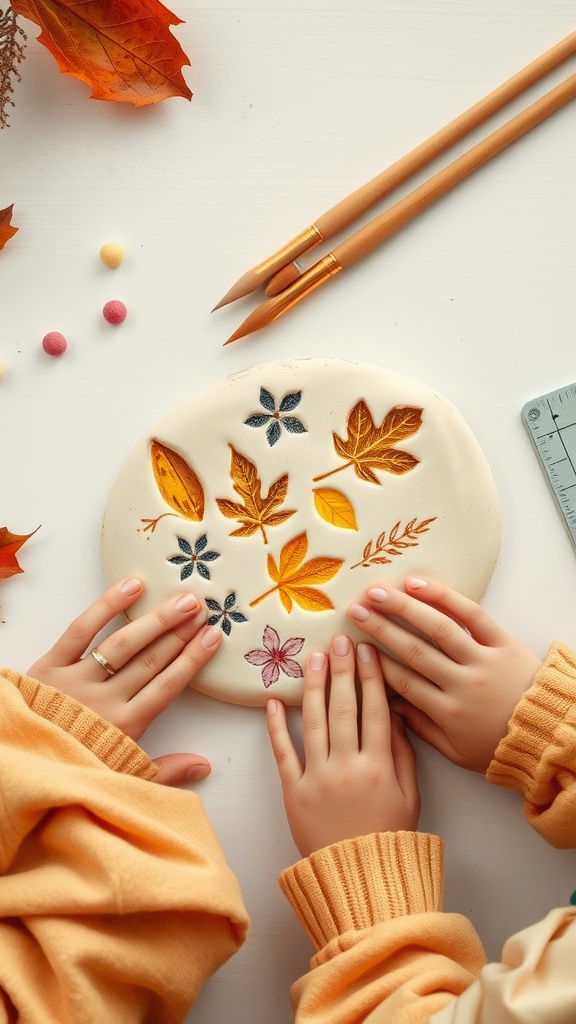
Creating clay nature imprints is an enjoyable way to connect with the outdoors. In this fun activity, kids can use leaves and flowers to make beautiful designs in clay. You can see two hands pressing down on a piece of soft clay that is already showing detailed impressions of various leaves and flowers.
The process is simple and exciting. First, gather some natural items from outside, like colorful leaves. Then, roll out some air-dry clay on a flat surface. Kids can press the leaves into the clay to make impressions. It’s a great way to learn about nature while also being creative.
After making the imprints, let the clay dry completely. Once it’s ready, kids can paint the imprints with vibrant colors to make them pop. This activity not only encourages creativity but also helps kids appreciate the beauty of nature.
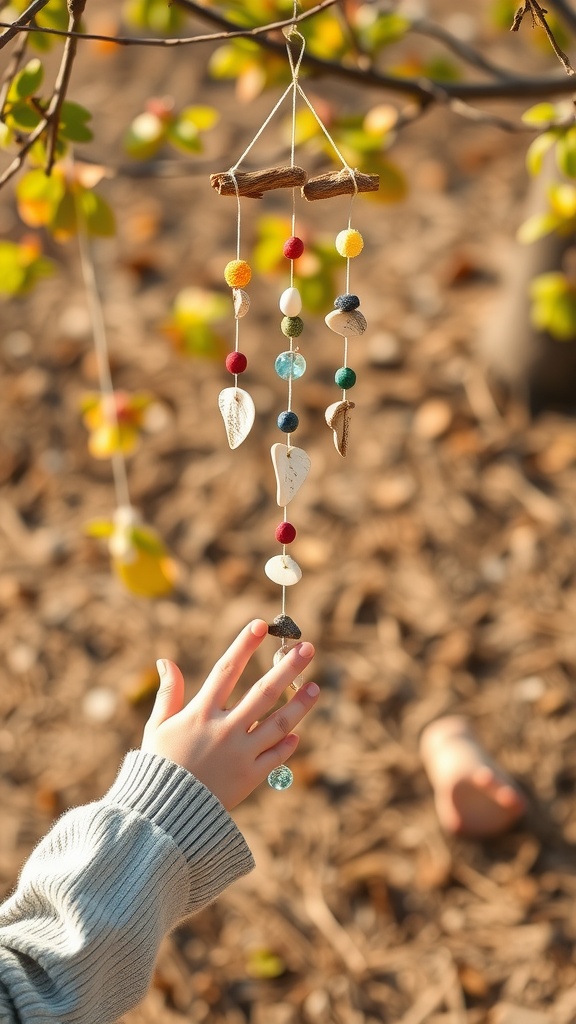
Creating nature-inspired wind chimes is a fun and simple project for kids. In the image, we see a child reaching for a colorful wind chime made from natural materials. The chime hangs from a tree branch, swaying gently in the breeze.
These wind chimes can be made using sticks, leaves, and colorful beads. It’s a great way to connect with nature while making art. Each piece adds a unique touch, making every chime special. Kids can gather materials from their backyard or nearby park, encouraging exploration and creativity.
To make your own, start by collecting sticks and any decorative items like beads or seashells. Then, tie them together using string. Hang your masterpiece in a spot where it can catch the wind and make beautiful sounds. It’s a delightful addition to any outdoor space!
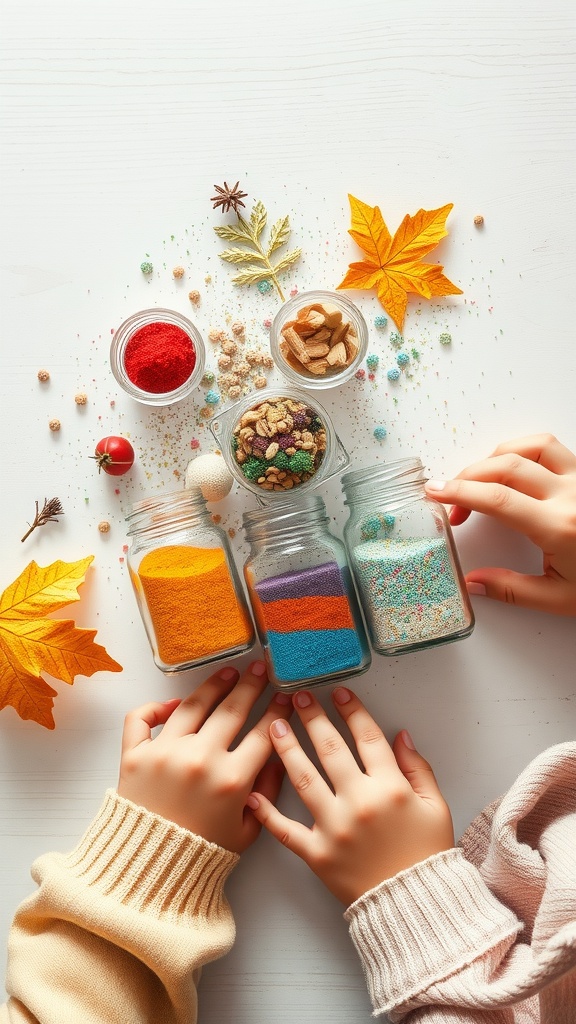
Sand art bottles are a fun and creative project for kids. In the image, we see colorful layers of sand in glass jars. Each jar holds different shades, making the whole display vibrant and inviting. Kids can let their imaginations run wild as they choose colors and patterns.
This activity is not only enjoyable but also helps develop fine motor skills. Kids can pour the sand into the bottles, creating unique designs. It’s an excellent way for them to express their creativity while having fun.
Gather materials like colored sand, jars, and some natural decorations. Leaves and small stones add extra charm to the artwork. Kids can decorate their bottles with stickers or ribbons once they finish layering the sand.
Sand art bottles make lovely gifts or home decor pieces. They can be displayed on shelves or given as personalized presents to family and friends. Overall, this is a great project that combines creativity and hands-on play!
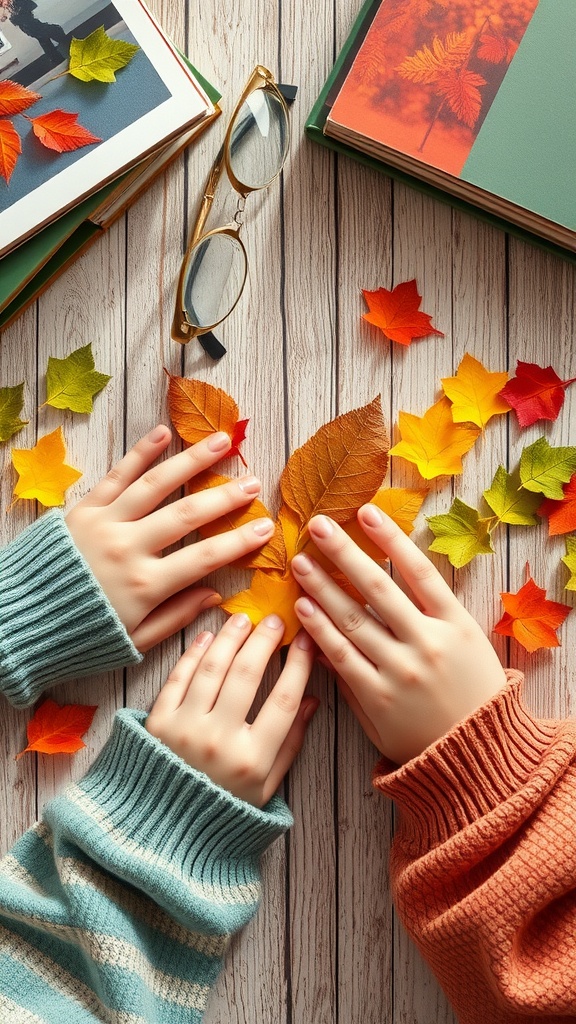
Pressed leaf bookmarks are a fantastic way to combine nature and creativity. Imagine collecting beautiful leaves in vibrant colors, just like the ones in the image. Two pairs of hands are working together, showcasing teamwork and excitement. They gently arrange leaves of various shapes and hues, ready for a fun crafting session.
To create these lovely bookmarks, start by gathering leaves from your backyard or local park. Choose flat, colorful leaves that catch your eye. Once collected, place them between the pages of a heavy book for a few days. This will press them flat.
After your leaves are ready, you can craft bookmarks by gluing them onto strips of cardstock or sturdy paper. You can even decorate these strips with drawings or stickers. This project not only results in a unique bookmark but also lets kids appreciate the beauty of nature.
Pressed leaf bookmarks make great gifts, too! They’re special and show effort. Plus, every time you open a book, you’ll be reminded of your time spent creating something beautiful.
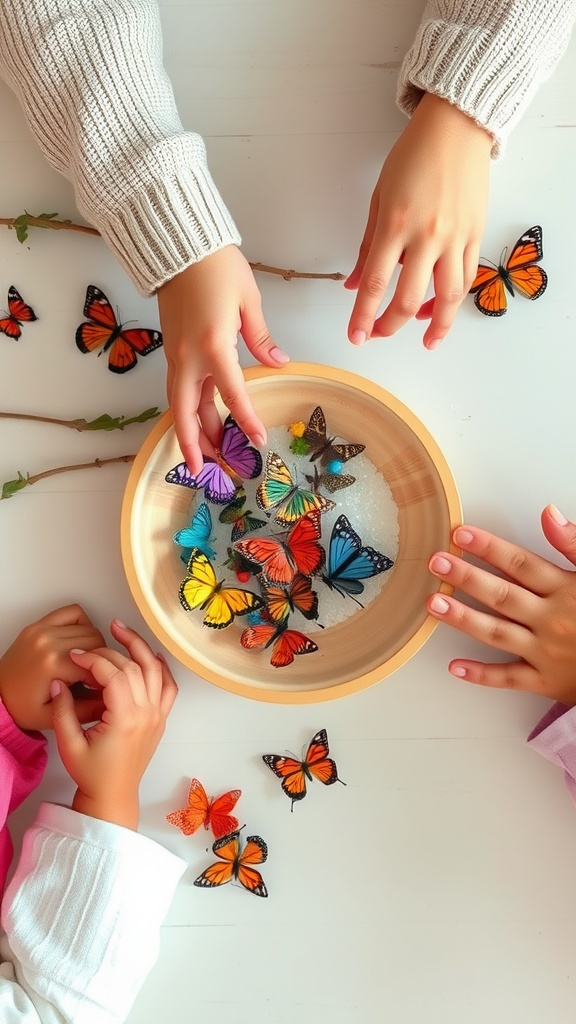
Creating a butterfly feeder is a fun activity for kids. They will love attracting butterflies to their outdoor space. The image shows hands reaching into a bowl filled with colorful butterfly decorations. This can inspire kids to make their own feeder.
To make a butterfly feeder, you need a shallow dish, sugar, water, and a few colorful flowers. Start by mixing equal parts of sugar and water to create a sweet solution. Pour this mixture into the dish. Next, place the dish in a sunny spot outside. Adding flowers around the feeder will make it even more appealing to butterflies.
Encourage kids to check the feeder daily. They can observe the different types of butterflies that come. This simple project helps them connect with nature while having fun!
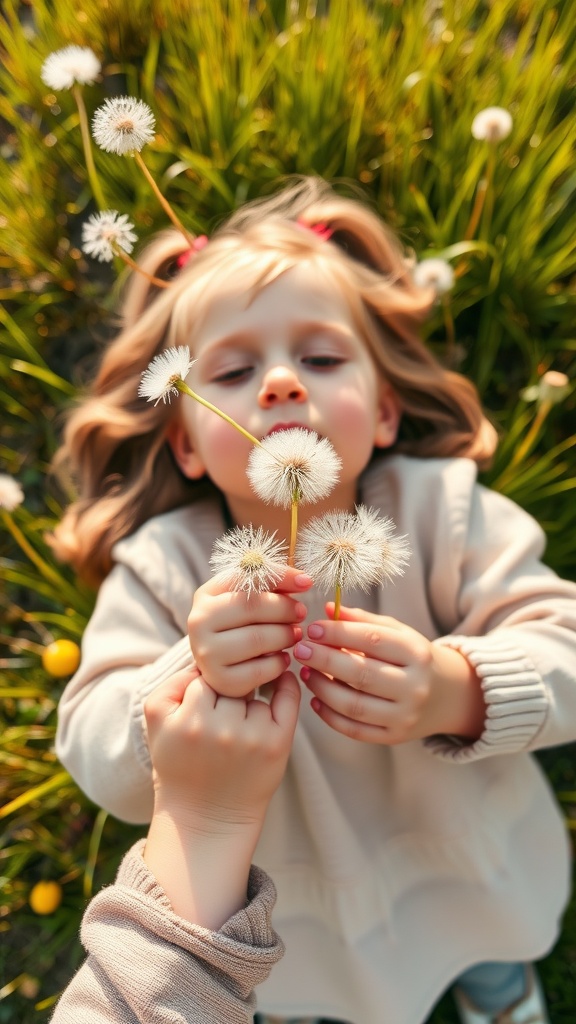
Dandelion puffs are a joy for kids to interact with. They are fun, fluffy, and perfect for imaginative play. In this image, a child holds dandelion stems, ready to make a wish or blow the puffs into the breeze. With the sun shining and the lush green grass around, nature provides a beautiful backdrop for these moments.
Creating art with dandelions can be a simple and delightful activity. Kids can gather them and make bouquets, or even use them for a blowing game to see who can scatter the most seeds. Each puff is like a tiny balloon, filled with potential for new dandelions to bloom.
Encouraging children to play with dandelions helps them connect with nature. It’s a great way to spark their creativity. Most importantly, it fosters curiosity about how plants grow and spread. So, the next time you spot dandelions, grab a few and let the kids enjoy!
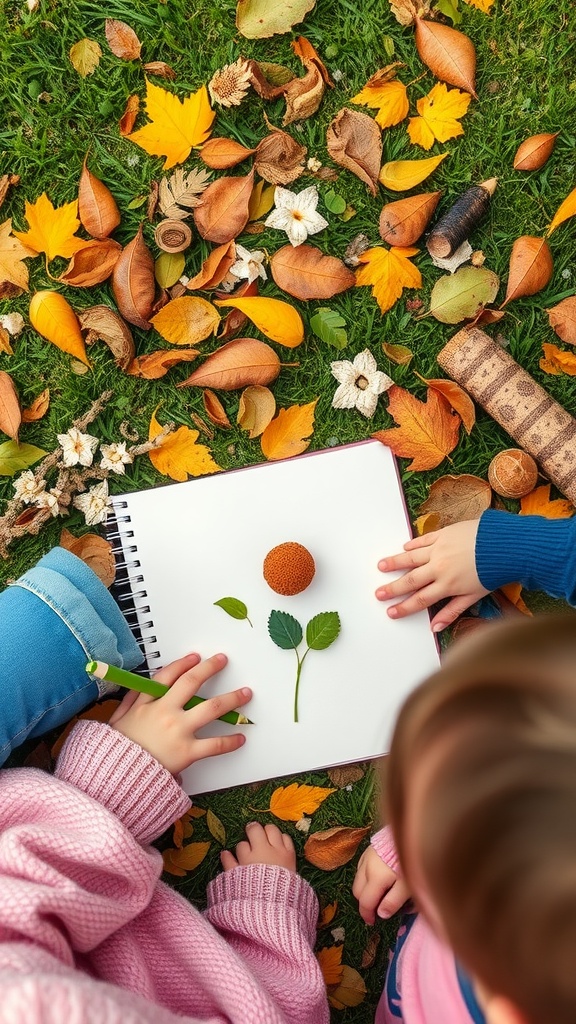
Nature journaling is a fantastic way for kids to connect with the outdoors. It encourages them to observe closely and appreciate the beauty around them. In the image, we see two kids gathered on the grass, surrounded by colorful autumn leaves. They’re working on a nature journal page, placing leaves and other natural treasures on the paper.
This activity is simple yet engaging. All you need is a notebook and some natural items. Kids can collect leaves, flowers, or even interesting stones. They can then draw or write about what they find. This helps them develop their creativity and observation skills.
Encourage your little ones to describe their finds. What colors do they see? What shapes? This kind of interaction fosters a love for nature. Plus, it’s a great way to spend time together outdoors. Nature journaling can be done in parks, backyards, or even on a family hike.
At the end of the day, they’ll have a personal keepsake filled with memories from their nature explorations. It’s not just about the journal; it’s about the moments shared and the lessons learned.
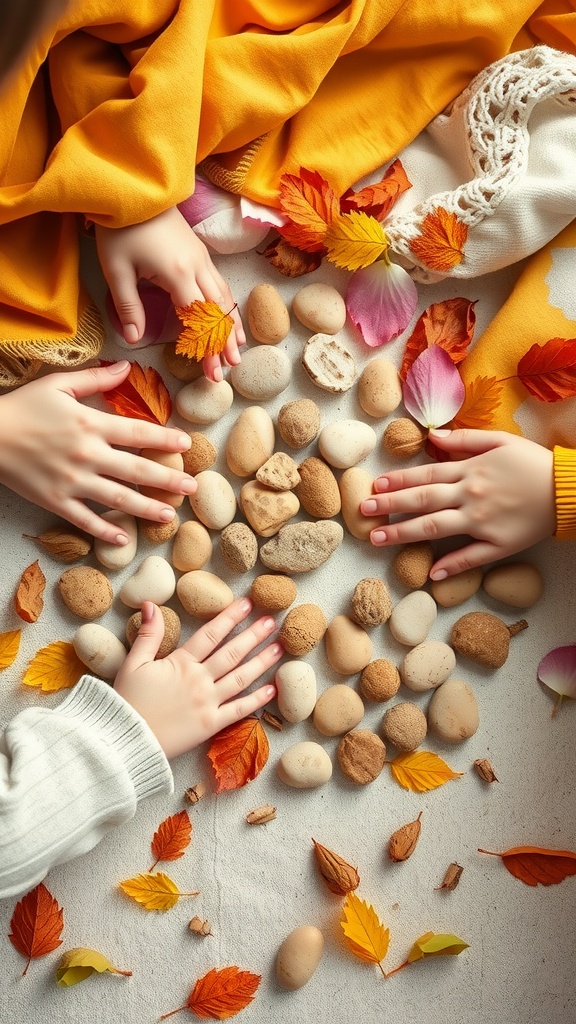
Creating nature mandalas is a fun and engaging way for kids to connect with the outdoors. The image shows little hands exploring various natural materials, like stones and colorful leaves. This hands-on experience helps children appreciate nature’s beauty while developing their creativity.
To make a nature mandala, gather items like leaves, flowers, stones, and twigs. Arrange them in a circular pattern on the ground or a flat surface. Encourage kids to think about colors and textures as they create their designs. This activity fosters teamwork and imagination.
Once the mandala is complete, take a moment to enjoy it together. You can also discuss the different materials used and their natural surroundings. This is a wonderful opportunity for kids to ask questions and learn more about nature.
Cleaning up afterwards can be just as fun! Collect the materials and return them to where they were found, teaching kids about respect and care for the environment.
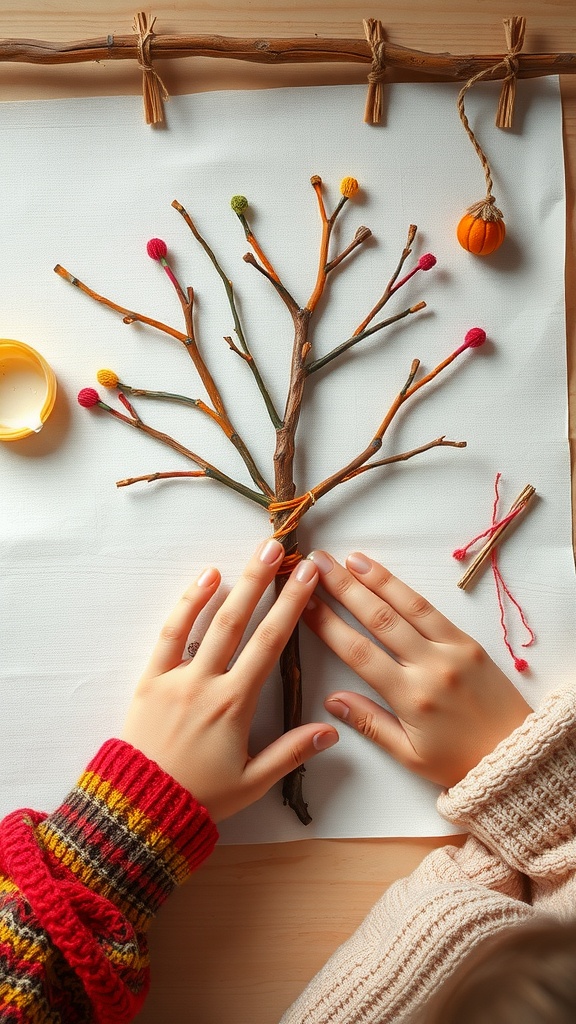
Creating twig and string art is a fun way for kids to connect with nature while honing their creative skills. In the image, we see a delightful display of twigs arranged like a tree, adorned with colorful pom-poms. This simple yet engaging project allows children to express themselves artistically.
To start, gather some twigs from outside. Look for various shapes and sizes to make the artwork more interesting. Using a piece of sturdy paper or canvas, arrange the twigs to form a tree-like structure. Kids can then use string or yarn to attach colorful pom-poms, adding a playful touch.
Encourage kids to think about the colors they want to use. The bright hues in the image suggest a cheerful approach. This project not only sparks creativity but also teaches kids about nature and the beauty of using natural materials.
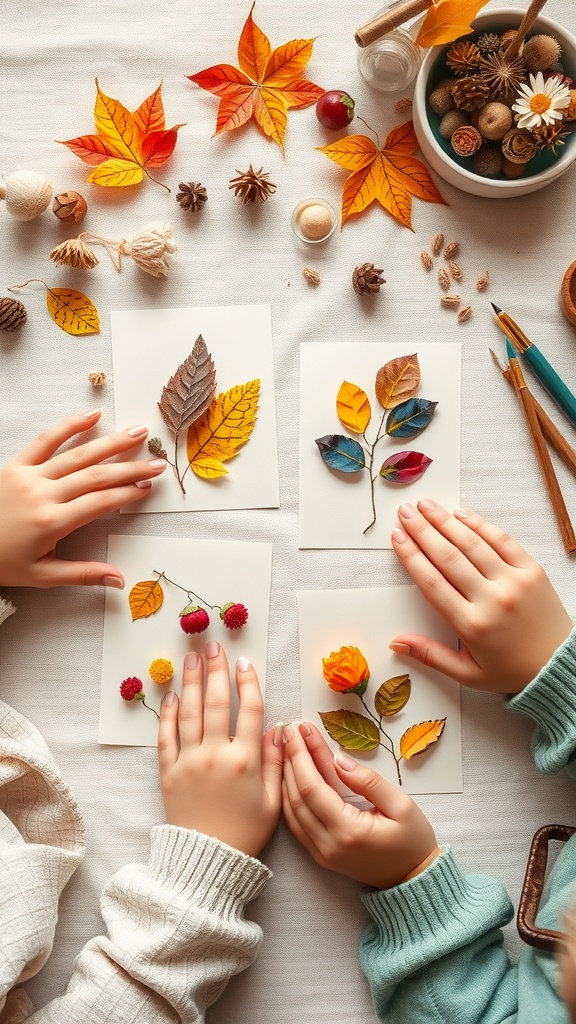
Making nature-themed greeting cards can be a fun and creative way for kids to express themselves. In the image, we see two kids working together on their cards. They are using different leaves and flowers to create colorful designs. This activity allows them to explore their artistic side while connecting with nature.
The vibrant autumn leaves and tiny flowers add a nice touch to each card. With a little glue and some imagination, these kids are turning simple materials into beautiful keepsakes. It’s a great way to celebrate the changing seasons and share special messages with family and friends.
Gathering materials from outside, like leaves, twigs, and seeds, encourages kids to appreciate the beauty around them. Parents can join in on the fun by helping with the cutting or writing messages inside the cards. This activity not only fosters creativity but also strengthens family bonds.
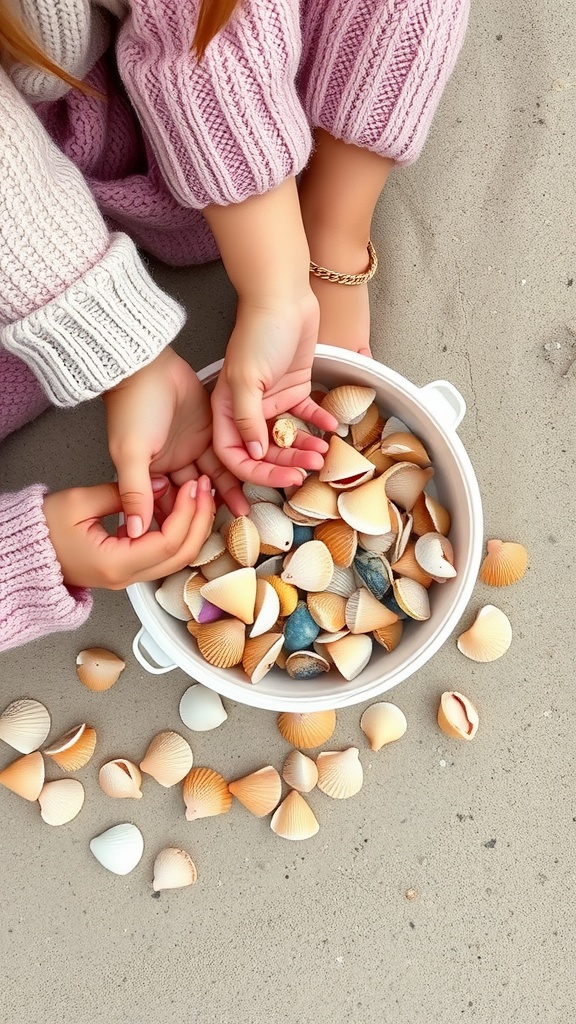
Beach combing and shell collecting is a delightful activity that brings kids closer to nature. Imagine walking along the beach, scooping up shells of all shapes and sizes. The image shows little hands carefully holding shells, showcasing the joy of discovery.
Once you’ve gathered a collection, the fun doesn’t stop there! Shells can be used for various creative projects. Kids can paint them, glue them onto picture frames, or even create beautiful mobile decorations. This encourages both imagination and fine motor skills.
Don’t forget to talk about the different types of shells and where they came from. It’s a great way to teach kids about marine life and the environment. Shell collecting is not just a craft; it’s an experience that fosters curiosity and creativity!
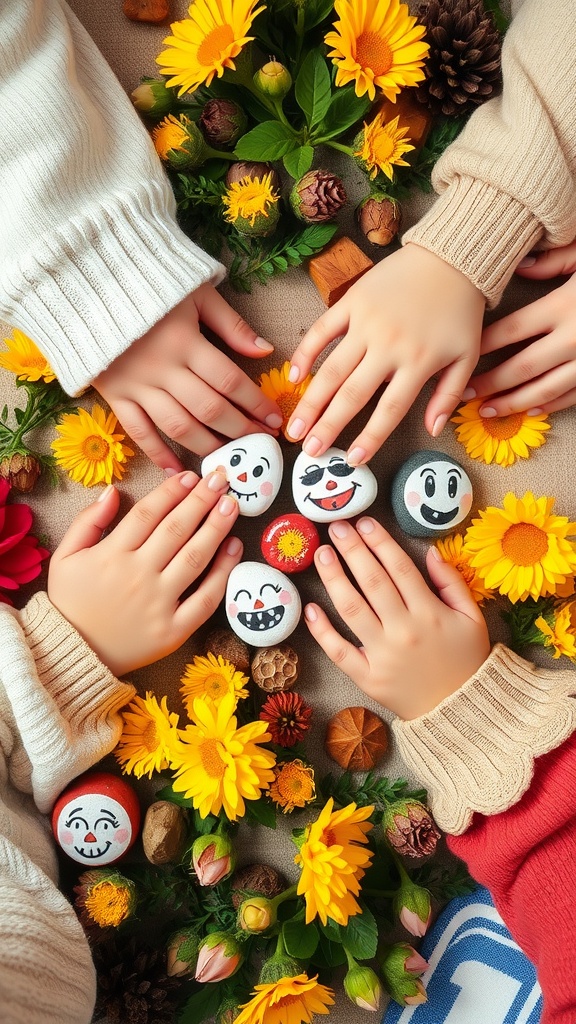
Garden pebble art is a fun way for kids to express their creativity using simple materials from nature. In this delightful activity, children can gather smooth stones and paint them with cheerful faces and bright colors. This encourages imaginative play and fine motor skills.
The image shows several little hands, eagerly touching and arranging painted pebbles surrounded by vibrant sunflowers and other natural elements. These pebbles, adorned with playful designs, add a personal touch to any garden or indoor space. Kids can create their own characters, turning ordinary stones into a whimsical art display.
To start, all you need are some clean stones, non-toxic paint, and brushes. Allow kids to choose their favorite colors and get creative. Once the paintings dry, these stones can be placed in the garden, used as decorations, or even given as gifts to family and friends.
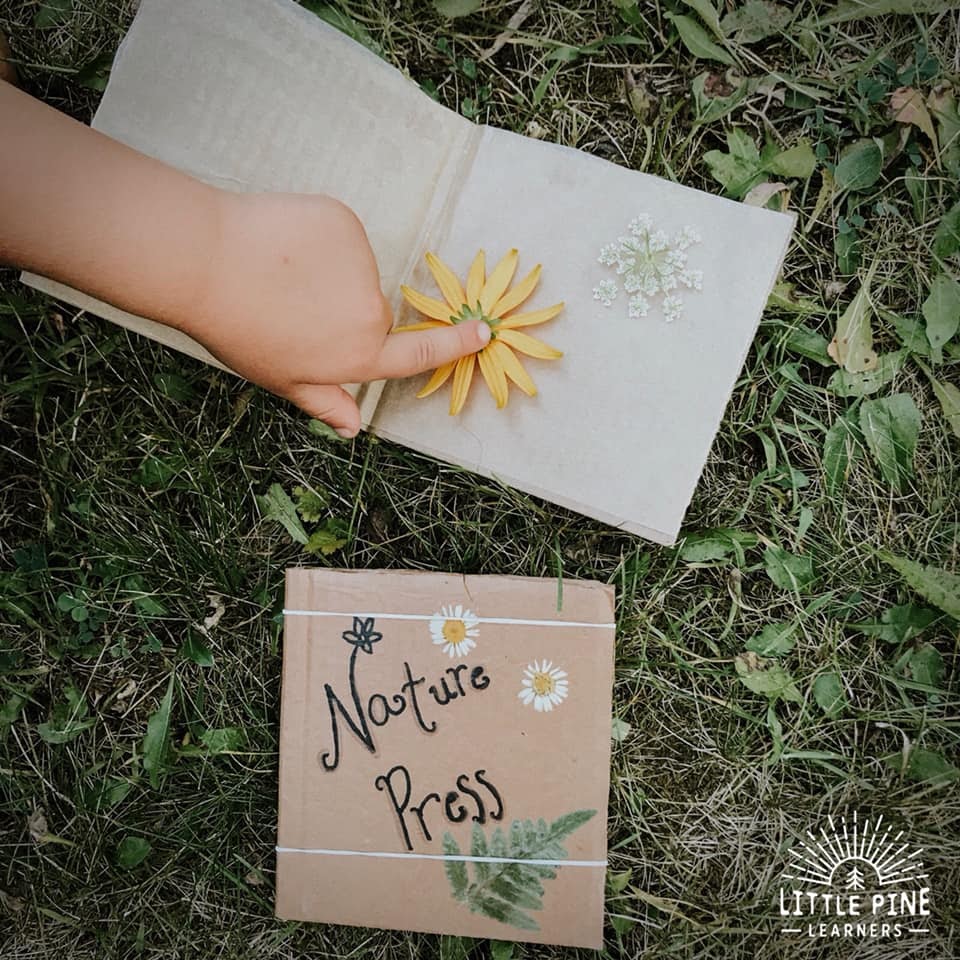
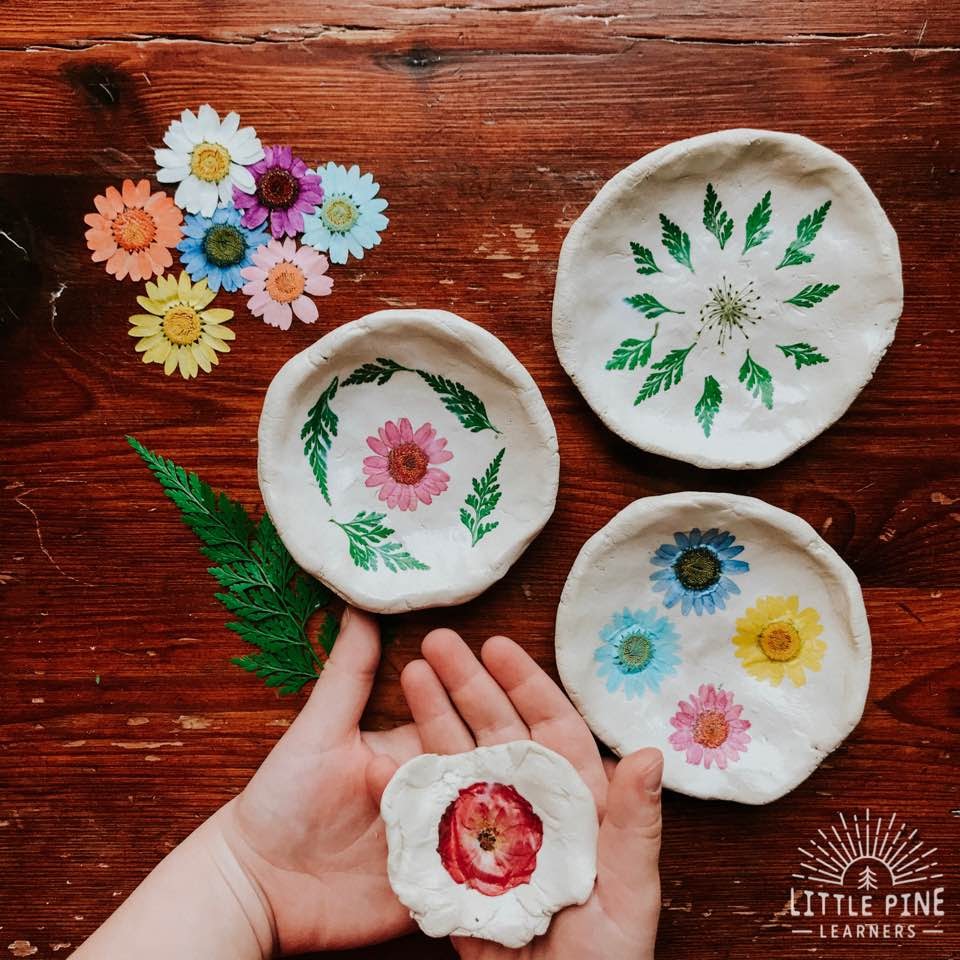
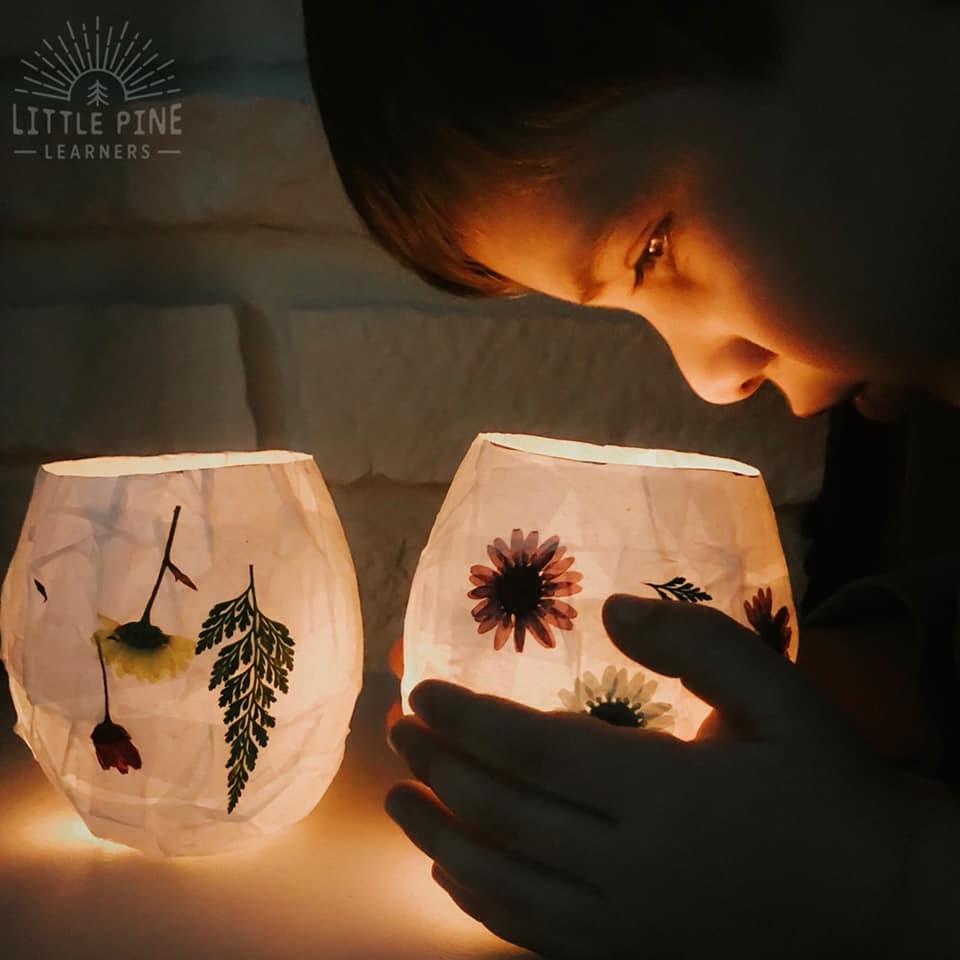
We made these pretty nature pinch pots over a year ago and the pressed flowers and leaves are still vibrant and beautiful!
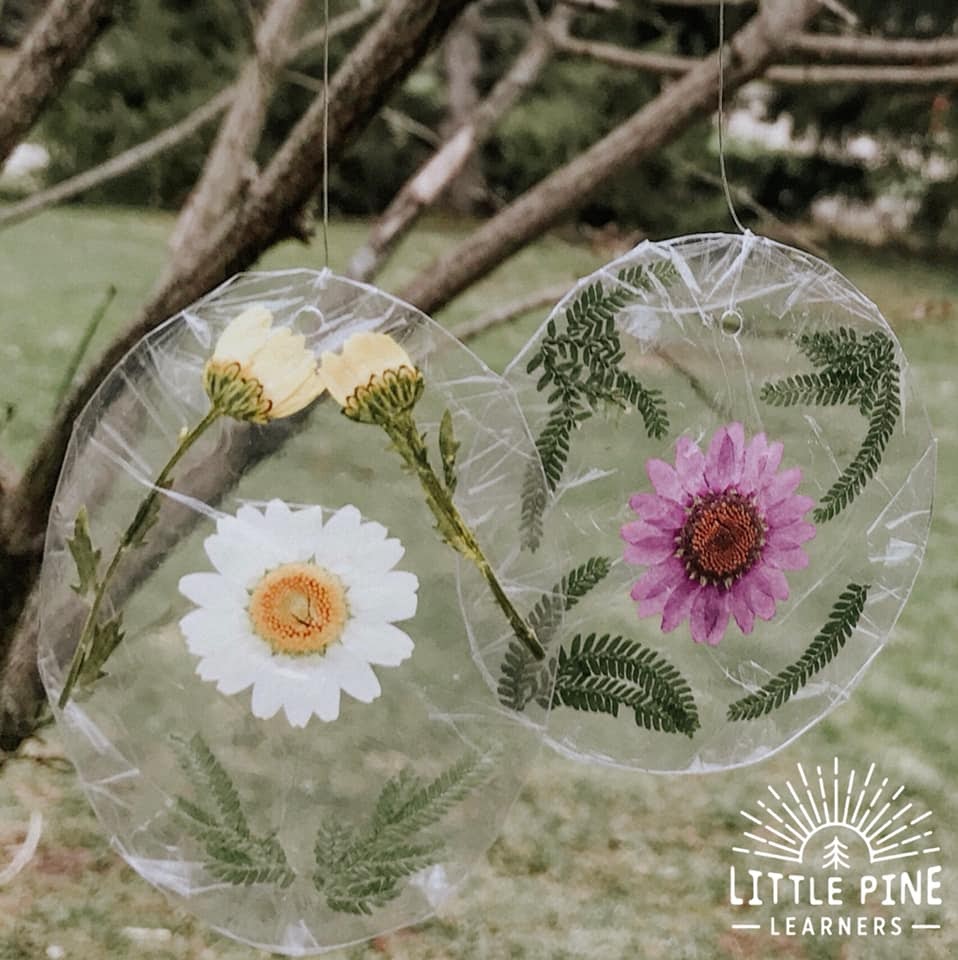
These are so fun to make and you can feel good about using recycled items to make these simple suncatchers.
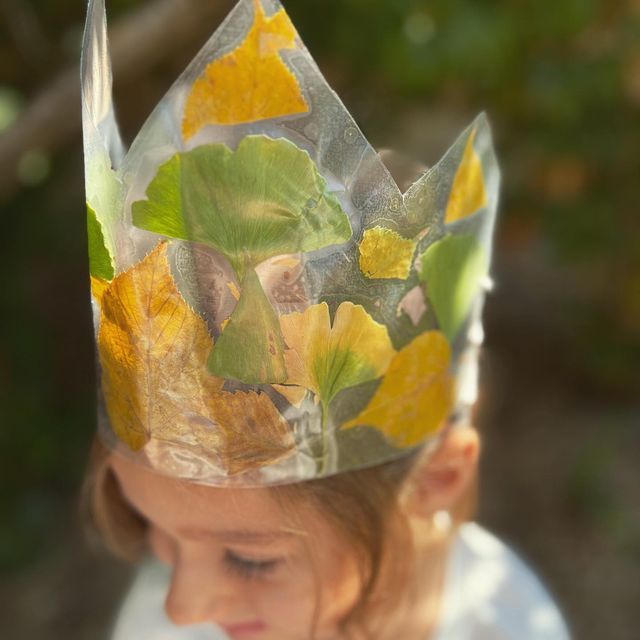
This one takes a little bit of effort, but will last FOREVER if you take the time to make one! This crown is truly a treasure and is a wonderful tool for imaginative play!
Nature Collages
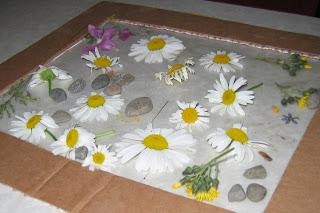
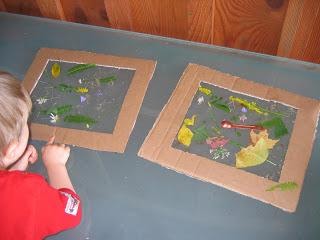
Fall is such a beautiful season. Whenever I think of it, I imagine color change, cooler temperatures and the smell of sweet potato pie. Recently, I asked my nieces what their favorite part of the season was, and they both immediately answered: “Playing with leaves!” With this enthusiastic response, I decided to make a Fall-themed sensory activity.
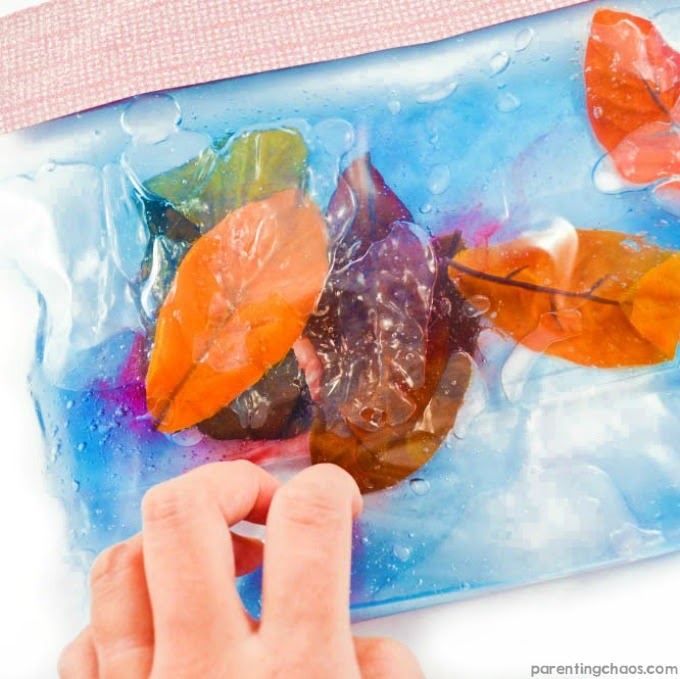
Recently, my nieces and their friends have been extremely interested in anything remotely “squishy.” They search toy aisles for kid-friendly stress-balls, get excited to make slime, etc. They just love the feeling of being able to squeeze their hands into something oozy. I put together my oh-so-easy Fall Squishy Bags to offer them something new to play with. Today, I’ll show you how to make them for your very own!
The wonderful thing about squishy bags is that you can get extremely creative with its inner contents. For my Fall-themed one, I decided to focus on leaves since my nieces expressed such a liking to them.
Items Needed:
Artificial or natural leaves, preferably in autumn shades
Scissors
Large freezer bag
A bottle of hair gel or Aloe vera gel
Medium-sized bowl (optional)
Colorful duct tape (optional)
Colored Glitter or confetti...if desired.
Directions:
1. If necessary, cut artificial leaves off from their stem. For one large freezer bag, you’ll need about 4 to 6 leaves.
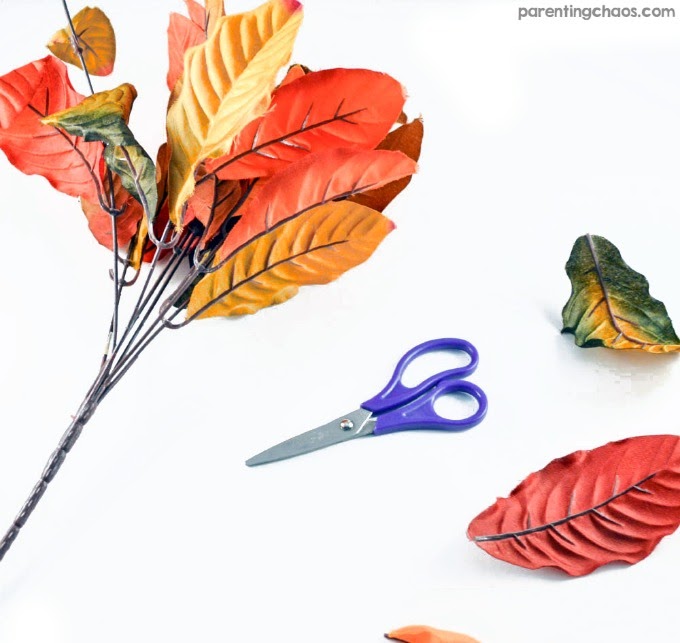
2. If you don’t have anyone helping you to keep the freezer bag open, I suggest opening it up and placing it in a bowl. This will keep it standing upwards and will allow you to fill it up with easy. First, add your leaves then, add your entire bottle of aloe or hair gel.
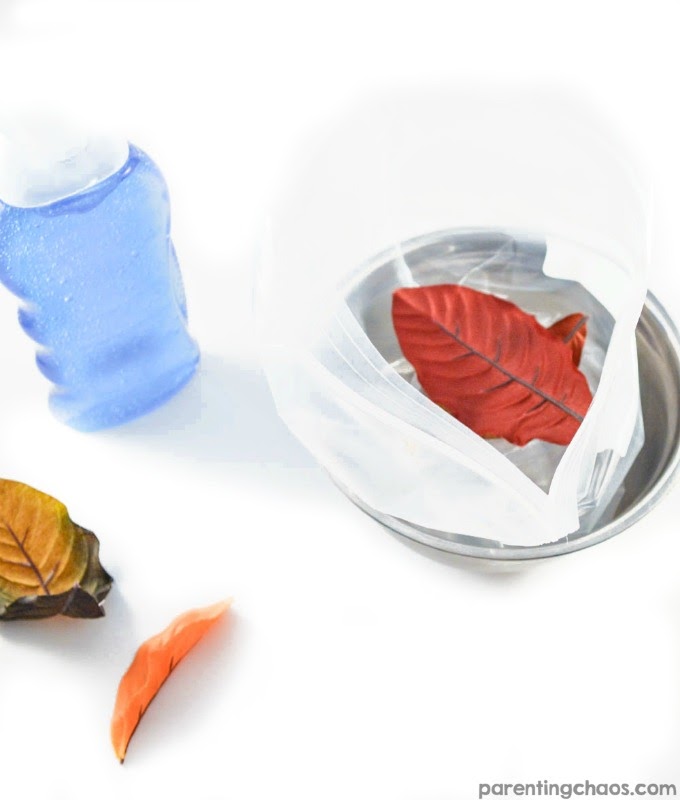
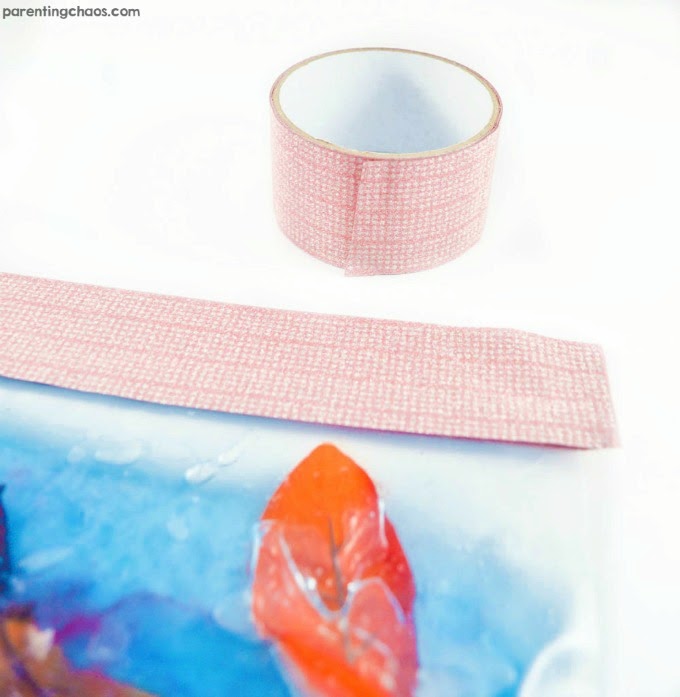
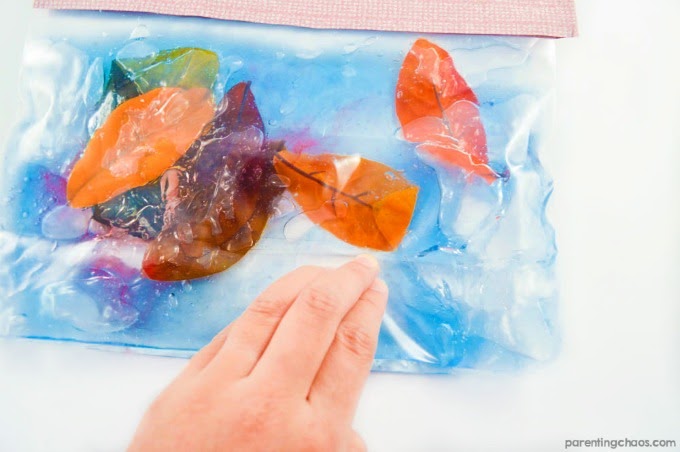
3. Squeeze out the air from the bag and zip shut. I always like to seal the top of my squishy bags with decorative duct tape for extra protection.
If you have a biter, tape around the edges too.
4. Squish away and have fun!
My nieces had a great time playing with their squishy bags. I was happy to provide them with an activity that they found so satisfying to squish their hands into. We’re just getting into the fall season in my area, so this sensory play was just what we needed to welcome the beautiful season!
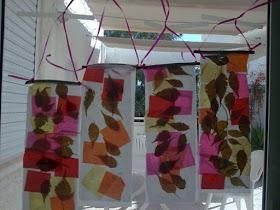
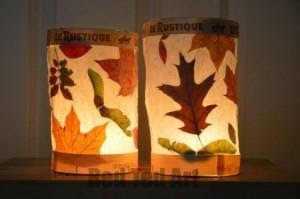
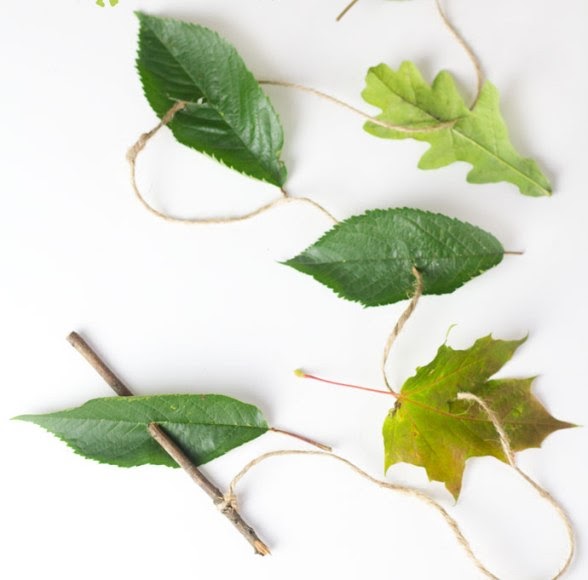
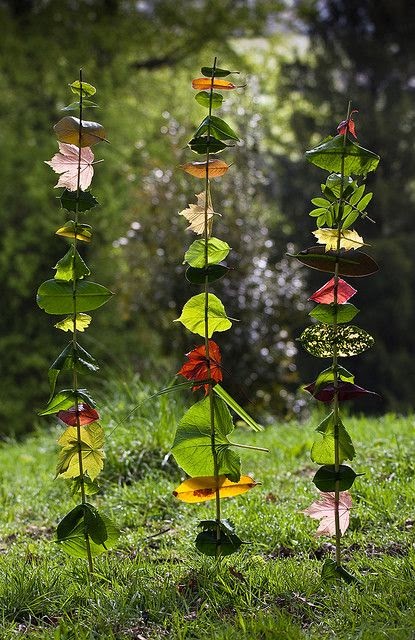
Using a full sheet of semi transparent waxed sandwich paper, gluing leaves and color tissue paper folding in the middle and adding a stick and ribbon or string for hanging.
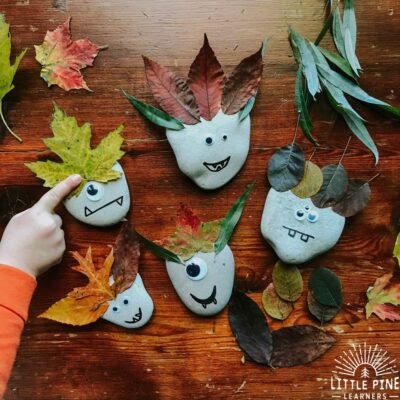
Here is an easy leafy monster rock craft idea for Halloween. This is a great non-scary idea, and uses natural…Read More
***We washed and painted our rocks first...You can order funny face stickers on Amazon if you don’t want to draw faces. We also Mod-Podged the whole rock to keep it together.
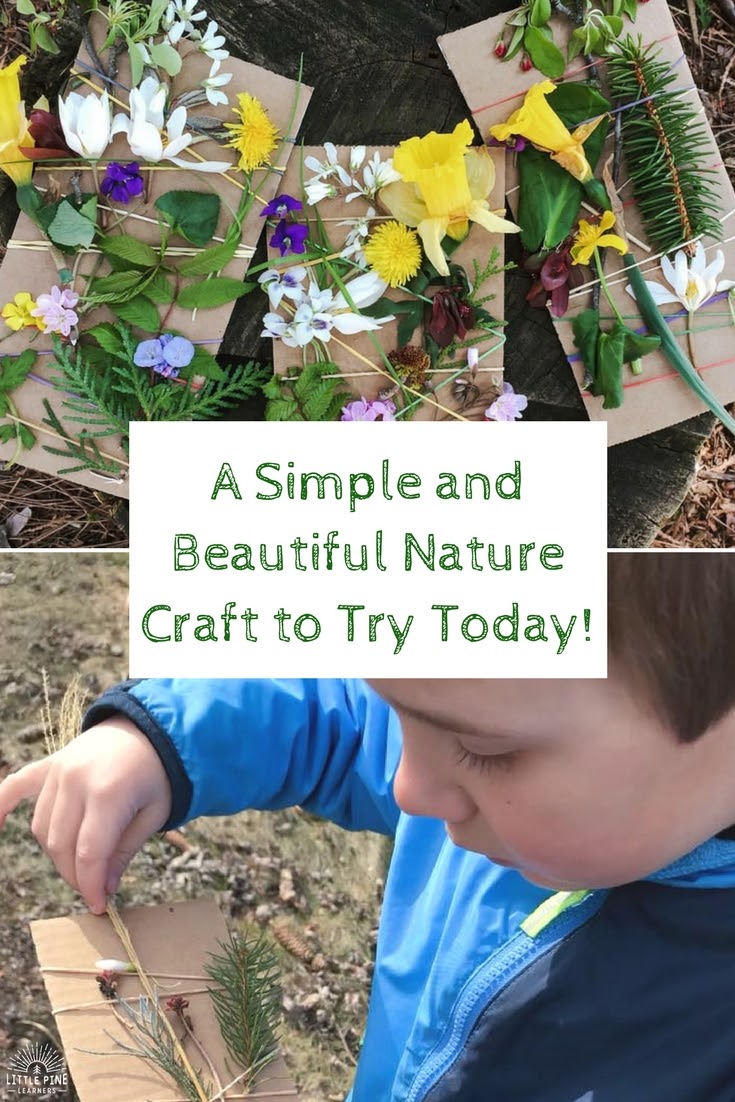
Try this simple and beautiful nature weaving craft the next time you go for a walk in your backyard. This easy spring craft is so fun to create and the results are gorgeous every time! At the end of the post, I also share an alternative idea if you don’t have access to a variety of collectable nature near you.
Spring is finally in the air in Wisconsin! We are loving the beautiful spring flowers and the promise of warmer weather. This time of year, we look forward to creating these wonderful nature collages. If you give this easy spring activity a try, I promise it will become a cherished springtime tradition for your little nature lovers as well!
Guess what?! You can also try this activity for Christmas and Valentine’s Day! Just cut the cardboard in different shapes and adjust the weaving material to match the season. Simple as that!
•Pieces of cardboard Cut into shapes like hearts, butterfly circle or square
•Bits of nature
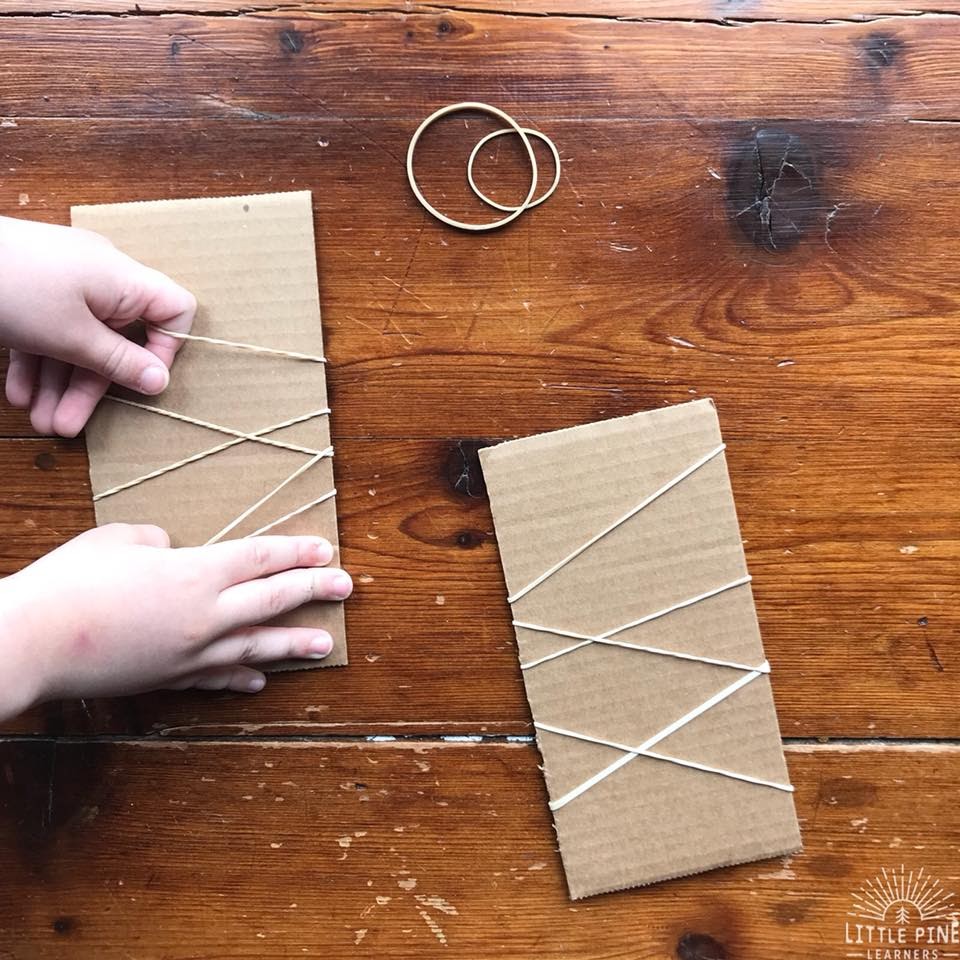
1. Cut cardboard into rectangular pieces that are about 4in X 9in. Feel free to experiment with different sizes and shapes of cardboard.
2. My boys put 5 rubber bands around the cardboard. This is a great way to work on fine motor skills! It’s okay if the rubber bands overlap, it doesn’t hinder the weaving process.
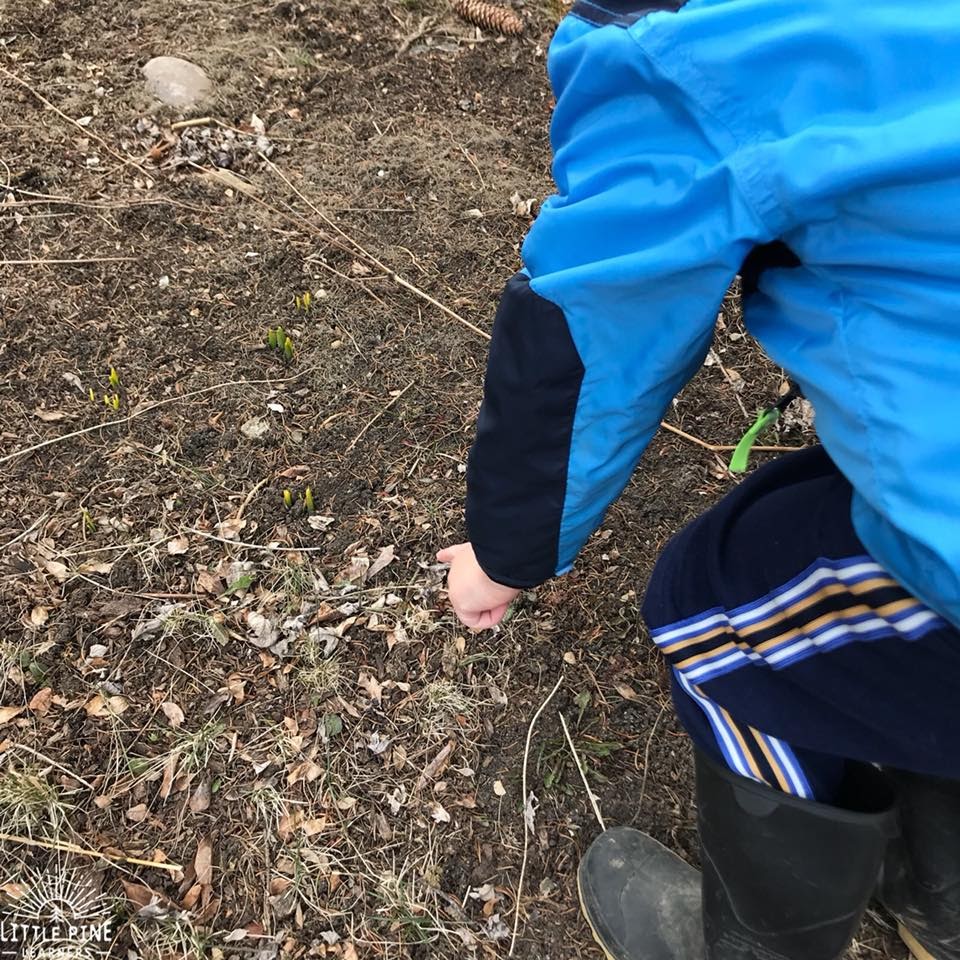
We headed outdoors and searched high and low for signs of spring. My four year old saw sprouts and was so excited because this is a word in our spring words scavenger hunt activity! He loved making this real world connection.
As we continued our search, my boys picked up pieces of nature to weave through their rubber bands. They experimented with the different objects and realized some of them didn’t weave very well, so they decided not to include them in their crafts. We tried to identify as many objects as we could and took pictures of the pieces of nature we couldn’t identify for further research.
Once finished, we looked over their works of art one more time and displayed them in our home. Over the next couple of days, we visited our collages and discussed what we liked most about each piece of nature.
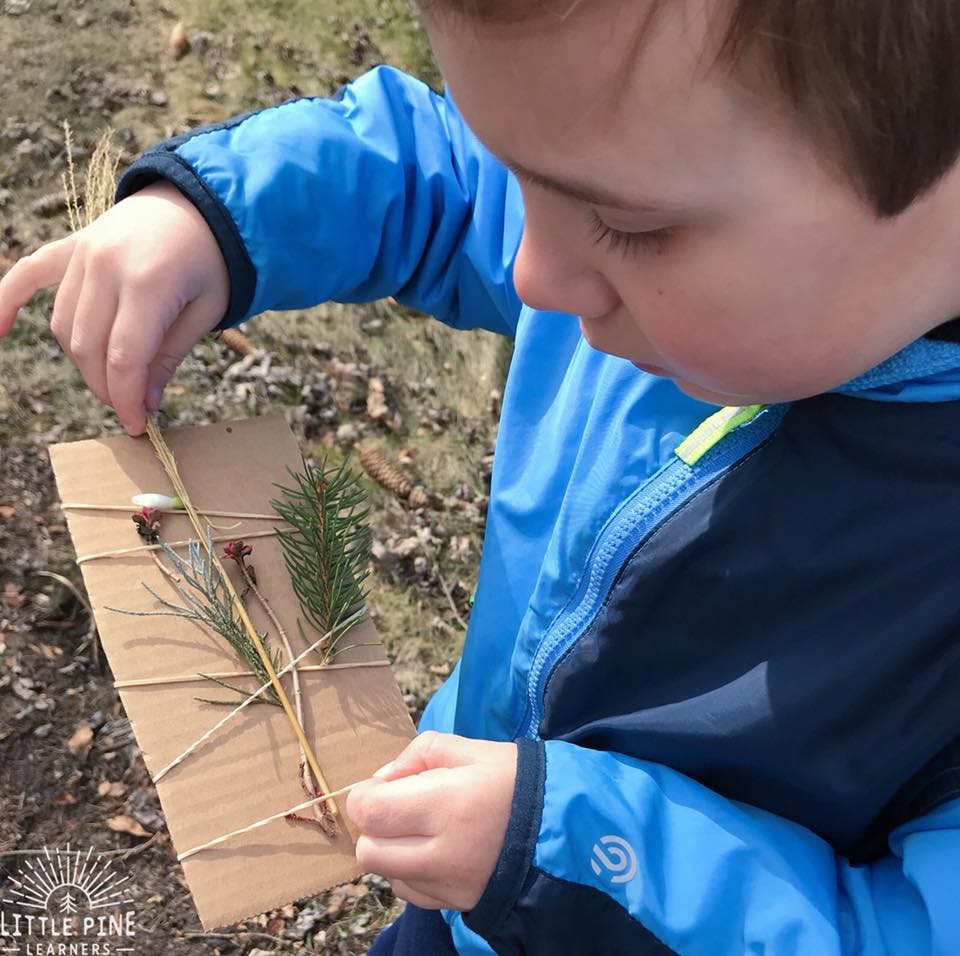
No problem! You can still try this easy spring craft with flowers from a seasonal bouquet. Enjoy the bouquet in your home for a while and weave the flowers instead of throwing them away. My boys helped me cut the flowers and they got busy creating their masterpieces. We identified as many spring flowers as we could in the bouquet. As you can see, the final product is beautiful!
Have you tried making melted crayon rocks?
Liking a rock the way they found it is Ok!!! Please don’t forget to ask a child if they want to paint their rocks that they collected. If they just want to make it shiny, a good layer of Mod-Podge works. Hope often just wanted to coat them with
glitter glue to make them sparkle.
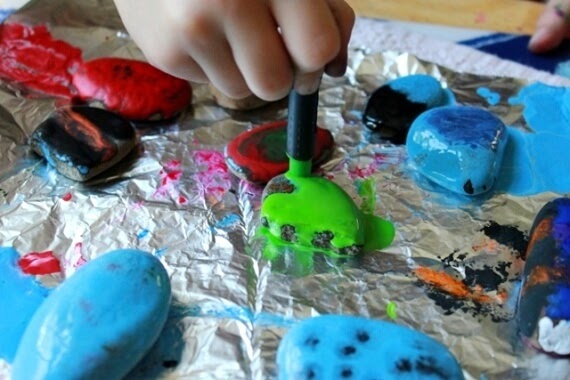
The crayon melts over the surface of the hot rocks and creates a smooth, vibrant, colorful coating that hardens into a waxy shell. It is SO satisfying. A tad addictive even.
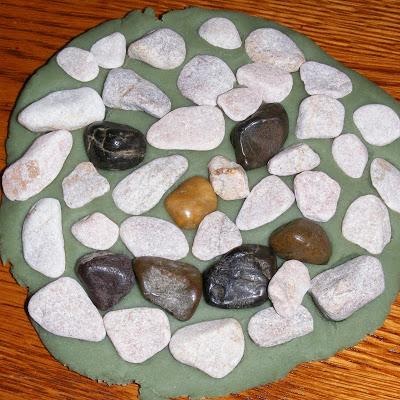
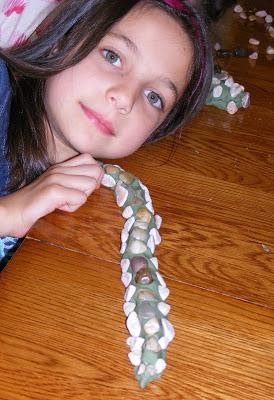
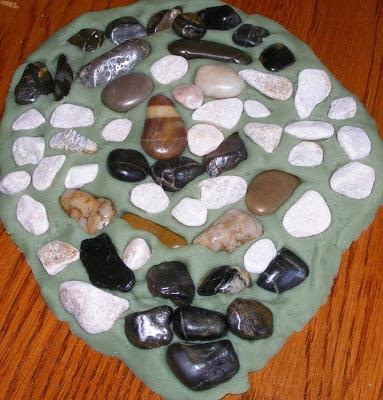
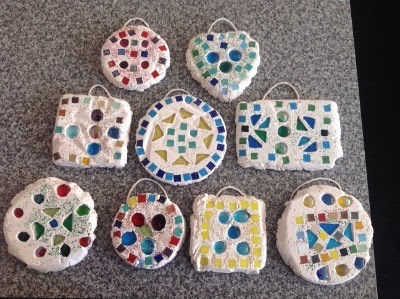
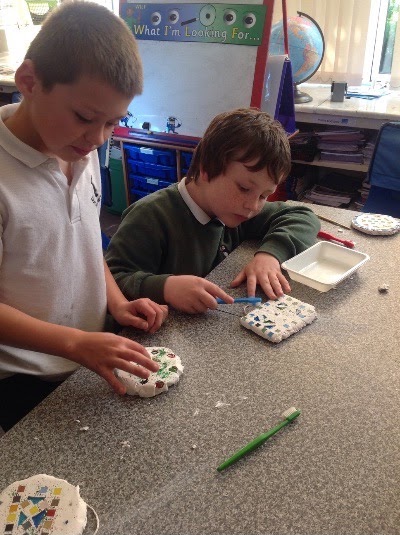
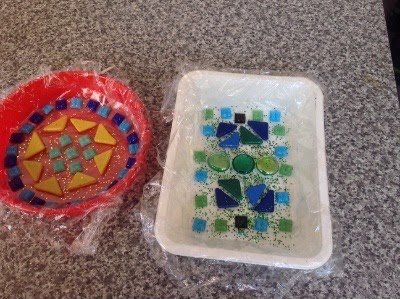
I didn't want to buy a kit and I didn't want the little kids trying to glue pebbles to cardboard, so I came up with this idea. I made a batch of playdough in a "natural" color and then had the kids make their mosaics on this. It provided a great substance for the pebbles to "stick" too, and they could experiment with this technique over and over again.
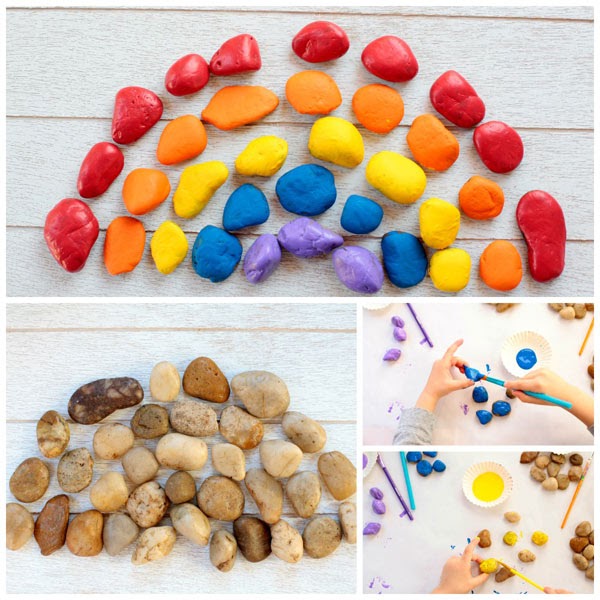
Supplies:
river rocks
paint in the color of the rainbow
toddler paint brushes
Step 1: Gather your river rocks and set them up as a rainbow.
Step 2: Group the rocks by the color they will be painted. Prepare your paints and paintbrushes.
Step 3: Paint the rocks color by color. Little ones will need to do one color at a time So first try 3 purple pebbles, then move up the colors giving them one color paint at a time
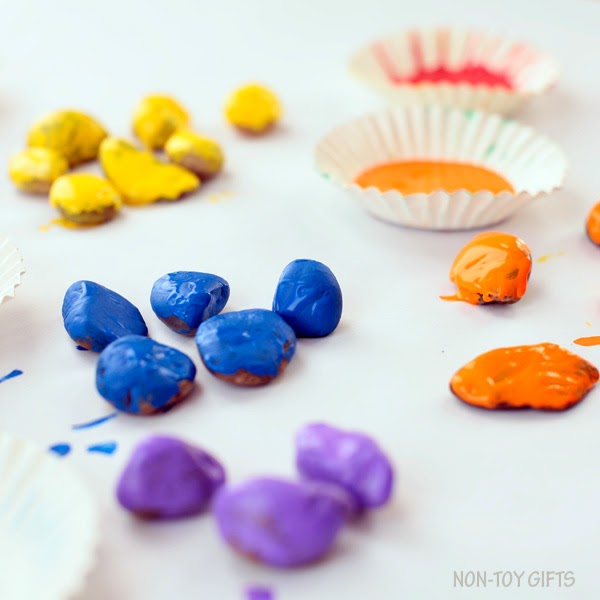
Step 4: Wait for them to dry. Turn them over and paint the other side with the same color.
Step 5: Arrange the stones as a rainbow starting with the purple layer.
NOTE 1: For Rock Blocks- Just paint however many you want- Remember to use different sizes. For toddlers- you might want to make cards with outlines. Just trace the stones and pebbles into different shapes.
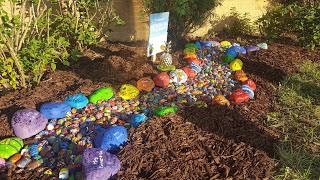
Note 2: Rock Garden was painted by 700 students but man is it impressive to show students there is only one you. But when it is combined with others, it can make something beautiful.
More about Rock Blocks: Children will have fun with this construction and early learning manipulative. Ideal for developing fine motor skills, and for counting, sorting and creative design. How many pebbles can you stack before they topple over? Encourage visual perception, fine motor skills, sorting, counting, stacking, and more! The wonderful tactile experience of the smooth, or rough pebbles in six different colors will delight the senses.
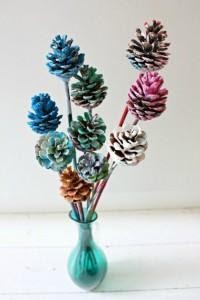
Painted Pine Cone Flowers from Emma Owl – This cheerful “bouquet” won’t wilt after a week, and I’m sure the children will have such fun creating it. HINT: we used sticks from the forest floor instead of dowels.
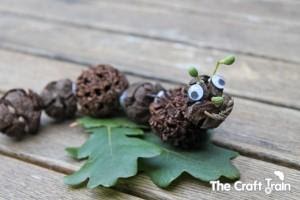
I hope you give this easy spring craft a try!
Fall Leaf Suncatcher
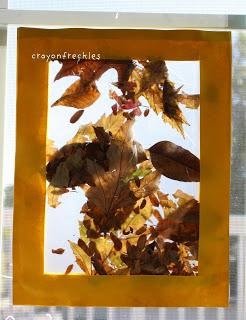
Be inspired by Crayon Freckles to
make your own gorgeous leaf suncatcher
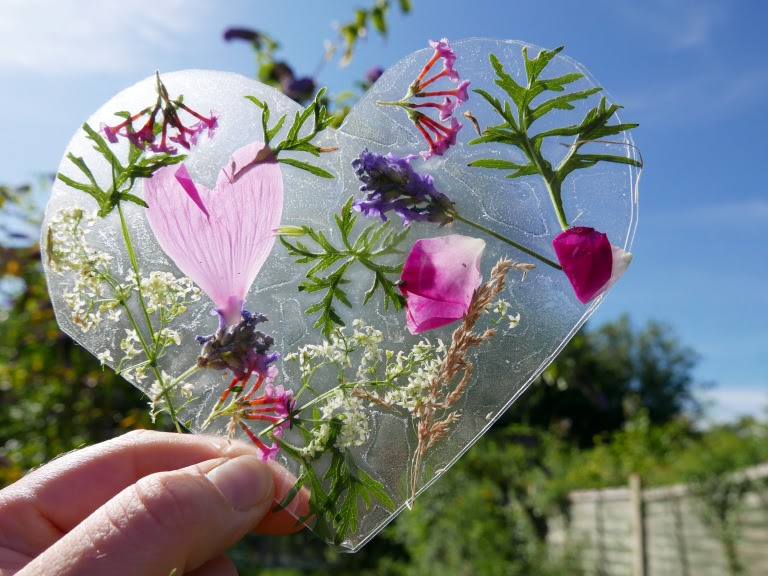
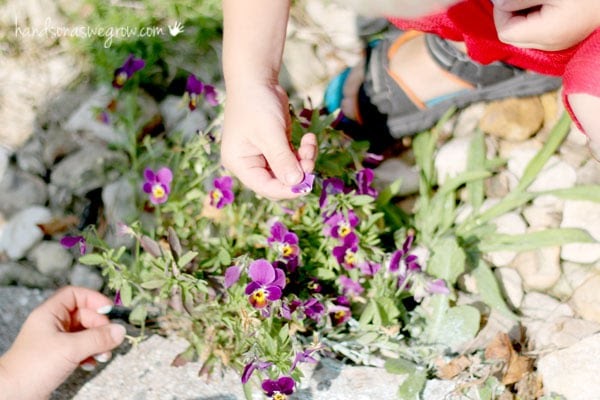
Once we collected our nature goodies, it's time to set up to make a collage of it all. Don’t forget the extra special part: these double asgorgeous suncatchers, too.
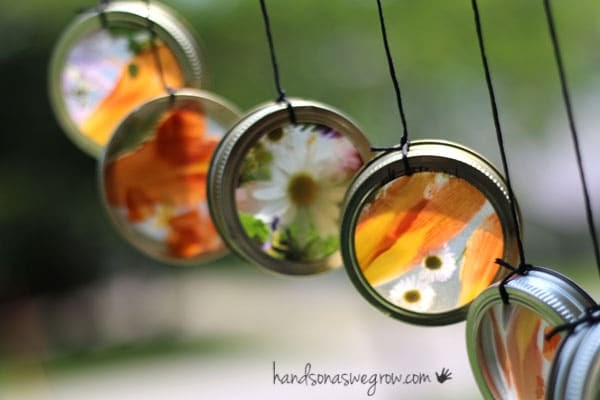
Homemade Nature Suncatcher Wind Chimes for Kids to Make
To make your found nature into wind chime suncatchers, you’ll also need:
Contact paper
Scissors
Marker or pen
Rings from Mason jar lids
String (we used hemp cordbut yarn works too)
A sturdy stick
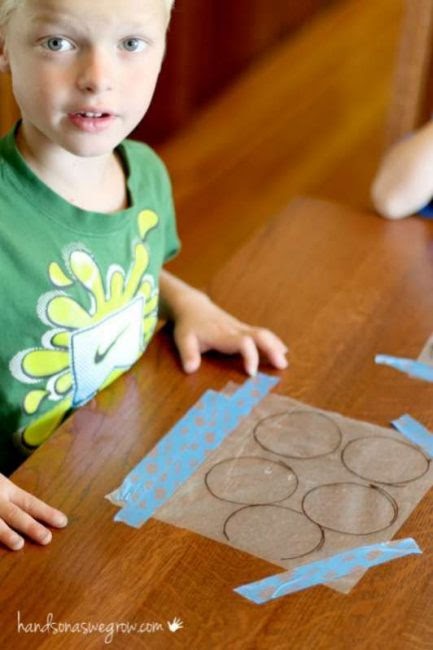
Cut a small piece of contact paper and trace the mason jar rings onto the contact paper side (not the part you peel off). Trace as many as you have rings for. Then peel the backing off the contact paper and tap onto the surface, sticky side up.
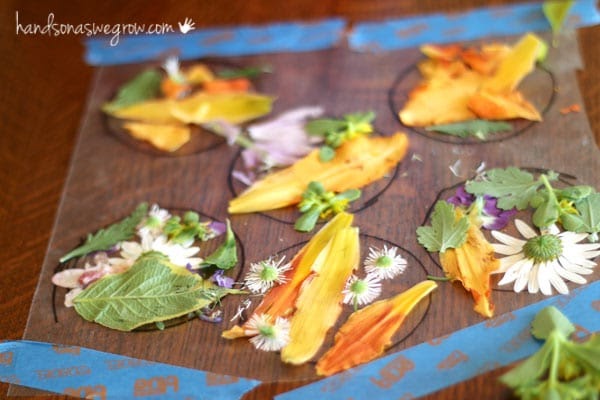
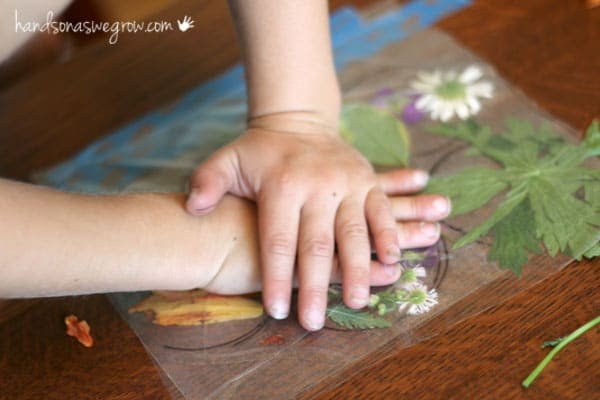
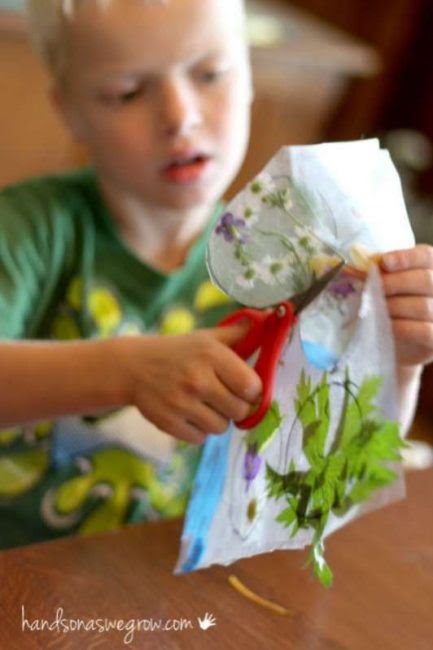
Once their collages were complete, we finished off the suncatcher with another piece of contact paper over top. Press them as flat as you can, sticking the contact paper wherever you can. Such pretty suncatchers already!
We traced the outside of the mason jar ring. So to fit in the ring, they had to be slightly smaller.
Then I tied a knot around the rings using the string we had on hand.
I simply pushed the suncatcher circles into the ring. We didn’t need to tape them, they stayed securely in place. But I can see that you may need to.
I also tied the strings onto a stick to make them into a wind chime that we hung on our porch. Two actually, and I love looking at them!
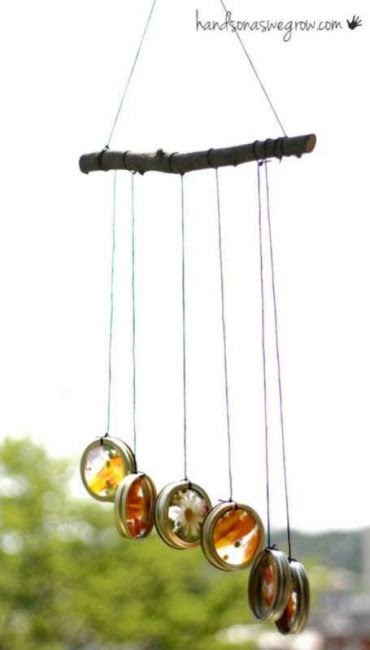
I love the simplicity of the raw mason jar rings. But I also think it would be fun to spray paint them to give them color, too.
However, I plan to use the lids again at some point for my jars, so I didn’t want to “ruin” them at this time.
SEASONAL NATURE-INSPIRED SENSORY BOTTLES
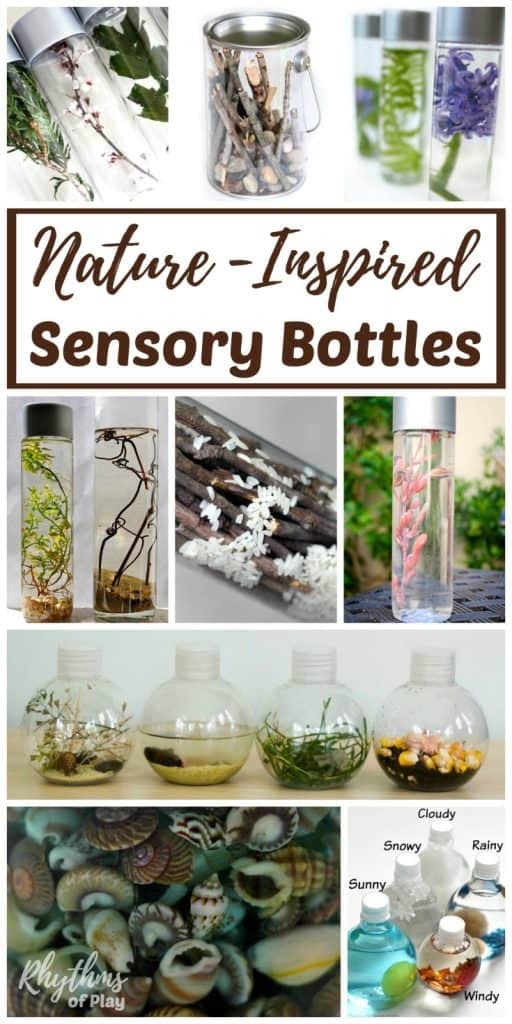
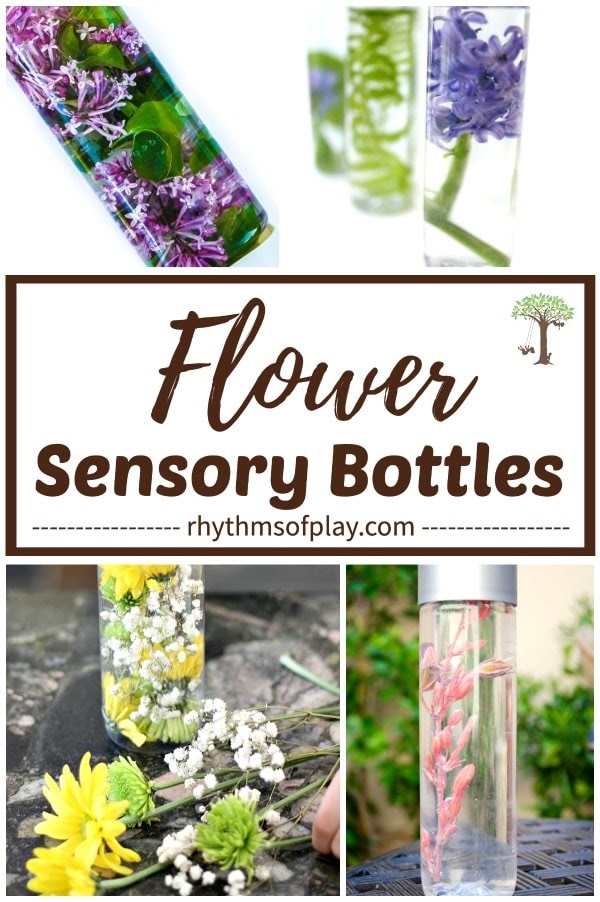
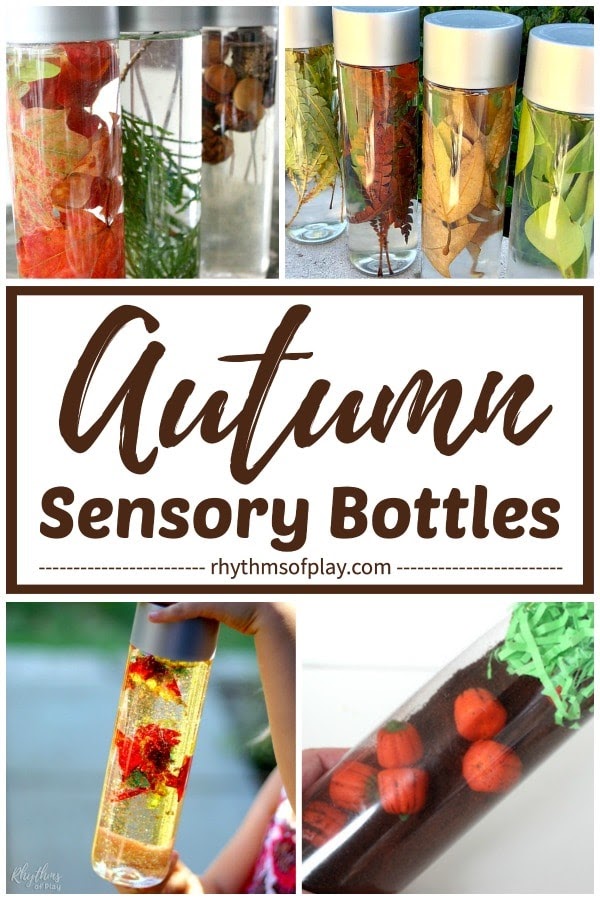
Related: Glowing Halloween Pumpkin Sensory Bottle
A Pine Needle in a Bottle | Teach Preschool
Nature Sensory Bottle | Carrots are Orange
Snowman Sensory Bottle | Little Bins for Little Hands
Related: The Best Rock Painting Ideas for Kids
This fun collection of nature sensory bottles and discovery bottles have many purposes at home and in the classroom. They are fantastic educational teaching aids for homeschoolers and teachers.
Nature-inspired sensory bottles are the perfect way for babies and toddlers to safely investigate natural materials and small items without the risk of choking on them. DIY sensory bottles made with natural and recycled materials are also a great tool to help children (and adults) learn to calm down and unwind.
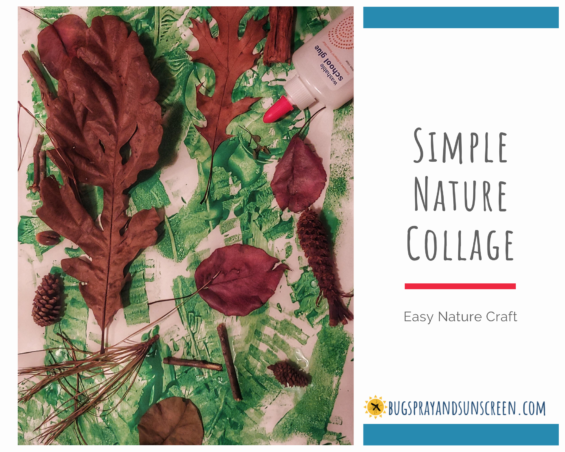
I really enjoy ideas for projects that incorporate all those nature treasures our kiddos bring home, and I particularly like ideas that are open-ended and allow for self-expression. This idea for a simple nature collage is as easy as it gets, but creates engagement on a personal level.
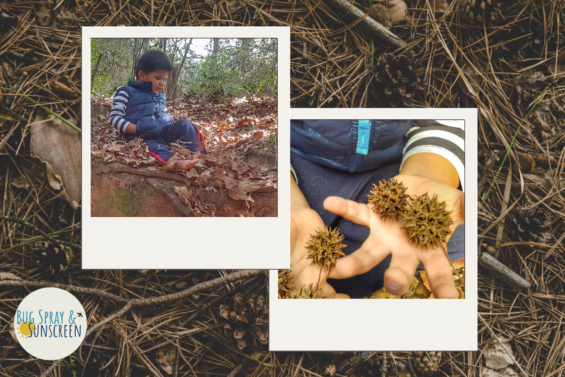
Nature Items (Such as acorns, sticks, leaves, flowers, grass)
Heavy-weight paper or poster board
Glue
Paint (optional)
Collecting the supplies is always our favorite part!
Collect items such as twigs, leaves, grasses, flowers, seeds, pine cones and acorns. This is not a problem in our home. We have a “collection” of just about everything that is constantly growing. If things are similar for you, this is a great way to get rid of some of that stuff.
Paint it and /or glue it! I told you it was simple. Simplicity means that it gives your child the most freedom of expression and ownership over the finished piece. It also means easier for you! I love a good win-win.
Abel first painted the white poster board green, then picked out the things he wanted to glue. The paint step isn’t necessary but added some fun. He’s gotten the hang of glue (even though he uses 10x too much!) so he was self-sufficient on this project. Try not to worry if they use too much glue – glue is fun and these don’t have to be masterpieces. They just need to be theirs. If your kiddo isn’t glue-ready yet, just let them do as much as they are capable of and then navigate placing their treasures on their own. Remember – glue on the hands is just like dirt on the hands. They both wash off.
Hang it up! Your kiddo will love seeing their simple nature collage gracing the walls in their room.
Your child could make 100 nature collages and still find unique arrangements and materials. They are artists and nature is the medium! The variations on this are endless – season specific, color specific, all flowers, all leaves!
If you enjoy the simplicity of this nature craft, consider collecting supplies for these Wildflower Suncatchers and Sticky Nature Bracelets the next time you are out for a walk
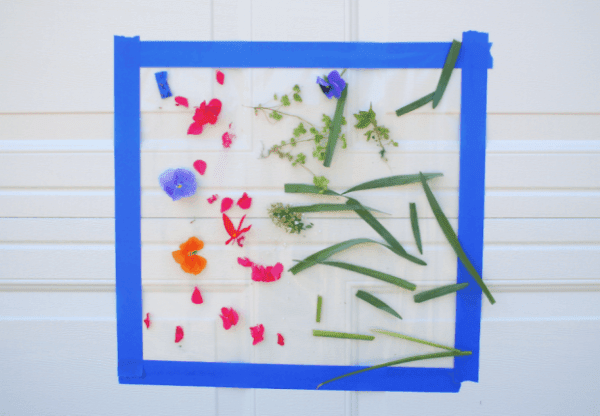
Nature is art, and you can also create your own custom art with elements from nature! I can Teach my Child has a lovely idea for an outdoor mural where toddlers can stick leaves, petals and whole flowers in any pattern of their choice. You’ll need contact paper for this activity, which you can stick to a wall or solid gate outside. Hand the children the materials and let them create art!
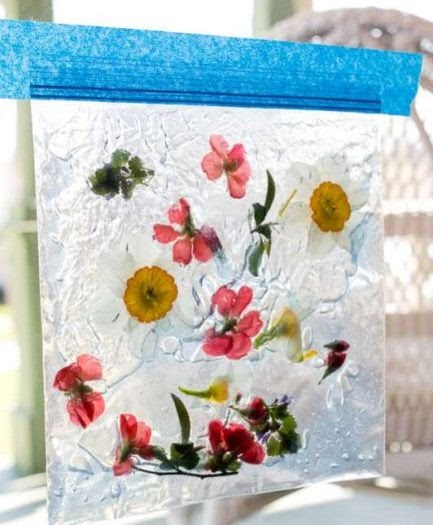
Sensory bags are a great way for babies to explore and learn to focus their attention. This sensory bag from Hands On as We Grow also doubles as a sun catcher – just stick it on the window! Gather the materials by doing a scavenger hunt or a nature walk and use double bags especially if you’re dealing with over-excited toddlers or babies! You can focus on using different textures here, so it’s more fun to squish and move around!
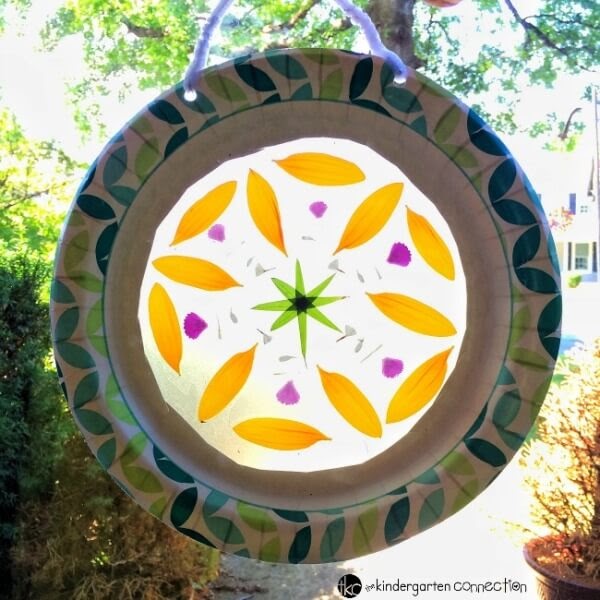
This activity from The Kindergarten Connection is more of a big-kid activity, but toddlers can do it with help from Mom or Dad. With paper plates, self adhesive transparent sheets and lots of pretty petals and leaves, you can create a beautiful sun catcher to hang by your window. What’s more, as the sun shines through the leaves, kids can clearly see the veins and other parts of the leaf and marvel at Nature’s attention to detail!
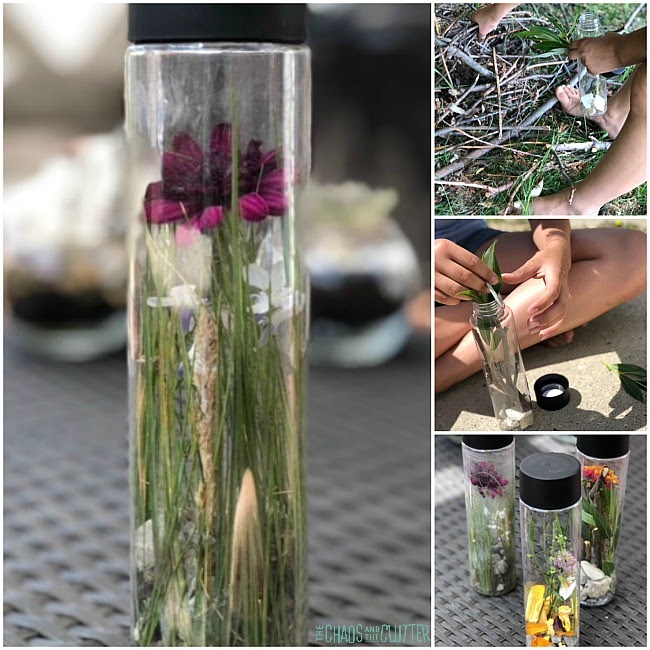
The sensory input on this activity happens throughout the activity. Each individual nature sensory bottle is unique.
Begin with a trip outside to explore nature. Bring a plastic water bottle with you. Allow your child to really take the lead on this walk or hike. NOTE: If you are using an expensive bottle- hold onto the lid. The kiddos are sure to loose it!
If they find things that catch their eye, they can add them to their sensory bottle. They can either gather all of the items before and add them to the bottle later or they can add the items as they find them.
My kids really enjoyed creating their natural sensory bottles. They enjoyed climbing through the trees looking to discover items to include. I love how each one of them came out so differently and yet all were lovely. We filled ours in the spring and the colors were so beautiful. The flowers, flower petals, and purple clover contrasting against the white rocks, green leaves and stems, and brown twigs made them quite striking.
Materials needed:
empty unbreakable bottle (I used 1 liter clear soda bottles)
items found in nature
Instructions:
Go on a nature walk or hike to gather items for your nature sensory bottle. As you are outside, ask your child questions designed to help them become more aware of their sense.
“How does that rock feel?” or for younger kids, “Does that rock feel rough or smooth?”
“What do you smell?”
“Can you feel the wind?”
“What sounds do you hear?” or for younger kids, “Can you hear the birds chirping?”
“What colors or shapes do you see?”
As they gather items to fill their bottle, have them describe the items to you. See if they can incorporate their senses into the descriptions. Really, any item they find can be added to the sensory bottle, so this list is not comprehensive.
When complete, place the lid on the bottle. Some of the items in these sensory bottles can mold over time due to moisture, so the bottles only keep for a few weeks. Or you can fill the bottle up and empty it right away and head back out on another nature hike to fill it again.
What to put in a nature sensory bottle:
sticks
rocks
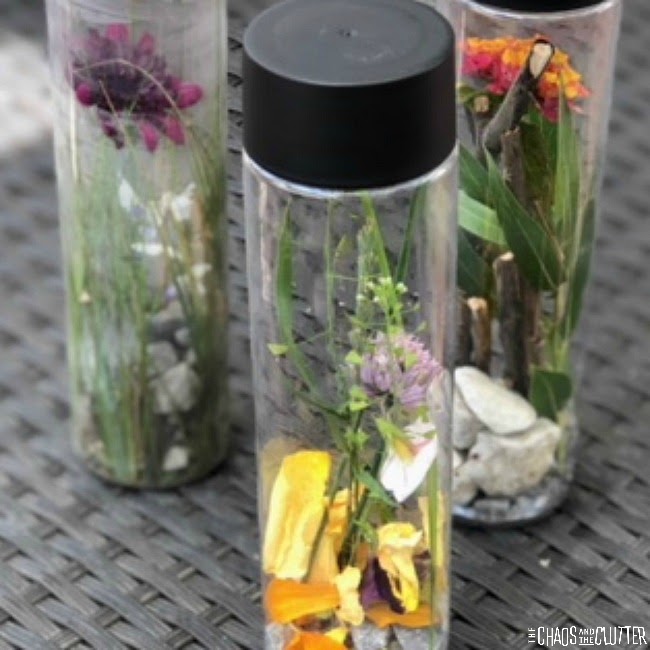
pussy willows
leaves
snow
water
flowers
flower petals
weeds
pebbles
seeds
dirt
mud
sea shells
pine cones
pine needles
feathers
herbs
grass
acorns
sand
berries
insects (only if you poke holes in the bottle of course)
wheat
You can do this sensory activity in any season. Encourage interest in the different colors and textures as the opportunity arises. The nice thing about that is that the natural sensory bottle you make in winter will be very different from the one you make in spring. My favorite season is fall because of the colors of the leaves. They make beautiful sensory bottles!
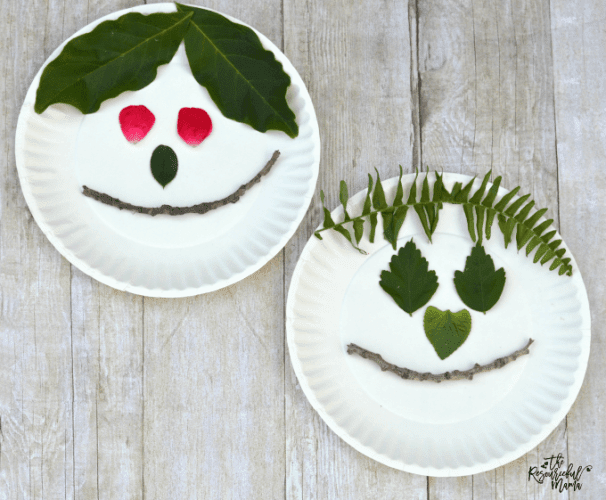
Does your toddler like making faces? Well, then this activity from the Resourceful Mama is perfect for her! With paper plates and lots of leaves, flowers, berries and more, you and your toddler can make some hilarious looking faces! Gather twine or long grass for hair and go crazy with some weird hair styles! Just hand the materials to your little one and let her create a face to her liking.
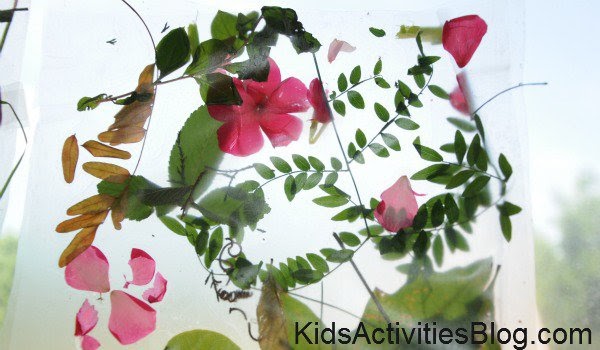
Collages are among the easiest craft projects for toddlers and preschoolers, and this one from Kids Activities Blog is no different! However, what’s special here is that you use only natural elements to make the collage! They have used contact paper to make the collage do double duty as a sun catcher, but you can just use a sheet of thick paper or card stock as well. Use fresh flowers or dried ones – they’ll all look pretty!
Today we have a fun nature mobile fall craft for kids that doubles as a great way to get your family active. Strap on your hiking shoes and get ready to forage through the wilds to get the supplies for this easy craft! Winter is on its way, my friends. There is no denying it. The temperatures are dipping and some of us have to turn on our heat at night! Soak up the last of the warm remnants of summer and spend some time outdoors before the icy temps hit. While you’re out there, keep an eye out for some great supplies in nature for this craft!
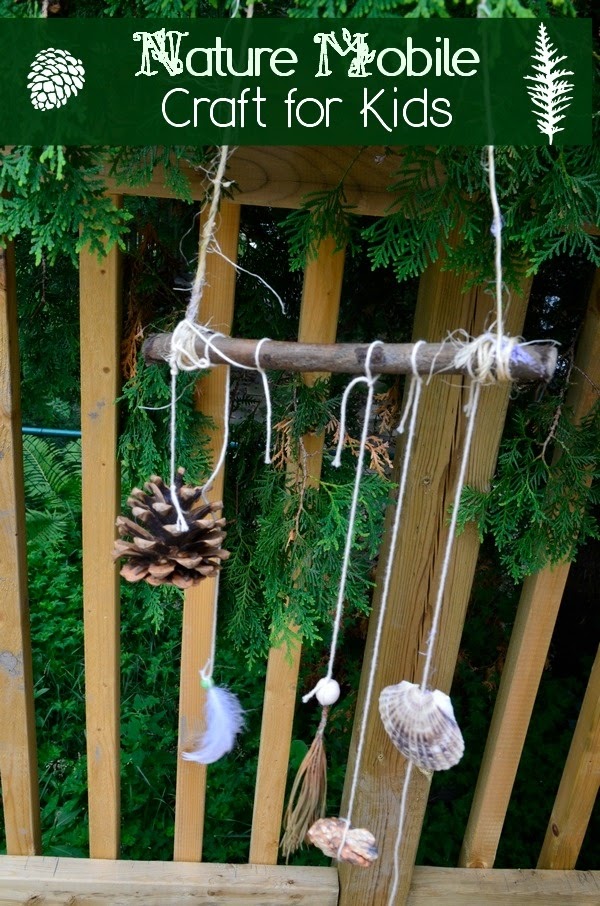
Pinecones, seashells, feathers, cool rocks and any other natural elements that you find on your journey.
Twine or other natural-looking rope
Beads, if desired, preferably in browns, greens and other forest colors.
A thick stick or twig
Live in the city and can’t get to nature? We don’t want to leave you out! You can find most of the supplies at a craft store. Take a look at our suggestions.
Start by gathering your supplies for this fall craft for kids. This is the really fun part! If you live in a woodsy area, you could find everything you need in your own front yard. For the seashells, dig into your family memory box from past trips to the shore. Don’t have seashells? No big deal, you can really use any natural elements here. The key is to make it meaningful to your family.
Lay everything out in front of you so you can see what you have. Take the thick twig and place it at the top of your surface. Arrange your other elements until you have everything where you want it.
Cut your twine in varying lengths, enough pieces for each item.
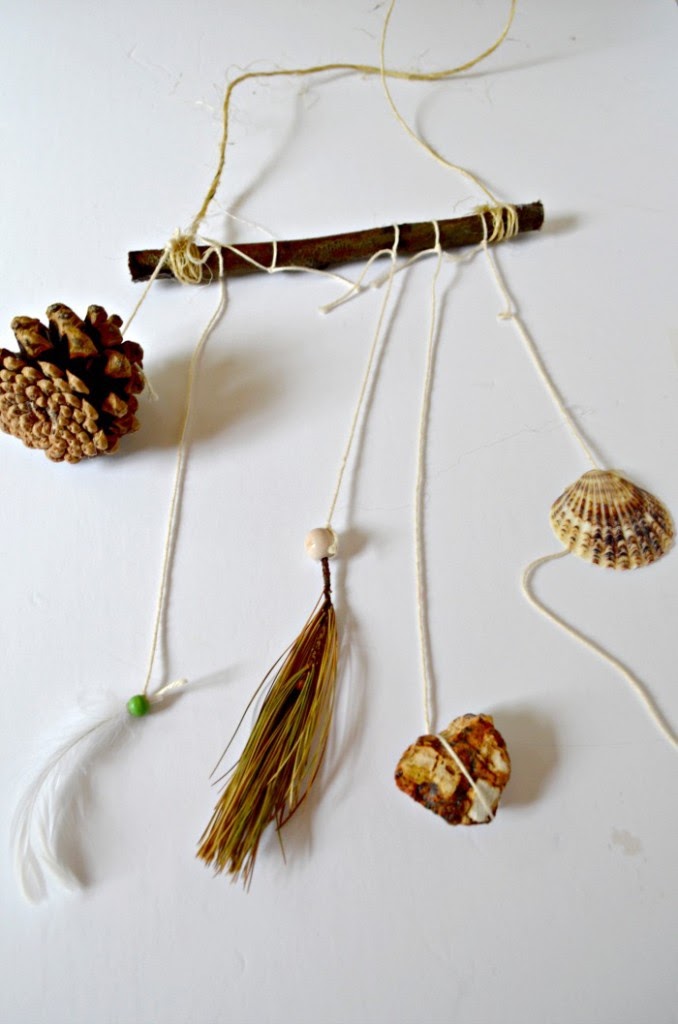
4. Use the twine- and beads, if desired- to attach each piece to the thick stick.
5. Create a hanger by tying the twine to each ends of the stick, with enough give in the middle to let it dangle from your hook.
6. Hang your nature mobile someplace where everyone can admire it!
That’s it! Easy, right? You could take this nature mobile fall craft for kids in so many different directions. Make one each season and bring it out to celebrate the change in weather. Make it a new tradition: when you go on vacation, search for items for another mobile. The great thing about this fall craft for kids is that it has the potential to bring the entire family together.
This activity was inspired by our DIY Nature Slides for the light table. It uses simple materials and not only teaches kids about the environment in their area but it’s also a fun activity to work on fine motor skills.
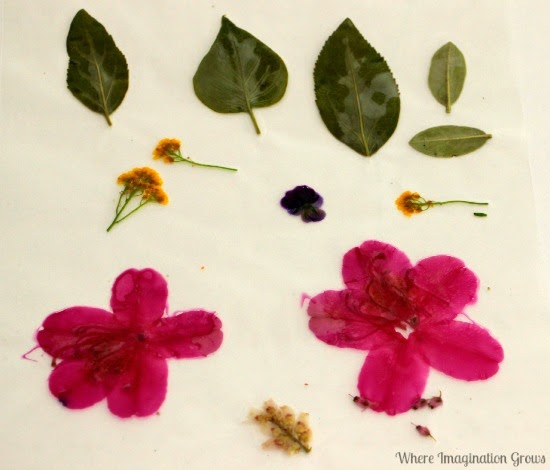
Flowers/leaves from your yard or local park
Laminator
Laminating pouches
String
Scissors
Hole punch
Tape or suction cups
Start this activity outside by collecting flowers and leaves from your yard or local park. My daughter calls this part a “nature adventure” as we take magnifying glasses and bag for our finds with us and walk around the neighborhood. It’s a great way to begin discussions about local plant life and the life cycle of plants.
Once we collected a few different types of flowers and leaves we took them home and laminated them.
For this activity, we just laid the flowers on the laminating pouches and ra, cut off the excess stems, and sent them through the laminator. If you have more time I’d recommend pressing the flowers first but my daughter didn’t want to wait a week or two to see her nature suncatchers so we just did them as is.
One of the most common ways to preserve leaves is by pressing them between wax paper.
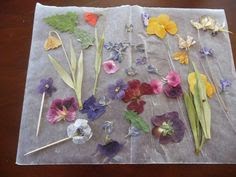
What You Need:
Leaves
Wax paper
Thin towel or paper
Iron
Ironing board
Place some leaves or flowers or between two pieces of wax paper.
Put a towel or a piece of thick paper over the wax paper.
Press on the towel or paper with a warm iron to seal the wax sheets together. This takes about 2-5 minutes on each side, depending on how moist the leaf is. Once you have finished one side, flip the leaf over and do the other side.
Cut around the leaf, leaving a small margin of wax paper to ensure that it will stay sealed.
Rather than cutting out the leaves, you may want to try to peel the wax paper off the leaves, leaving a coat of wax behind to protect the leaves. Try this on one leaf first to see if this method works for you.
We have been collecting shoe box lids for a variety of activities and this one came straight from the wonderful artistic ideas shared by Casa Maria’s Creative Learning Zone….
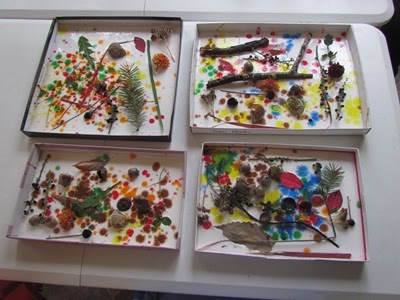
To make these beautiful shadow boxes, the children started by pouring glue into shoebox lids. I wasn’t sure how much Mod-Podge would be needed so I had them at least fill the lid with enough glue that the nature items could lay firmly in the Mod-podge…
Next, the children went outside to collect nature items to put in their mod-podge. I had the children go back and forth to collect something and instructed them to look for something different each time so they would have a variety of items to put in the glue…
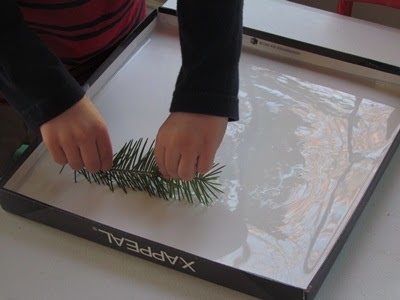
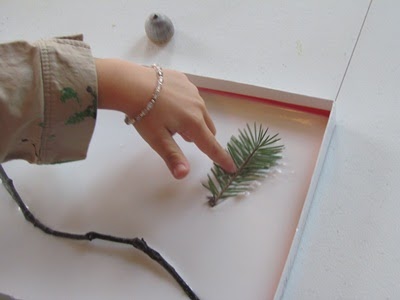
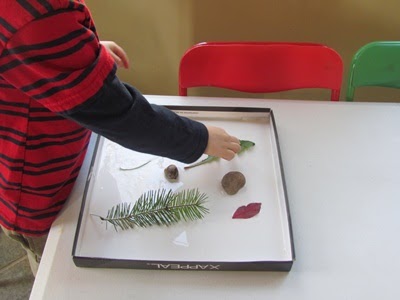
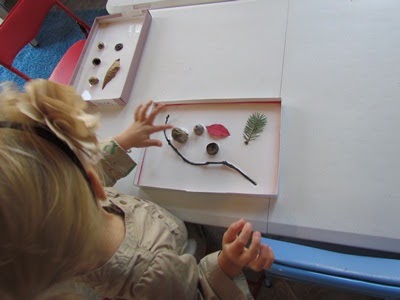
The children found leaves, sticks, pine needles, acorns, flowers, rocks, and a few other nature items to add to their boxes…
I encouraged the children to be very selective as they searched for items to add to their shadow boxes. For past activities, the children would grab a handful of random leaves and give little thought as to the beauty or different qualities of each item they bring in. So this time, I wanted to slow them down and have them be more thoughtful in what they selected to add to their boxes…
Some of the children were very selective as to where they set their nature items in the box. That would be my Hopey, wanting color balance and symmetry. Other children just placed them anywhere in the box…
Once the children added a nice supply of nature items to their box lids, then we began to add some color. I debated about leaving the glue just white because I felt like they were beautiful as they were but the children loved this next step so I am glad we continued on….
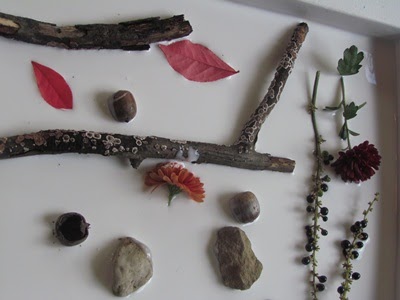
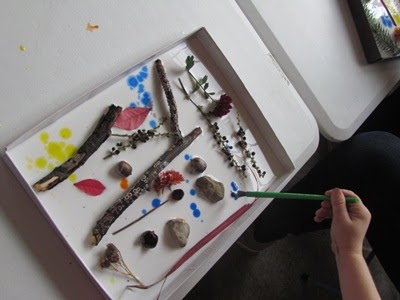
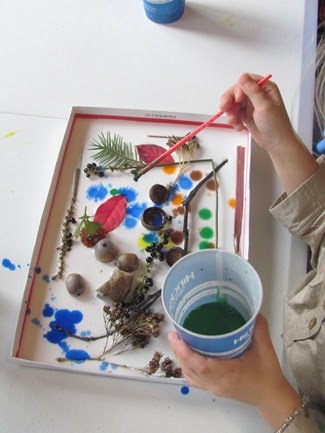
For our next step, I set out cups of slightly watered down tempera paint and some paint brushes. The children used the brushes to gently sprinkle different colors of paint on the glue (or white spaces between their nature items)…
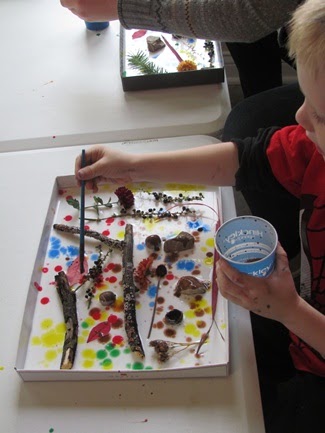
The children concentrated on adding color. The room was so quiet as the children focused on the process for about 10 whole minutes which is unusual in my classroom…
Once each child was satisfied with the paint dripping part of this process, then I set the shadow boxes up to dry for a few days….
The shadow boxes have been drying for over a week so far.. Ours are still not quite dry but as they dry, the glue starts to turn clear. I hung these up for a quick photo and had to take them back down because the glue was dripping. The shadow box all the way to the left is almost completely dry – as you can see the glue has started to turn clear in color. I am interested to see the final results of their unique creations and the nature items should really stand out…
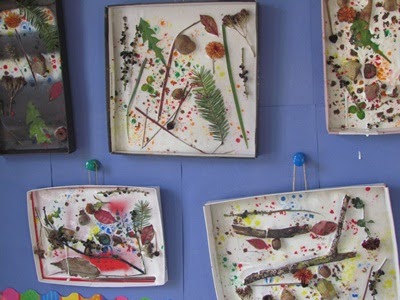
Hope really liked the effect of spraying water with a spray bottle over the whole shadow box -allowing the watercolor to spread out under and around her treasures.
My kids are always collecting nature on our walks. I love to use their nature treasures for crafts. How about making:
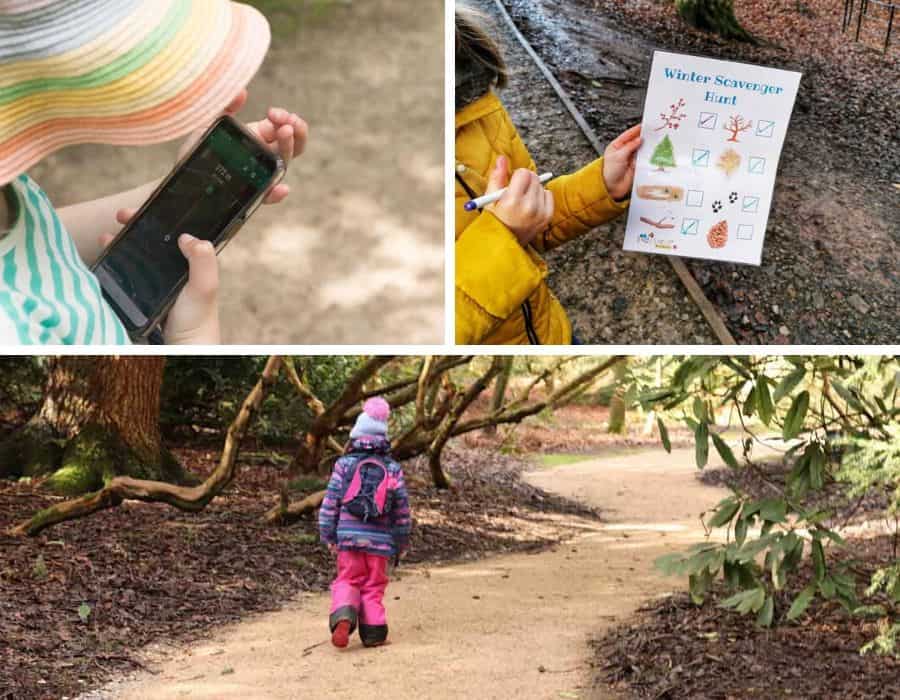
I’m a big believer in getting kids outside from an early age. Toddlers will love being outside.
But if you are wondering what to do with them though? Here are 33 outdoor activities for toddlers.
Thinking of going camping with toddlers? Do it but read my top tips first for my top tips for camping with toddlers. Find the best camping toys for kids over here.
Go on an after-dark lantern walk. Here’s a DIY paper lantern craft for toddler
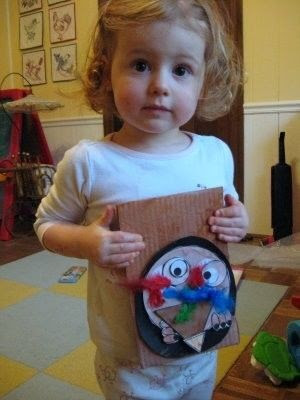
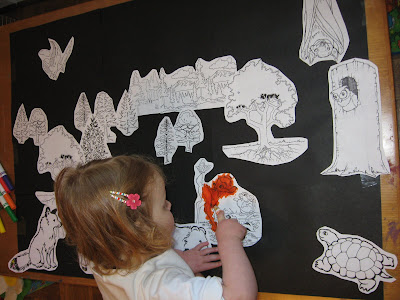
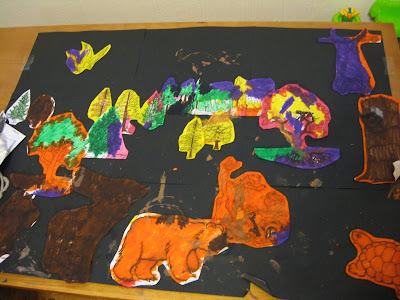
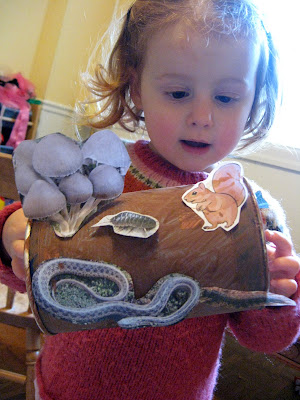
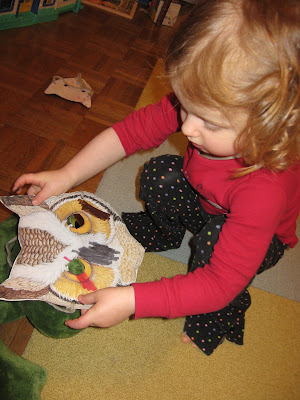
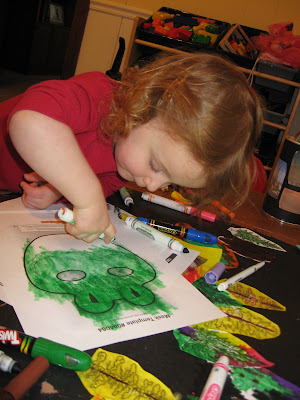
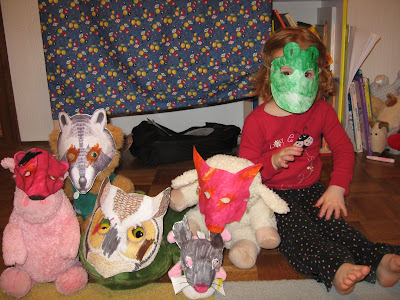
Okay, so these are a little weird-looking. No, Nora and her stuffed friends were not off to rob a bank. Nora really enjoyed dressing her animals up...as other animals!


This is a FAQ description. Add more detail about this service, such as benefits, appearance, components and value
This is a FAQ description. Add more detail about this service, such as benefits, appearance, components and value