Incredible Kids

13218307041

Superscript

Family Nature Walks & Photography

Because a healthy connection with nature boasts many social-emotional and physical health benefits, I’d like to share them with you! 
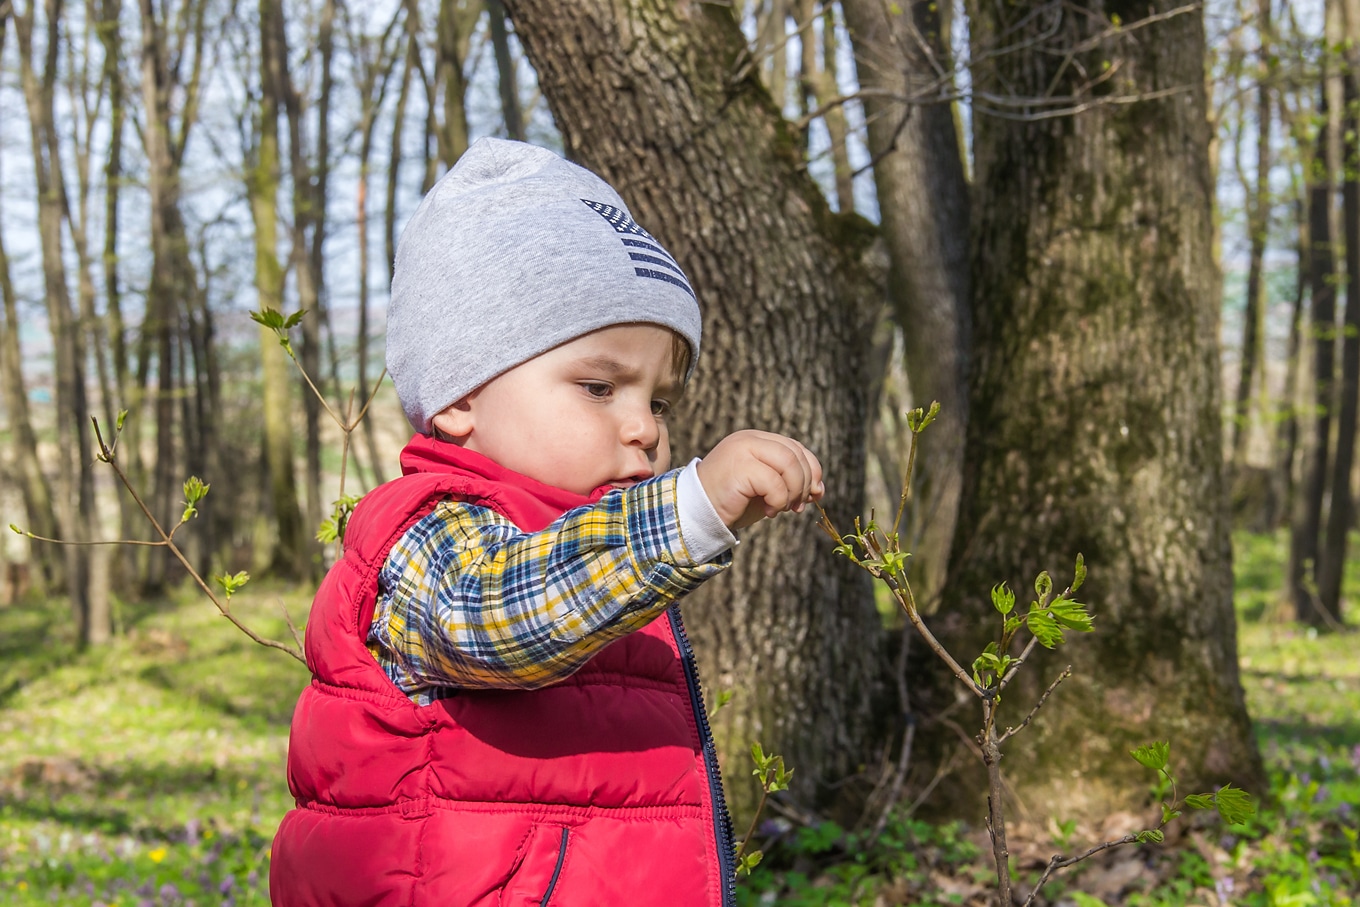
I have spent my entire life trying to get rid of the universal notion that walks and hikes are about getting to a certain destination. When really walks are all about the adventure and the the things that fascinate us along the way. Just ask any of your children and count on them to find the fun stuff along the way. They are outside to discover and find joy in the process of exploring the plants and animals that are right in front of them. So add in some spontaneous "Natural STEAM" activities and enrichment that are featured below.

CLICK HERE to go directly to Photography Section

Tips and Tricks for the Best Family Nature Walks

Whether your family lives in a city and enjoys access to public parks and gardens or lives in a rural setting such as mine, making time for outdoor play every day is a lifestyle choice you won’t regret.

Related: Sticks and Stones Outdoor Activity Book for Kids

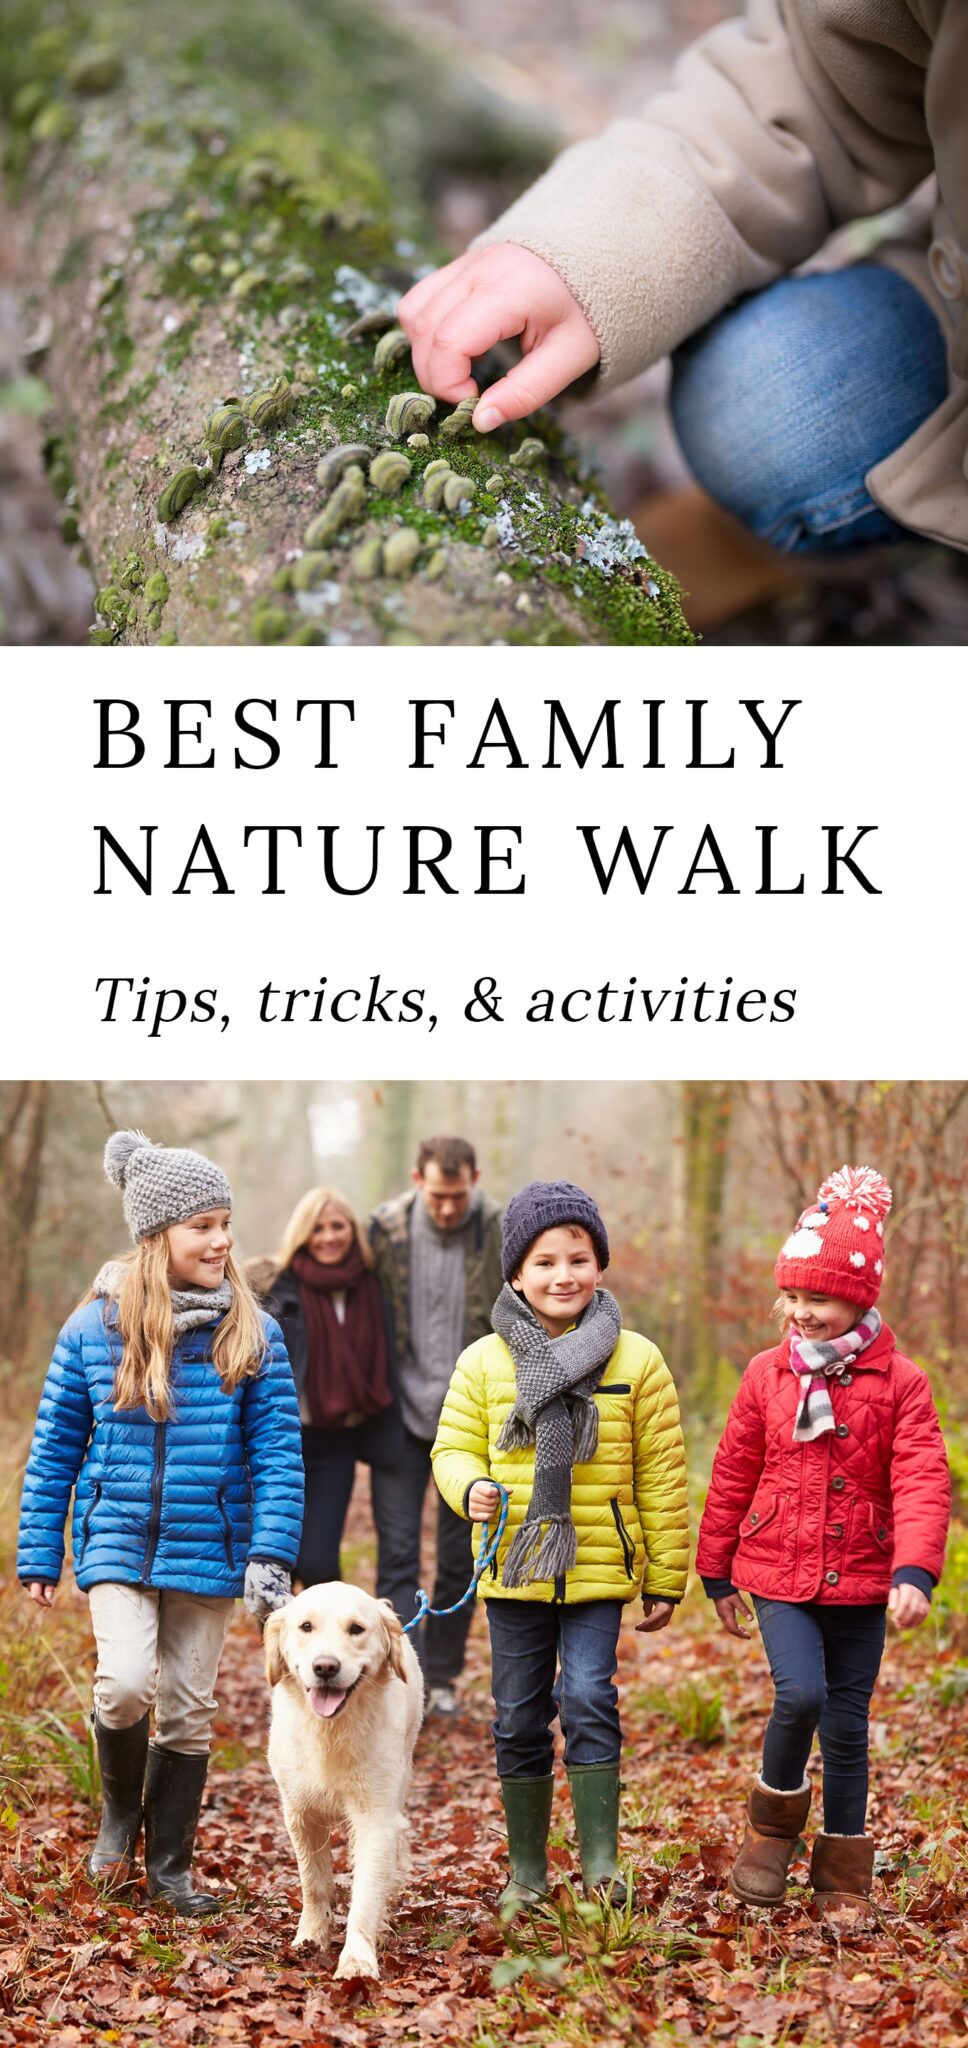
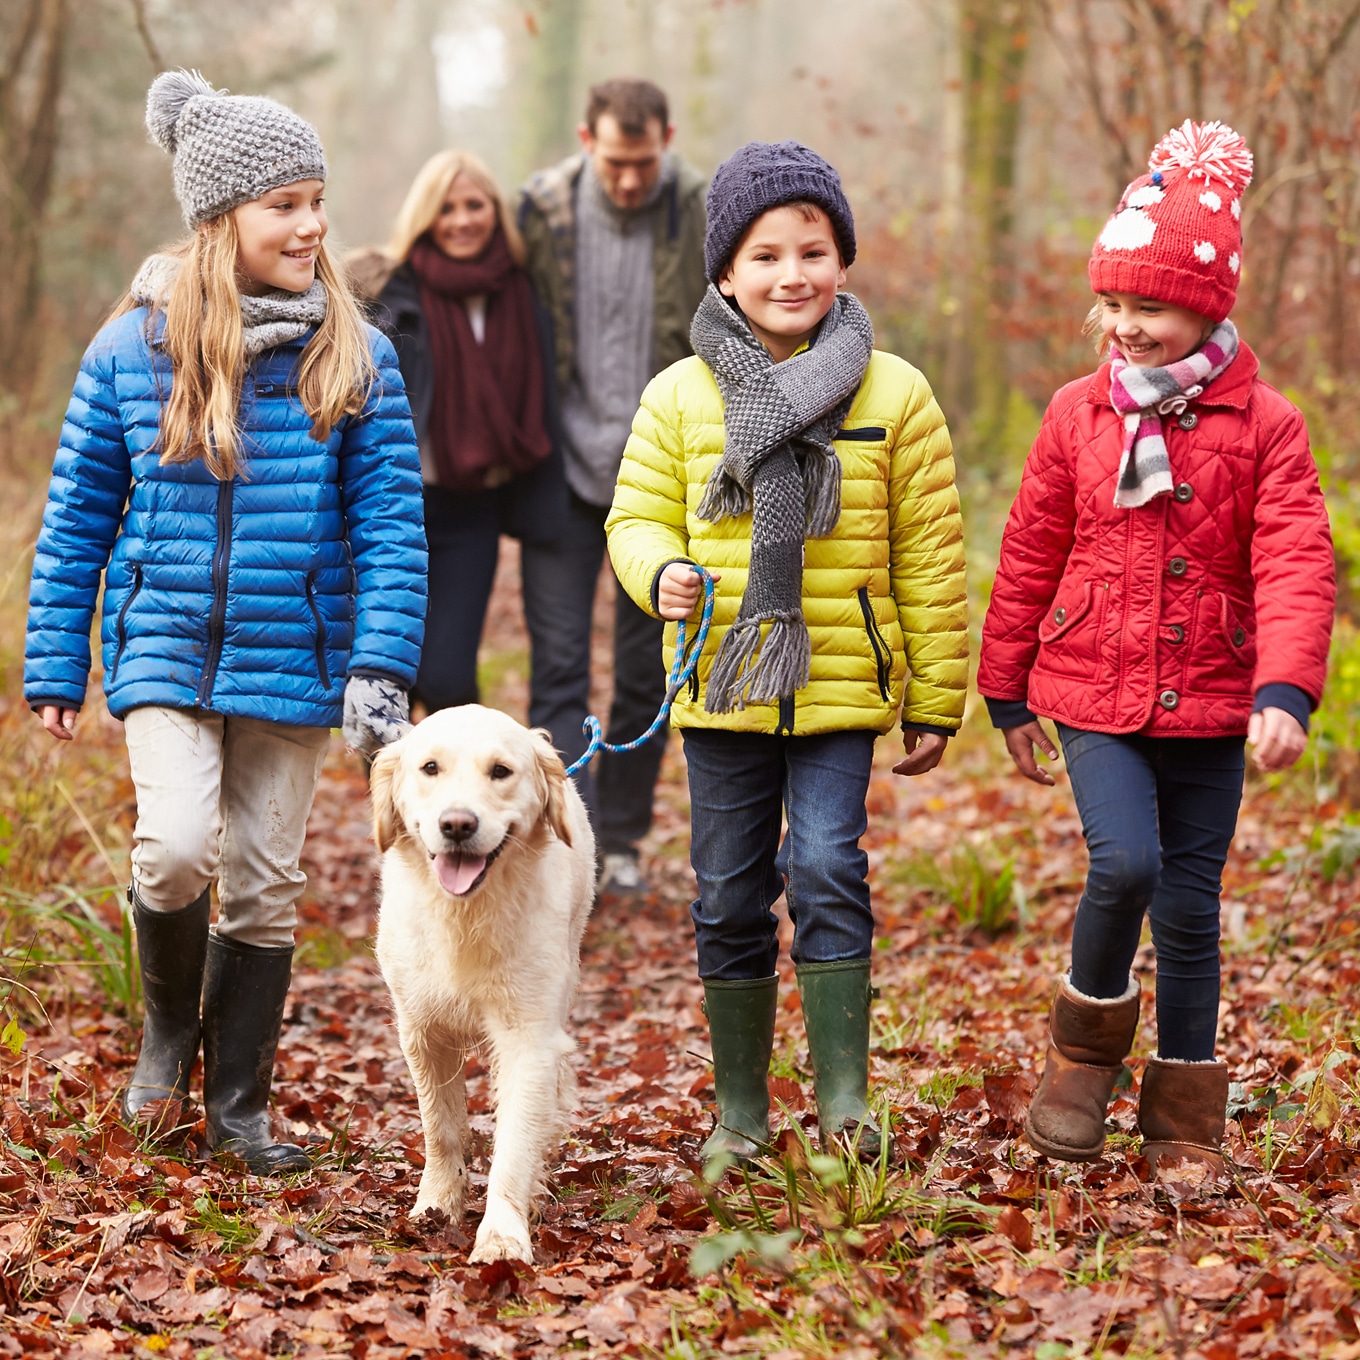
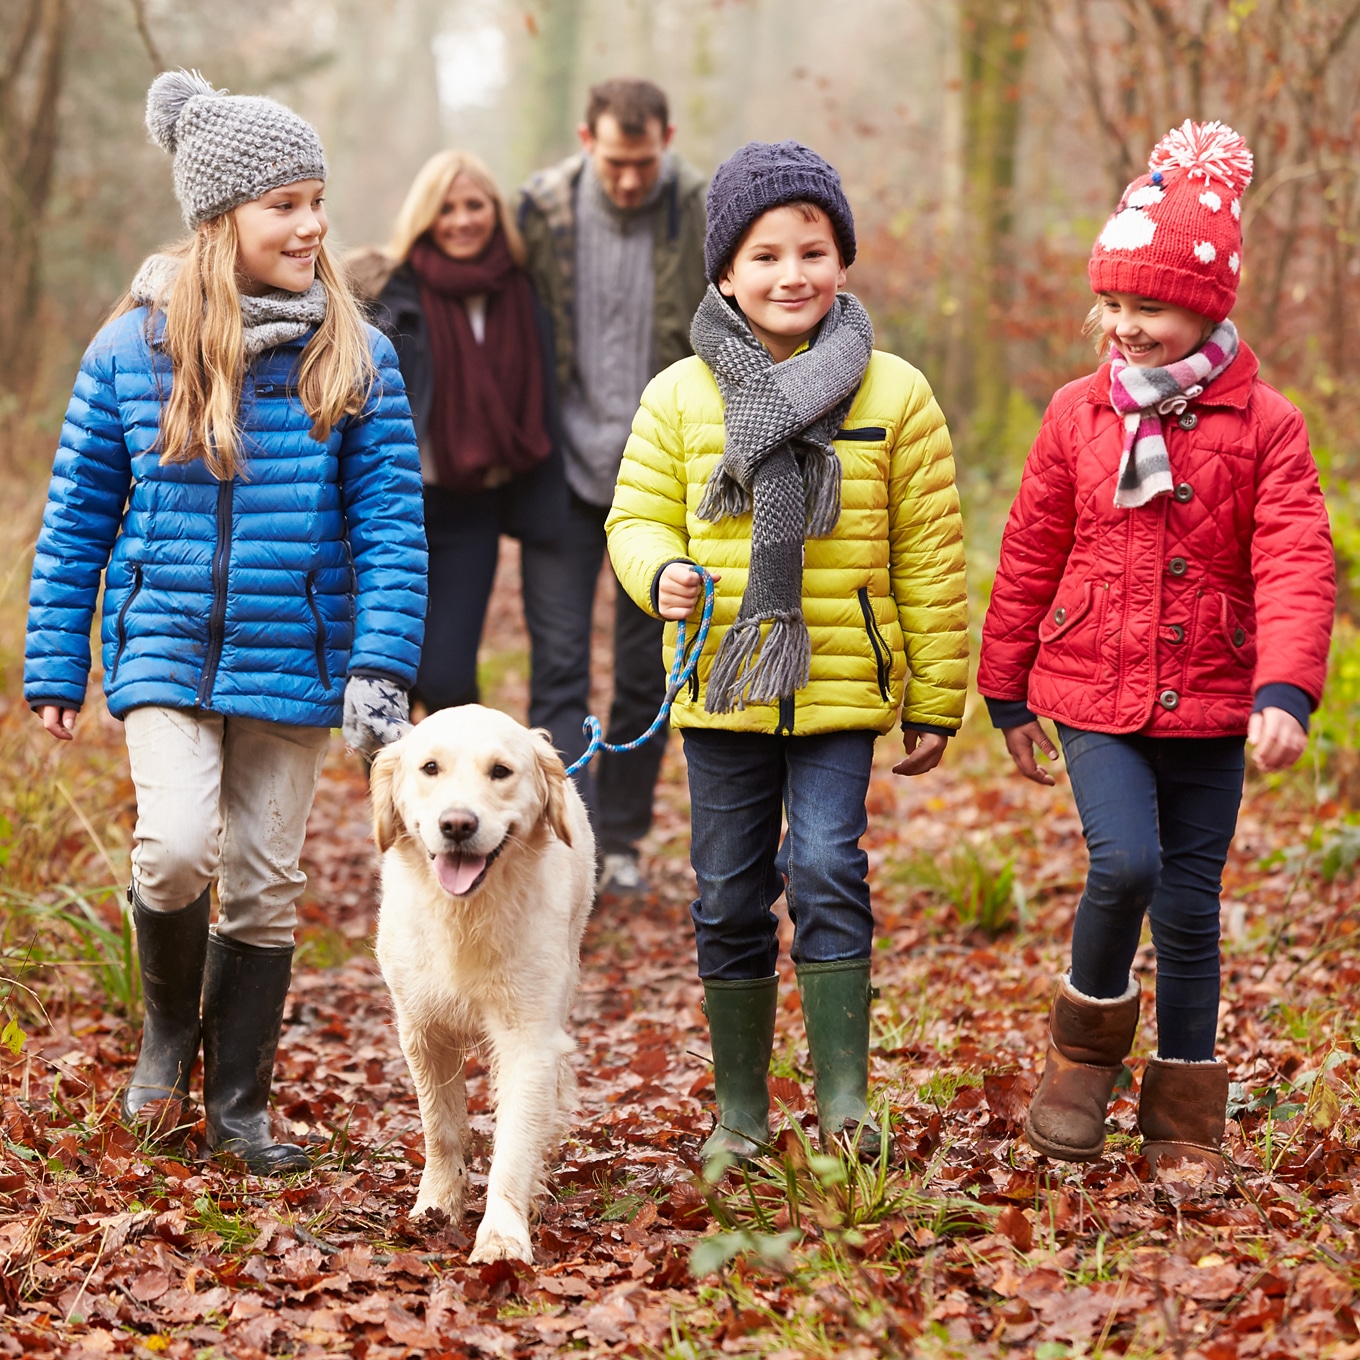
Happy Family Enjoying a Nature Walk with Dog

Credit: Monkey Business | Adobe Stock

What Do You Do on a Nature Walk?

Nature walks need no agenda! You can search for wildlife, plants, or geocaches. You can explore vernal pools, hunt for edible plants, or collect colorful leaves.

Or, just stroll, breathe deep, and enjoy the fresh air, weather, and sounds of nature.

What Should I Bring on a Nature Walk?

When you are going on a nature walk with kids, get everyone dressed appropriately for the weather! It is also helpful to have:

Tip: Keep a change of clothes and a towel in the car just in case your kids decide to play in mud or water!

Family Nature Walk Tips

In my twenties, I worked for the local YMCA camp as an outdoor educator. Leading groups of kids and adults on nature walks was a large part of my workday. Let me tell you, there is nothing more thrilling than watching a child’s eyes widen at the sight of a deer or seeing him catch a toad for the very first time!

So lace up those close-toed shoes and grab your favorite water bottle! Shared below are 5 of my best tips for enjoying meaningful and engaging nature walks with kids.

1. Invite Your Child To Set The Pace

For the simple purpose of supervision, I prefer to have kids walking in front of me rather than behind me. More importantly, letting kids set the pace on a nature walk builds confidence and decision-making skills while satisfying their innate curiosity.

There is so much for children to see, touch, smell, and discover on a nature walk!

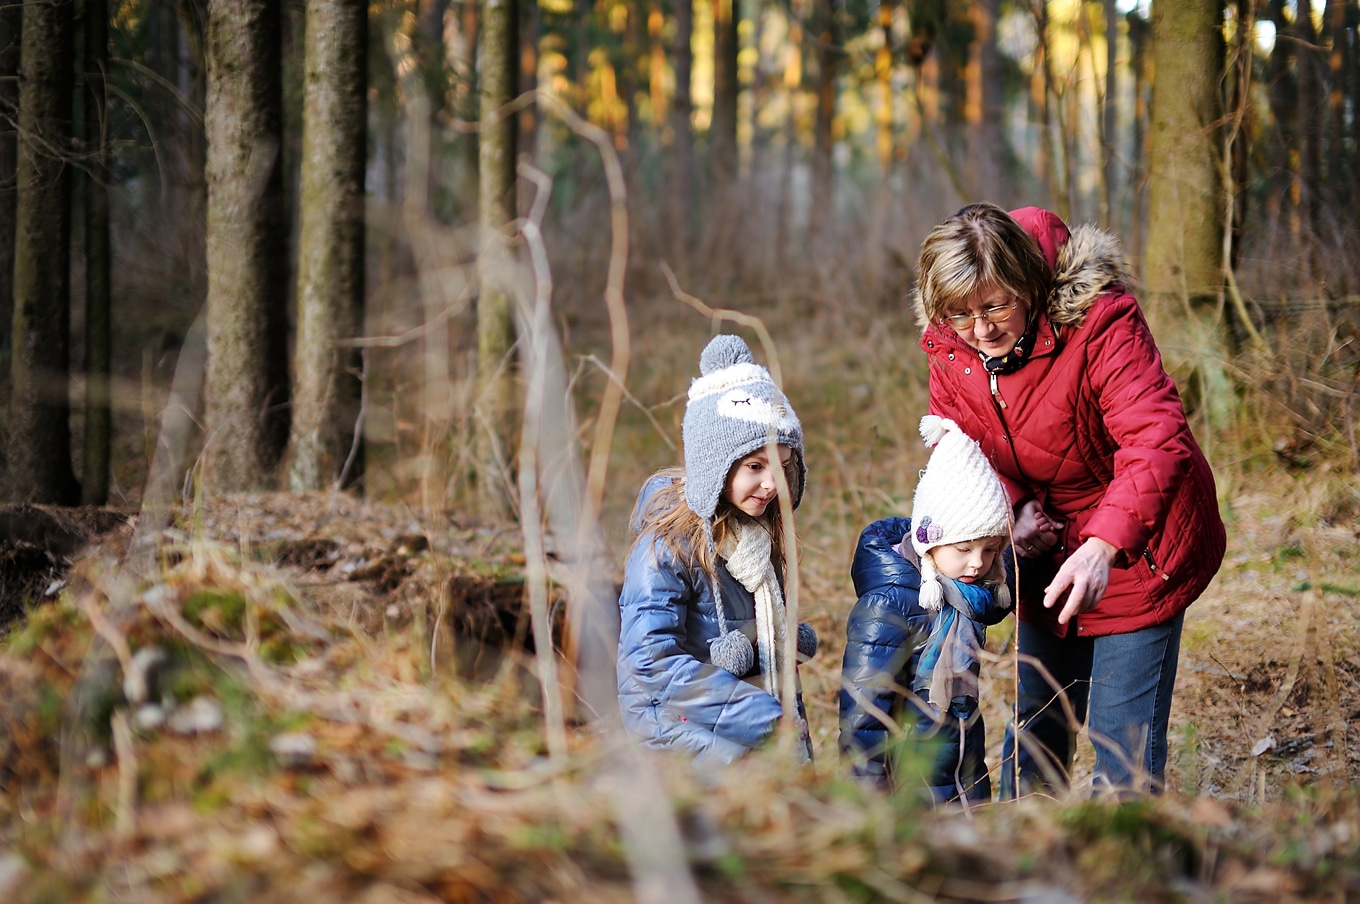
Grandmother Taking Kids on Nature Walk

Photo: MNStudio | Adobe Stock

Sure, you may not get very far while walking with a little one…but that’s okay! Allow your child to set the pace, and avoid hurrying her along.

Related: 10 Ways to Spend Quality Time with Kids

2. Start a Nature Collection

Bring a bag and invite your child to start a nature collection by gathering interesting items that have fallen to the ground. Pine cones, bark, leaves, sticks, small stones, and seeds can all be saved and used for nature crafts.

We store our nature collection in a basket outside on the porch. Right now, there is even a small mammal skull in it!

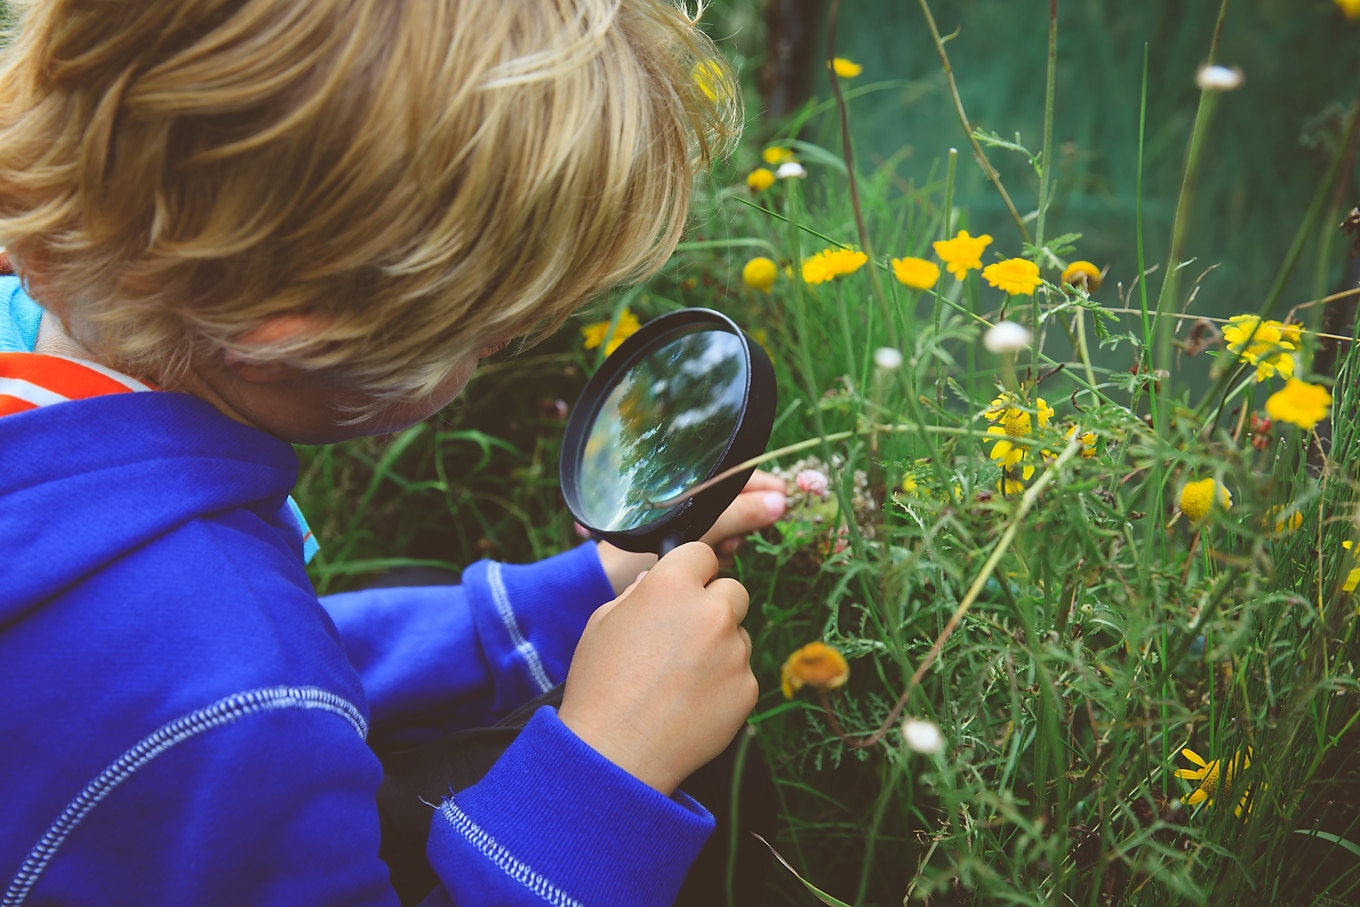
Tip: Provide magnifying glasses, plastic tweezers, and kid-friendly field guides so kids can examine and identify their treasures.

Boy with Magnifying Glass

Photo: nadezhda1906 | Adobe Stock

3. Practice Mindful Listening

There is satisfaction in listening to the not-so-silent sounds of the forest. Mindful listening is being fully present and aware of yourself and the sounds around you.

Through mindful listening, kids will notice and feel gratitude for the sounds of wind, birds, babbling brooks, leaves, and crackling twigs.

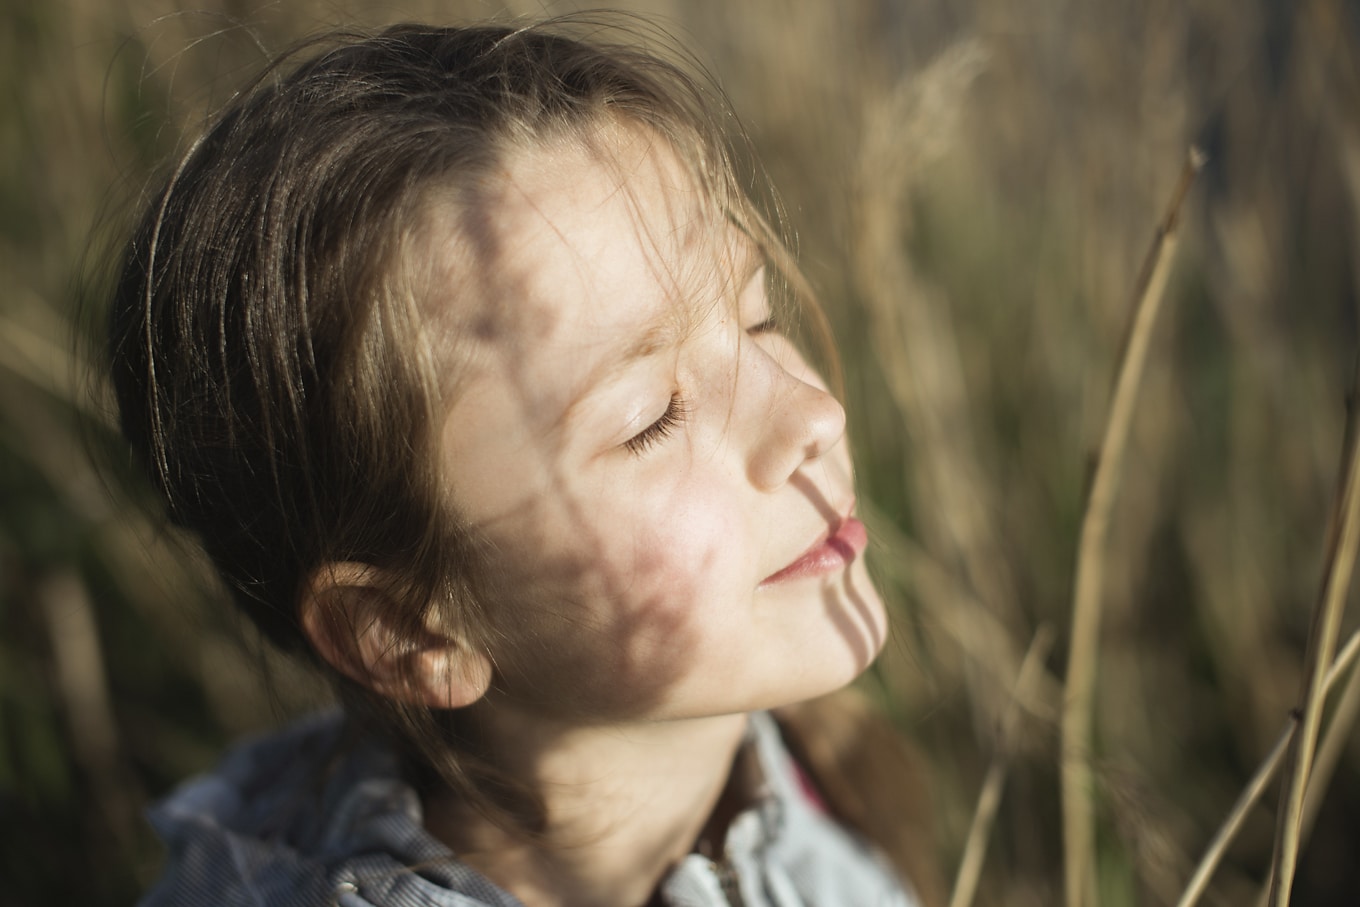
Girl Practicing Mindfulness in Nature

Photo: Yury Zap | Adobe Stock

Try it: Invite your child to close their eyes, press their face towards the sun, and listen to the sounds of nature. What do they hear?

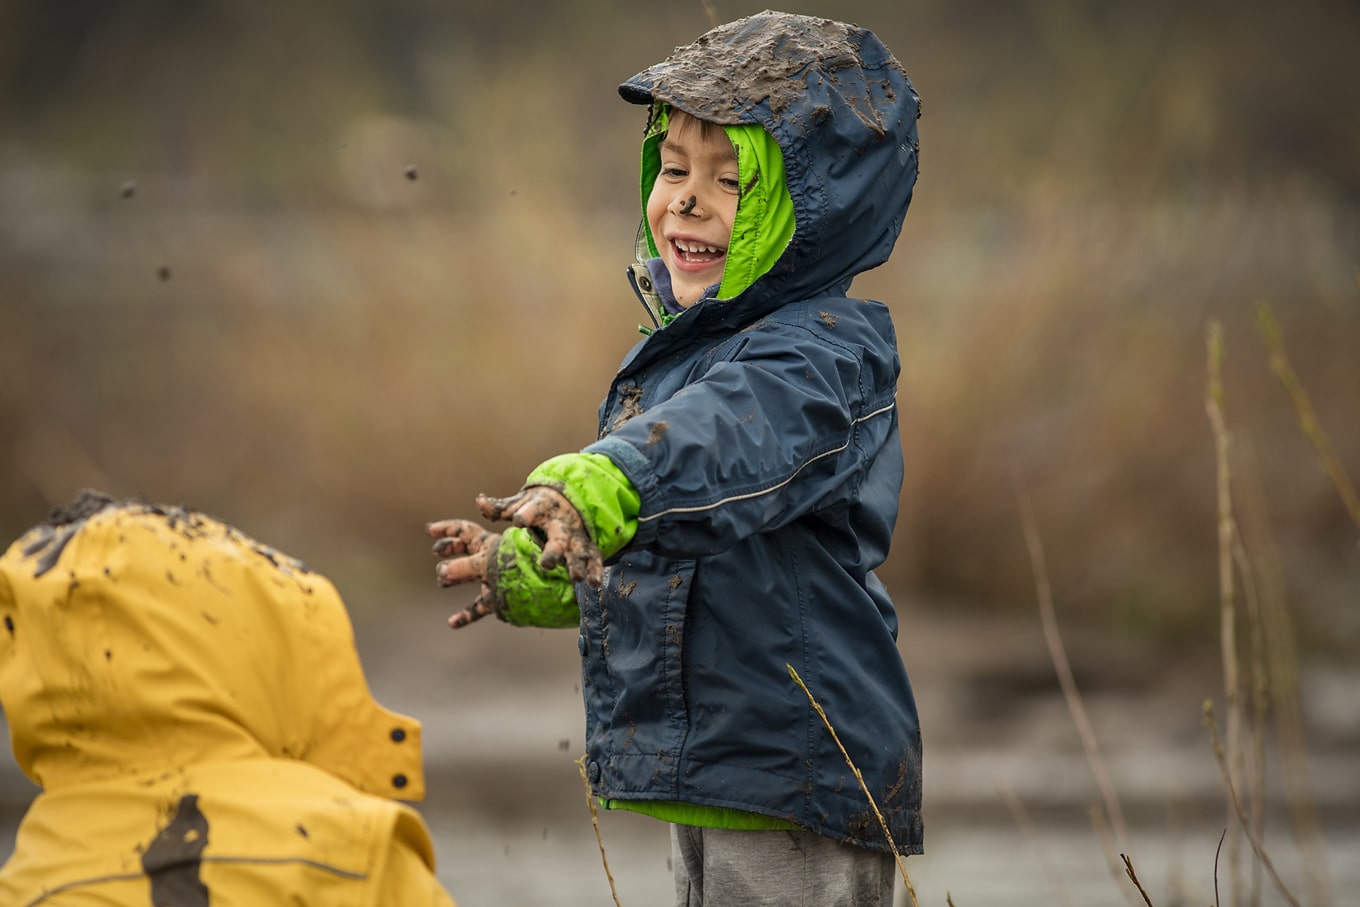
4. Say Yes to Mud

Kids and clothes are so very washable! And a little dirt helps build a child’s immune system.

Say yes to mud squishing, puddle jumping, creek splashing, frog catching, and hill rolling. Let your child’s hair become wild and unruly and their cheeks pink and streaked with dirt!

Children Playing in the Mud

Photo: Paloma Ayala | Adobe Stock

5. Bring Your Camera

Photographs of kids in nature are incredibly touching and you won’t want to forget these moments with your family.

Additionally, not everything your child finds on the nature walk can be brought home to their nature collection. Instead, consider snapping a picture as a keepsake.

Related: Fun Outdoor Arts and Crafts Ideas for Kids

Family Taking a Selfie in Nature

Photo: Syda Productions | Adobe Stock

Nature Walk Activities

Simple nature walk activities are fun and can help kids become more engaged in the experience. Shared below are some of our favorite ideas:

1. Create Nature Art

Pack small canvases and travel-sized tubes of green and brown paint. Invite your child to create camouflage art with paint, grass, leaves, dirt, and twigs. The paintings can dry in the sun while you enjoy lunch or explore a creek. Collect items for nature crafts!

2. Collect Leaves for Stamping

Invite your child to collect interesting leaves, like tuliptree or sassafras leaves. Back at home, use those leaves to make colorful leaf-stamped shirts.

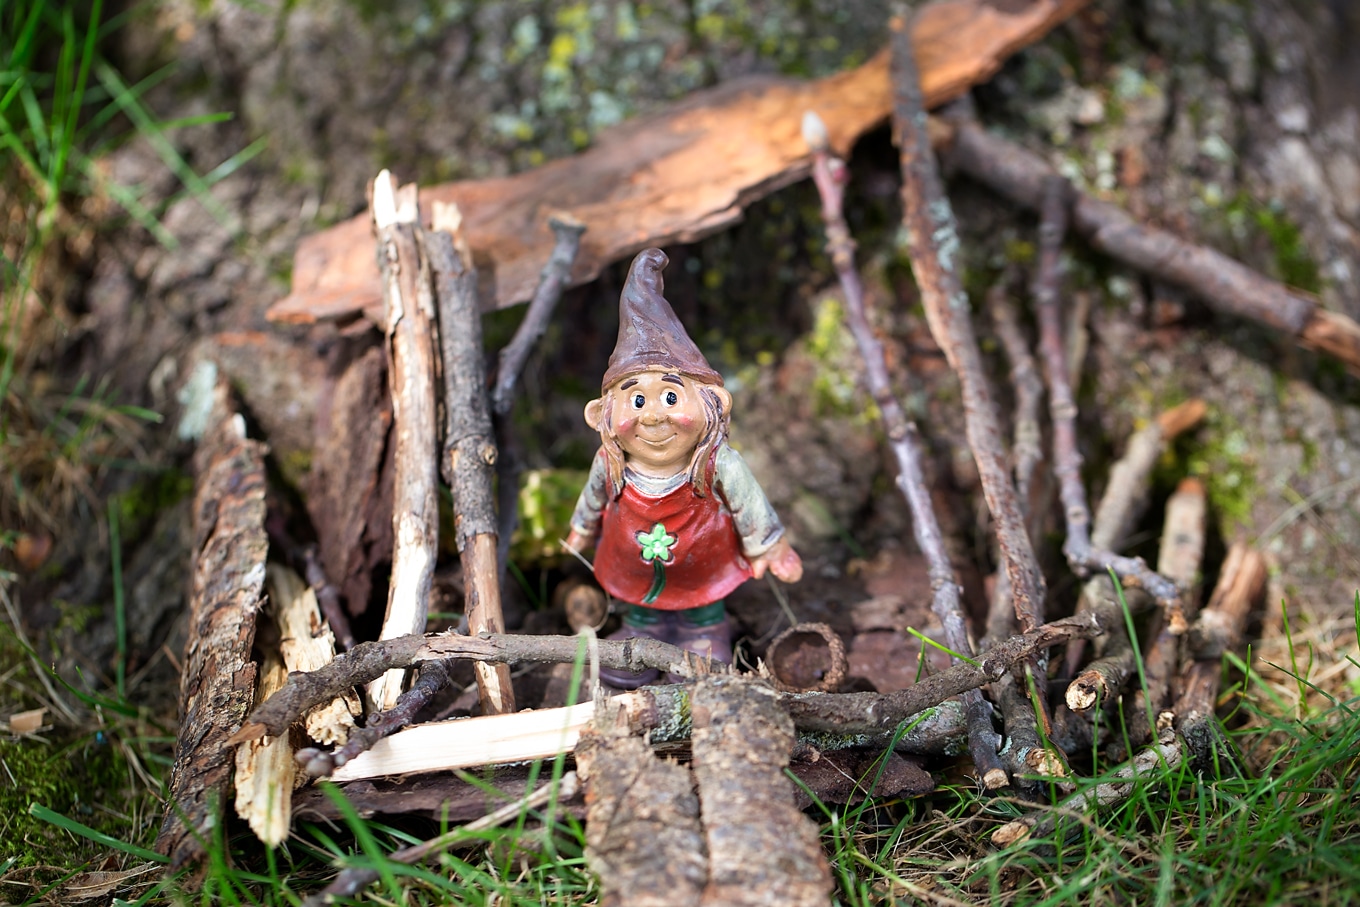
3. Build a Gnome Home

Building a gnome or fairy home sparks imagination and creativity! Best of all? All the supplies you need for this nature walk activity are found outdoors!

Gnome and Fairy Home Building on a Nature Walk

4. Make a Flower Crown

The moment you place a flower crown on your child’s head, they become king or queen and are swept into the magical world of imaginative play.

5. Play a Game

My young boys love to play the color match game, I Spy, and participate in nature scavenger hunts.

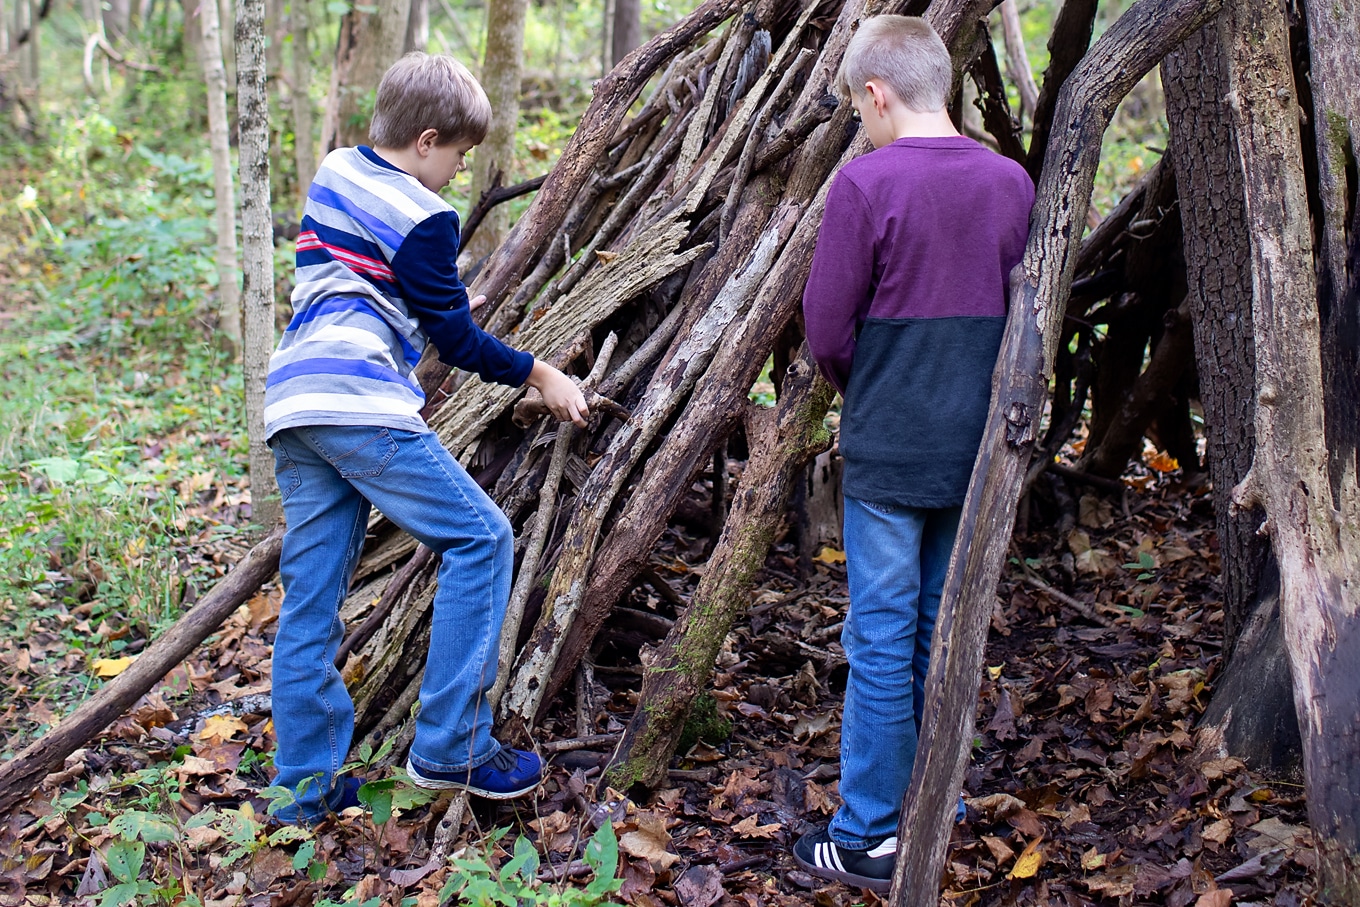
6. Build a Log Fort

Kids love to work with friends and siblings to build log forts. It’s so fun to see what they create!

Children Building Forts in Nature

Things to Look for on a Nature Walk

There is so much to see and discover outdoors! When I take kids on nature walks, some of the things we look for include:

1. Plants

  • Deciduous trees

  • Evergreen trees

  • Leaves

  • Flowers

  • Buds

  • Mosses

  • Sticks

  • Pine needles

  • Fruit, such as apples, pawpaw, blueberries, and black raspberries

  • Edible plants, such as cattails, wild garlic, and dandelions

  • Aromatic plants, such as wintergreen

  • Bark

  • Sap

Child Examining a Leaf on a Nature Walk

Photo: catalin30682 | Adobe Stock

2. Seeds and Nuts

  • Acorns

  • Pine cones

  • Walnuts

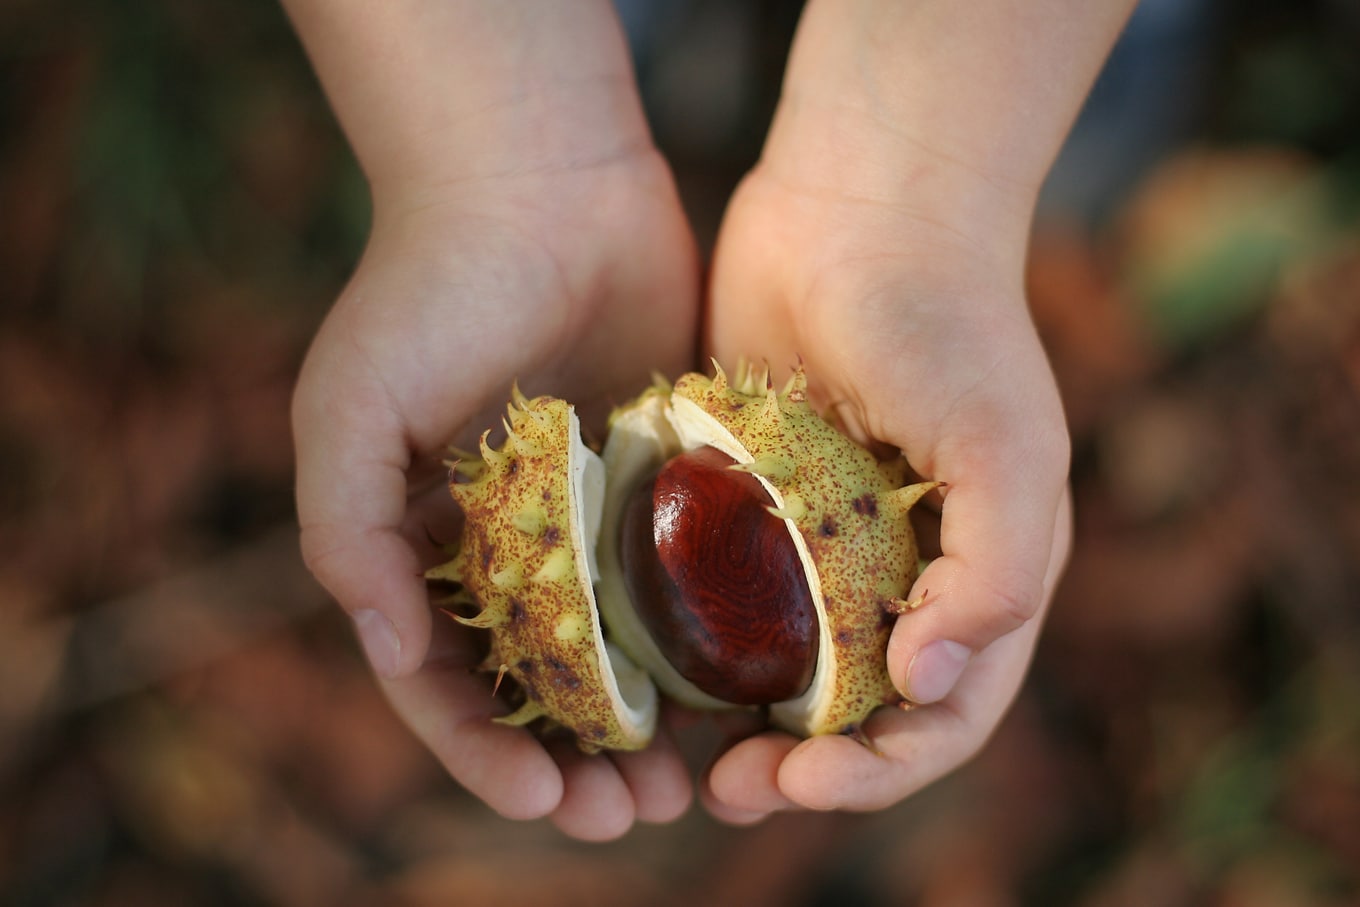
  • Chestnuts

  • Maple keys (helicopters)

  • Milkweed pods

Child Holding Chestnut on Nature Walk

Photo: Anna Kubczak | Adobe Stock

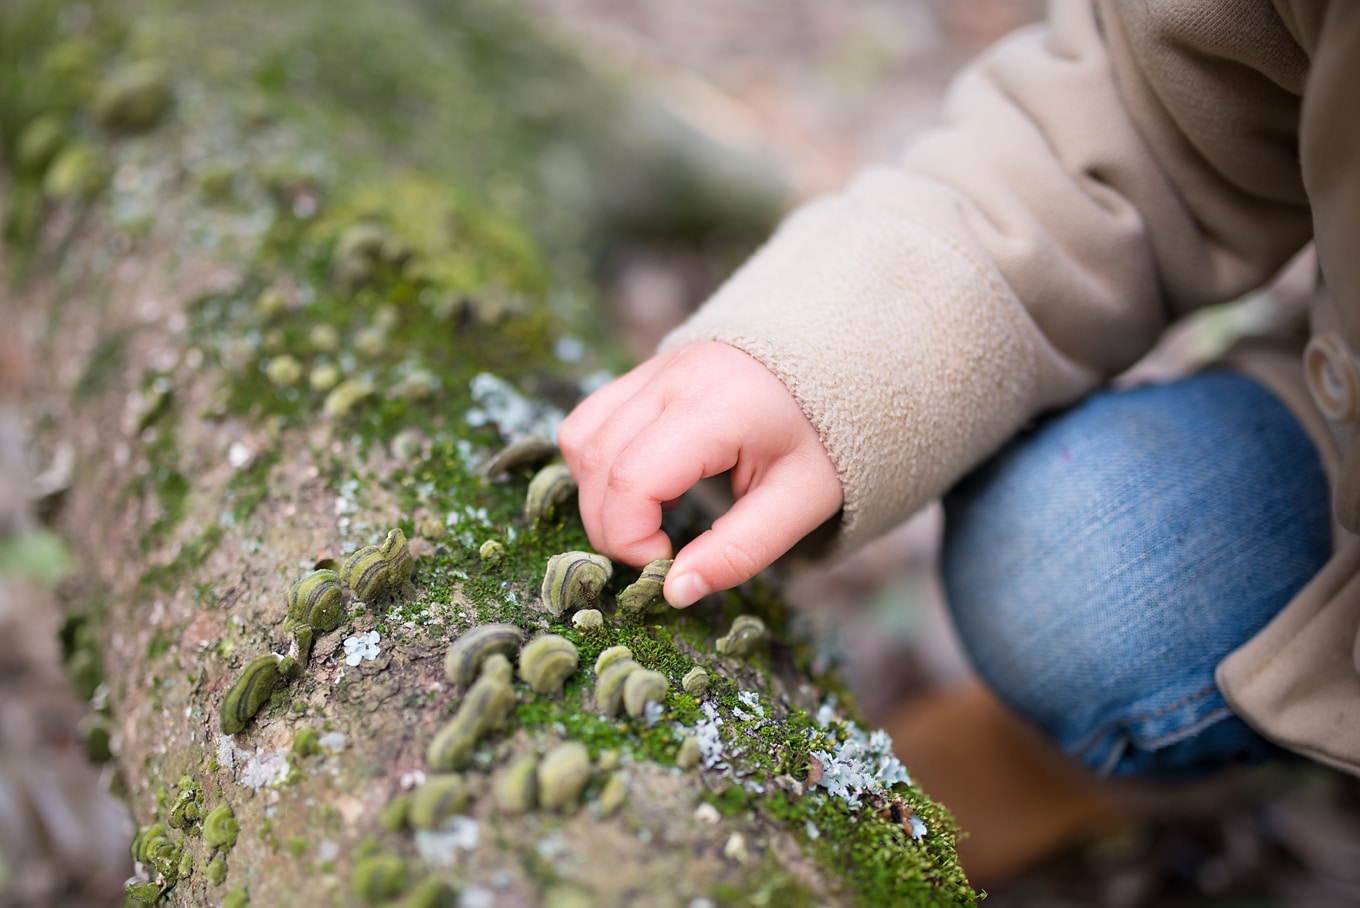
3. Fungi

  • Shelf fungi

  • Mushrooms

  • Slime molds

  • Lichens

Child Looking at Shelf Fungus on Nature Walk

Photo: hakase420 | Adobe Stock

4. Animals

  • Mammals, such as squirrels and deer

  • Birds, such as hawks and woodpeckers

  • Reptiles, such as turtles and snakes

  • Amphibians, such as frogs and salamanders

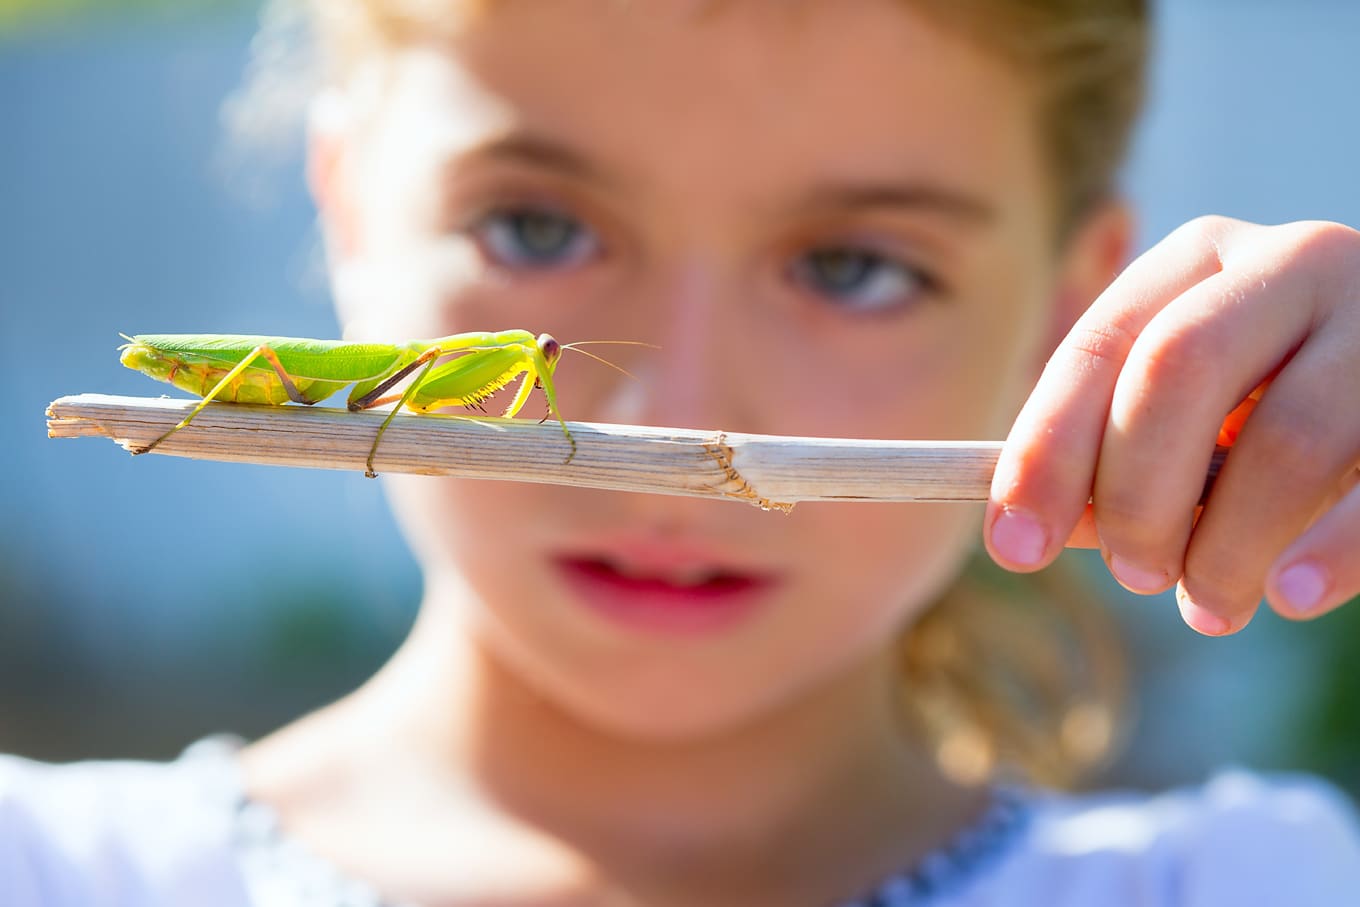
  • Insects, such as fireflies, ladybugs, and mantids

  • Crustaceans, such as crayfish and pill bugs

Child Looking at Insect on Nature Walk

Photo: Tono Balaguer | Adobe Stock

5. Evidence of Animals

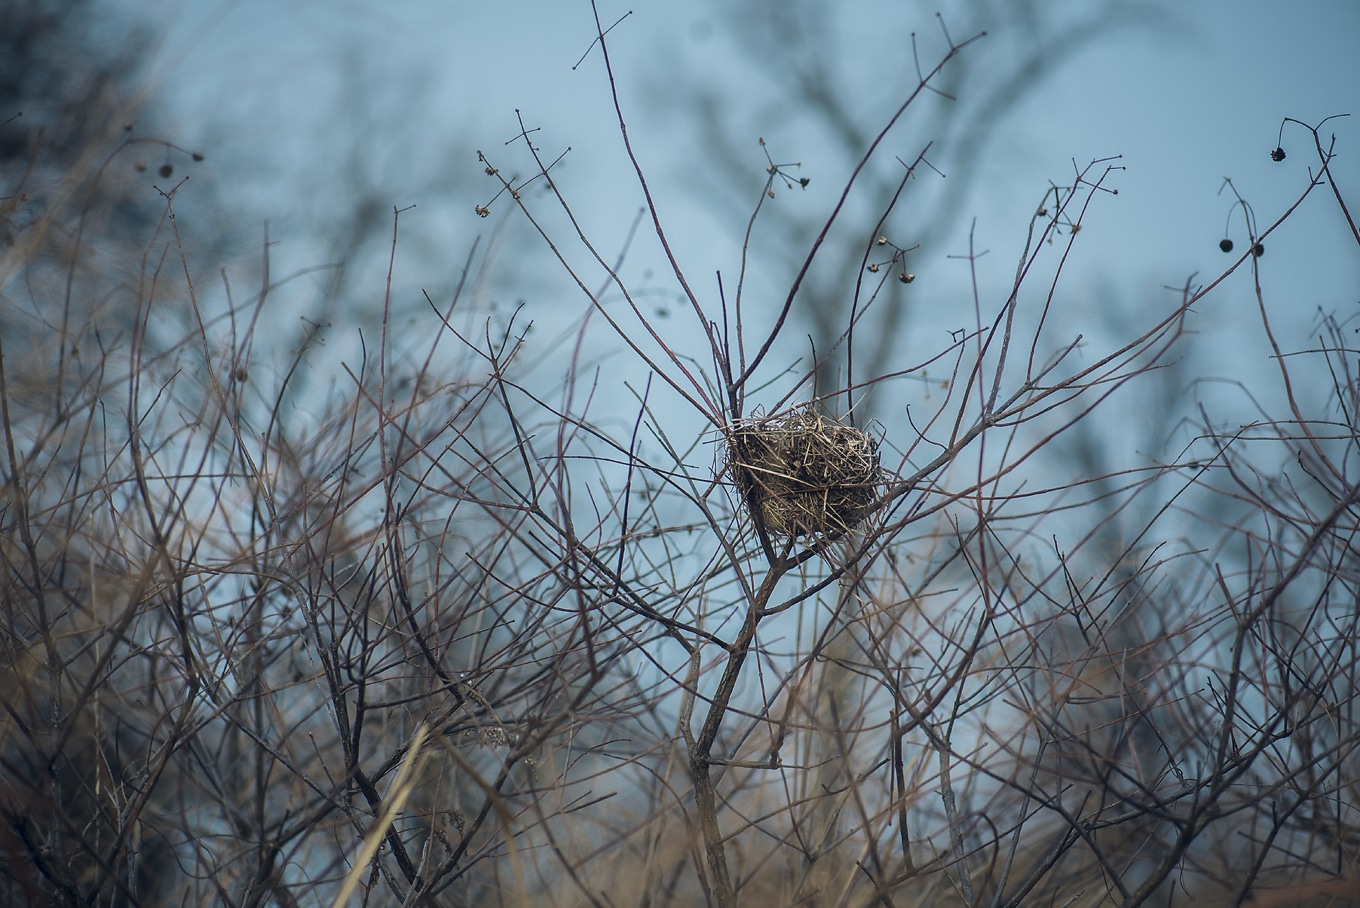
  • Nests, such a bird and squirrel

  • Cracked seeds or shells

  • Munched leaves (leaves with holes)

  • Spider webs

  • Shells

  • Exoskeletons

  • Scat (wild animal droppings)

  • Feathers

  • Bones

  • Dens

  • Burrows

  • Tunnels

  • Anthills

  • Eggs

  • Woodpecker holes

  • Snakeskin

  • Fur

  • Animal tracks

  • Cocoons and chrysalids

  • Beaver lodges

  • Beehives and hornet nests

Bird Nest on Nature Walk

Photo: Amy Buxton | Adobe Stock

6. Evidence of Humans

  • Trails and/or roads

  • Trail markers

  • Stone cairns

  • Carved trees

  • Footprints

  • Vehicle tracks

  • Litter (pick up and throw away)

  • Geocaches or letterboxes

  • Buildings

  • Fairy homes

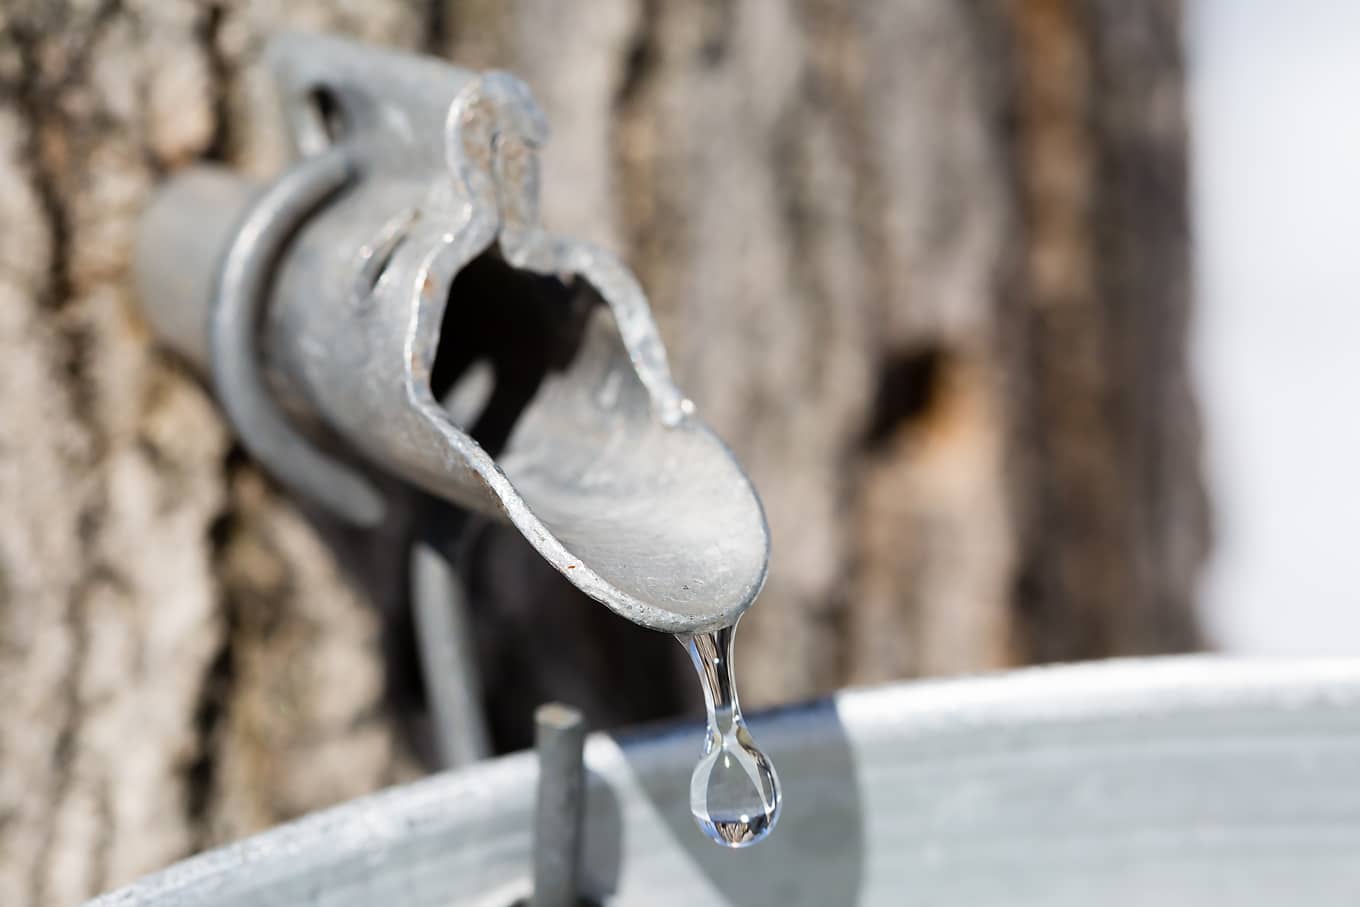
  • Tapped maple trees

  • Hunting and/or bird blinds

  • Bird feeders

  • Birdhouses

  • Bat houses

  • Bridges

  • Shelters, forts, and tree forts

  • Docks

  • Arrowheads

Maple Tree Tap

Photo: Martin | Adobe Stock

7. Geological Features

  • Rocks and minerals

  • Fossils

  • Concretions

  • Sand

  • Clay

  • Landforms, such as mountains

  • Rivers, creeks, streams, and freshwater springs

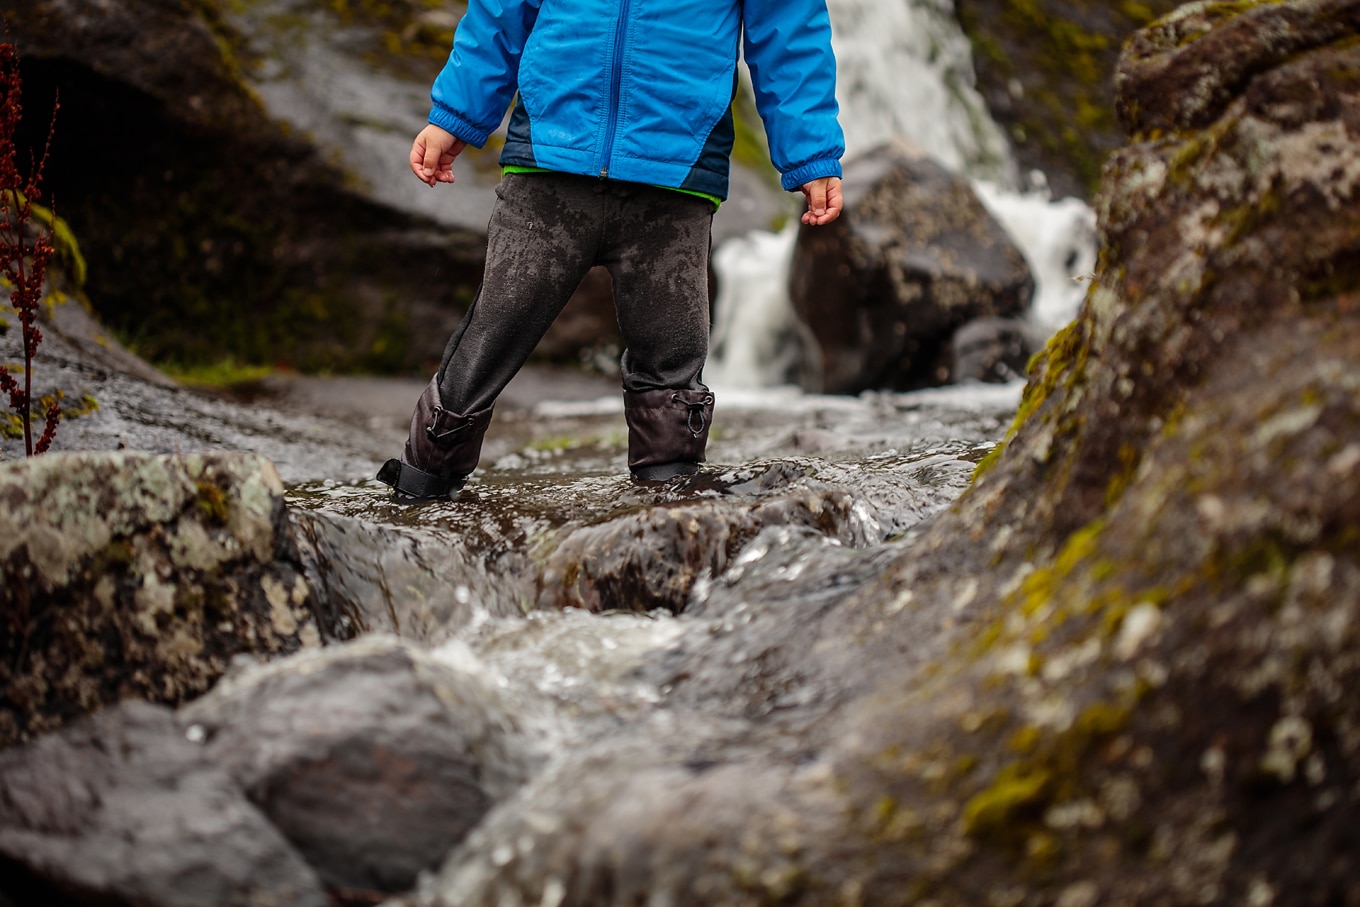
Child Playing in Creek on Nature Walk

Photo: Paloma Ayala | Adobe Stock

8. Additional Ideas

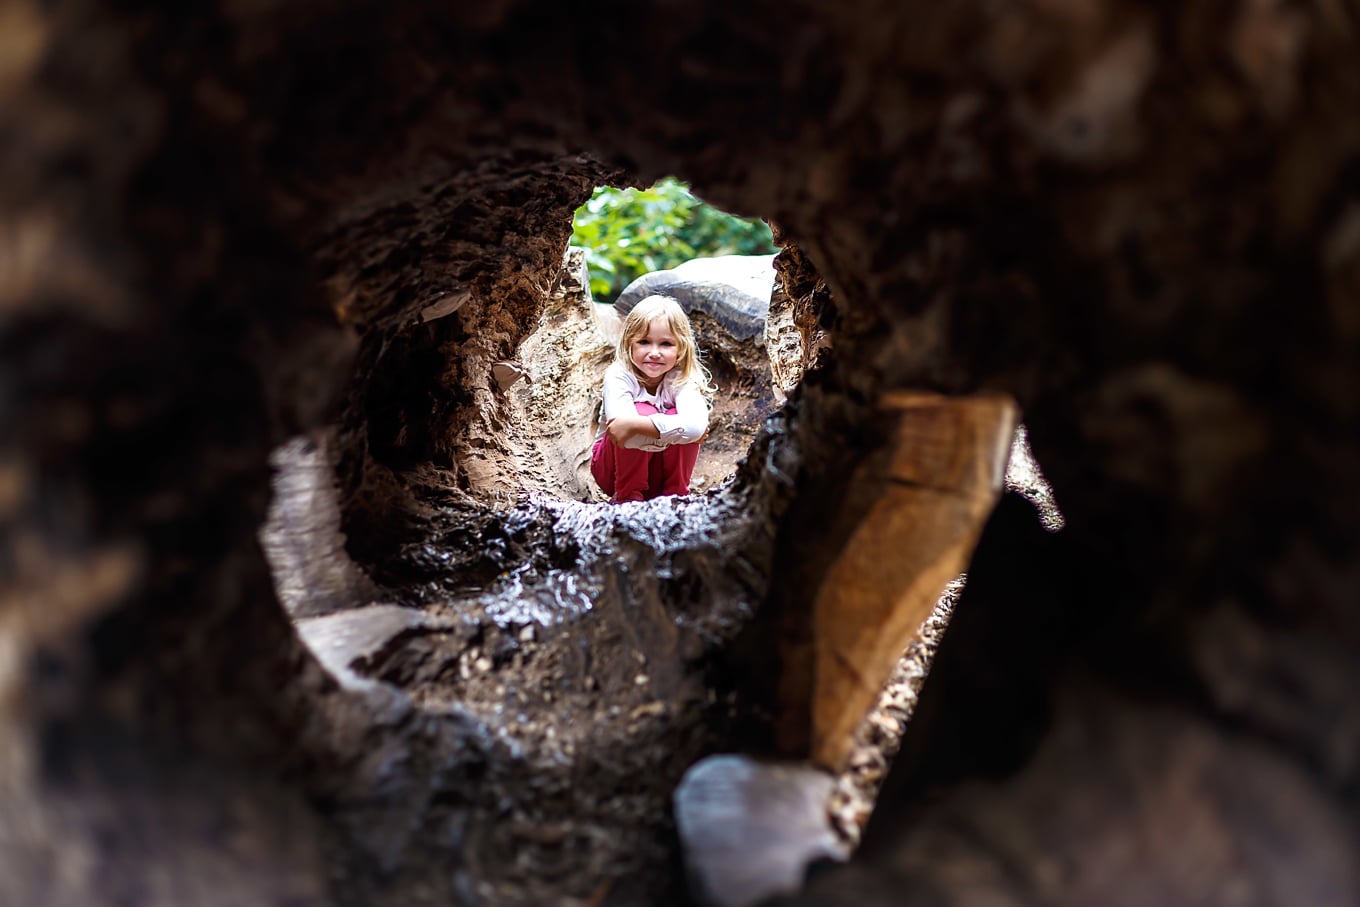
  • Rotting logs

  • Ice and/or icicles

  • Snow

  • Rain

  • Mud

  • Vernal pools

  • Frost

  • Puddles

  • Dew drops

  • Sunsets and/or sunrises

Child Exploring on a Nature Walk

Photo: Alexey Fedorenko | Adobe Stock

Happy Family Enjoying a Nature Walk with Dog

Family LifeNature Activities -You May Also Like

10 Ways to Enjoy Simple Fall Family Fun

“If a child is to keep his inborn sense of wonder, he needs the companionship of at least one adult who can share it, rediscovering with him the joy, excitement and mystery of the world we live in.”


Ideas for taking in all that surrounds us on a walk in the woods

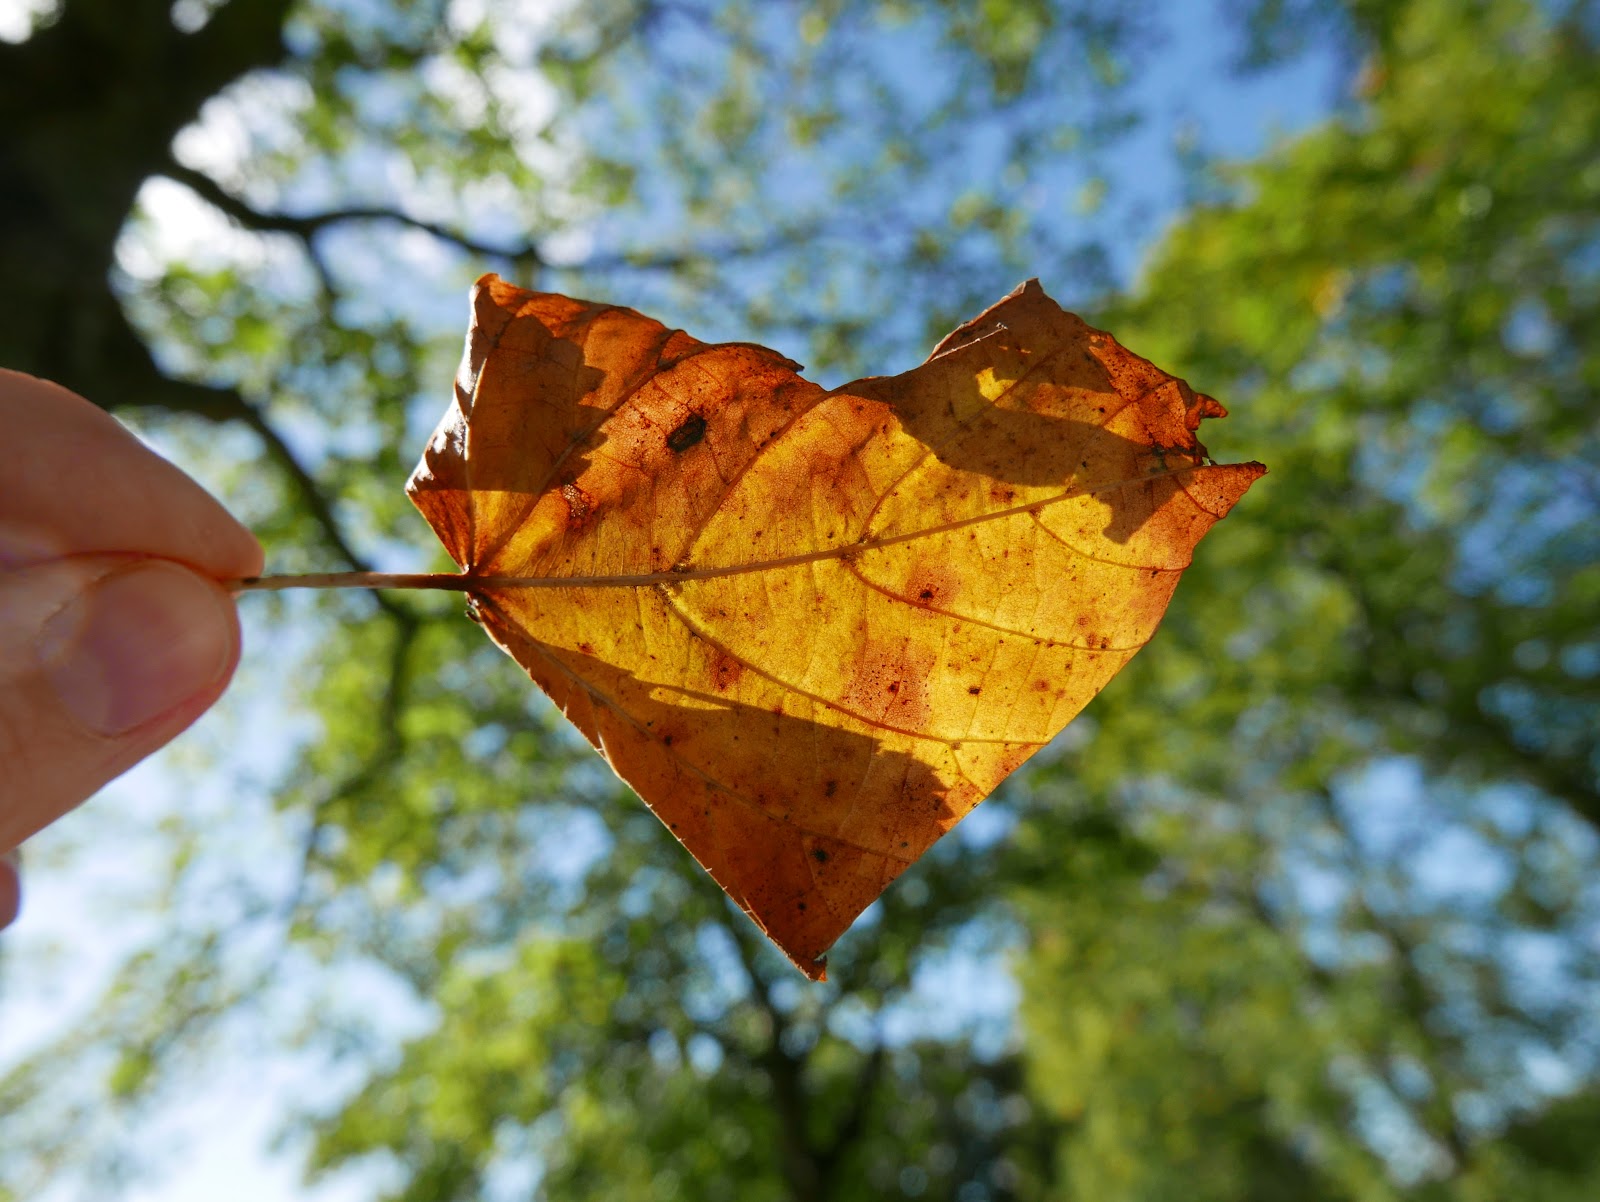
We love going on woodland walks to collect fallen twigs, branches, sticks and leaves for crafts and activities. However, I have spent my life trying to get rid of the universal notion that walks and hikes are about getting to a certain destination. When really walks are all about the adventure and the the things that fascinate us along the way. Just ask any of your children or students, and count on them to find the fun stuff along the way. They are outside to discover and find joy in the process of exploring the plants and animals that are right in front of them. 

You can find a list below of over 30 fun and easy tree related activities ideas below for all ages to enjoy.
IMG_20191002_134314_036

Trees are an important and vital part of our ecosystem, they create oxygen, soak up carbon dioxide, prevent soil erosion, retain nutrients in the soil and provide food and shelter for wildlife. Thousands of different species depend on trees from birds, mammals and invertebrates to reptiles, fungi, mosses and lichens. Even when a tree dies it still plays a vital role in the ecosystem. The dead wood creates nitrogen for the soil and provides habitats for a variety of animals.
IMG_20170929_205826_249

The Woodland Trust also have some fantastic, free tree identification guides that you can download here to help you identify the different types of trees you find.

Nature Faces

Take some natural clay with you to make funny and silly Nature Faces using acorns, flower petals, sticks, seeds, berries, and other things you find along the way. 
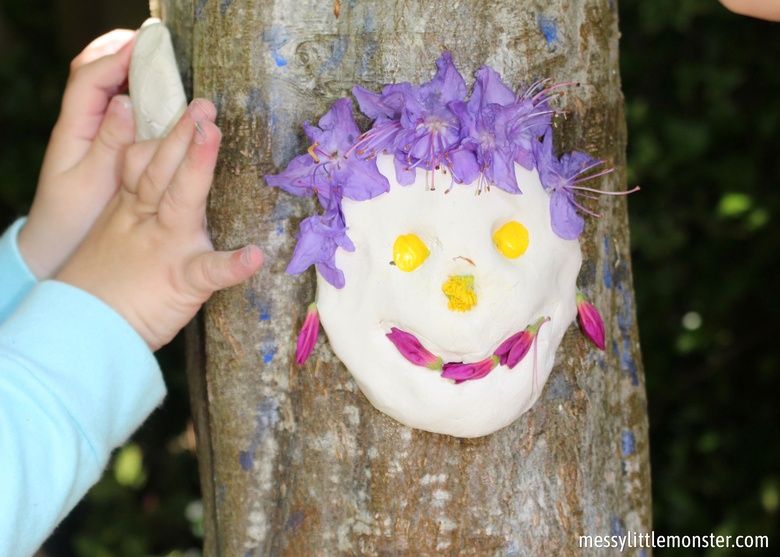
Clay nature faces - outdoor learning forest school activities


IMG_20200630_120439_860

2. NATURE CHARACTERS AND ANIMALS

Nature characters are so simple and fun to make for children of all ages. They are also a great way to stimulate conversation and explore different textures, colors, shapes and patterns. Simply draw a face onto a piece of cardboard and then cut it out. When you have cut out the faces you can take them on a woodland walk and place them by any interesting natural objects you find, to give your characters fun and interesting hair. How about taking photos of all the characters you create so you turn them into artwork, cards or pictures.
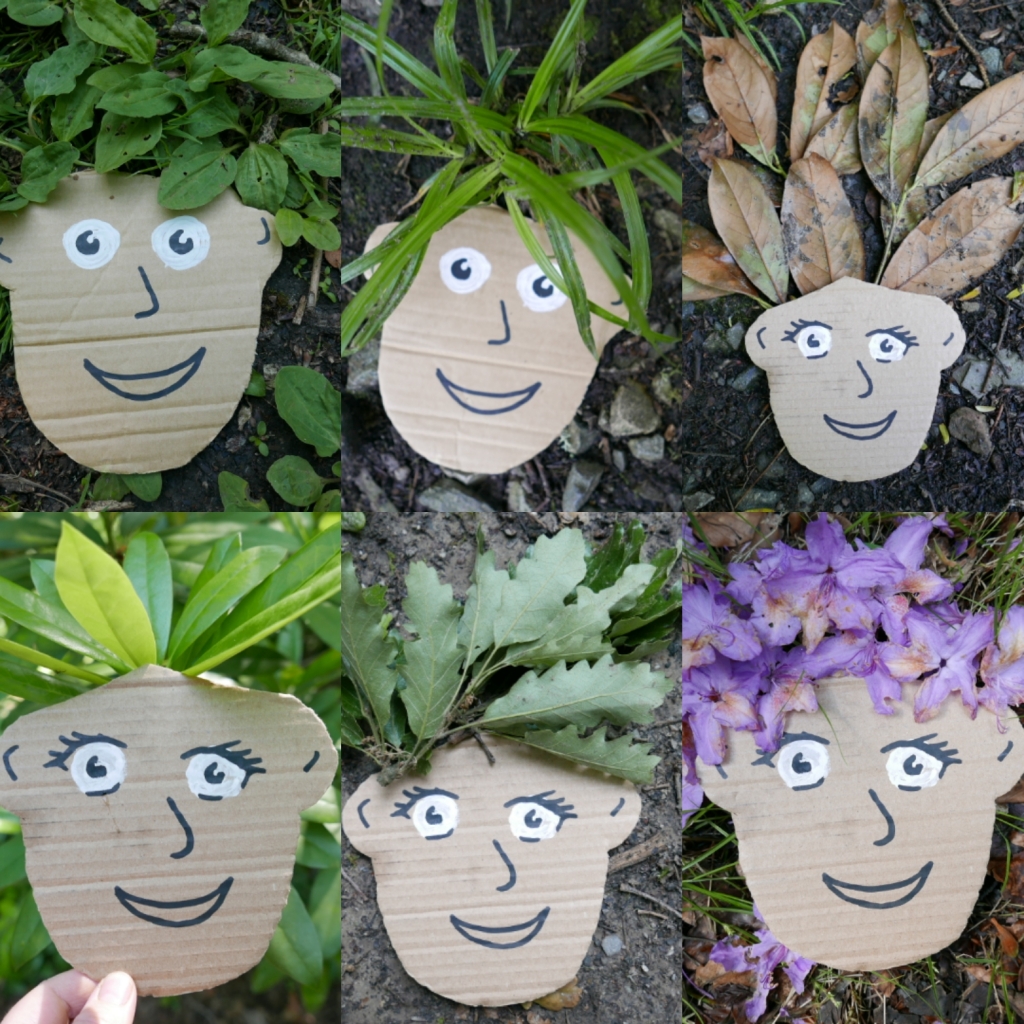
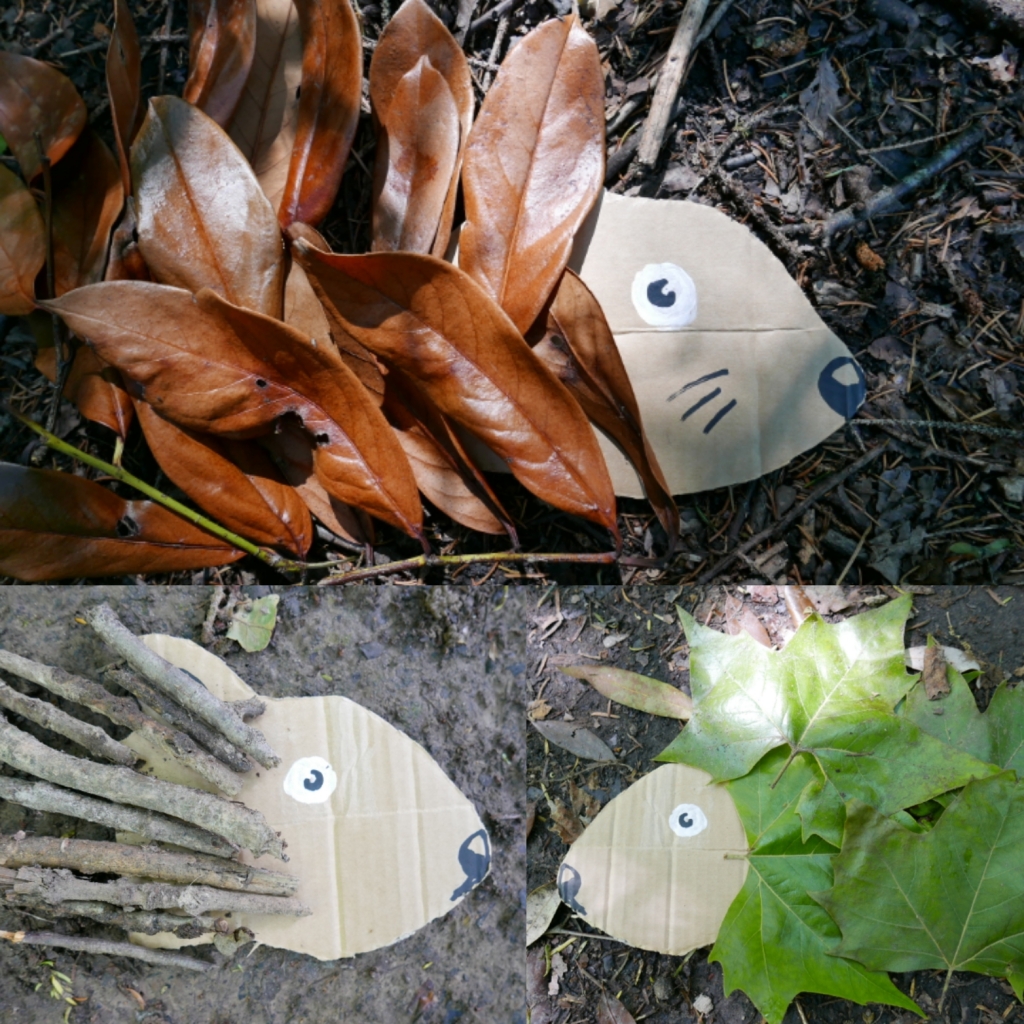
You could also make animal versions of your natural faces and cover or decorate them with interesting natural objects to give them fur, feathers, spines, ears, legs or wings. You could use leaves, stones, grass, bark, twigs, fallen fruit, nuts and seeds and flowers. *But pretty please don’t pick any wild flowers, only collect ones you have grown yourself or fallen ones you find on the floor.
3. STICK PEOPLE AND WOODLAND FIGURES

Making stick people and woodland figures is a fun and easy activity for children of ages where you can use any sticks and branches you find to create fun and interesting characters. You can easily bring the sticks and branches you find on walks to life by giving them faces and different expressions using just marker pens or paint.
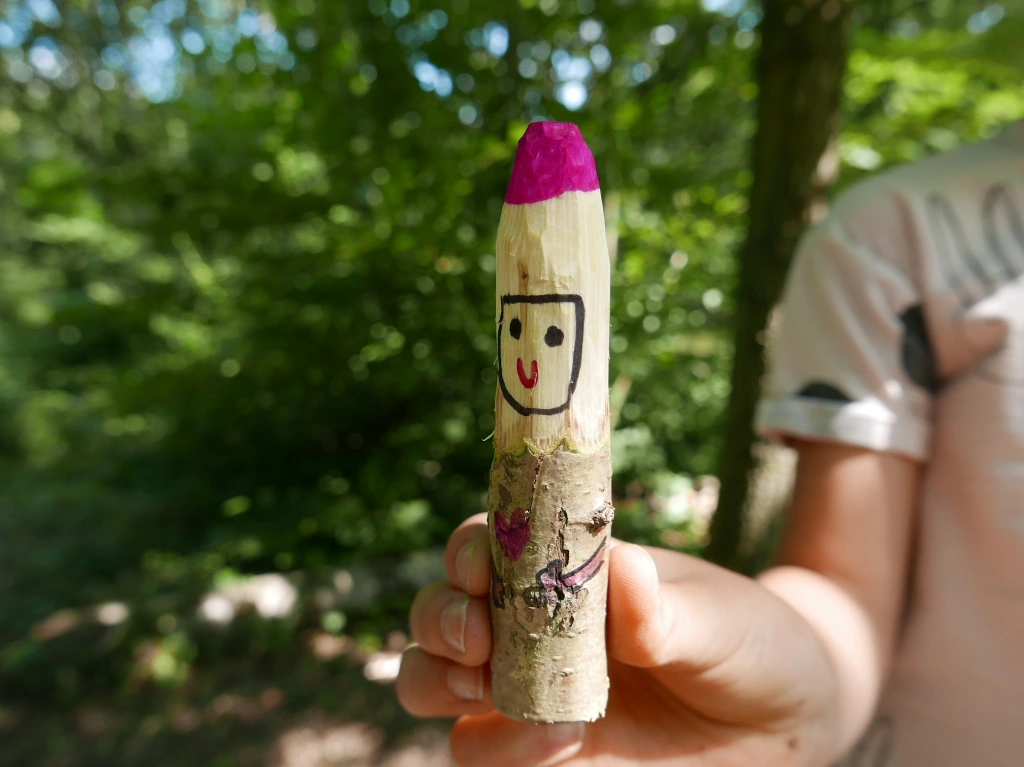
Older children and adults could also remove the bark at one end of the stick or branch using an old vegetable peeler (Adult supervision required) or sandpaper to create a smoother surface to paint and draw the faces onto.

You could also give the figures hair and clothes using old wool, string, ribbon, strips of fabric or found natural materials like grass, leaves, bark, thin twigs, seed cases and flowers. *But pretty please don’t pick any wild flowers, only collect ones you have grown yourself or fallen ones you find on the floor! You could either tie the materials on or use non toxic glue to stick and collage them onto the stick.
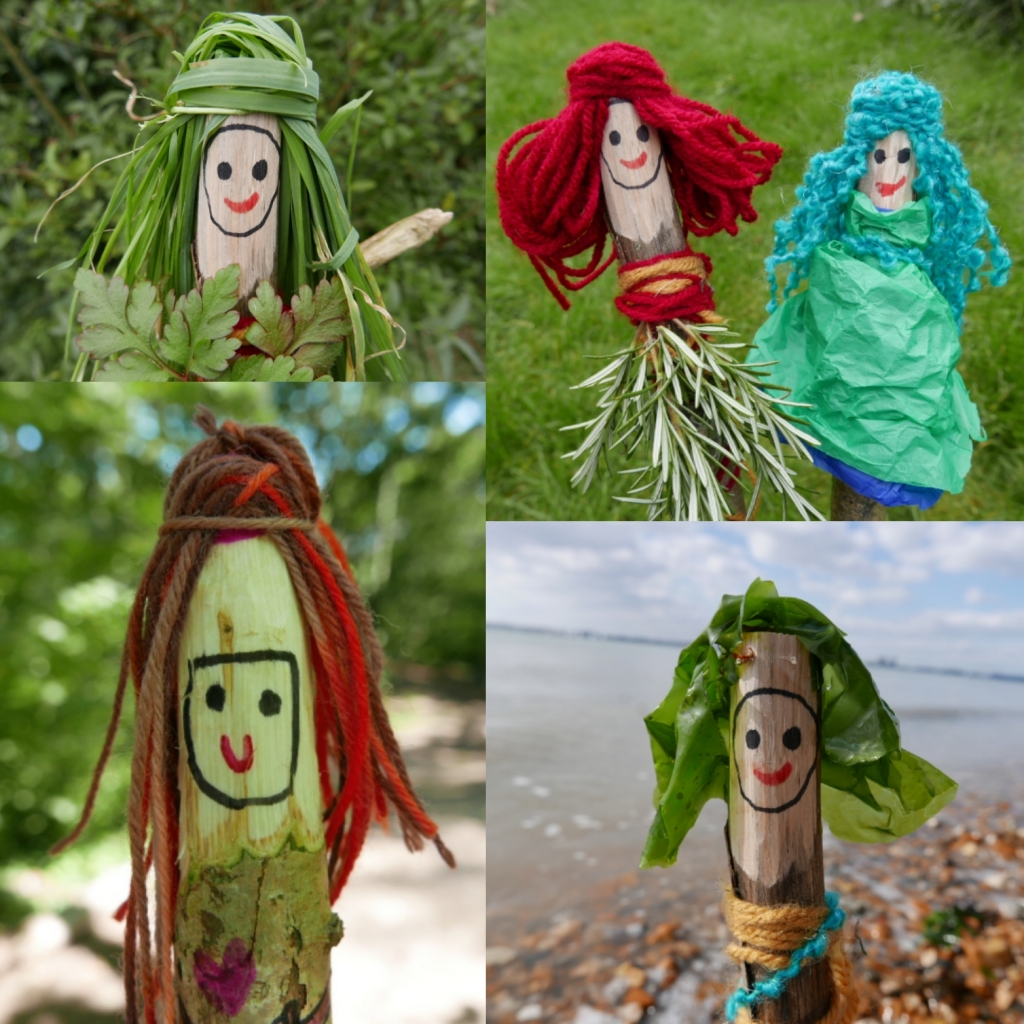
When you have finished making your characters and figures you can use them in pretend play and role play or as story props, puppets or decorations. You could even take them out on nature walks, adventures and picnics, the possibilities are as endless as your imagination.

4. JOURNEY STICKS

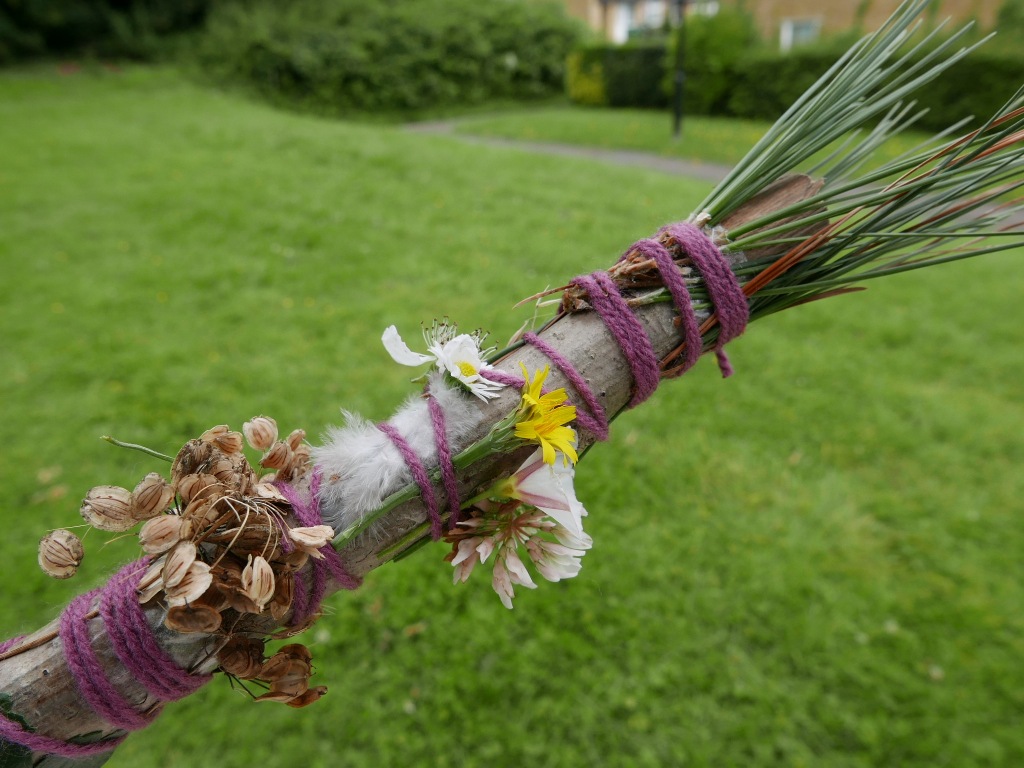
Journey sticks are a great way to engage children of all ages in the natural world. All you need to make a journey stick is a stick or short branch and some old string or rubber bands, wool or ribbon to wrap around it. The children can then collect interesting natural items* that they find a woodland walk and thread and weave them onto the stick as they go. Don’t forget to talk about all the things you find along the way. *Please don’t pick any wild flowers, only collect ones you have grown yourself or fallen ones you find on the floor.
5. NATURE ALPHABETS, NUMBERS AND MATH SYMBOLS

Nature art (also sometimes called land art) is a wonderful nature activity that encourages creativity and fine motor skills in children of all ages and abilities. All you need is some imagination and natural materials to make pictures, shapes and patterns or letters, numbers and words. How about challenging the children to write the whole alphabet, numbers from 0-9 or maths symbols using the different natural materials they find in a woodland.
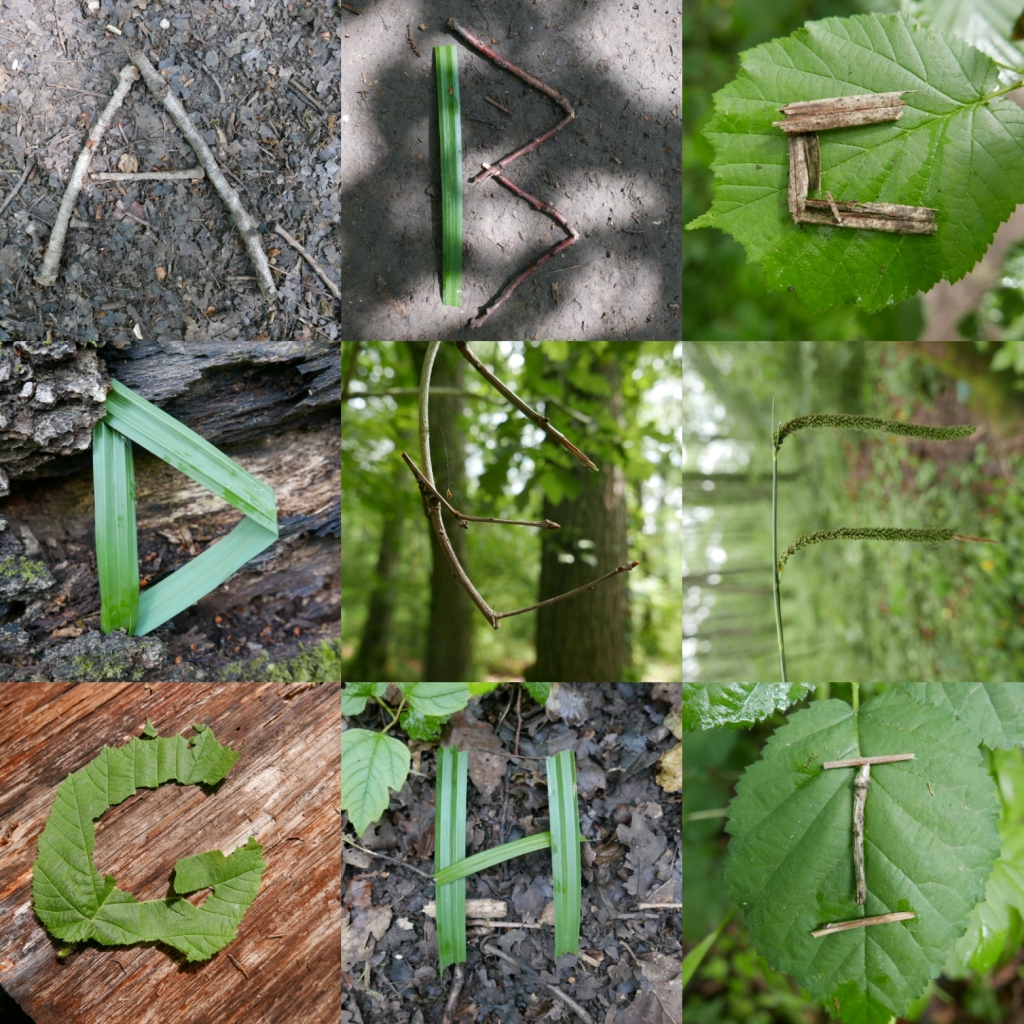
If you take photos of the letters, words, numbers and symbols you make you can then print them out later as artwork, learning resources or even turn them into cards to give to friends and family. You could even arrange and combine different photos together to create words, sentences or maths problems for the children to solve, or the children could have fun creating their own sums and solutions.
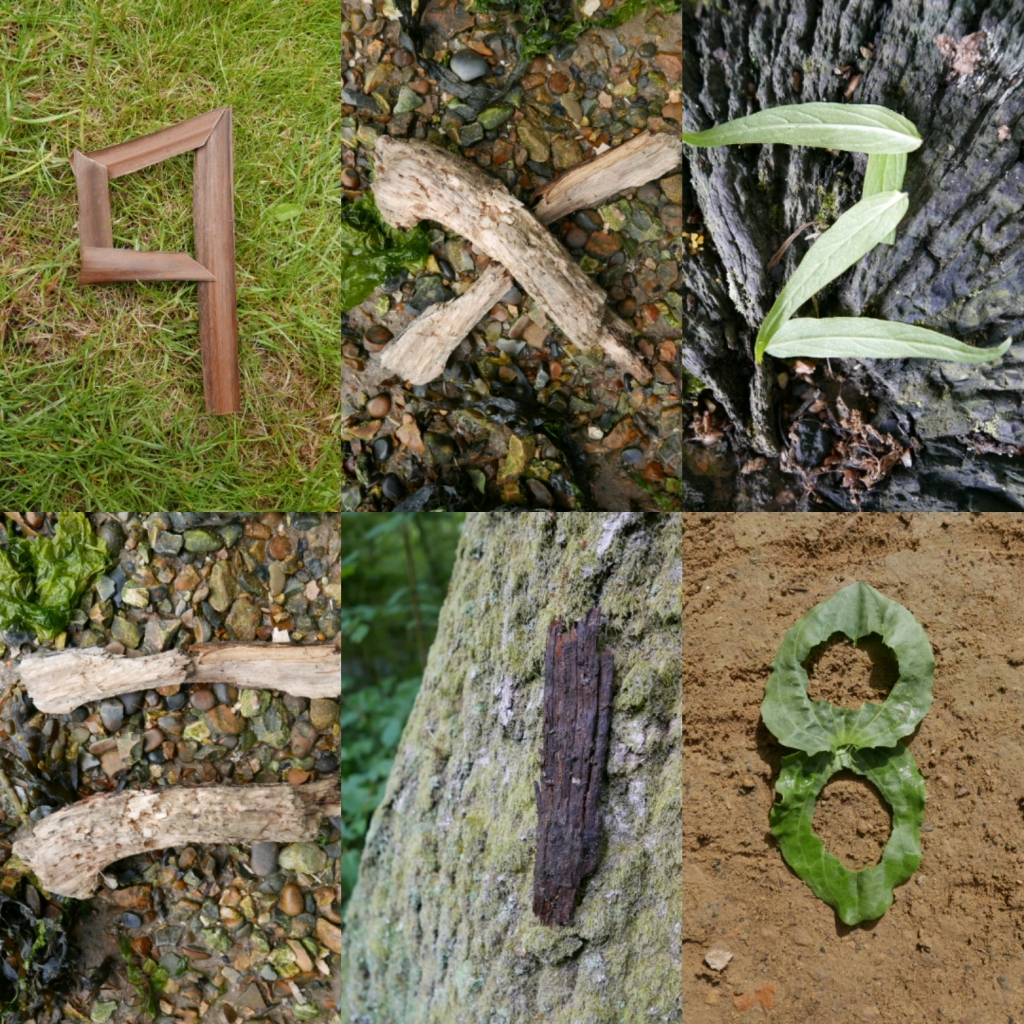
You could have a nature treasure hunt in the garden or go on on a nature walk to find natural materials to use like leaves, sticks, stones, shells, grass, plant stems, bark, fallen fruit, nuts, seeds and flowers*. *But pretty please don’t pick any wild flowers, only collect ones you have grown yourself or fallen ones you find on the floor.

6. NATURE ART FRAMES

Nature art frames are really simple to make, fun to play with and create some wonderful images. You just need an old piece of cardboard, a pen and some scissors. We hate to waste anything and recycling and reusing materials is one of many small things we can all do to help the environment. So instead of chucking used cardboard boxes we like to find ways to use them in crafts and activities.
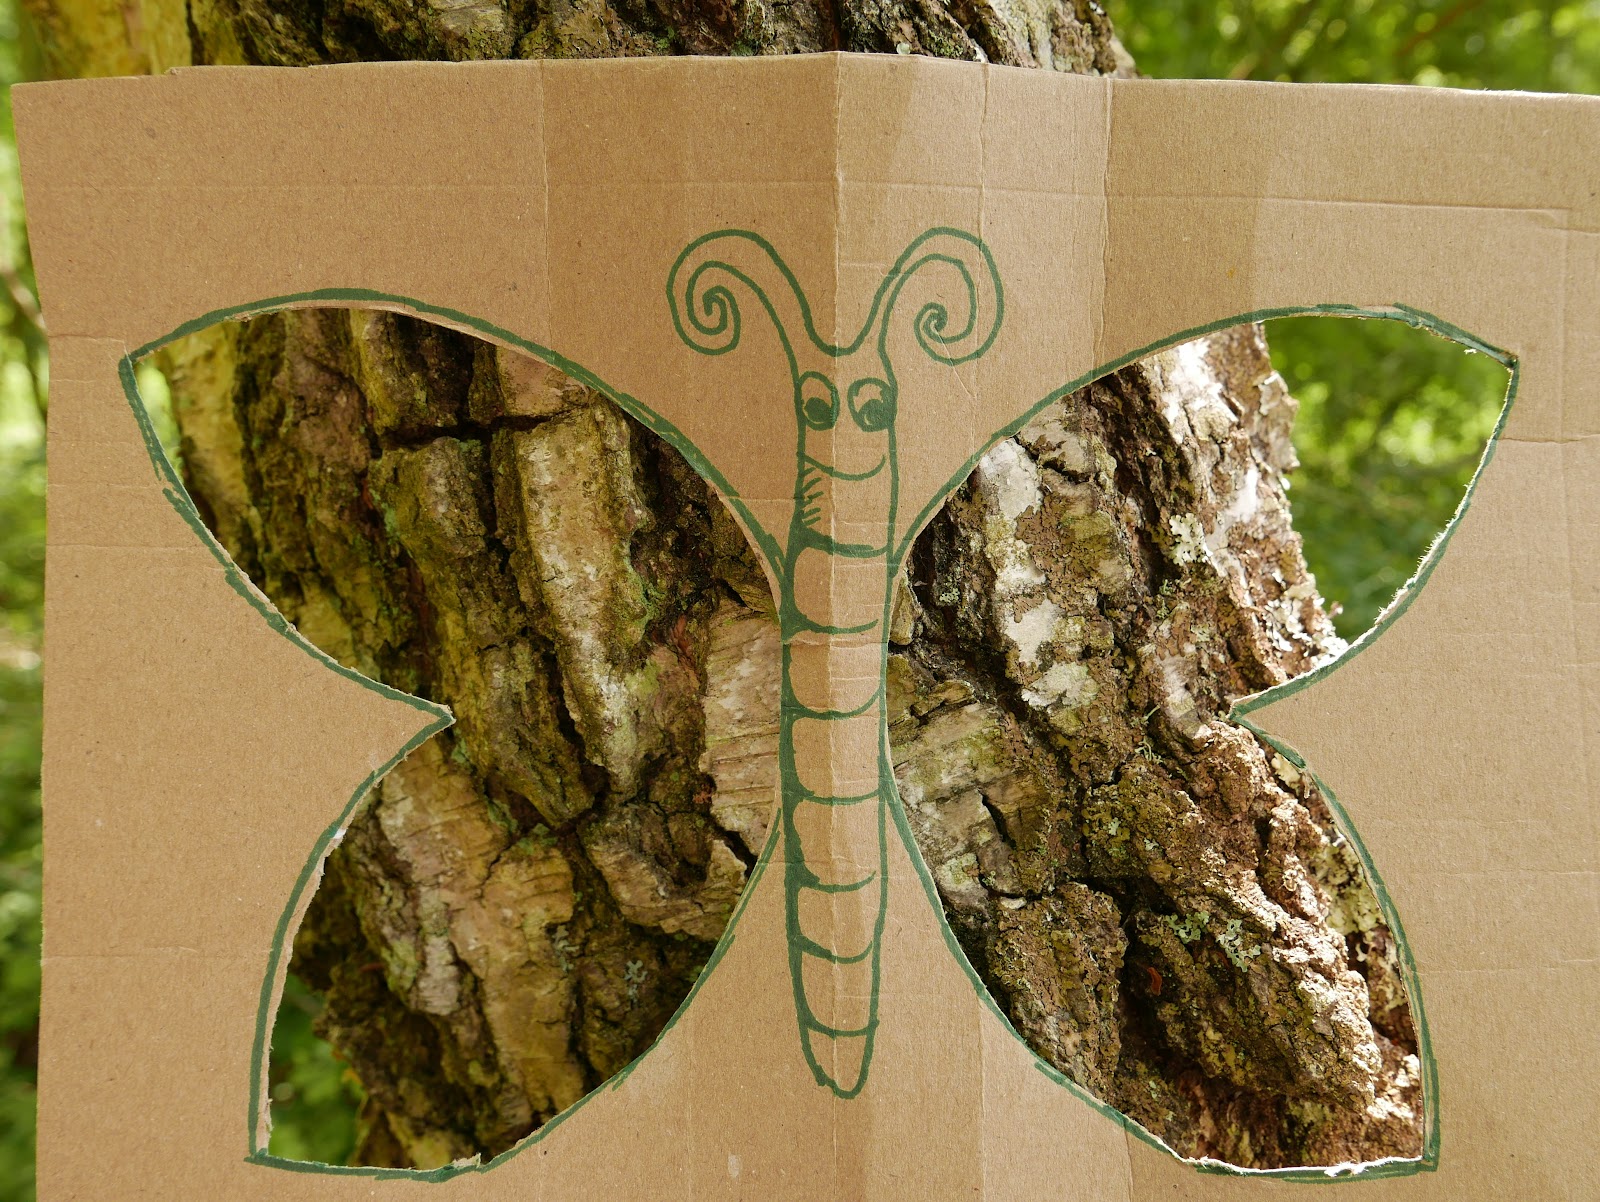
IMG_20200608_102301_792

All you need to make a nature frame is to draw a simple shape or picture like a butterfly or beetle onto cardboard. Your shape or picture should have at least 1- 2 easy to cut out sections that you can then look through. When you have cut out the see-through sections of your frames, you can take them on a woodland walk and hold them up against any of the interesting natural objects, textures, patterns and shapes you can see and find.
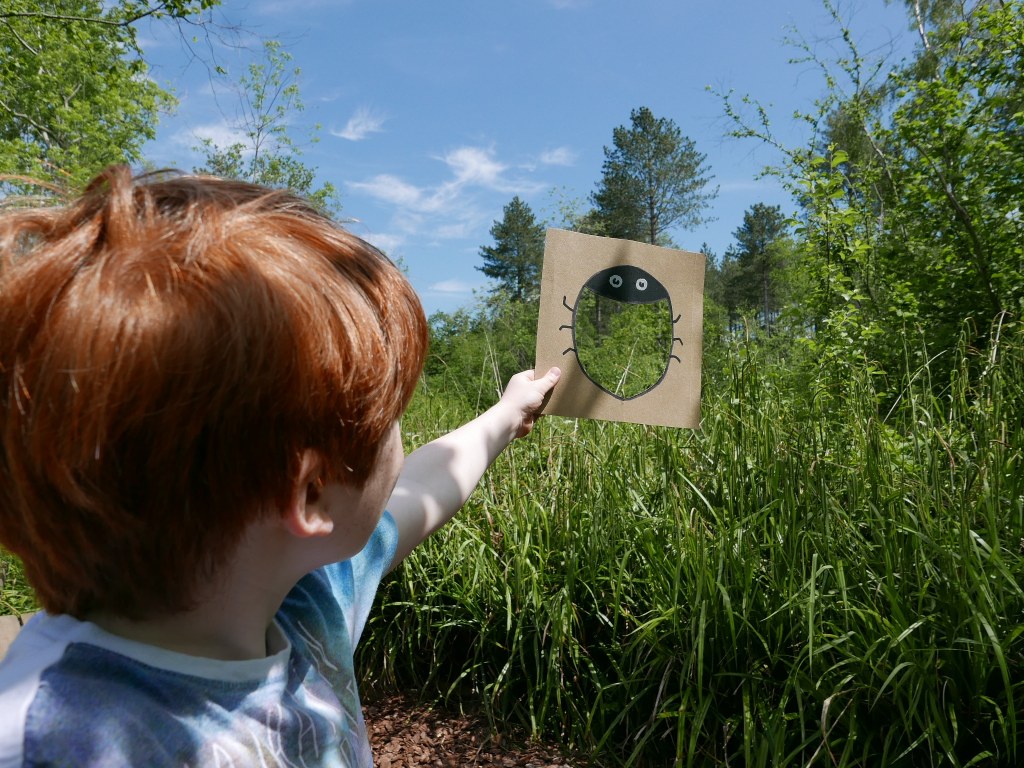
The picture you see or create with the frames changes as you move the paper around. It's fun to see all the beautiful patterns, shapes and colors of nature bring your pictures to life. You could even take photos of the nature frames as you go to capture the artwork and pictures they create.

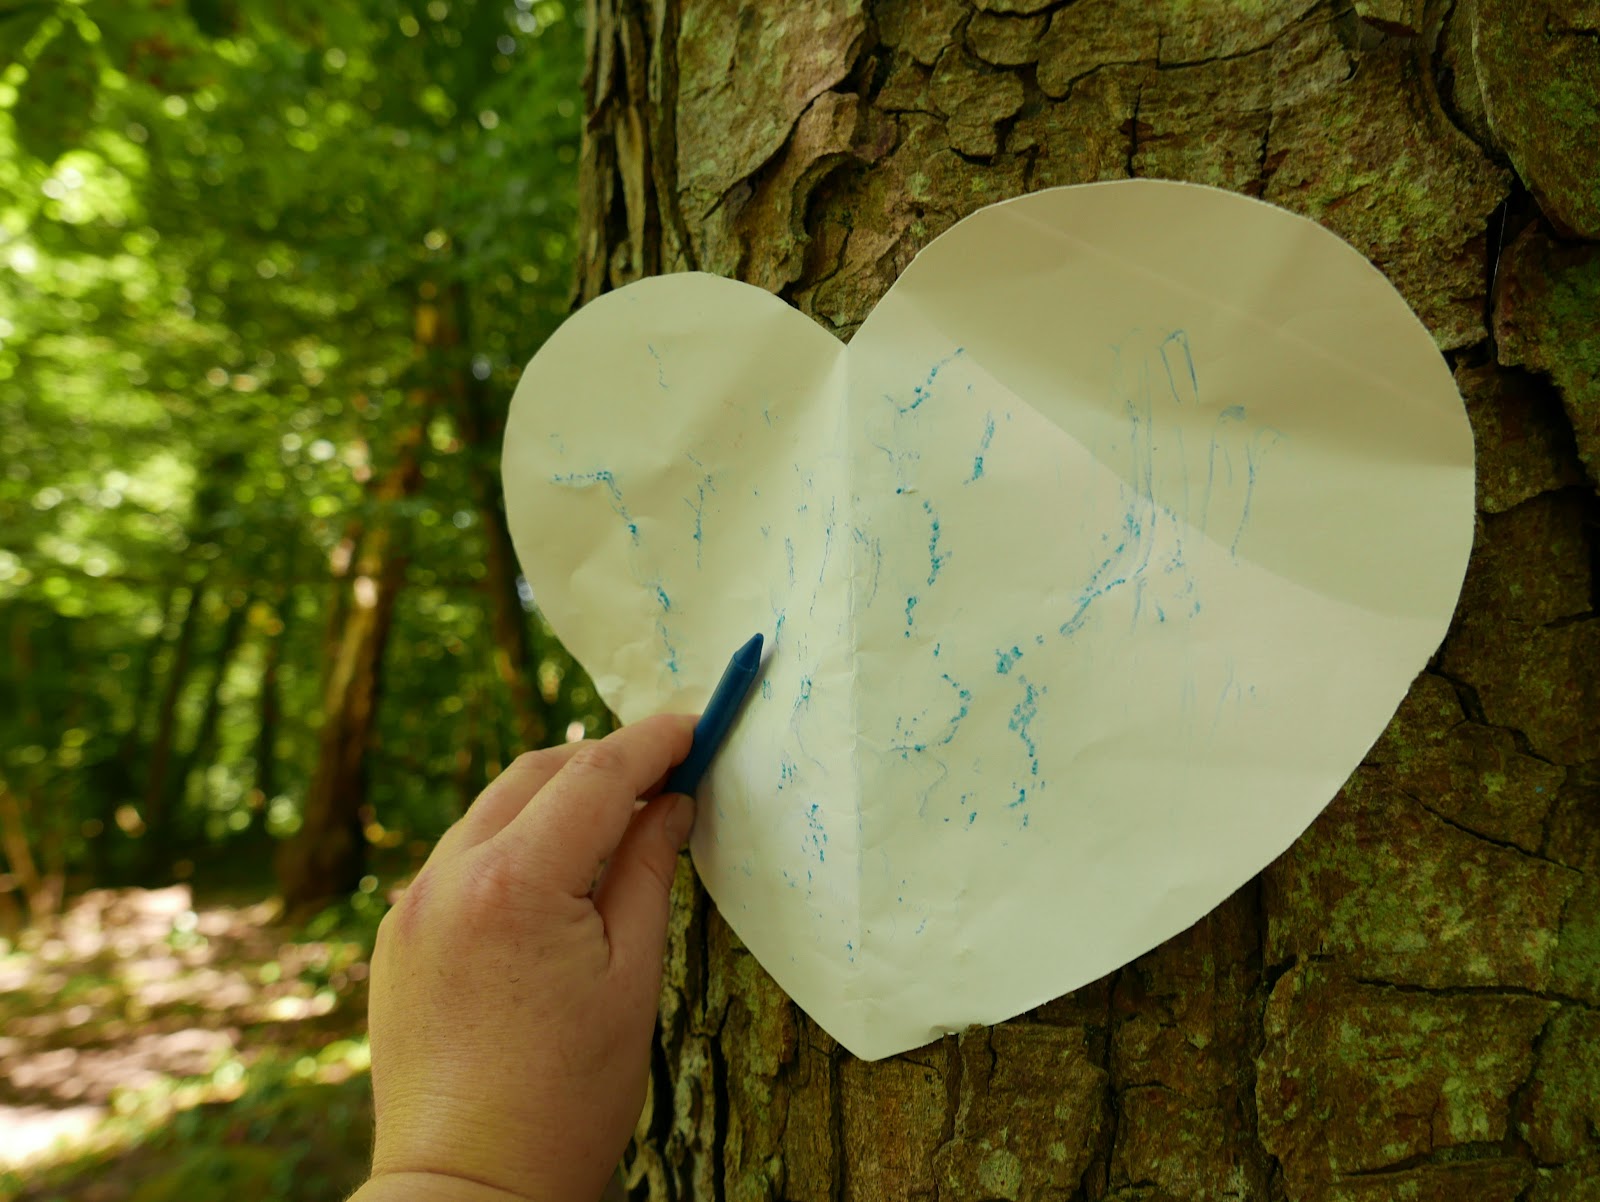
7. BARK AND LEAF RUBBING

A great activity for at home or on the go. Simply find some interesting bark or leaves and then place a sheet of paper over the surface. Using the side of a crayon or piece of chalk carefully rub over the surface of the paper to pick up the textures and patterns of the bark or leaves underneath.
IMG_20200624_194735_477

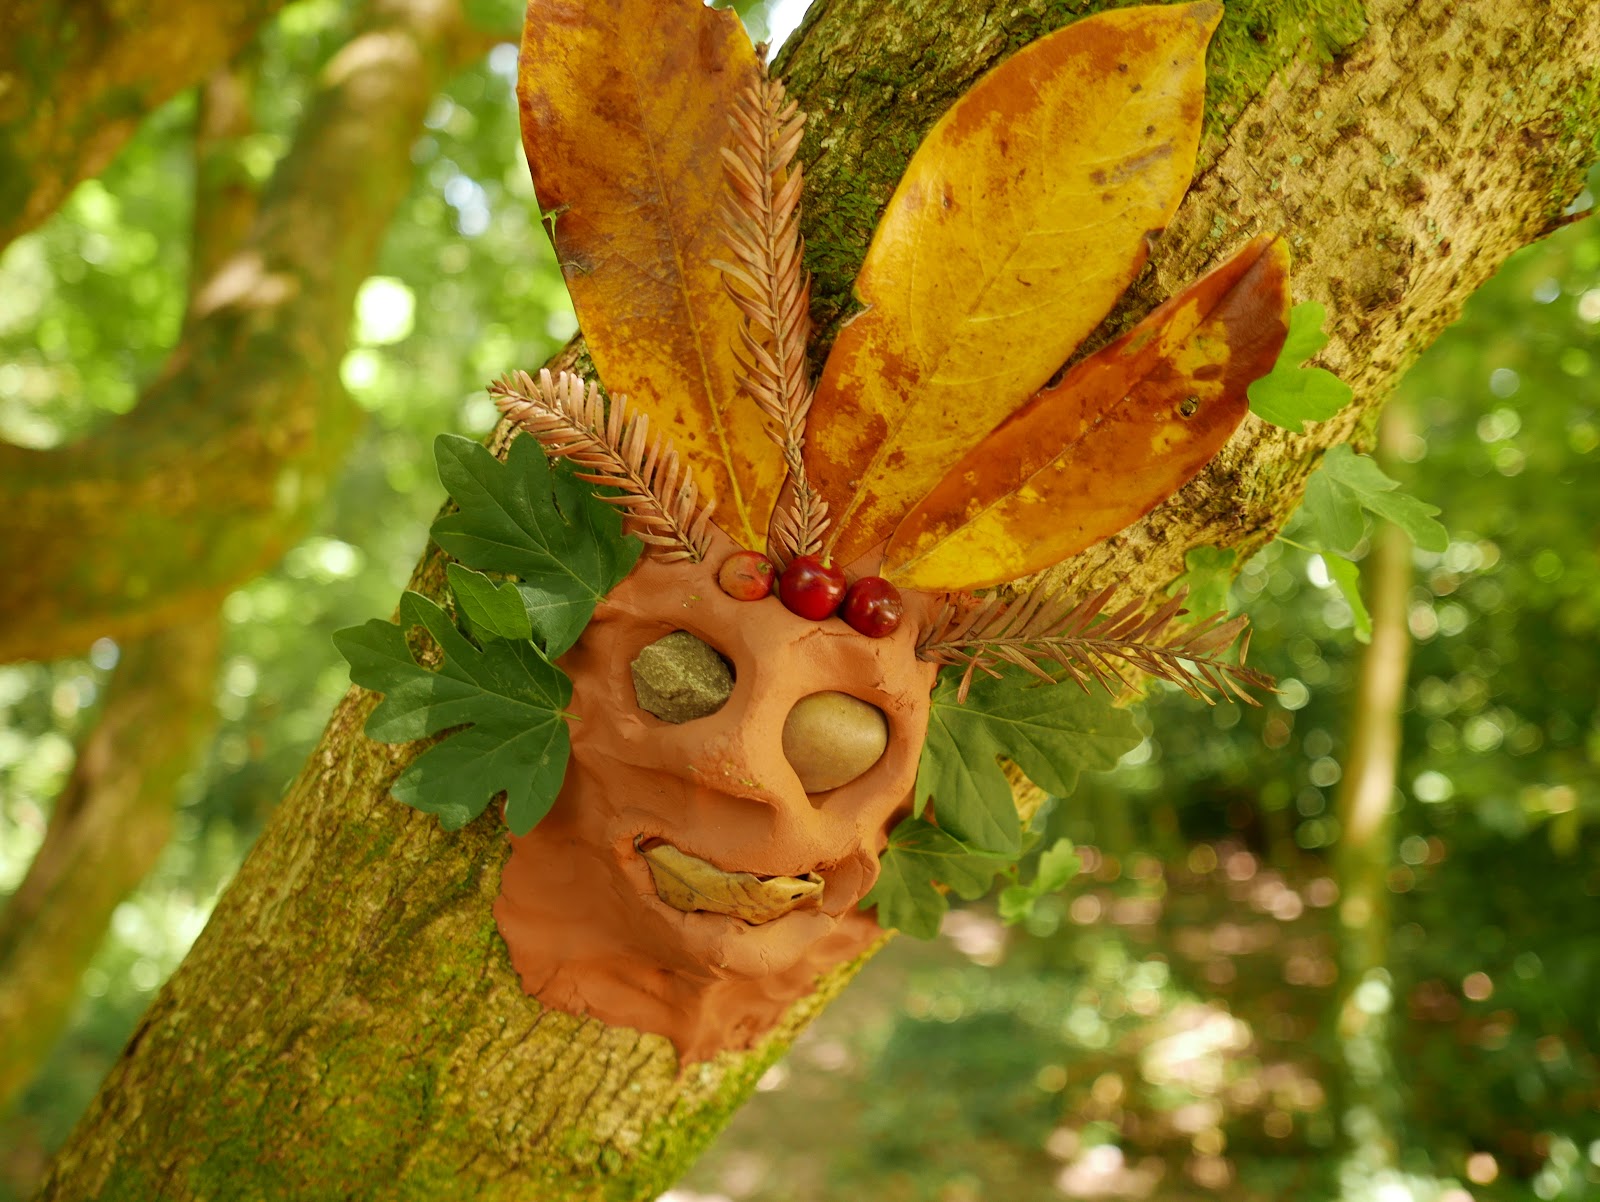
8. TREE SPIRITS AND GUARDIANS OF THE WOOD

If you have some clay you can have fun making tree spirits or guardians of the wood using natural clay and any natural materials you can collect and find. (Please don’t use salt dough or play dough for this instead as both contain high volumes of salt which is toxic to trees, plants and wildlife)
IMG_20200624_195154_075

You could use leaves, stones, grass, bark, twigs, fallen fruit, pine cones, acorns and flowers. *But pretty please don’t pick any wild flowers, only collect ones you have grown yourself or fallen ones you find on the floor. When you have finished, just simply leave the clay faces to dry on the trunk of the tree. They should last as long as the weather is dry. When they do eventually disintegrate then the clay and natural materials will naturally biodegrade back into the soil.

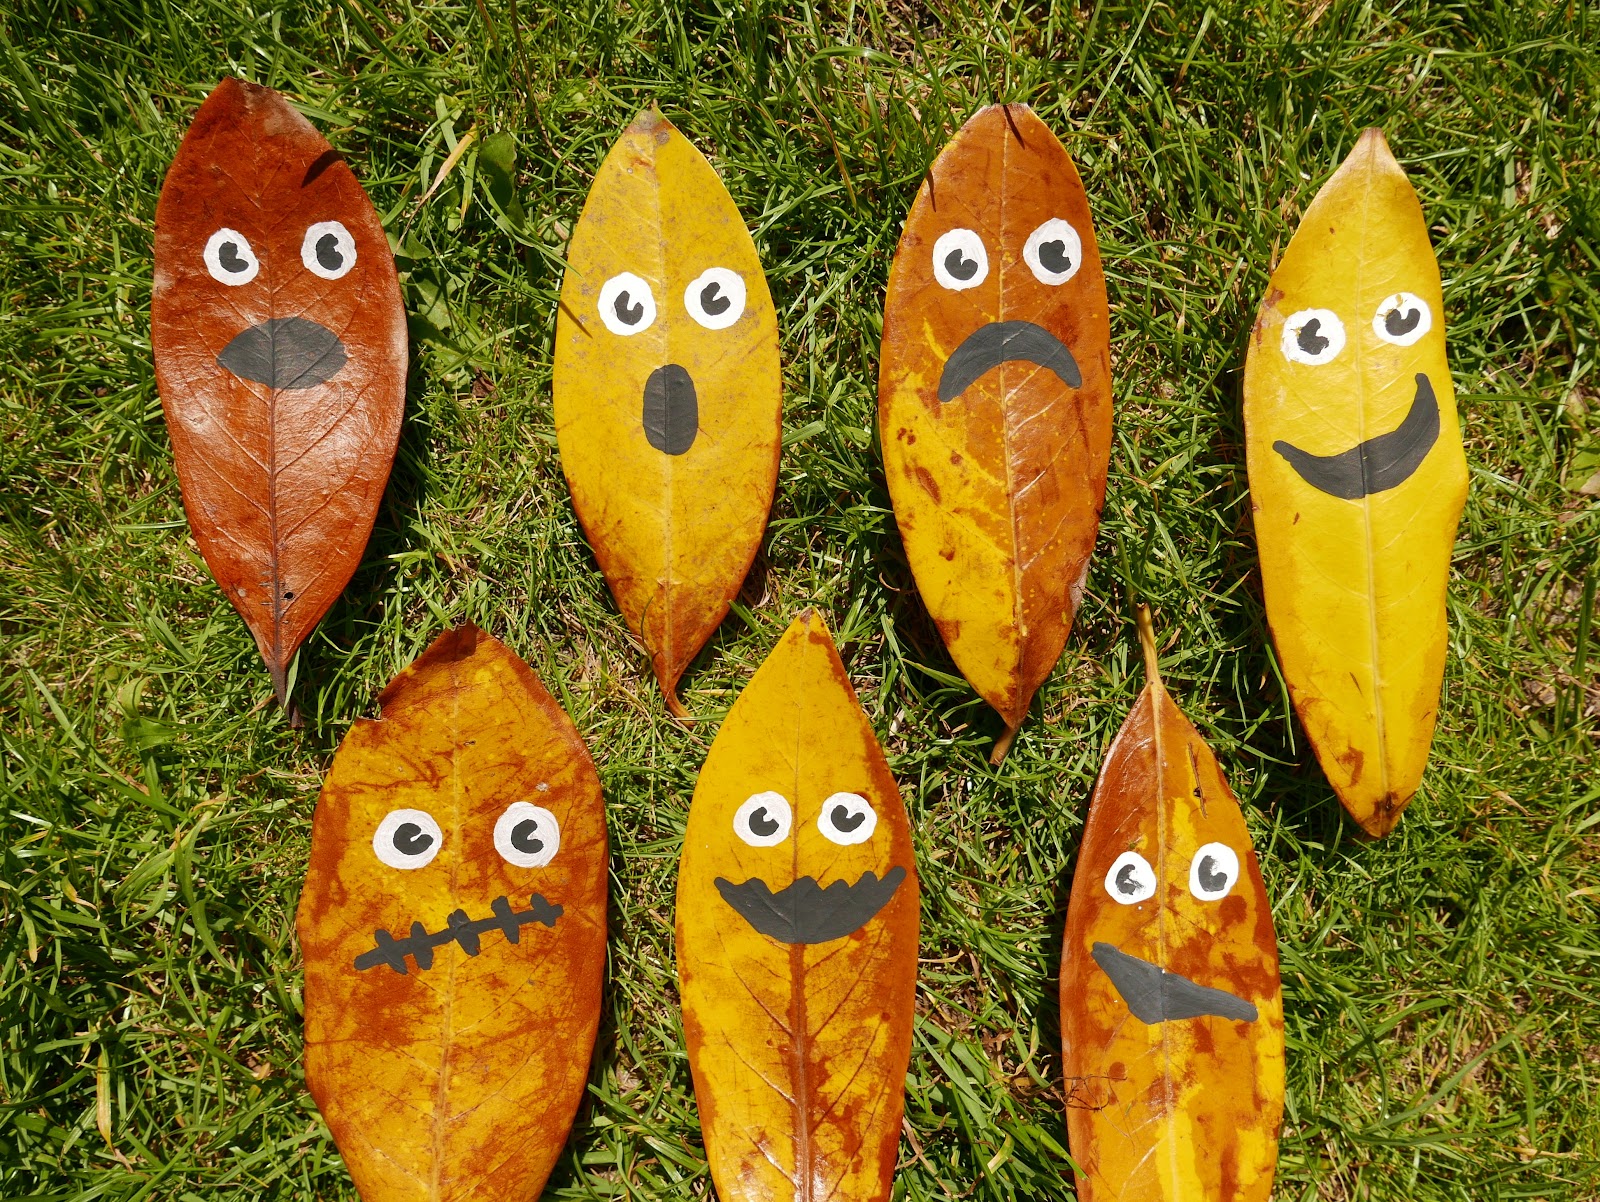
9. LEAF CHARACTERS

A simple activity but fun activity where you turn fallen leaves into funny or interesting characters by giving them faces and different expressions using pen or paint. The children will love decorating the leaves and role playing with them afterwards. It’s also a a great opportunity to talk about emotions with children of all ages.
IMG_20200624_195457_851

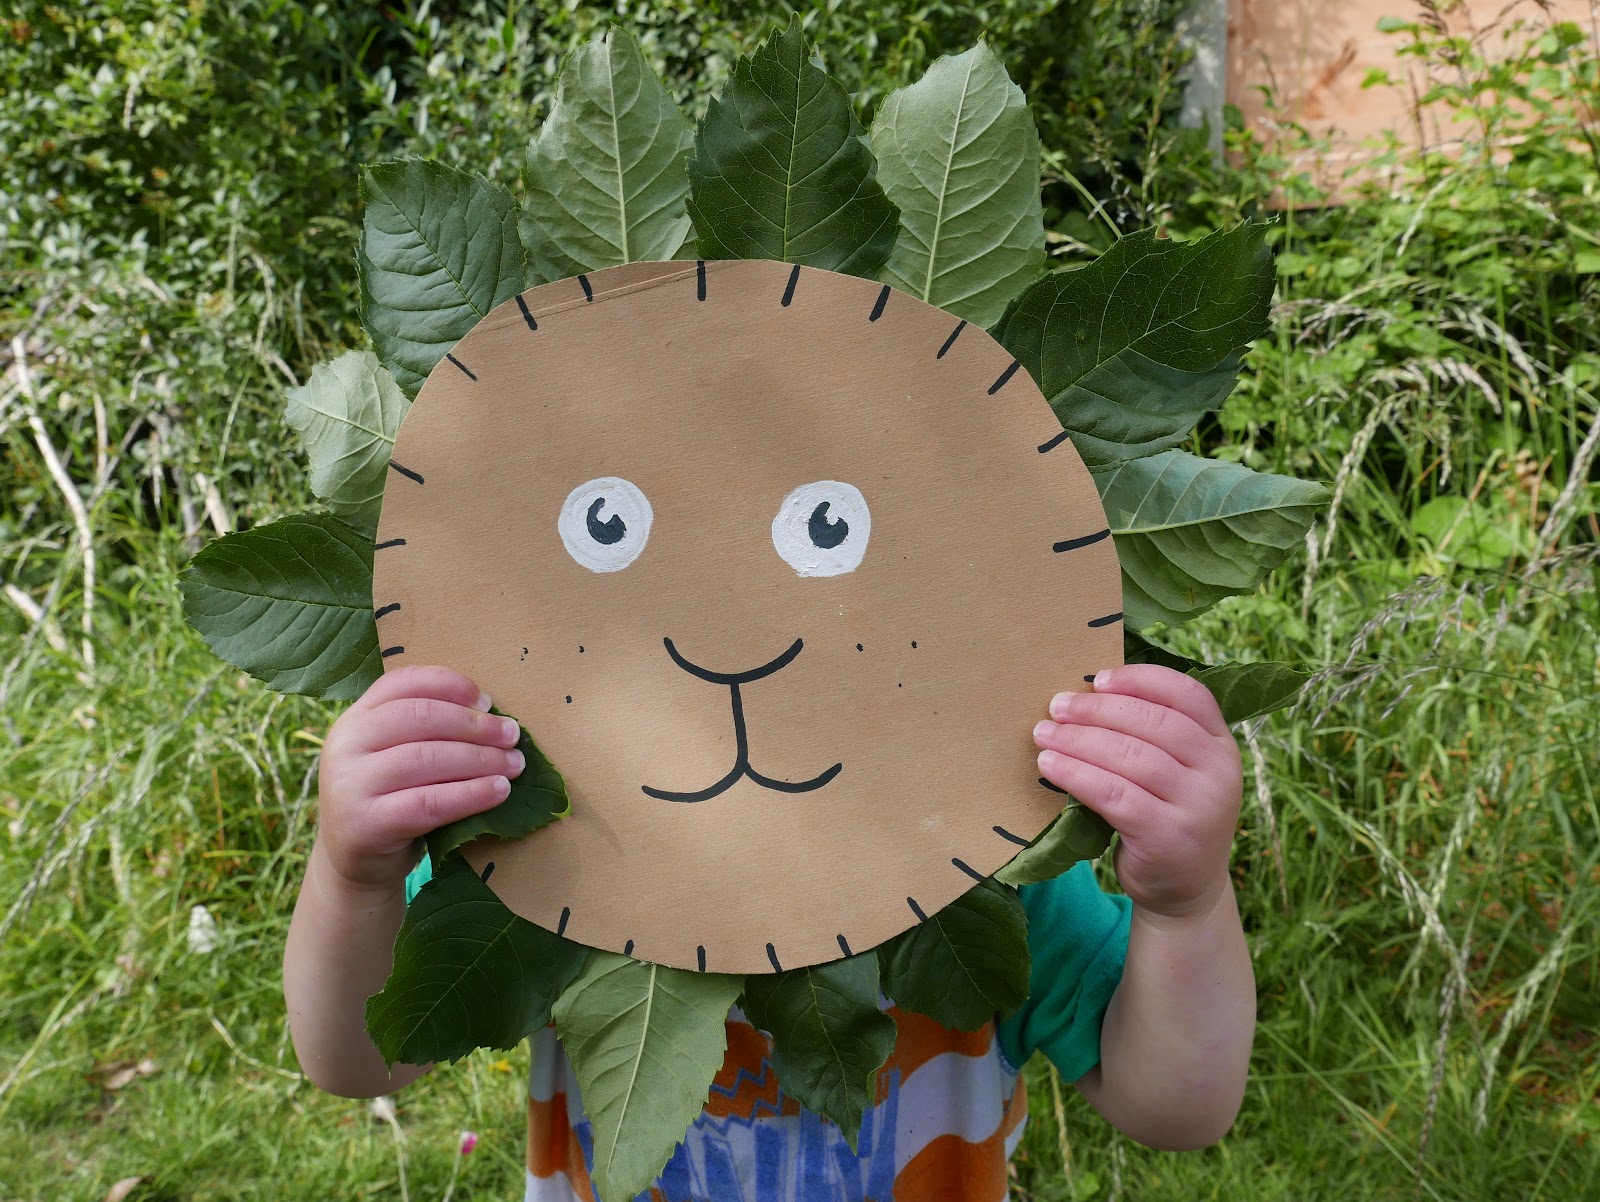
10. LION LEAF MASK

All you need to make a leaf lion mask is some recycled cardboard, double sided tape or glue and some leaves. Simply cut a circular shape out of the cardboard and draw on a simple lion face. Then stick or glue leaves all around the circle to form a leafy mane. The children can then have fun using the mask in role play games or you could use it as a decoration or prop.
IMG_20200623_223829_865

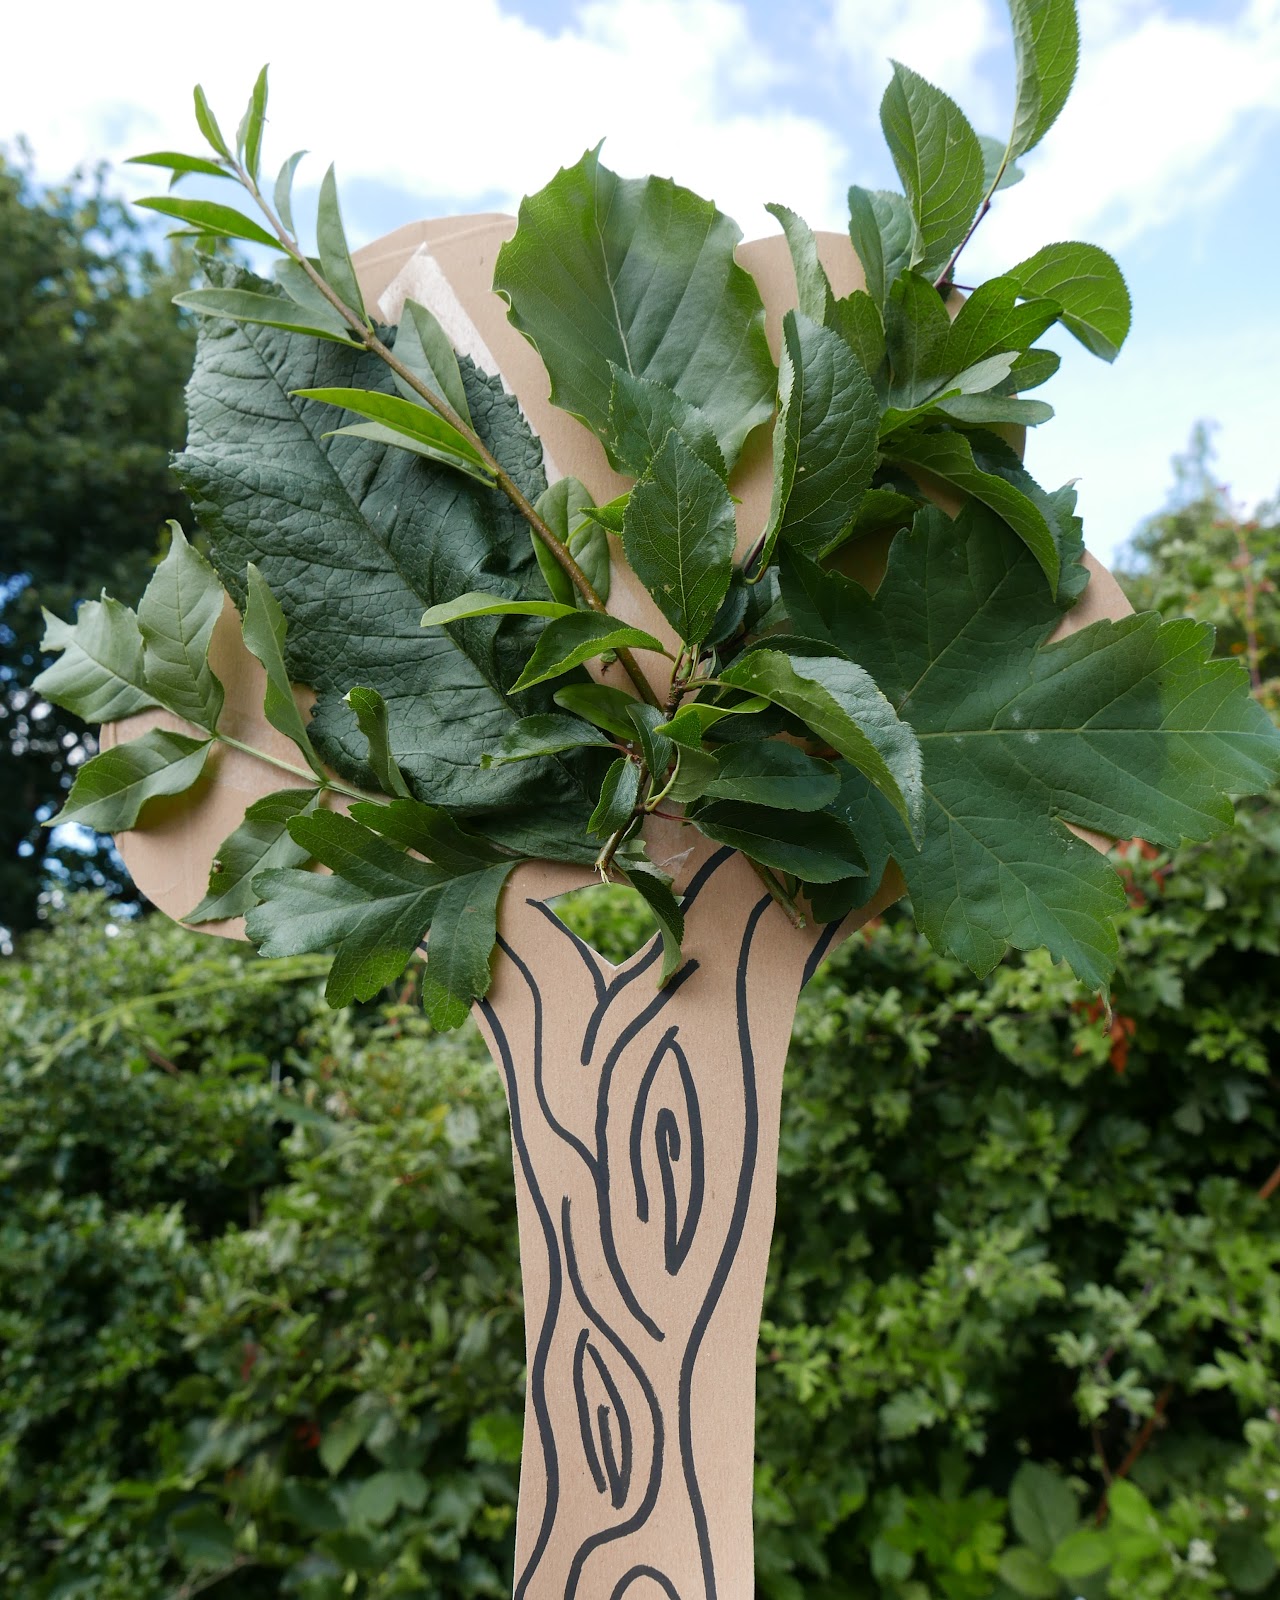
11. TREE COLLAGES

All you need to make a tree collage is some recycled cardboard, double sided tape or glue and some leaves.  Simply draw or cut a tree shape on or out of the cardboard. Then stick or glue any natural materials you find on a woodland walk like leaves, sticks, stones, grass, plant stems, bark, fallen fruit, nuts, seeds and flowers*. *But pretty please don’t pick any wild flowers, only collect ones you have grown yourself or fallen ones you find on the floor.
IMG_20200623_223856_629

12. DEN BUILDING

A childhood favorite and a fantastic way to develop problem solving, communication, teamwork and fine motor skills in children of all ages. All you need for this is some long tree branches, but you could also use old blankets or sheets to turn your den into a fort as well.
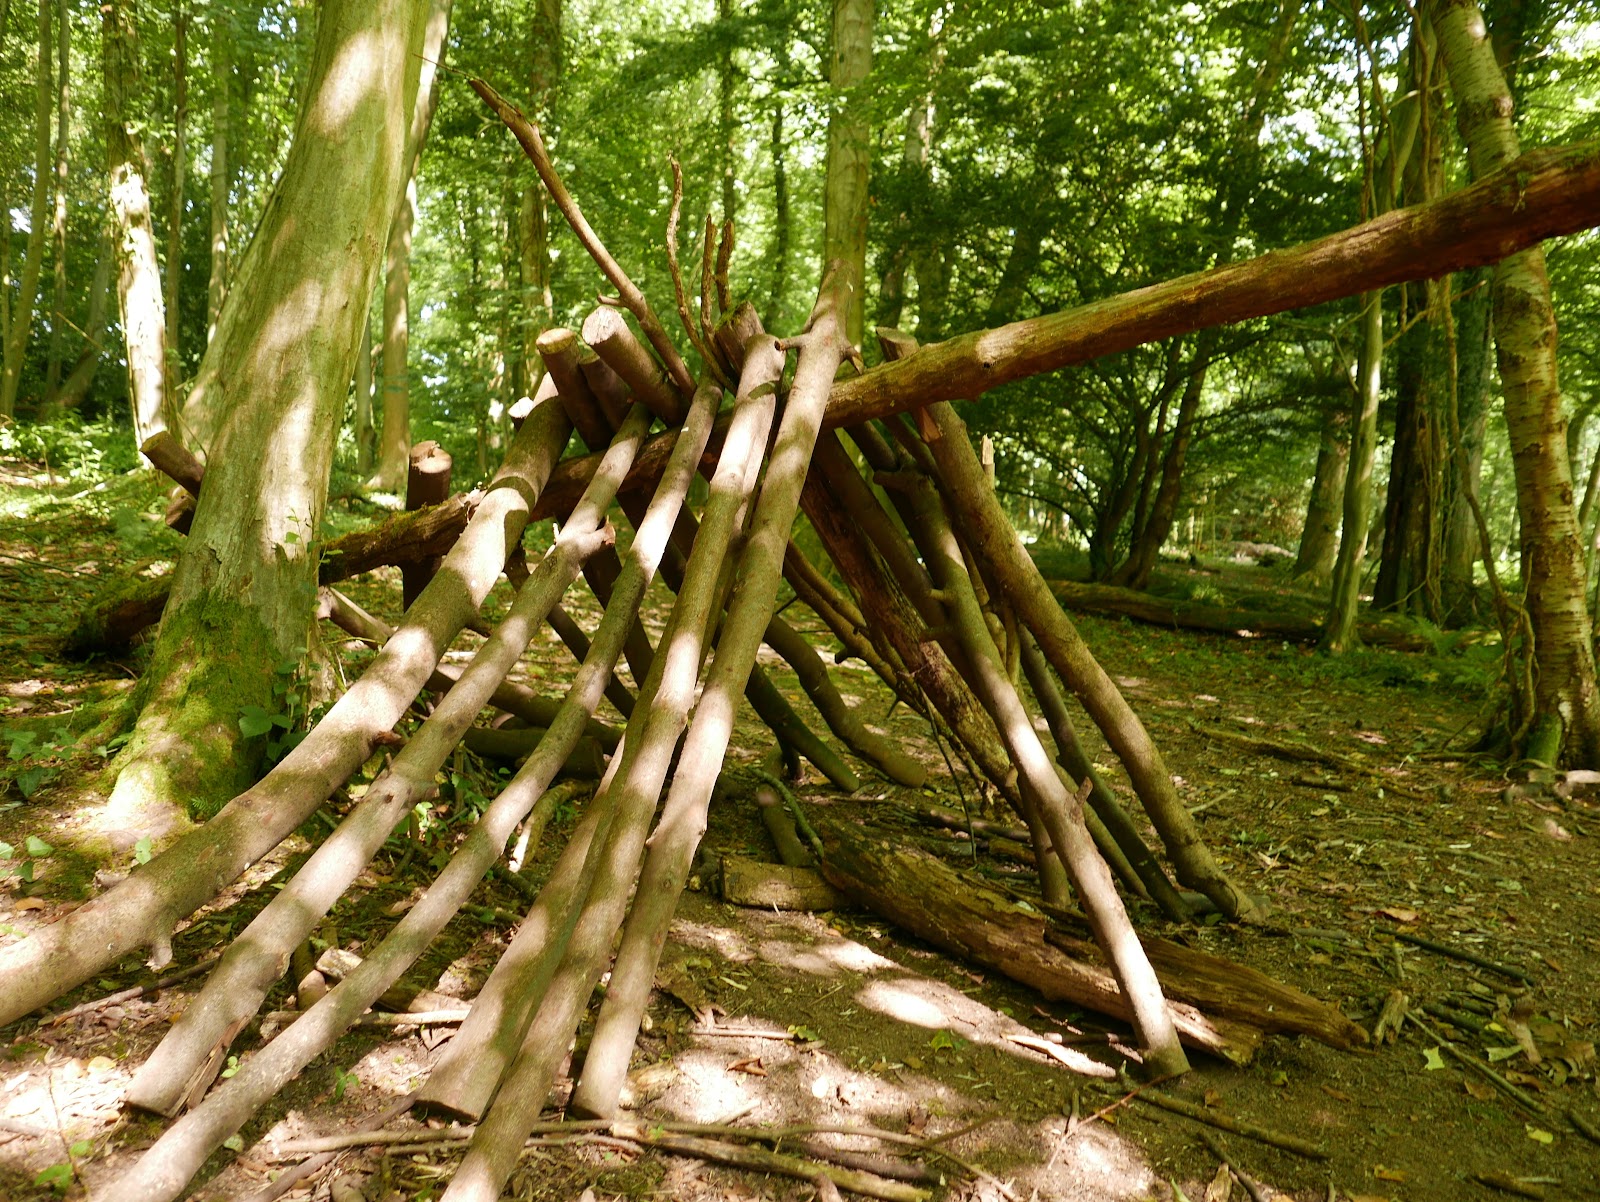
IMG_20200624_195657_448

When they have finished building their dens the children can then enjoy camping out in them and enjoy role play and pretend play. How about making a pretend campfire to go with then using sticks and twigs. (just don’t actually set light to it and remember to take the campfire apart when you are done so no one else is tempted to set fire to it)
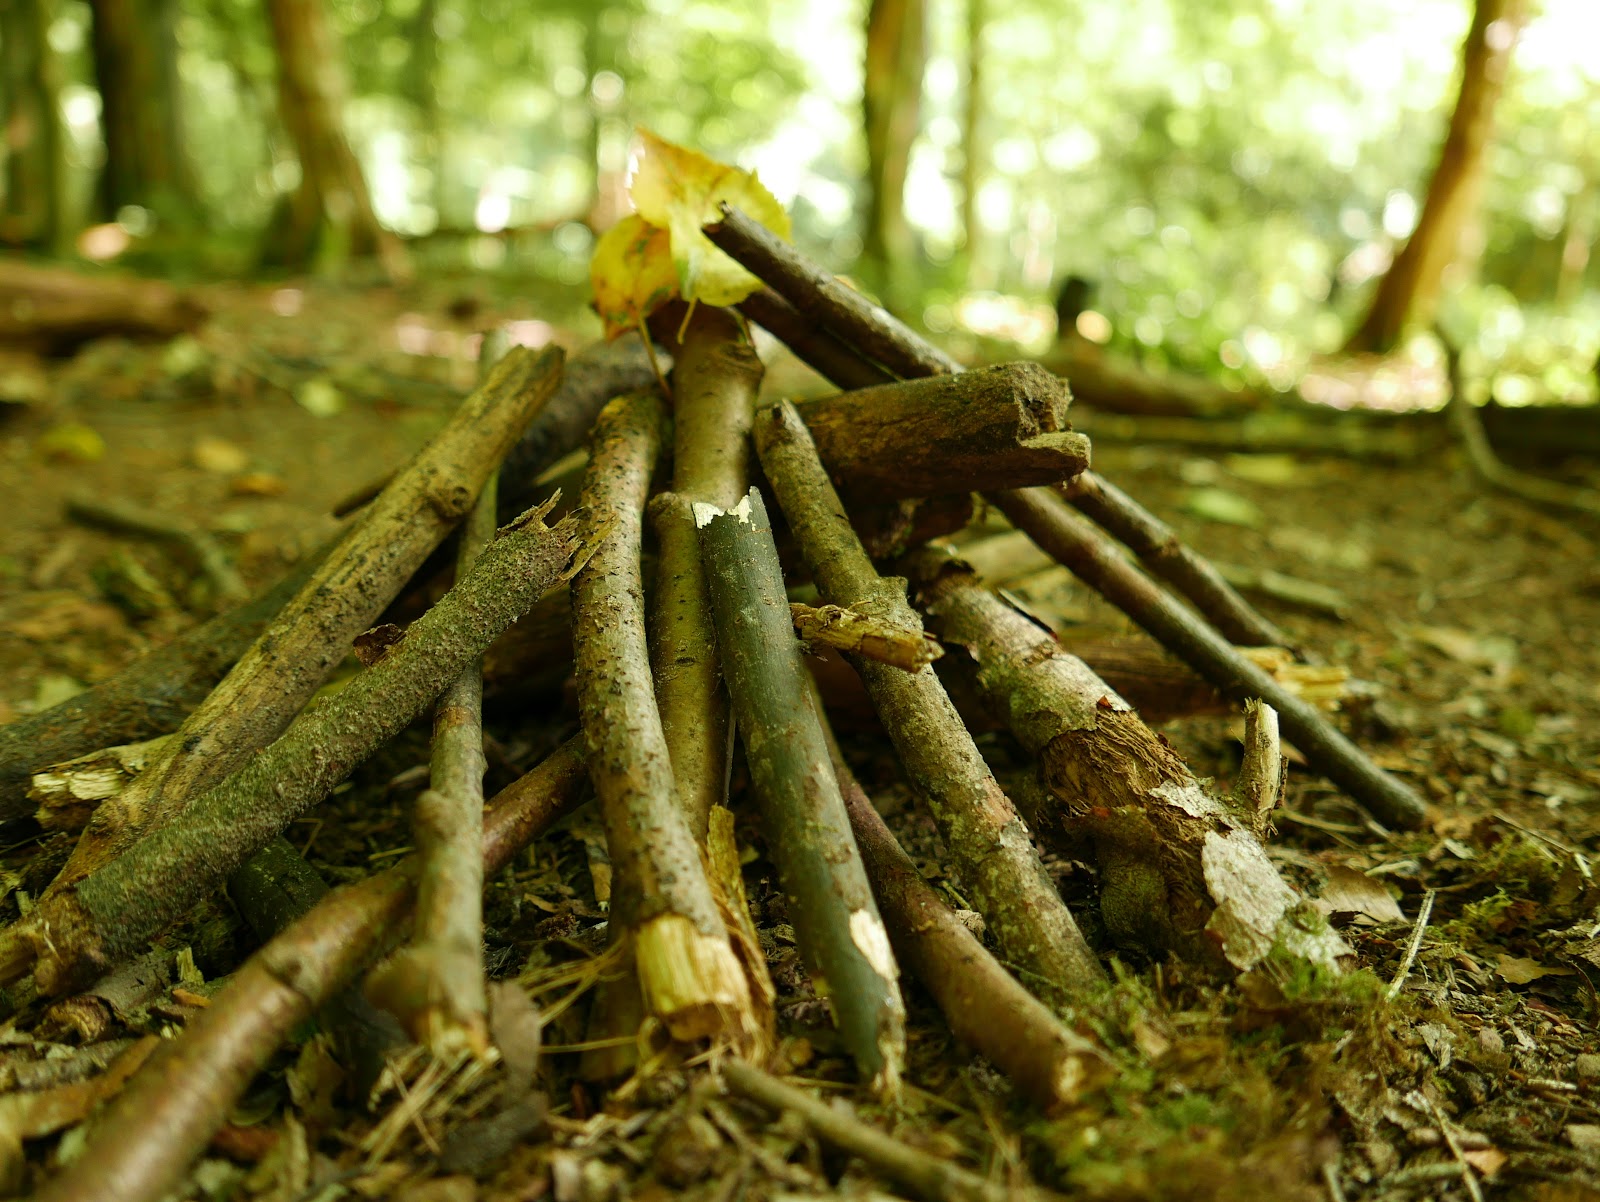
IMG_20200624_194646_424

13. LOOK FOR WOODLAND WILDFLOWERS

Looking for woodland wildflowers is a simple but fun activity for children of all ages and abilities. All you need to do is explore the woodland and see how many wildflowers you can find. You could even print out or download a handy photo guide to take with you. (The woodland trust also has a great photo guide to woodland flowers here.) Its a wonderful way to learn about different types of wildflowers and you might be surprised to see how many varieties there are when you take the time to look closely.
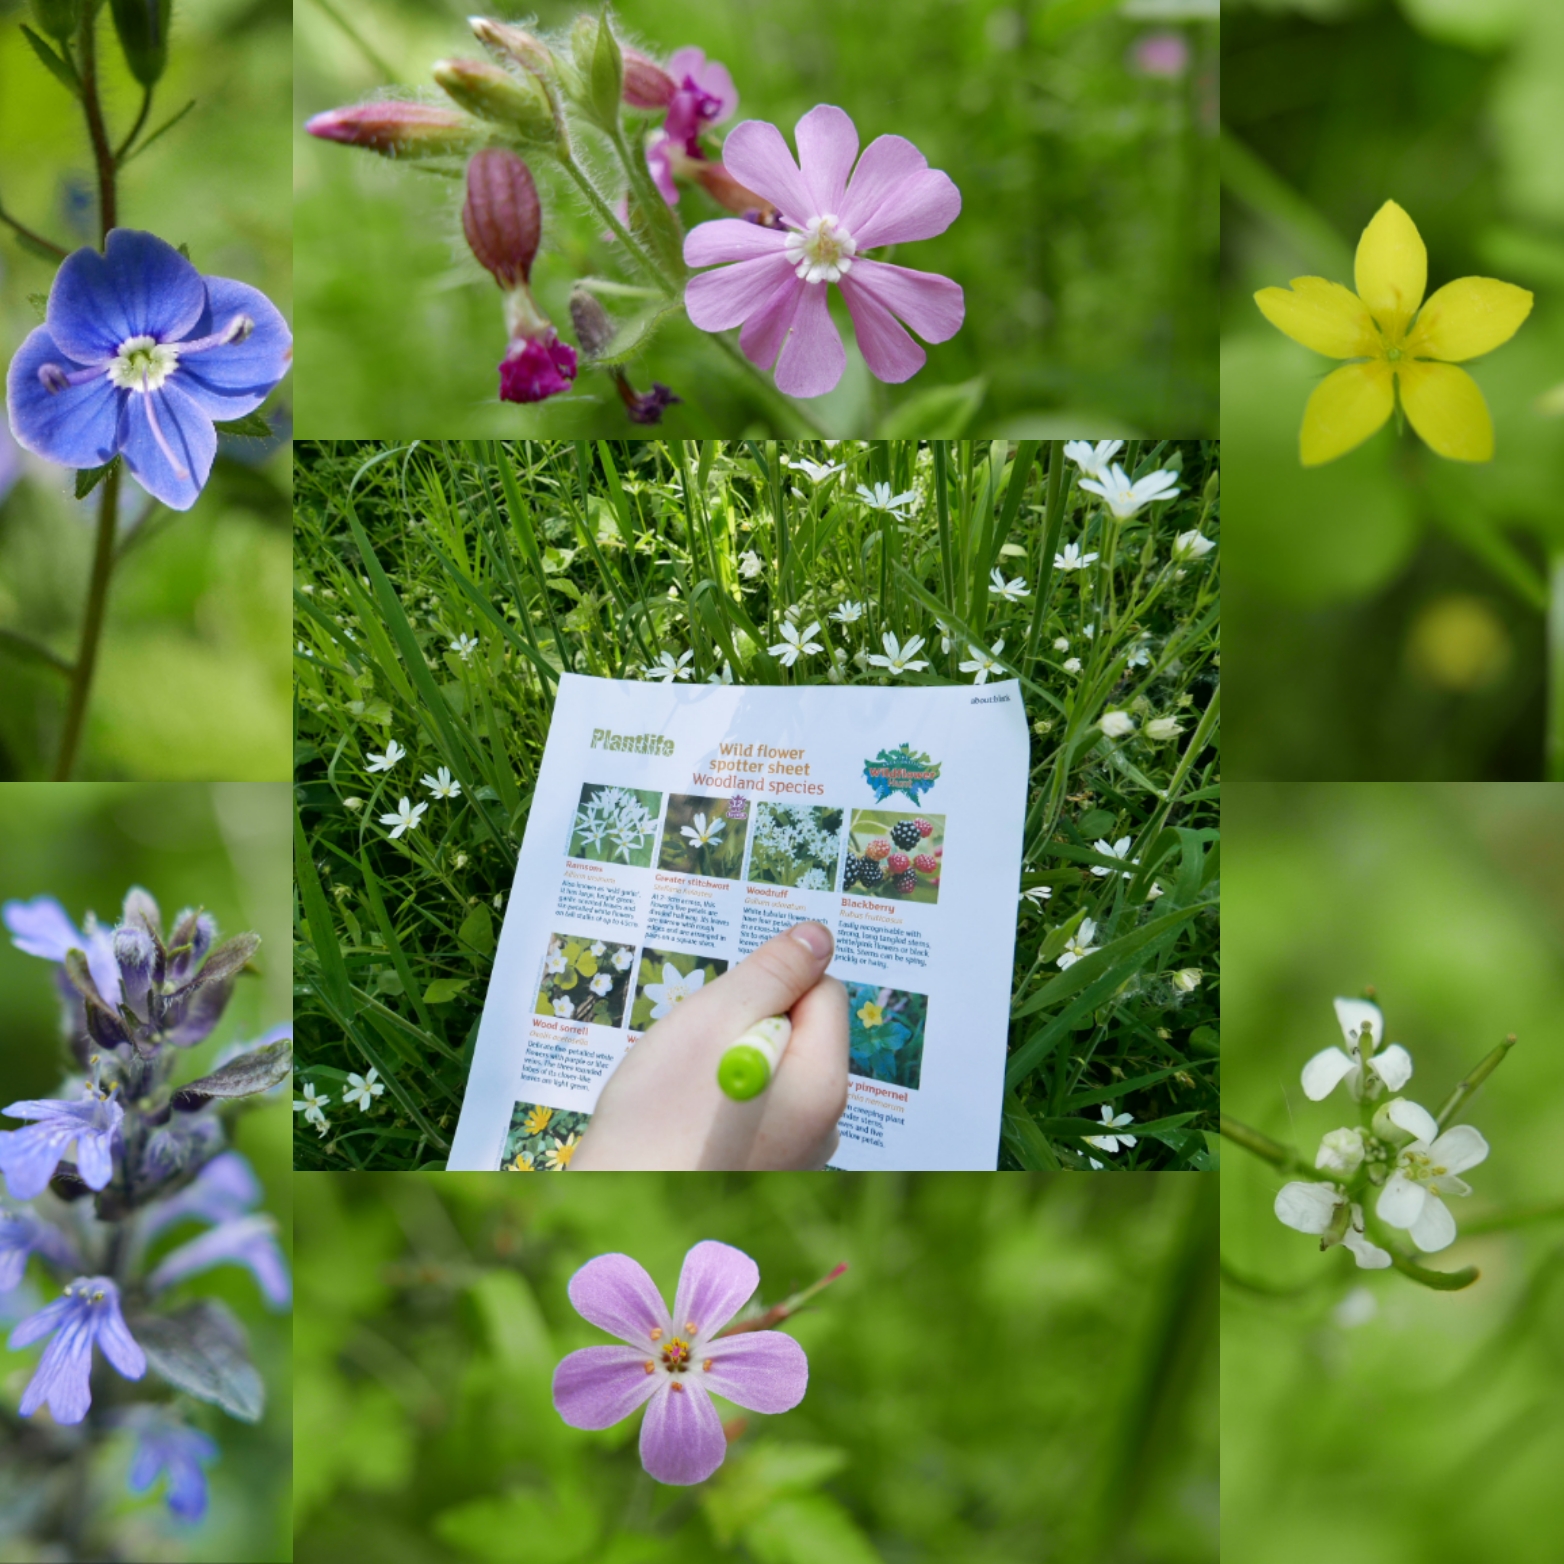
IMG_20210603_202753

14. TAKE PART IN CITIZEN SCIENCE

Citizen science is when members of the public work together to gather (or analyze) data that helps with scientific understanding or research. It’s a great way to help with conservation by expanding knowledge and understanding of the wildlife in your local areas. You might be surprised to find even the most urban spaces are teeming with wildlife when you take the time to look closely. By taking part you are also helping to monitor moth populations, track trends in species and produce data on environmental changes. This information will hopefully help future conservation efforts. You can easily record any wildlife or plants you spot in woodlands to Nature’s Calendar or iRecord.
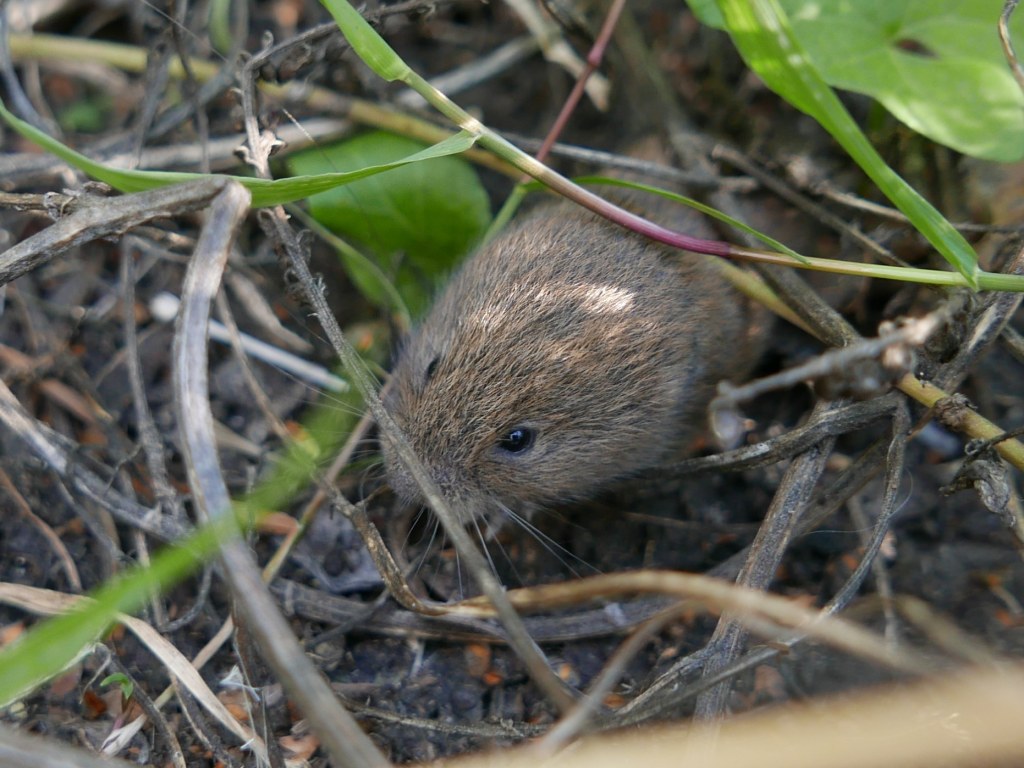
15. LEAF BOATS OR RAFTS

Making leaf boats and rafts is such a simple and fun activity that encourages creativity in children of all ages and helps develop fine motor skills. All you need for this is some leaves and water to sail your boats on. You could use a puddle, pond, stream, river, lake or even just a bowl or bathtub at home.

Safety note: Children should be supervised at all times around open water. Please be aware of the health and safety risks, rules and restrictions of any area you visit.
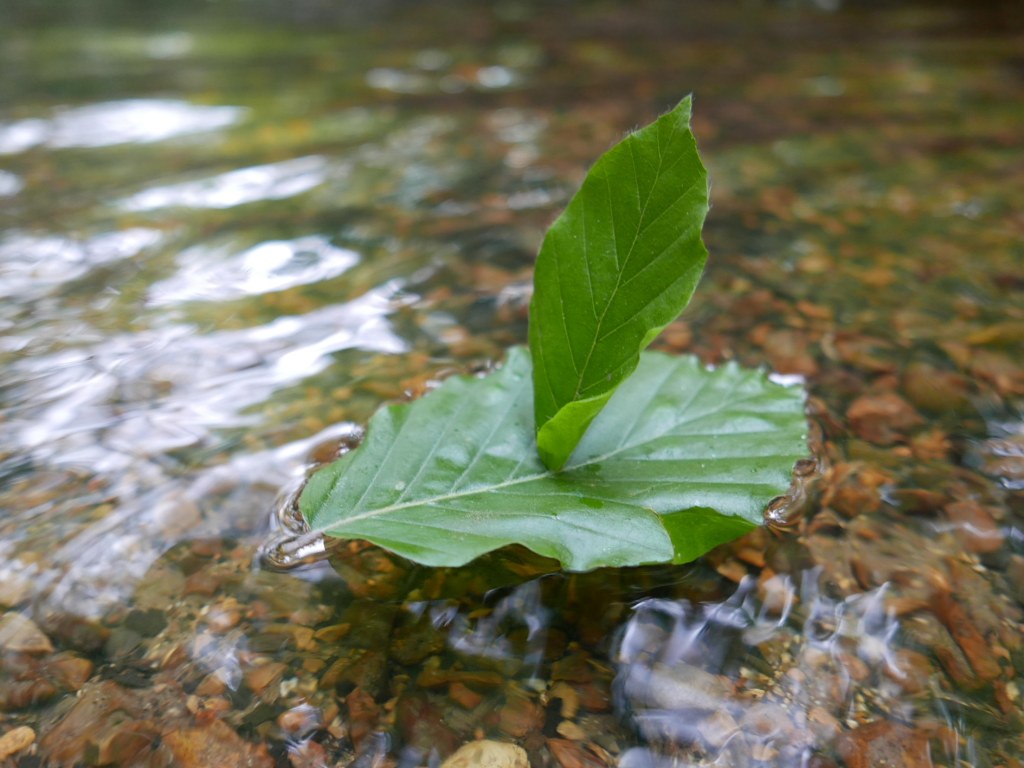
To make a leaf boat you simply need to push the stem of one leaf through the middle of another leaf, then carefully pull a tiny bit of leaf end through so it stands up like a sail, with the leaf underneath serving as the base of the boat.

Now your boat is ready to set sail, just place it on some water and watch it float, it really is that simple! How about making multiple leaf boats and having a boat race. Or you could experiment with pushing the leaf boats across still water by blowing or fanning air onto the sails.
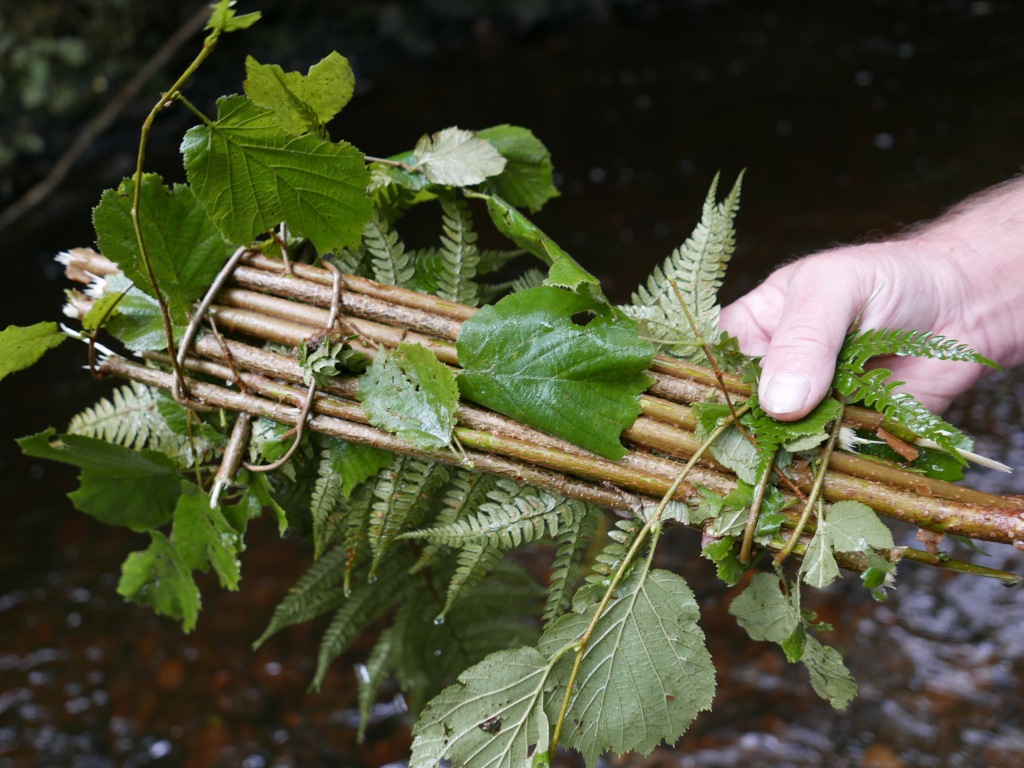
If you fancy more of a challenge you could try making a stick raft to float. All you need is some sticks and some natural materials to bind the sticks together like long grass or ferns. You can experiment with different materials and techniques to see which works the best.

16. RAINBOW STICK MOBILE

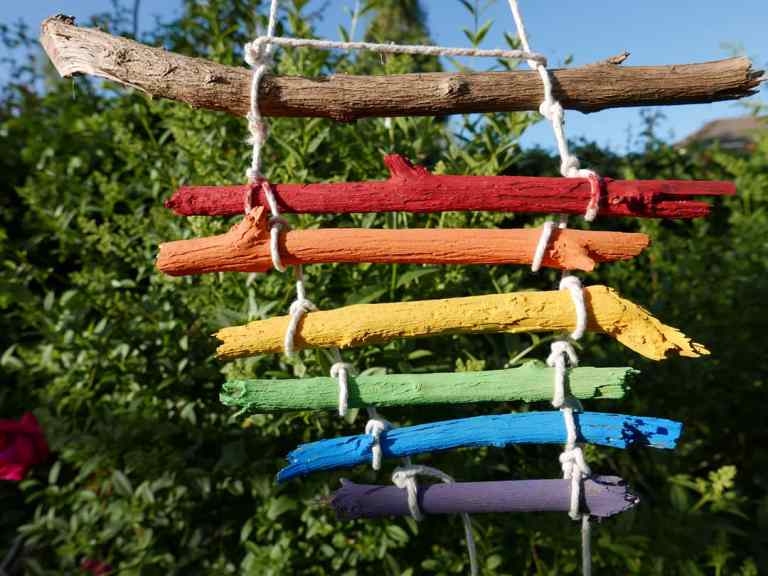
To make a Rainbow stick mobile you simply collect and paint 6-7 sticks in the colors of the rainbow. When they are dry you then tie them together using a piece of string. You could even use ribbon or wool to hang strings of seashells underneath to look like raindrops.
IMG_20200520_072636_723

17. NATURE PAINTING AND PRINTING

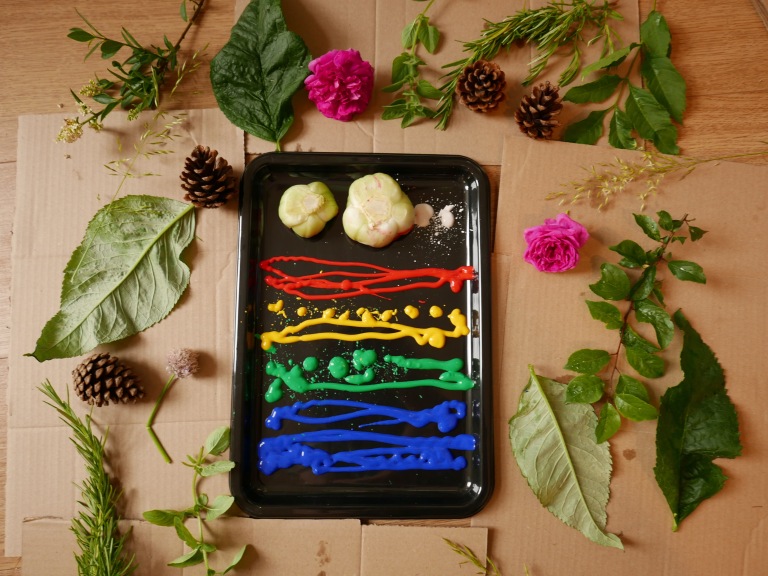
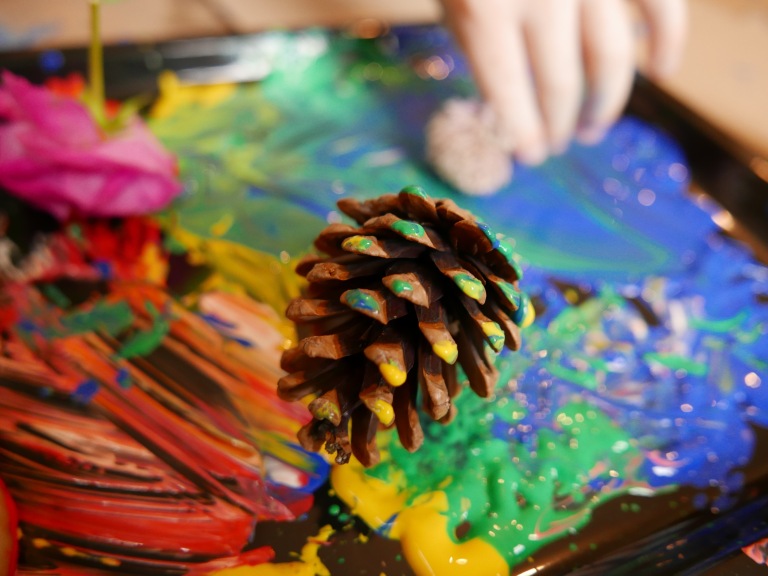
Nature painting and printing is great messy fun and for children of all ages and abilities. All you need is some paint something to paint on as well as any natural materials you might find on a woodland walk, like pine branches, leaves, sticks, stones, pine cones, bark and grass etc. Recycled cardboard is a great environmentally friendly material to use instead of paper. Simply cut out panels from old cardboard boxes and packaging and pour paint onto a tray, bowl or another piece of cardboard.
IMG_20200603_212420_247

The children can then have fun exploring the different patterns, shapes and textures of the materials they have found. Dipping, swirling and rolling them around in the paint and across the cardboard. They could even use the materials as a canvas, painting straight onto the surface of leaves, bark or pine cones.
IMG_20200603_212748_533

18. NATURE COLLAGES

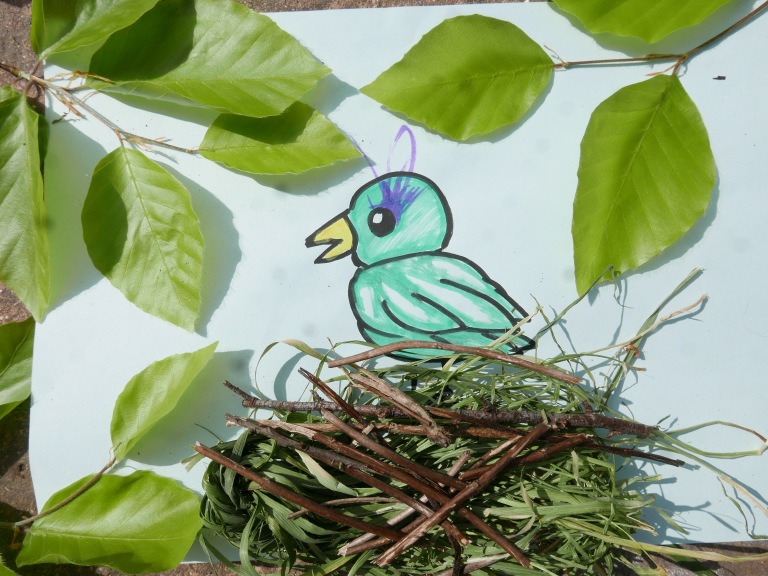
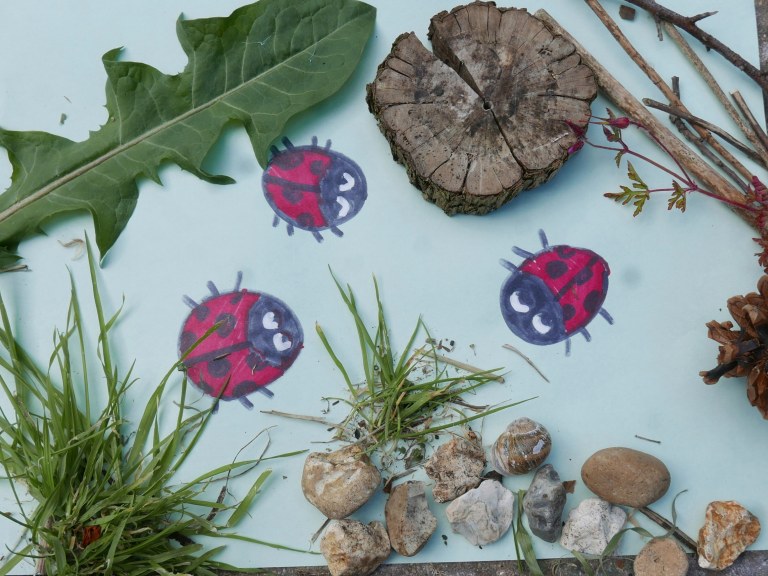
Making nature collages is a fun activity for children of all ages and abilities. It encourages creativity and helps develop fine motor skills. All you need is some paper or recycled cardboard. First you need to draw a simple picture, pattern or even write a message onto the paper. it could be as basic as a stick figure, smiley face or a love heart. Or you could draw all types and kinds of wildlife from birds and bees to tigers and elephants. Or how about drawing fairies, pirates, knights, dragons, robots or cars. The possibilities are as endless as your imagination.
IMG_20200615_212547_106

Next collect as many natural objects as you can find on a woodland walk for your collage. You could use leaves, stones, grass, bark, fallen fruit and flowers. *But pretty please don’t pick any wild flowers, only collect ones you have grown yourself or fallen ones you find on the floor.

Arrange the materials on top of your picture in any way you like. You could make a frame or a pattern on top of the picture. You could create a mini jungle for the Tiger or give a person grass hair and a leaf dress. We drew a simple bird and then made it a nest out of sticks and layered leaves over the top to make it look like it was in a tree, (above) .
IMG_20200615_212510_823

When you have finished you could glue your finished collage to the paper or take photos to print out so you can keep your art and enjoy it for longer. Or how about shaking everything off and starting again to make a completely different picture with different materials.

19. NATURE SCAVENGER & LOOSE PARTS HUNTS

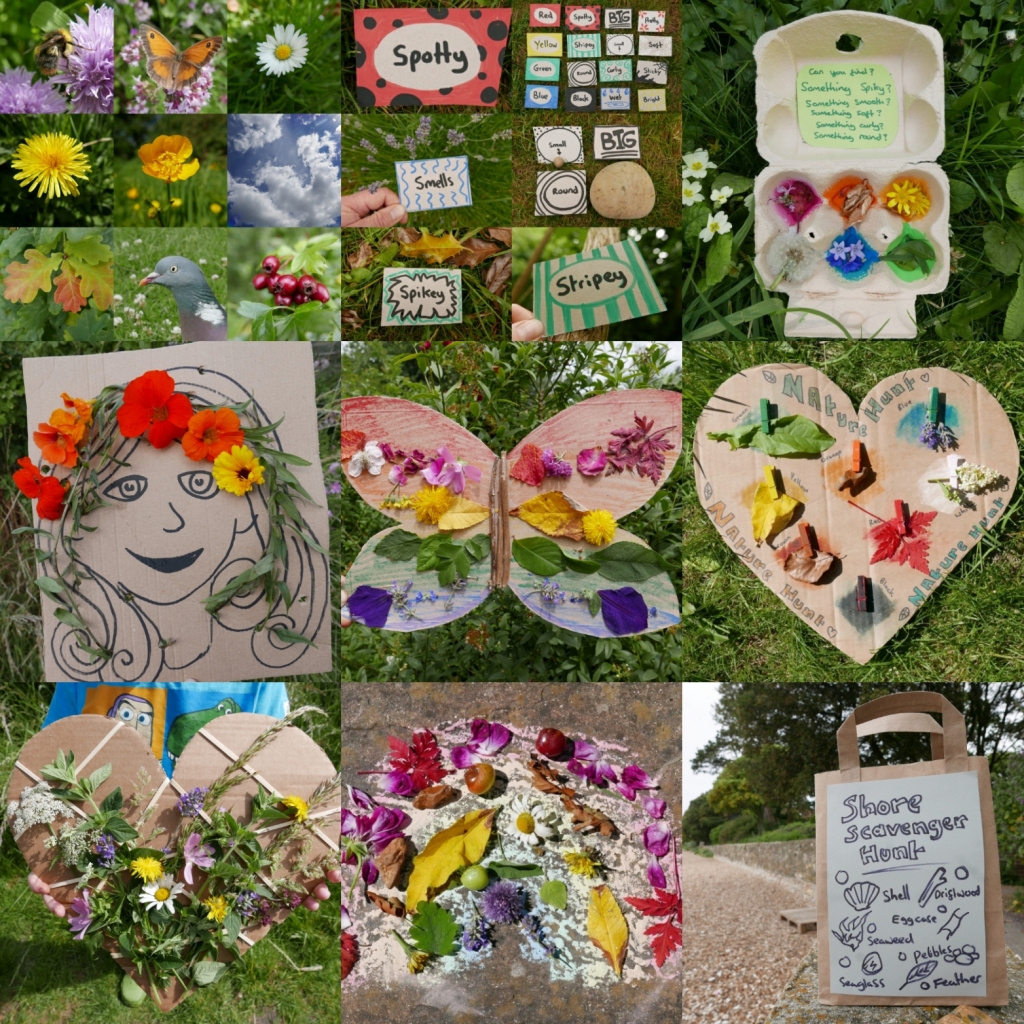
Nature scavenger hunts are a great way to engage children to engage in the natural world around them, as well as stimulating conversation and exploring different textures, colors, shapes, patterns and senses. You can find lots of different nature Scavenger hunt activity ideas here that children of all ages and abilities can enjoy.
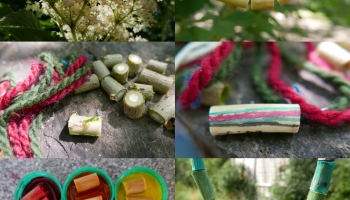
20. ELDER BRANCH BEADS

Elder tree branches have a naturally, soft pithy center which you can remove to create some beautiful, natural wooden beads. Elder beads are brilliant for threading, counting, jewelry making, decorations and loose parts play. Just please be aware of the choking hazard of beads with smaller children. To make Elder beads you will need some fresh cut elder branches, secateurs and metal tent pegs or skewers. First use the secateurs to cut the branches into little chunks of branch to make the beads. You can make the beads as short or long as you like. How about making a range of lengths to play with.
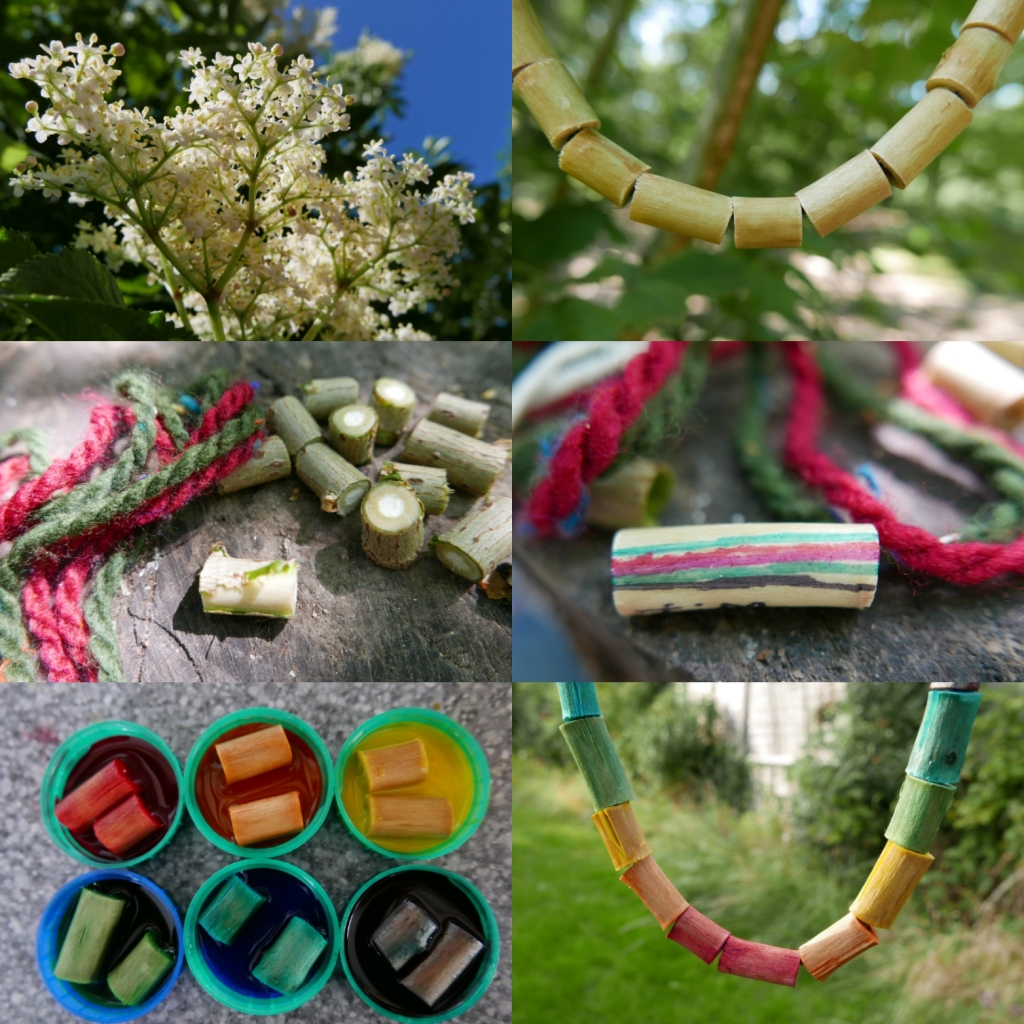
Once you have cut the beads you will then need to choose whether you want to leave the bark on the beads to give them a rough wooden finish or carefully strip the bark off using your fingernails to give the beads a smooth creamy finish. You could even make a mixture of both to create contrasting textures.

Next you need to carefully and firmly push a metal tent peg or skewer through one end of the bead to push the pith out of the center. Make sure you carefully hold the bead as you do this so you don’t accidently push the peg or skewer through into your hand, body or the surrounding surface. It’s easiest to push the pith out when the branches are freshly cut as it's still moist and malleable.
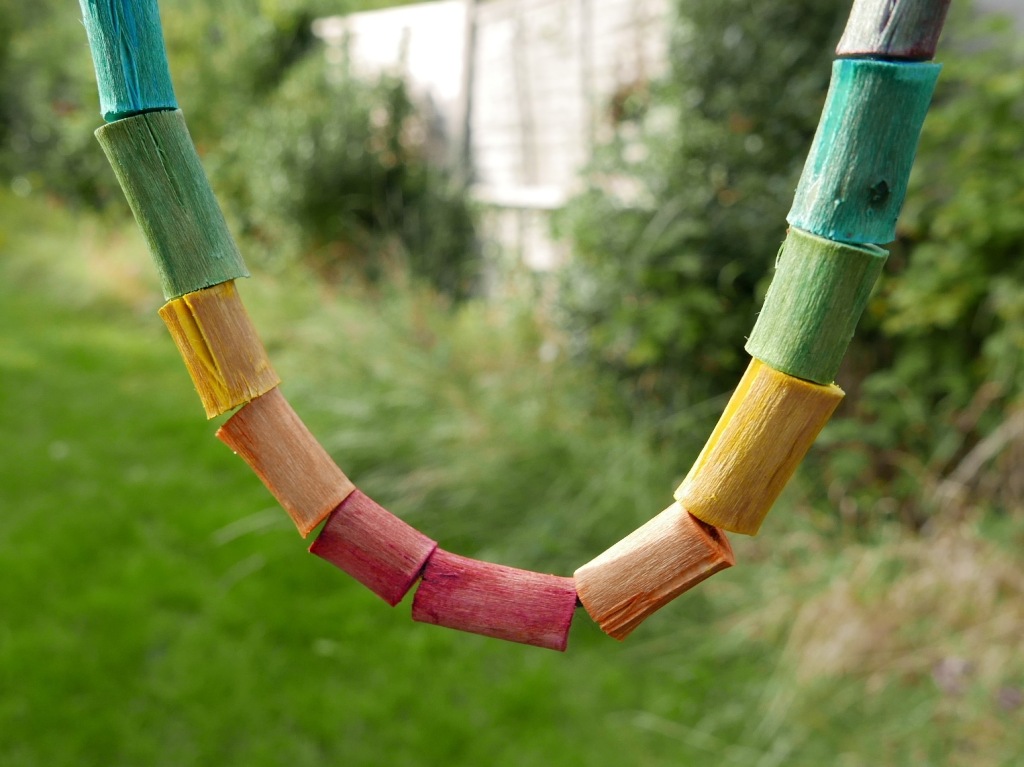
You could also decorate the bead’s using pens, paint, crayons, pencils or collage. It’s fun to draw patterns, colors, pictures and shapes onto them. Or you could write letters and words for spelling and writing games. Or numbers and math symbols on them for number, counting and math games.

You could also dye the beads different colors using botanical dyes, food dyes, wood dyes or fabric dyes. Simply place the dye color of your choice in a small pot or container and then soak the Elder beads in it. Please beware however that dye can stain skin, fabric and furniture. Once your beads are finished you can threading, counting, jewelry making, decorations and loose parts play. Just please be aware of the choking hazard of beads with smaller children.

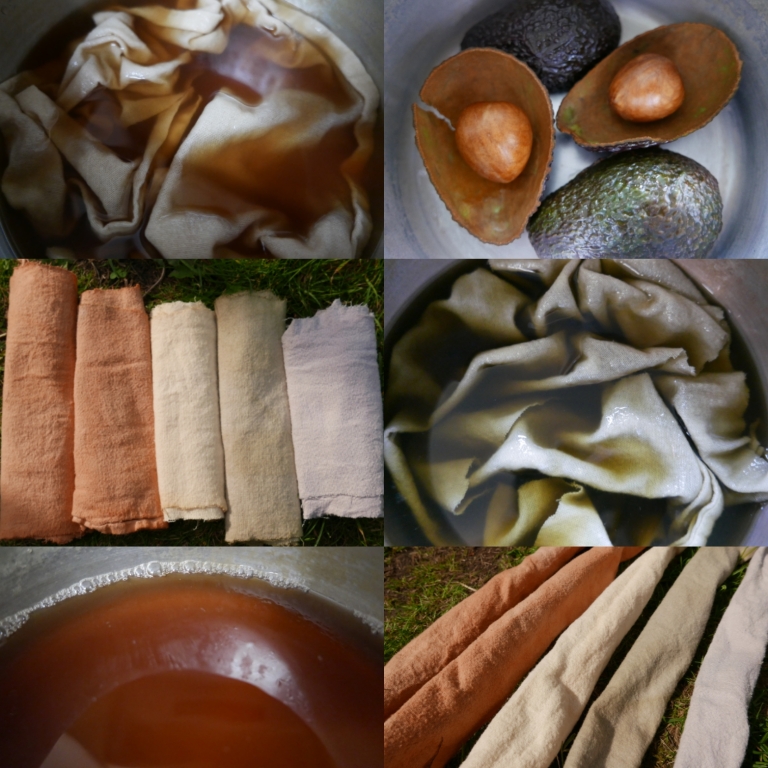
21. BOTANICAL DYES

Botanical dyes have been used throughout history to dye and paint everything from clothes, fabric and wood to buildings, furniture and even human skin. The dyes are made from natural pigments that can be extracted from the leaves, flowers, roots, fruit and seeds of certain types of plants and trees. Pine cones in particular can be used to make a beautiful brown botanical dye. Click here to find full instructions on how to make botanical dyes.
IMG_20200629_203051

22. LEAF POTATO PRINTS

Potato printing is a simple activity for children of ages. All you need is a potato cut in half, a bit of inspiration and some paint to get started. Leaf potato prints are fun and very easy to do. You just need to cut a leaf shape into potato halves. You can easily do this by cutting one end into a triangular point. Then carefully cut a line down the center of the potato half with two or three lines branching out on either side.
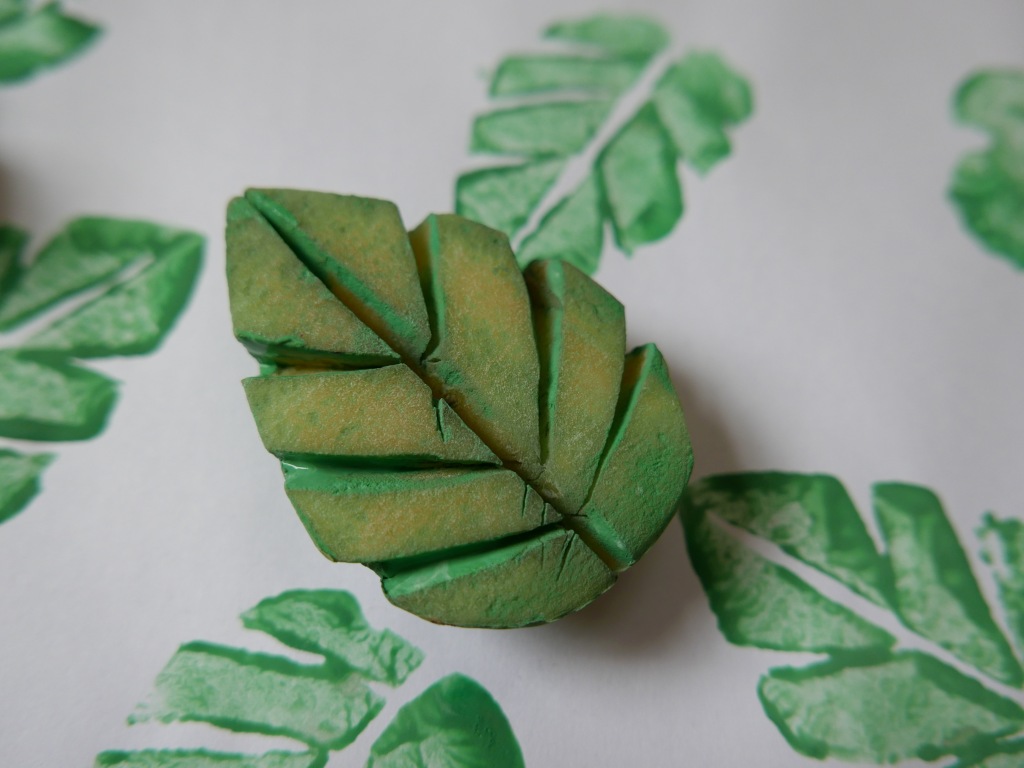
You can make your leaf prints reflect the changing color of the seasons by laying different stripes of coloured paint onto a tray. So when the potato is pressed into the tray it picks up more than one color of paint.
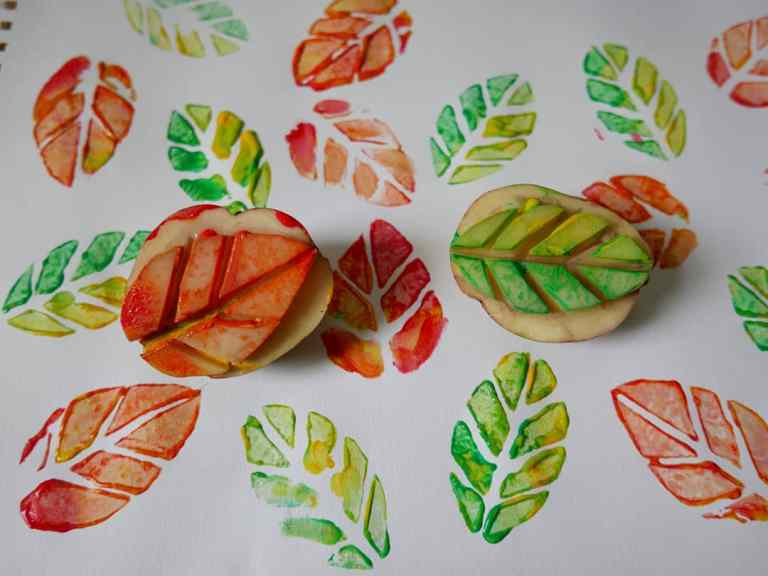
IMG_20191113_194055_711

This is a good opportunity to talk about how and why leaves change colors with the seasons. For example, leaves are green because of the chlorophyll in the cells which is busy turning sunlight into food. In autumn the leaves stop producing chlorophyll so the color changes from green through to yellow, orange, red and brown as the chlorophyll disappears.
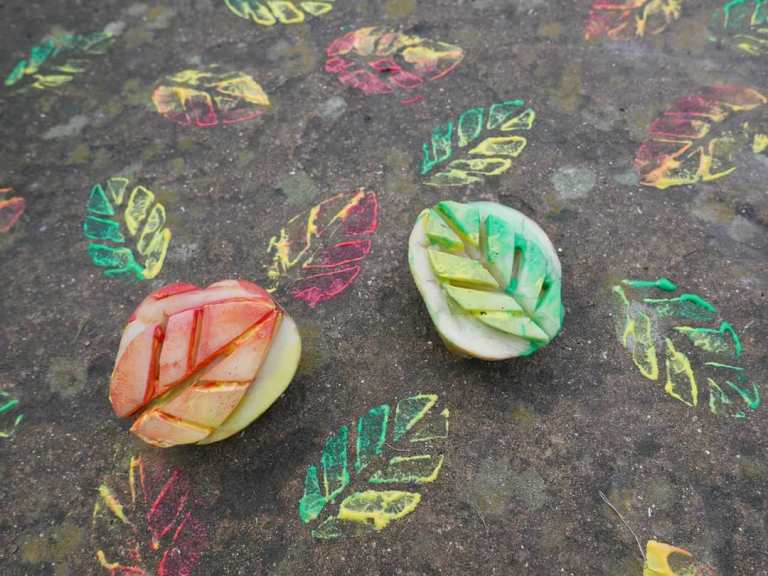
IMG_20191113_194224_338

It is also fun to experiment printing on different types of surfaces and textures from paper to fabric, foil and wood. And as long as you use non toxic paint you can even print on outdoor surfaces like paths, trees and leaves. Printing onto fabric is fun and easy to do. If you use special fabric paint you could use your potato prints to decorate old t-shirts, bags and sheets. Just make sure you put a layer of old cardboard under the fabric as the paint can often seep through onto the surface below.

23. PINE CONE POTATO PRINTS

If you're feeling adventurous you can even make pine cone prints using potato prints. There are a lot more fiddly to make than our usual Seasonal potato print ideas but if you have the time and patience the resulting prints look great .
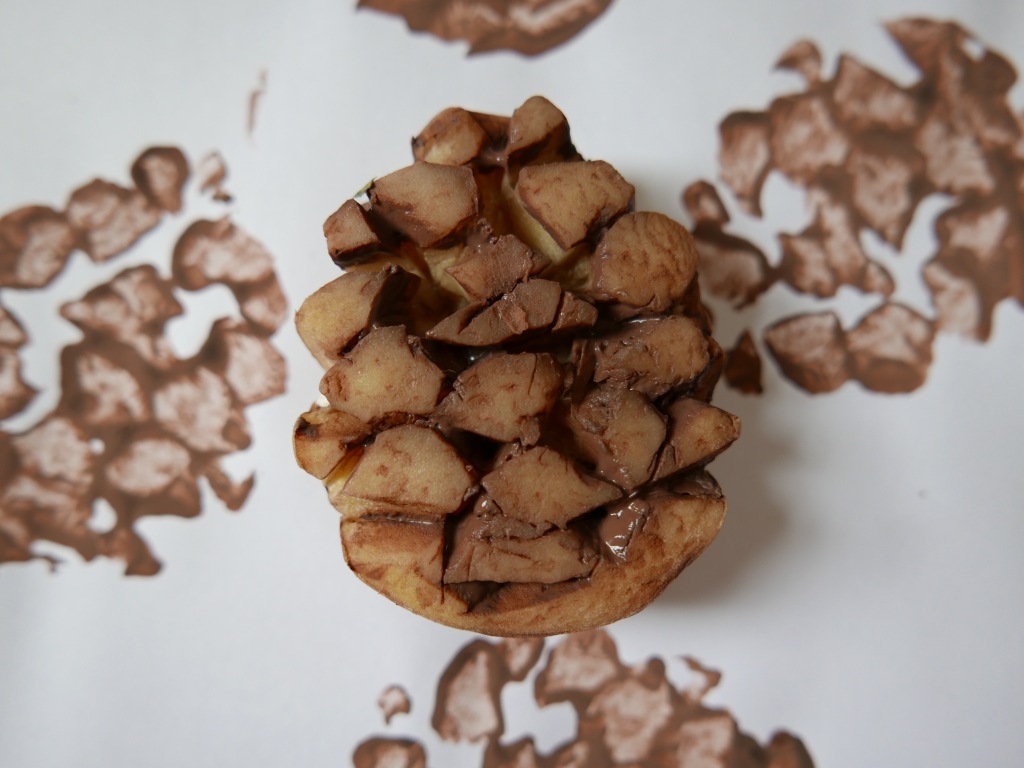
Carefully with a sharp knife cut a series of small triangles along the edge of the potato half. Then cut a few more triangles into the middle and carefully cut groves to join the triangles and form the bobbly pine cone scales. Then simply dip the potato half in paint and enjoy printing away.

OR Use a pine cone 
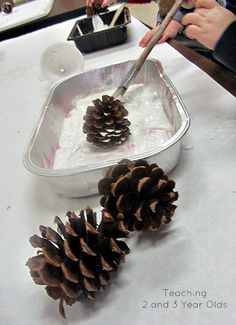

24. PLANT A TREE FROM SEED

Tree seeds take a little patience to grow but it is incredibly rewarding when you manage to grow a little seed into a tree sapling. Here are some types of tree seeds you can collect to plant and grow.

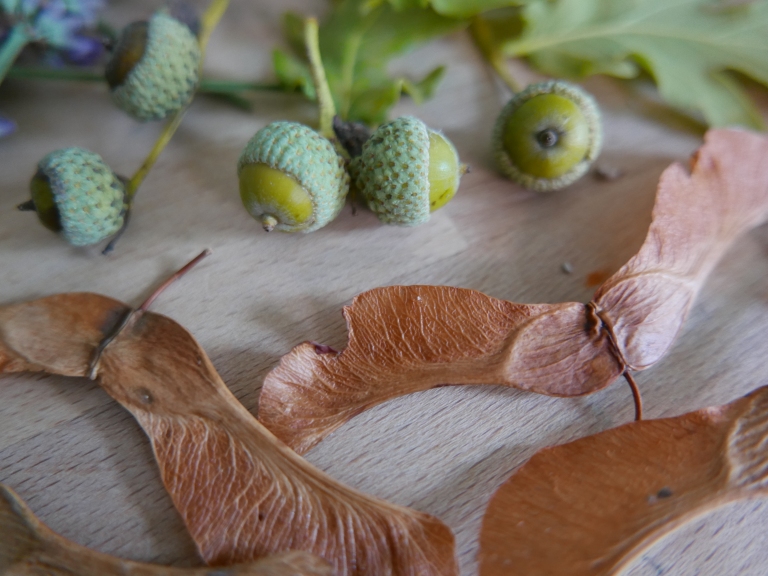
Sycamore seeds – These little helicopter type seeds are great fun to spin and watch twirl as they drop. They also grow really easily into little tree shoots. We often find them out and about growing in unusual places. With a little care and attention you might be able to grow your own sycamore tree sapling.
3260661.jpg

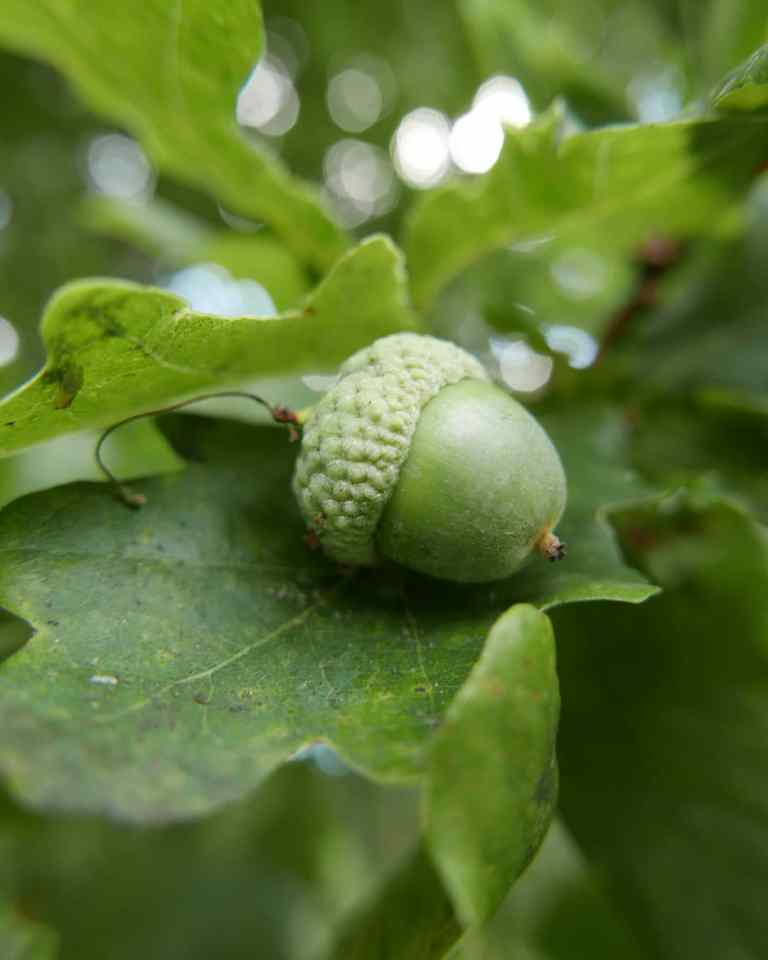
Acorns – We have had a lot of success growing oak saplings from acorns and they are very easy to collect and plant, you simply pop them straight into a pot of compost or into the ground and then water and wait a few months to see the first shoots of the sapling beginning to emerge. If you ever find an acorn that looks deformed then this is most likely an oak gall created by a wasp. Some wasps lay their larvae in acorns which causes them to deform as they grow.
IMG_20180804_200248_437

Apples, Pears and Plums – You can pick fresh apples, pears or plums or pick up bruised fruit that’s fallen to the ground. You just then need to carefully remove the pips/seeds/stones from the centers of the fruit, and then wash and dry them ready for planting to grow as fruit trees.
IMG_20170929_205826_249

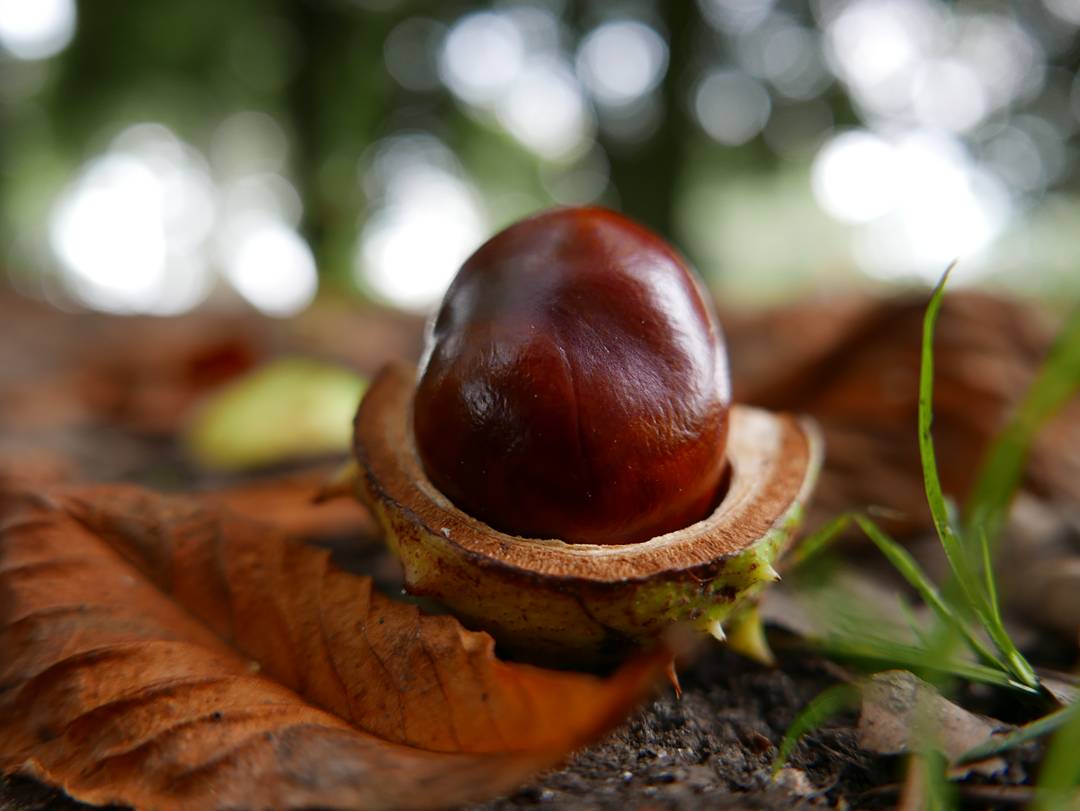
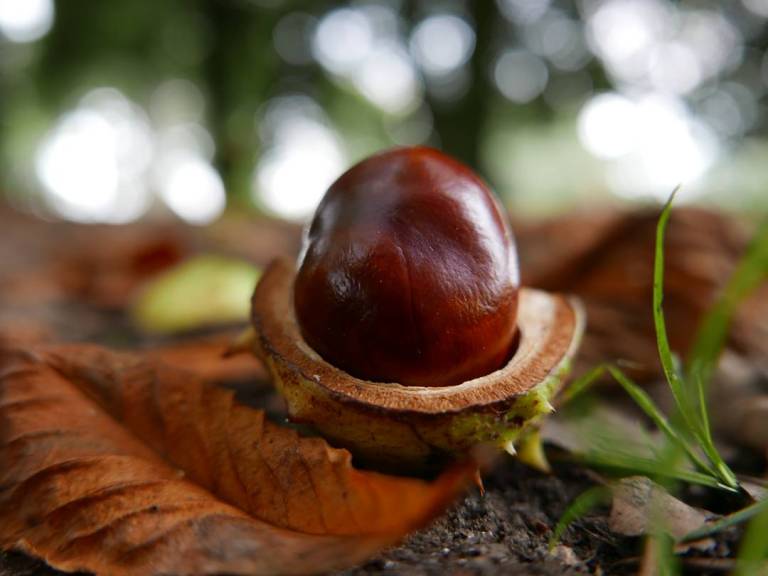
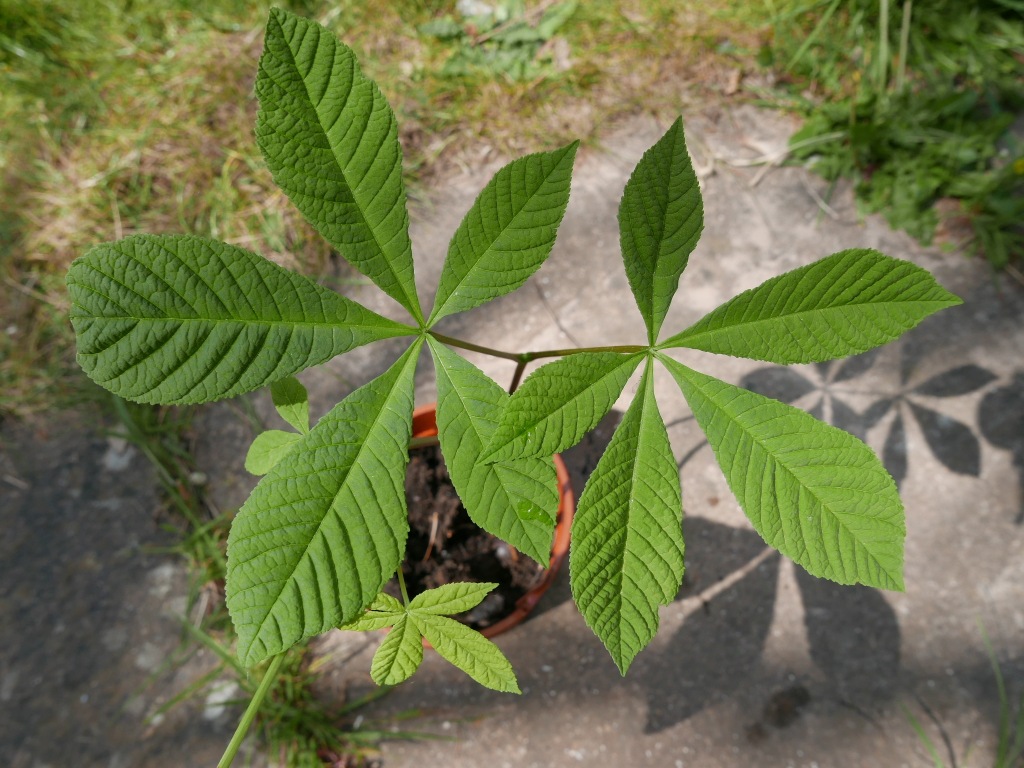
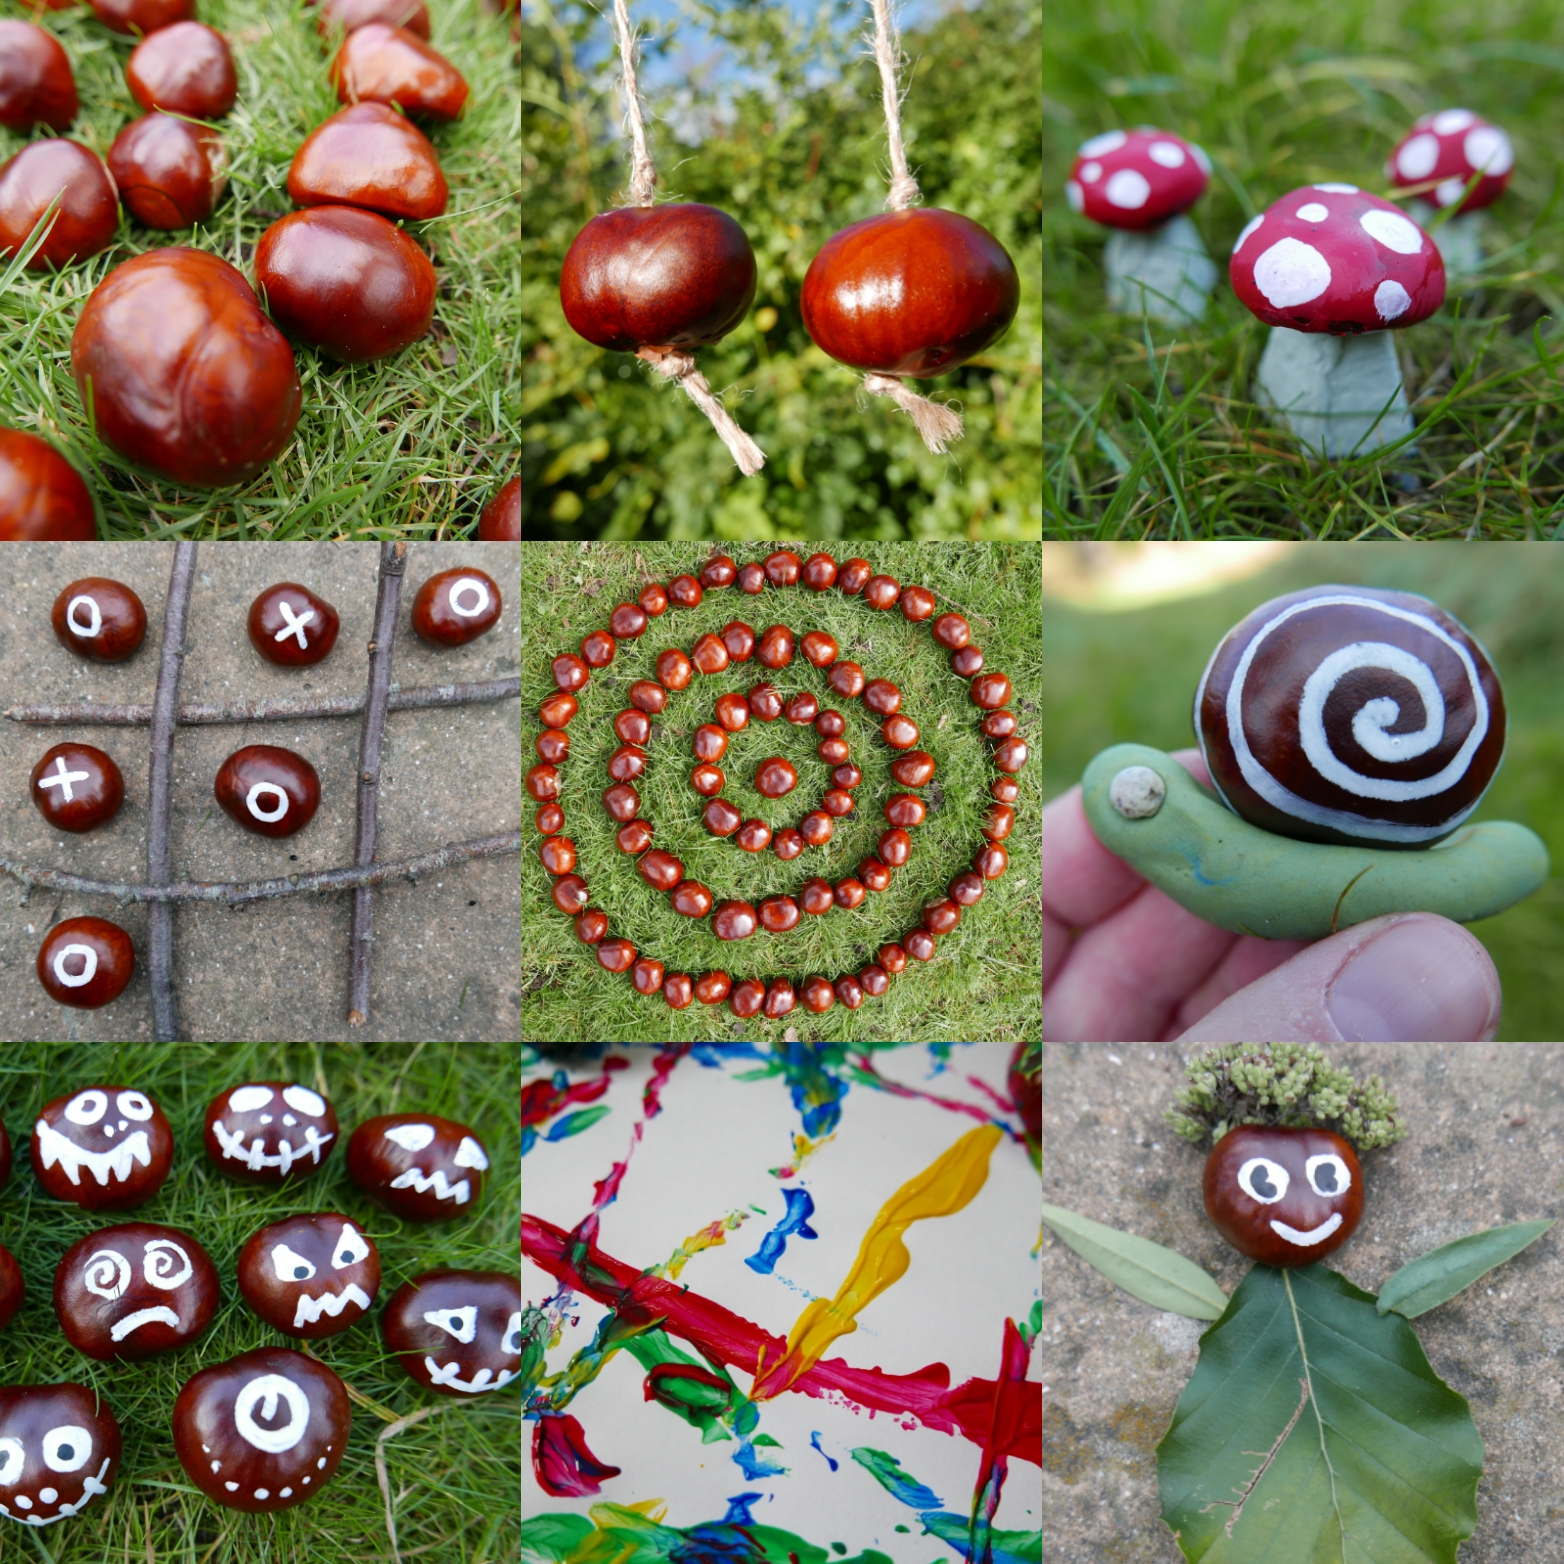
Conkers and Horse chestnuts – Both Conkers and horse chestnuts are protected by a spiky hard casing, so be careful to make sure little hands don’t get prickled when they touch or try to open the cases. The shiny round conkers and horse chestnuts inside are great for playing games with or threading onto string. You can also plant them to grow saplings.
25. EXPLORE A WOODLAND ACTIVITY TRAIL

Many woodlands and forests now have activity or adventure trails that you can find and follow. Some are free and up all year and others are seasonal. With some you may need to buy a trail map or activity pack to take part. You could easily have a quick search online to see if there are any near you.
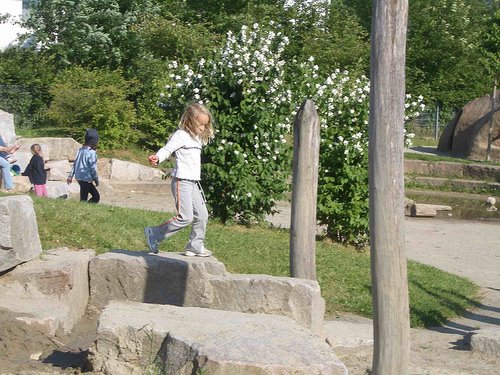
IMG_20200624_195622_005


26. LEAF CROWNS

The easiest way to make a leaf crown is by using a band of paper or recycled card. Simply cut two strips from the paper or card and attach them together so you have a band long enough to fit your head. Place a strip of double sided tape across the band. Then all you need to do is peel the backing off and stick leaves and or flowers to the surface. If you leave the double sided tapes backing on, then you can take your bands out with you on walks. Then you can decorate your crowns on the go using natural materials you find on your walk.
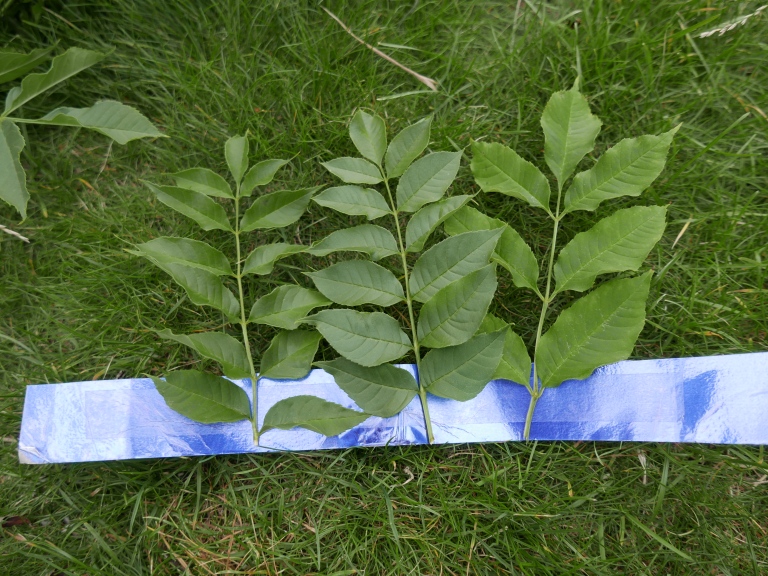
3300530

A slightly more tricky way to make a leaf crown is by threading the leaves onto a long piece of grass, plant stem, string or ribbon. This is more fiddly than the other method and it seems to work best with Autumn leaves. This is also a great way to make leaf bunting.
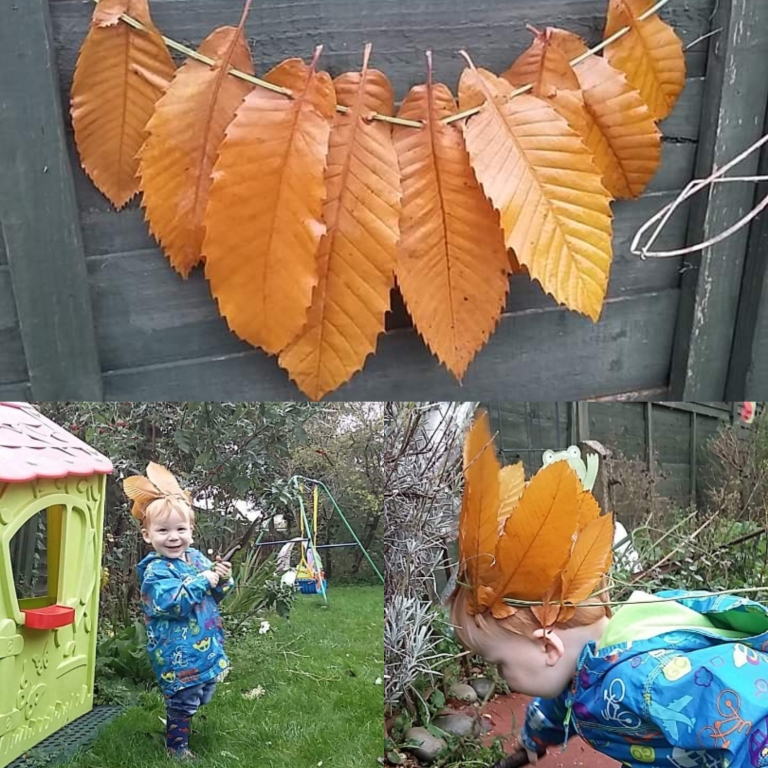
IMG_20190804_064605

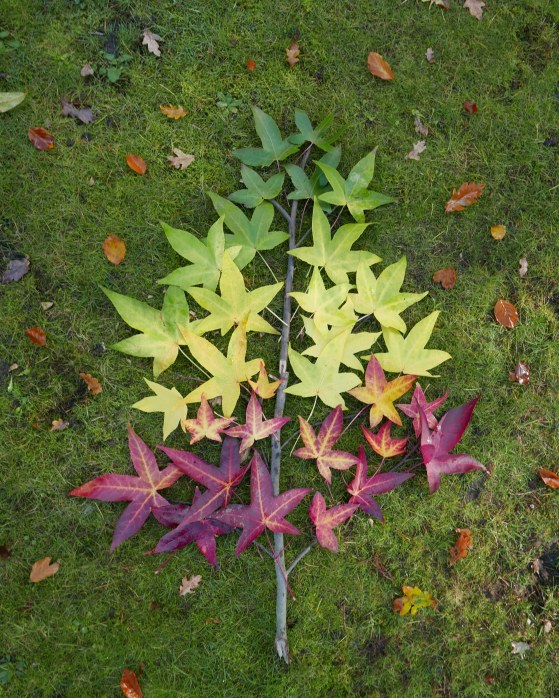
27. LAND ART AND LEAF ART

Nature art (also sometimes called land art) is a wonderful nature activity that encourages creativity and fine motor skills in children of all ages and abilities. All you need is some imagination and natural materials to make pictures, shapes and patterns or letters, numbers and words. You could use leaves, stones, grass, bark, twigs, fallen fruit, nuts and seeds and flowers. *But pretty please don’t pick any wild flowers, only collect ones you have grown yourself or fallen ones you find on the floor.
IMG_20191113_185345_904.jpg

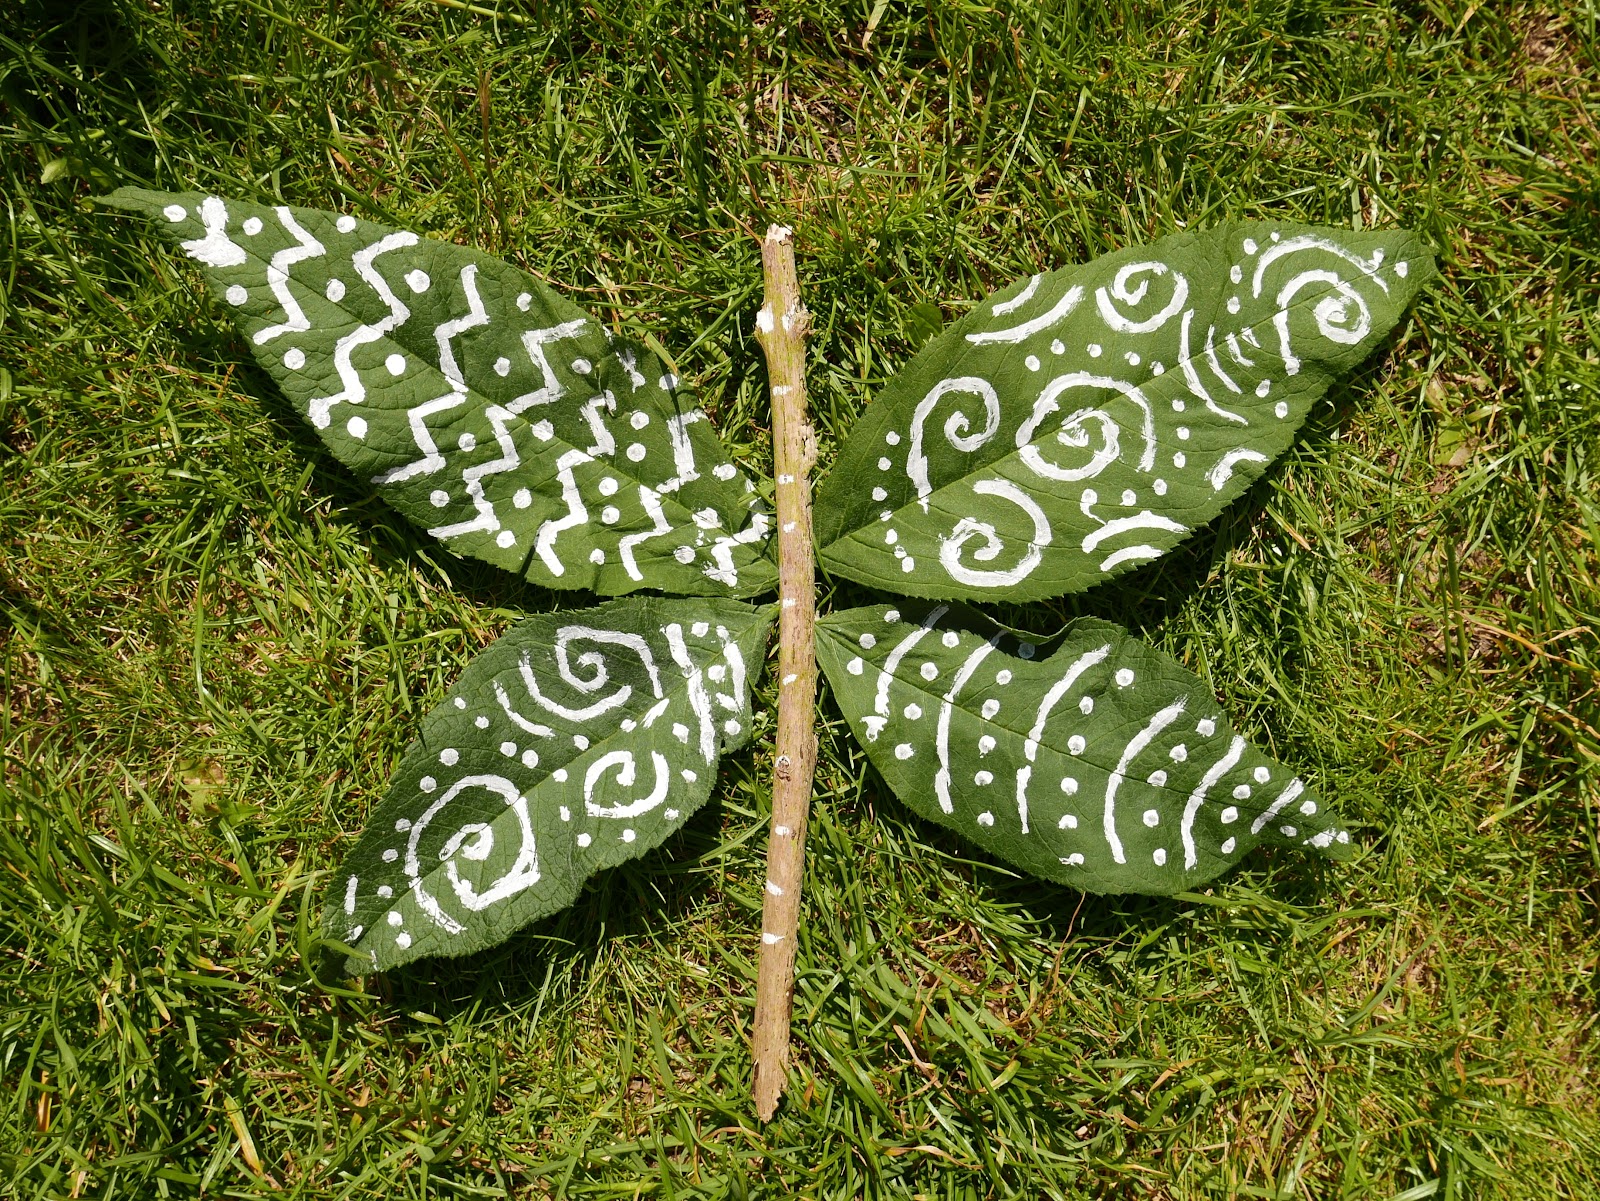
It’s easy to make simple patterns and shapes with leaves and sticks like spirals, hearts and smiley faces. Or you could be more adventurous and try to make a picture or story scene. How about making a stick and leaf butterfly or a leafy caterpillar. Once you have finished you could glue the leaves onto paper or card or take photographs and turn them into cards or artwork.
IMG_20200624_195544_860

Separating the leaves into the different colors before you start gives you a good opportunity to talk about how and why leaves change colors with the seasons. For example, leaves are green because of the chlorophyll in the cells which is busy turning sunlight into food. In autumn the leaves stop producing chlorophyll so the color changes from green to brown as the chlorophyll disappears.

28. NATURE IMPRINTS

Making nature imprints is a great way to explore patterns, shapes and textures. First collect some natural materials like leaves, stones, grass, bark, twigs, fallen fruit, pine cones, acorns and flowers. *Please don’t pick any wild flowers, only collect ones you have grown yourself or fallen ones you find on the floor.
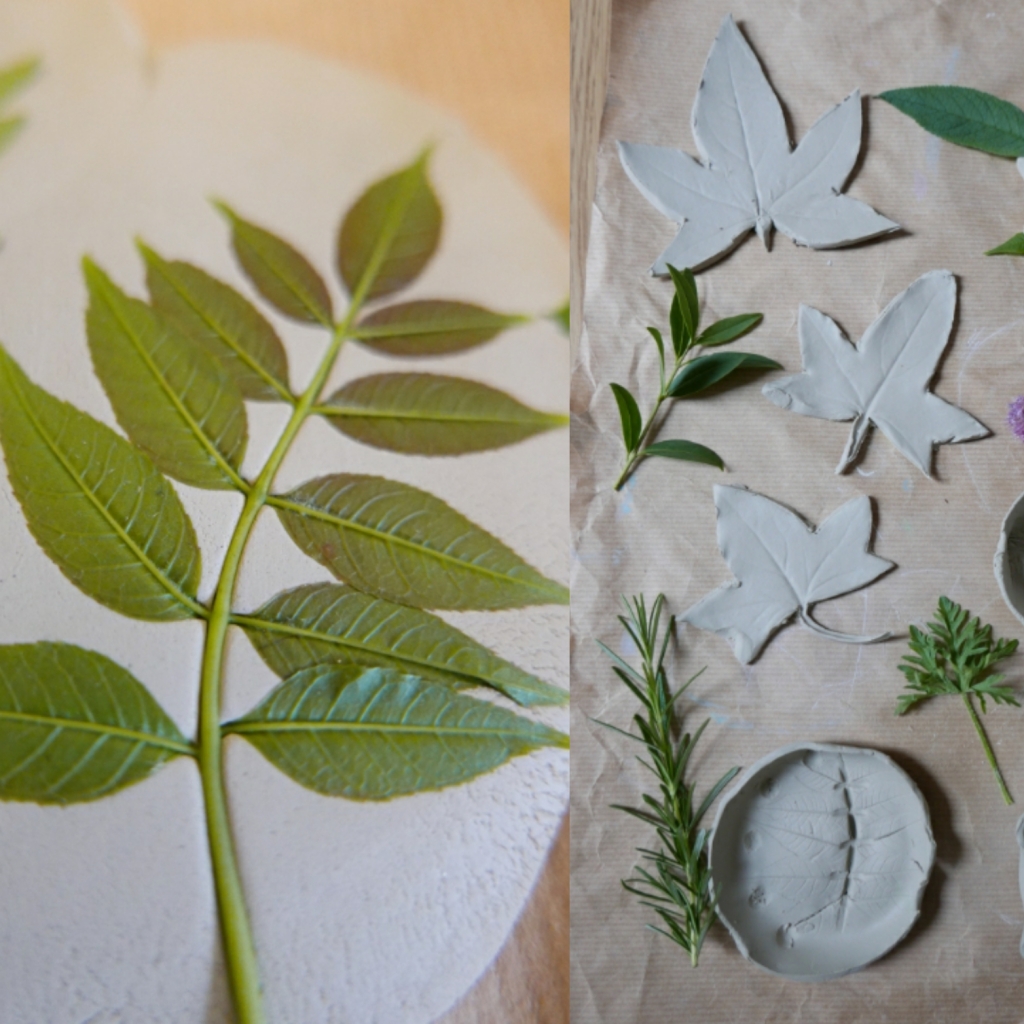
Next roll out some clay, salt dough or play dough to imprint onto. Then arrange the leaves and any other natural materials onto  the surface of the clay. Press and smooth them down firmly with your fingers. before rolling over them several times with a rolling pin to make sure they have embedded in the clay. When you carefully peel the natural materials away they should leave a detailed imprint in the surface. Once you have finished making the  imprints leave them out to dry and harden. You can then paint or decorate them if you like.

29. STICK RATTLES AND SHAKERS

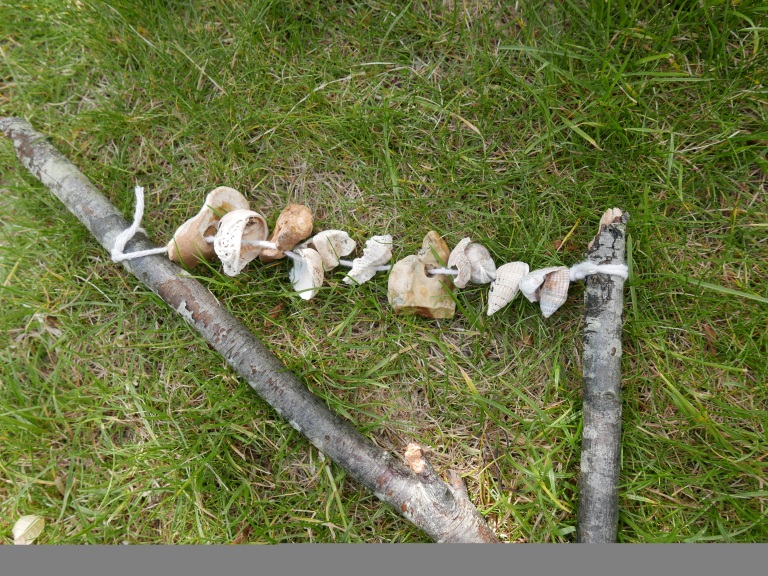
You could easily tie a threaded string of shells and stones onto a forked branch/stick to make a stick rattle. This is great fun to play with as it makes a fantastic noise and you can use it in games or as a musical instrument.
3200778

30. MAKE YOUR OWN BIRDS NEST

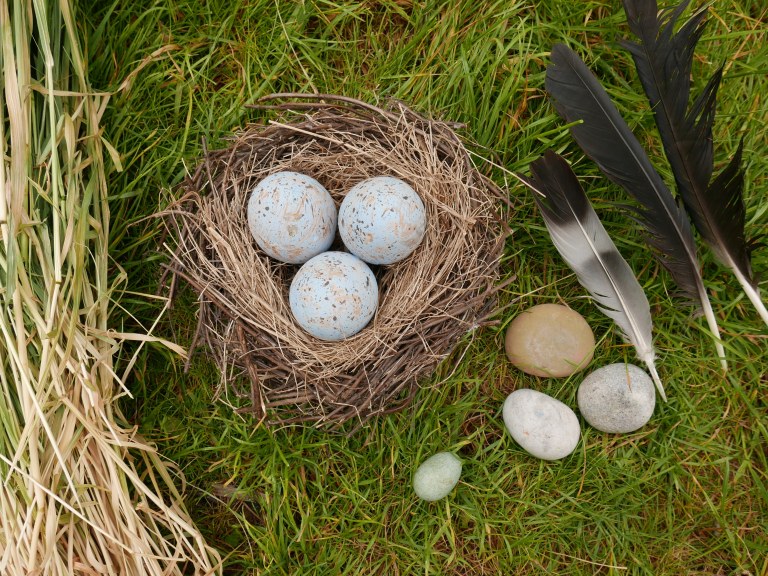
Making your own bird's nest is a simple, fun and educational activity for children of all ages, all you need is a few easy to find natural materials. February is often the beginning of nesting season for most birds but some nesting periods can last till August and a few birds (like wood pigeons) will actually nest all year round. Different types of birds will choose and use different materials and methods to build their nests. Many birds use twigs, grass and feathers to build them, some use mud, moss and fur and others like Chaffinches even use spider webs.
IMG_20200604_153810_965

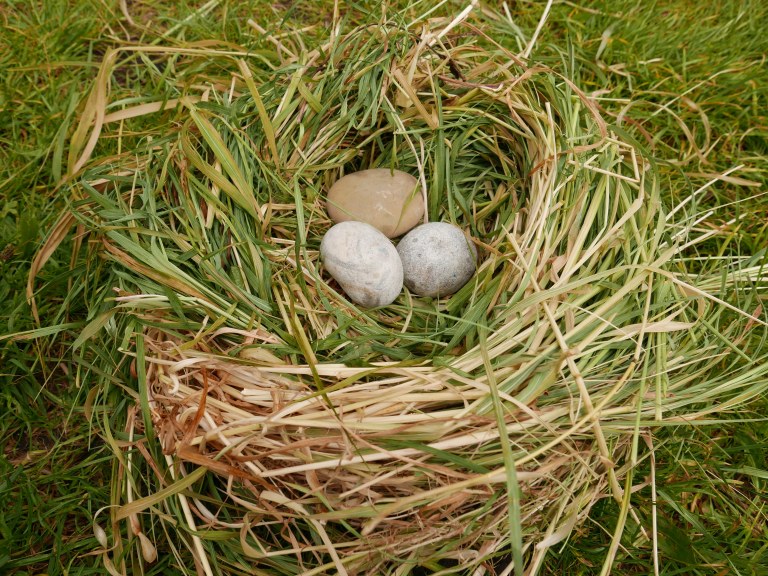
It is really simple to make your own basic bird's nest using long grass gently twisted or woven  into a circle. However if you don’t have any long grass you could use regular grass, leaves, sticks, mud or long stemmed plants to make your nest. Simply form a circular nest shape out of the materials.

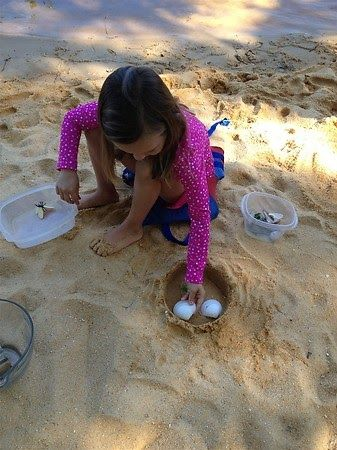
You can then place ‘eggs’ in the center of your nest. We used pebbles as pretend eggs but you could use anything you like from crumpled up paper balls to hard boiled eggs. You could even have a go at painting them to match the color and patterns of wild birds eggs.
IMG_20200604_154035_640

You can also make a more permanent nest to keep and use as a learning guide or for pretend play. They are surprisingly simple to make and require very few materials. You can find a full photo guide to making one here + additional bird nesting facts and resources.

31. BRANCH AND TWIG BROOMSTICKS

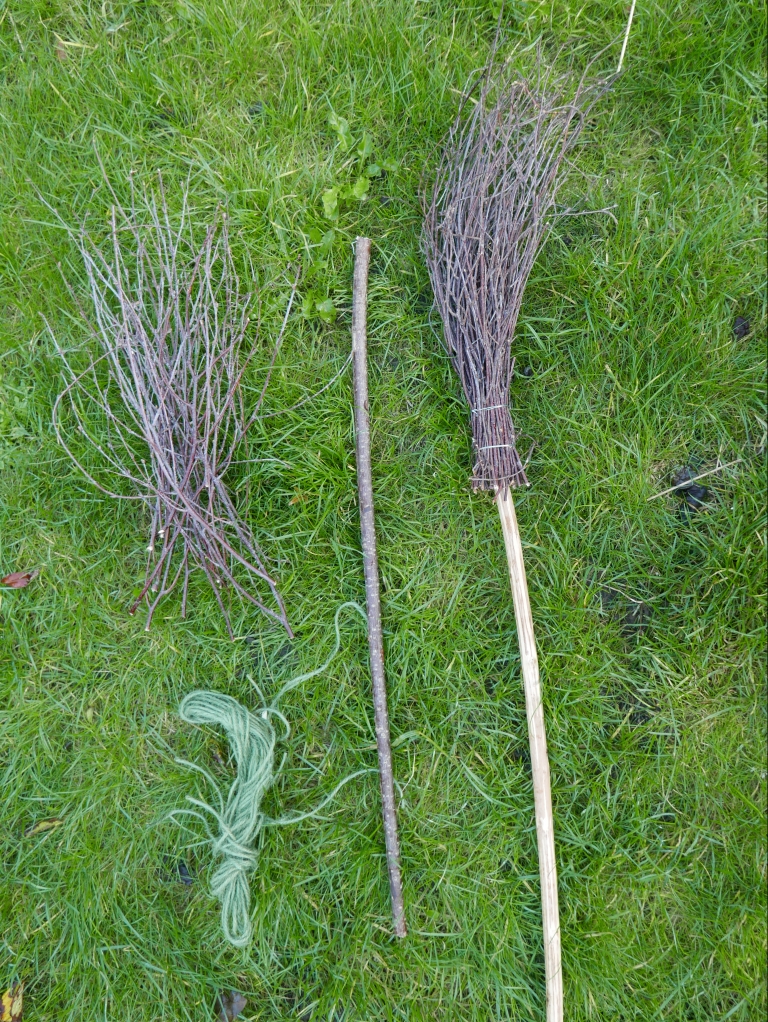
Another surprisingly easy thing you can make with woodland nature finds is a broomstick. All you need is a long stick for the broom handle, a cluster of thin and bendy branches for the brush and some string or wire to tie it all together. Simply tie the branches to the end of the stick. You could use a nail to fix it more securely in place but this isn’t essential.
3450380.jpg

32. PINE CONE BIRD FEEDERS

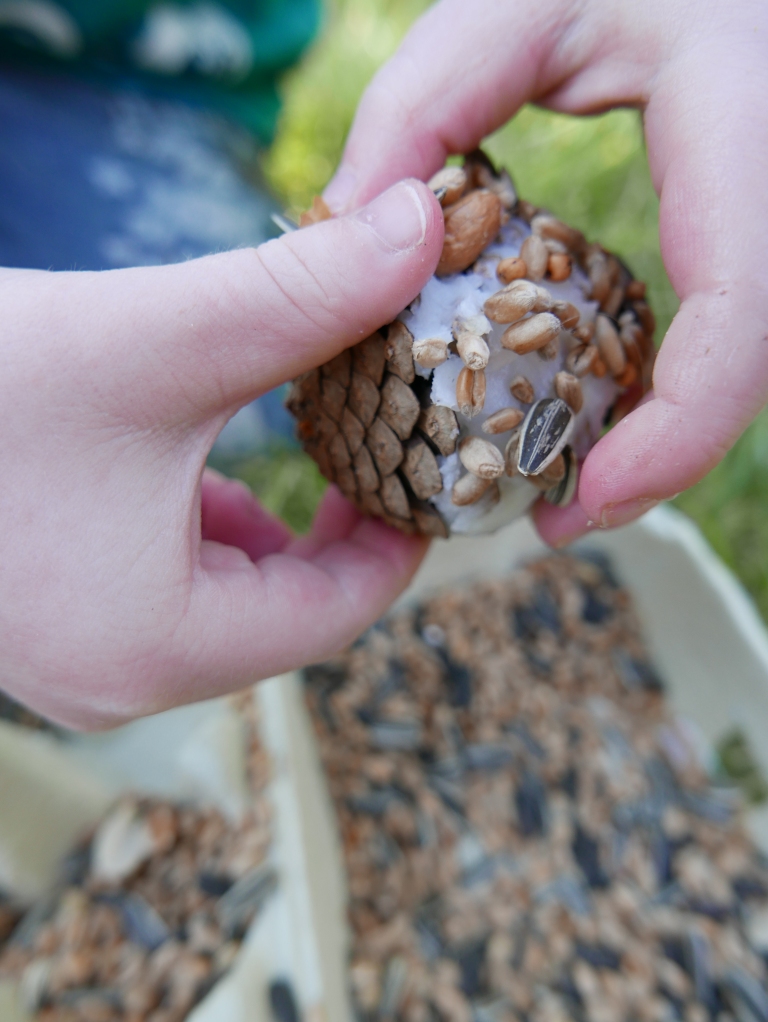
During the cold winter months food can be much harder to find for birds and wildlife. You can help get them through the winter by providing food, water and shelter in your garden. One of the ways we like to help is by making pine cone bird feeders. You can collect pine cones on a woodland walk or by looking in your local park. You will also need wild bird seed and string and a source of fat which can be either peanut butter, lard or a vegetarian lard substitute like Trex or Crisco.
2420149

Birds need high levels of saturated fat to sustain them during the winter months which is why bird feeders are often made from lard, suet or peanut butter as they are all great sources of saturated fat for birds. Simply cover the pine cones in the fat source and then roll them in the wild bird seed until they are fully covered. Next securely tie a piece of string to the top of your pine cones so you can hang them from a tree for the birds to enjoy.

33. PINE CONE FLOWERS

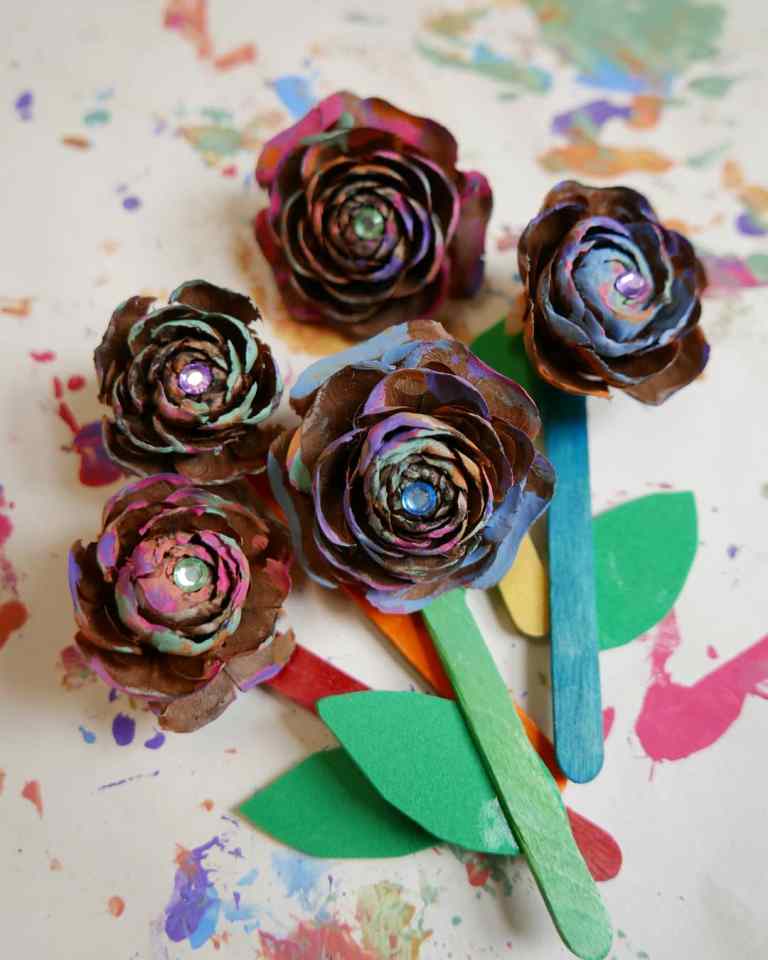
It’s easy to turn pine cones into flowers by adding a stem and some splashes of paint for color. If you look carefully you may even be lucky enough to find some naturally rose shaped pine cones like we did. You can use sticks and branches for the stems or recycled lollipop sticks, care or wood. Paper, card and fabric can also be cut into leaf shapes to glue onto the flower stems.
IMG_20190315_071053_789
  • For day 9 of 30 Days Wild 2022 we made nature stick figures, climbed trees, explored a park and watched bees buzzing and forth between the flowers.

  • For day 23 of 30 Days Wild 2021 we explore a woodland, splashed in steams, went on a nature hunt and had fun making nature characters and animals

If you like this you might like to try:

Conker or chestnut activity ideas
IMG_20201013_214025

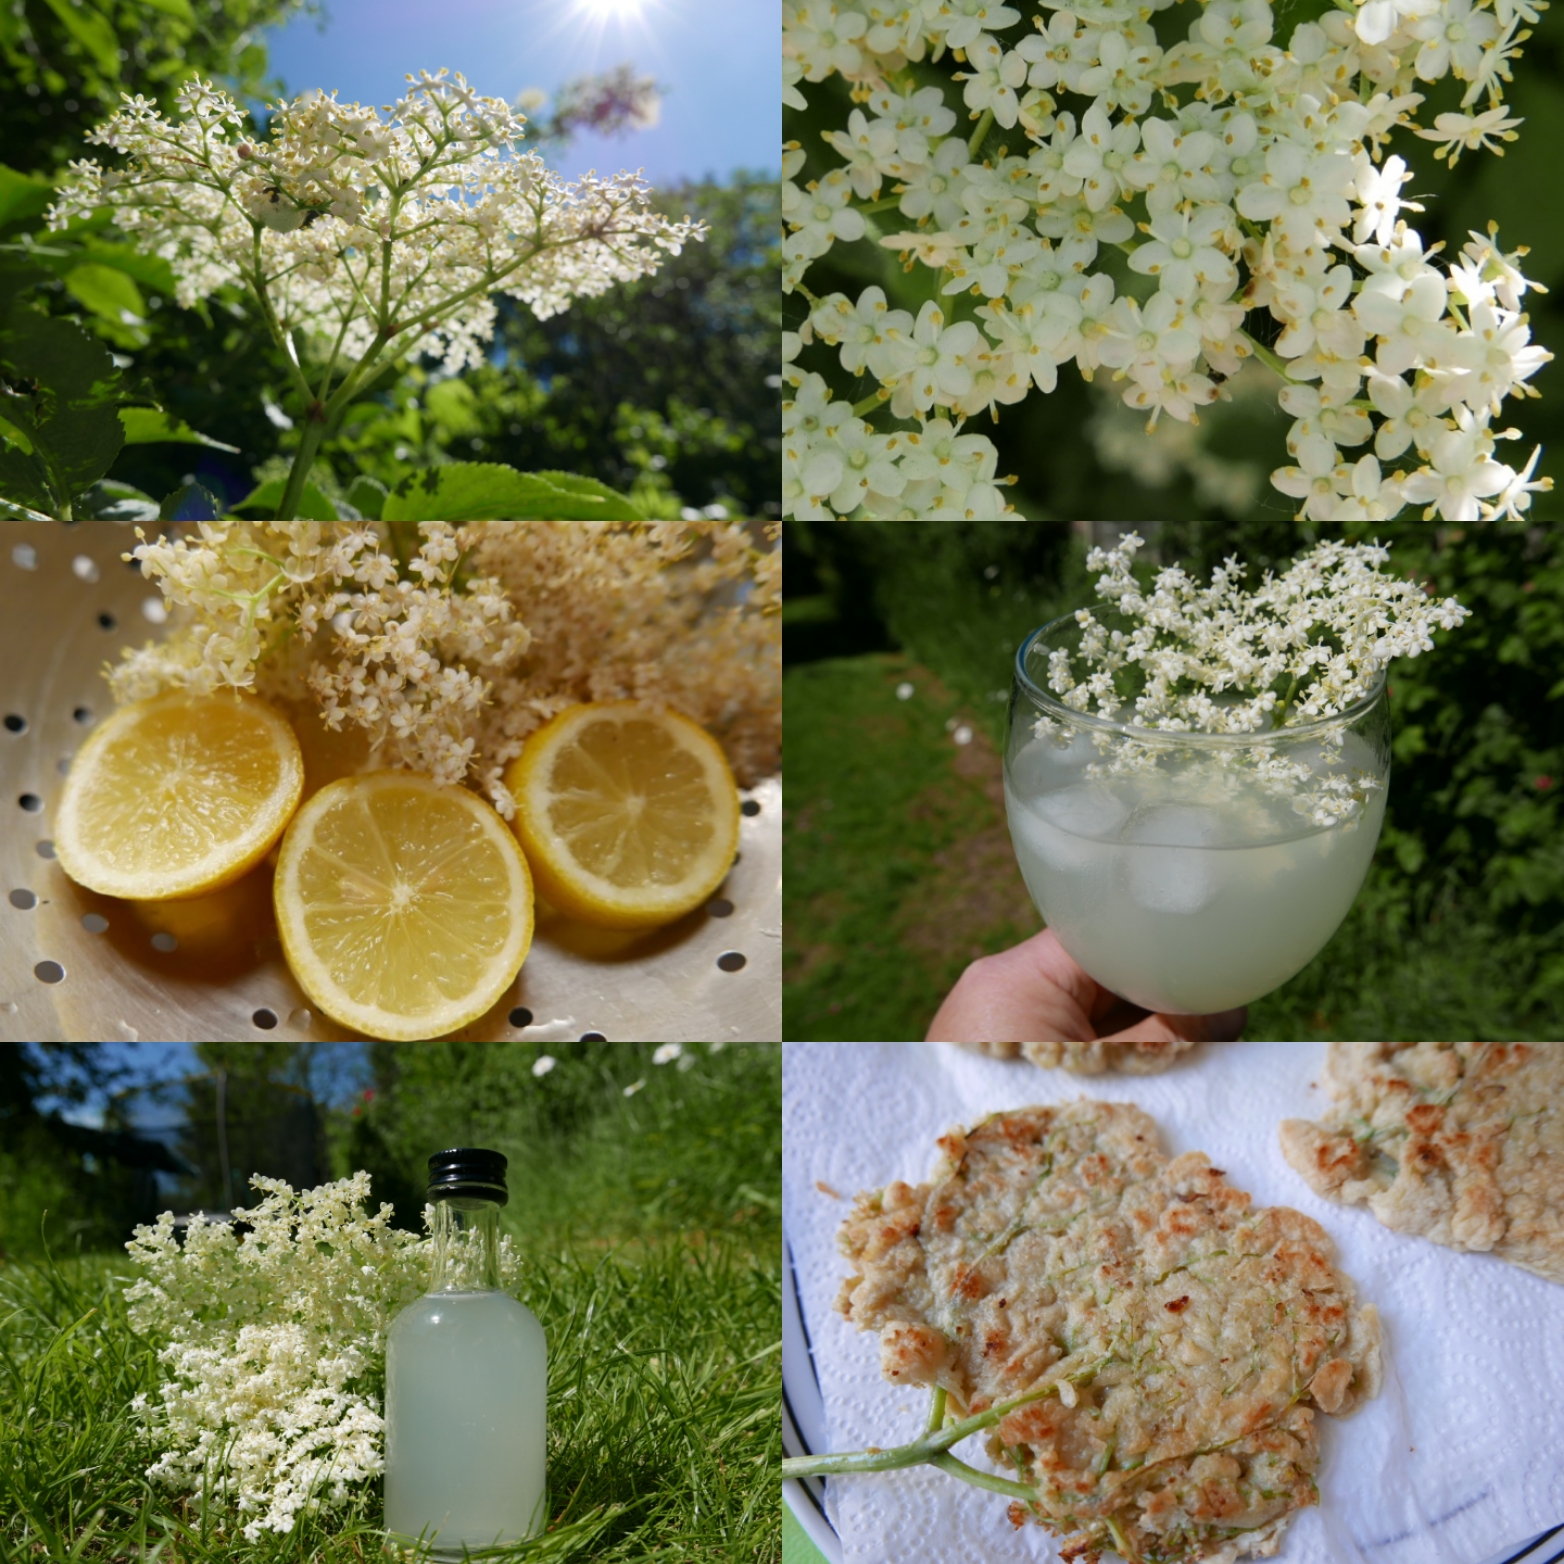
Elderflower recipes – Cordial and fritters
IMG_20210609_203833

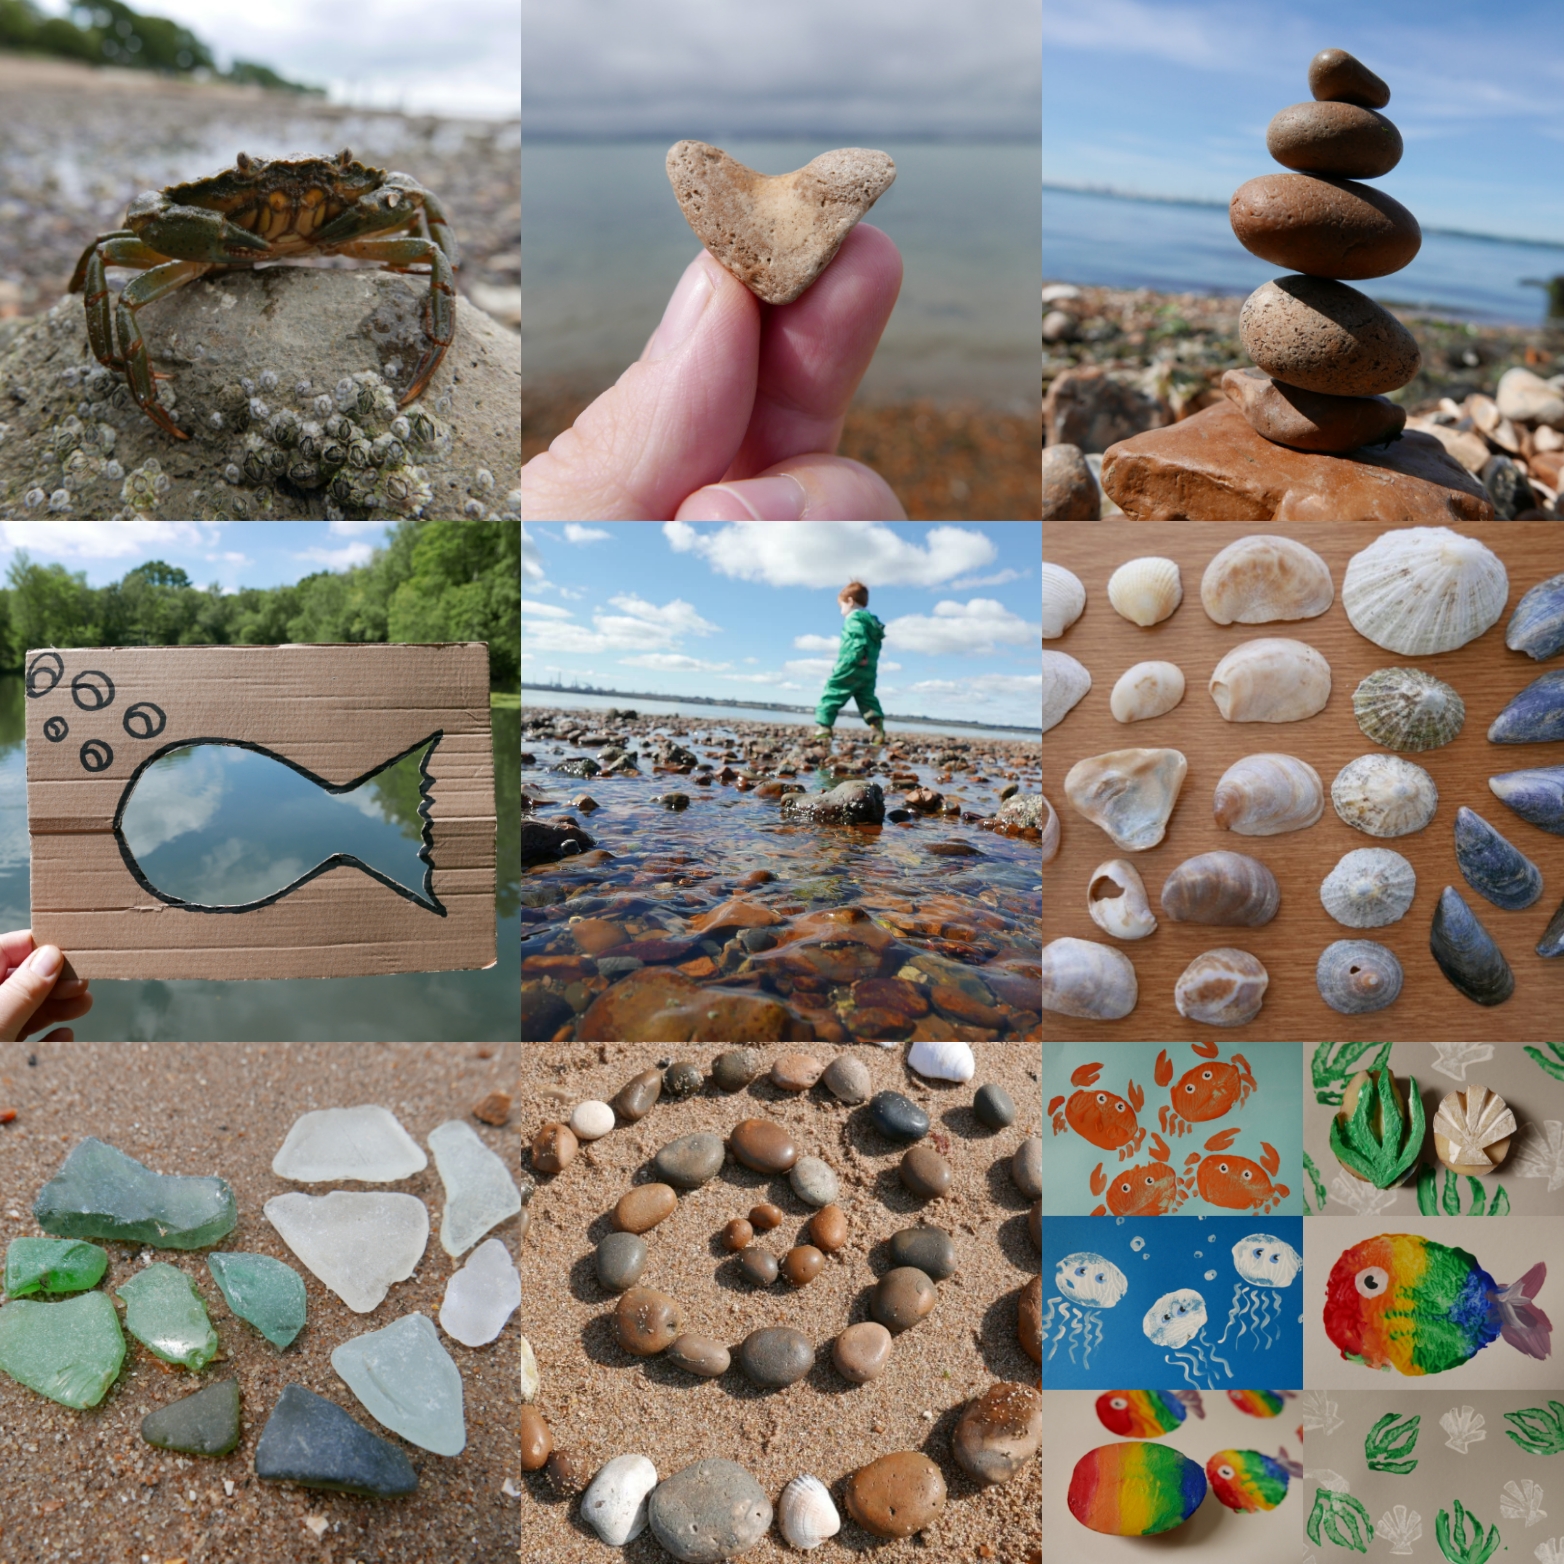
Exploring the shore – 15 activity ideas
IMG_20210621_193459


Elder branch beads

January 15, 2022

13 log slice activity ideas

July 27, 2020
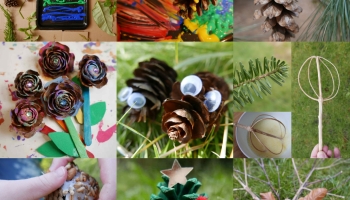
9 Pine tree activity ideas and fun facts
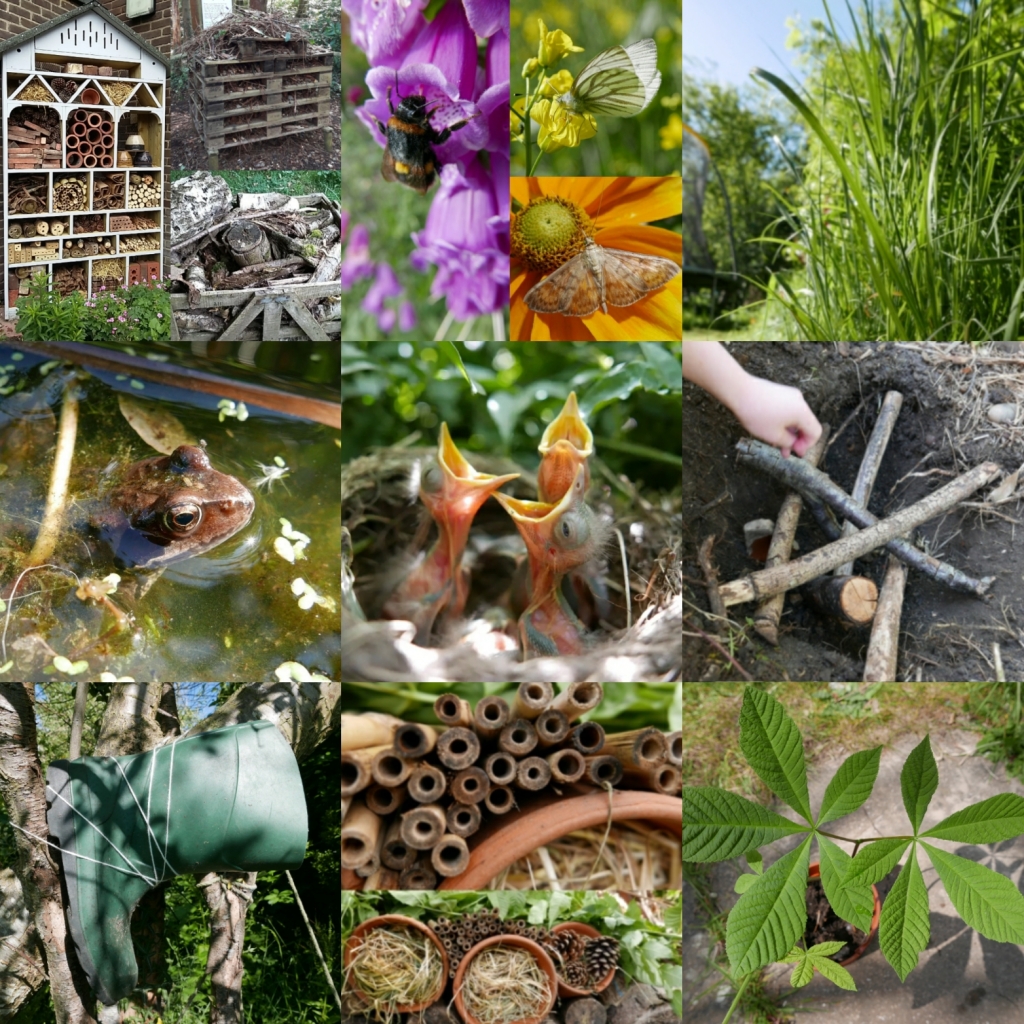
20 ways to make a home for wildlife
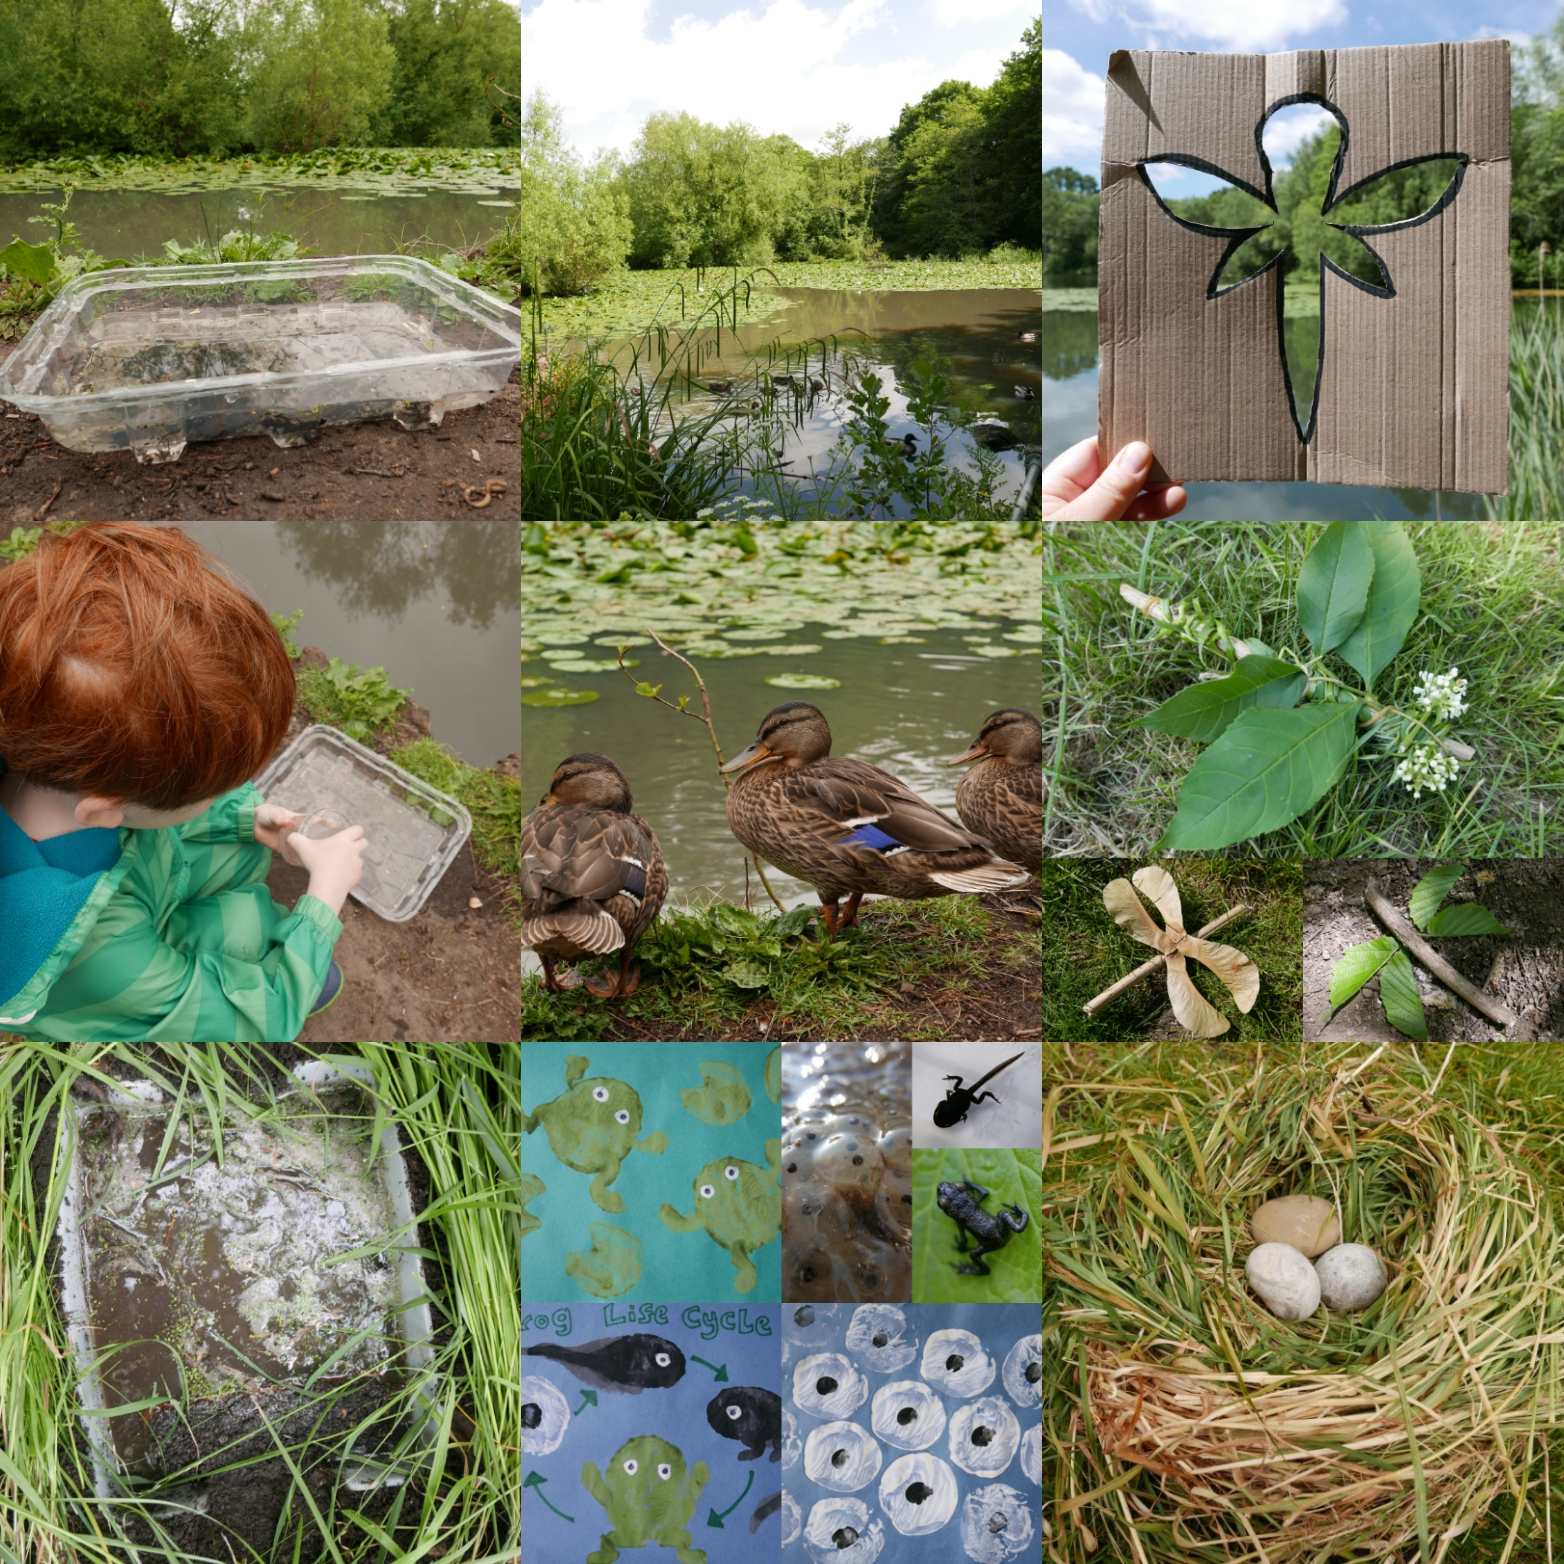
IMG_20210625_213314
16 Freshwater and aquatic wildlife activities
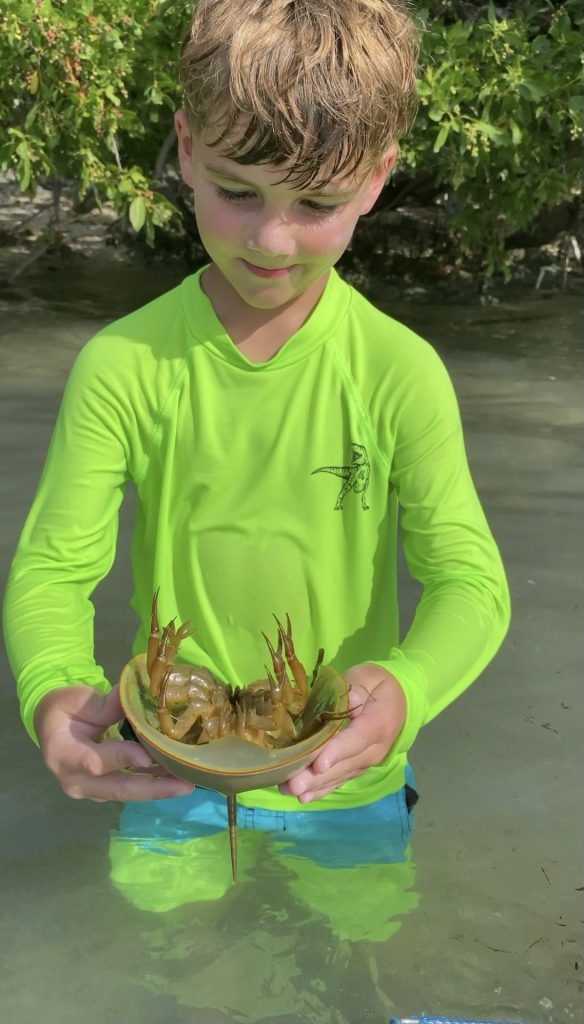
Ideas for taking in all that surrounds us on a walk on the beach

In 2001, we sold our home on Mount Falcon and moved to Cocoa, Florida. I was looking forward to walks on the beach but knew I was going to miss the mountains and everything I loved about our life in Colorado. 

Hope was four when we moved to Florida and it offered so many new and exciting ways to explore nature. We celebrated having new habitat to explore and have fun in. New animals to learn about and new flowers and vegetation to discover.

By letting your child's interest set the pace for walking the shoreline, and by us being open to their natural curiosity, we can definitely help any child to develop a healthy love of not just the beach but of the great outdoors. 

As a beginner, you will find that beachcombing transforms a leisurely walk along the beach into an exciting treasure hunt. This enjoyable hobby doesn’t require any special skills or equipment, making it accessible to everyone. Whether you’re searching for seashells, wildlife, driftwood, or unique pieces of sea glass, every find can spark a sense of adventure and connection with the ocean. 

Beachcombing combines the thrill of treasure hunting with a deep connection to the natural world. This hobby has a rich history and offers a unique way to explore the coastline while discovering a variety of oceanic treasures.

The Basics of Beachcombing

Beachcombing involves walking along the seashore to find items washed ashore by the ocean.

Common finds include seashells, sea glass, driftwood, and occasionally, more exotic treasures like lost jewelry or ancient artifacts.

Preparation is key:

  • Wear comfortable footwear suitable for walking on sand.

  • Bring a bag or bucket for your finds.

  • Check the tide schedules, as items are more likely to appear around low tide.

Beachcombing involves walking along the seashore to find items washed ashore by the ocean.

Common finds include seashells, sea glass, driftwood, and occasionally, more exotic treasures like lost jewelry or ancient artifacts.

Locations matter: Some beaches are more fruitful than others.

Choose less crowded spots for better chances of finding unique items. Beaches with strong currents or located near old ports can offer more interesting finds.

Engaging in beachcombing not only provides a sense of adventure but also fosters a deep appreciation for the ocean and its ecosystems.

It encourages you to spend time outdoors and observe the subtle changes in the coastline.

For more on beachcombing and collecting on the beach CLICK HERE

How to Find Sea Creatures
at the Beach


Want to know how to find cute sea creatures at the beach? It’s actually quite easy to find crabs, baby shrimp, fish, starfish, and seahorses! You just need to know where to look and the tools needed! Curiosity about the world starts with our littlest guys when they are still teeny, and we, as parents and teachers, must continue it with modeling and supported explorations like this.  Happy beach time! 

Look in the seaweed

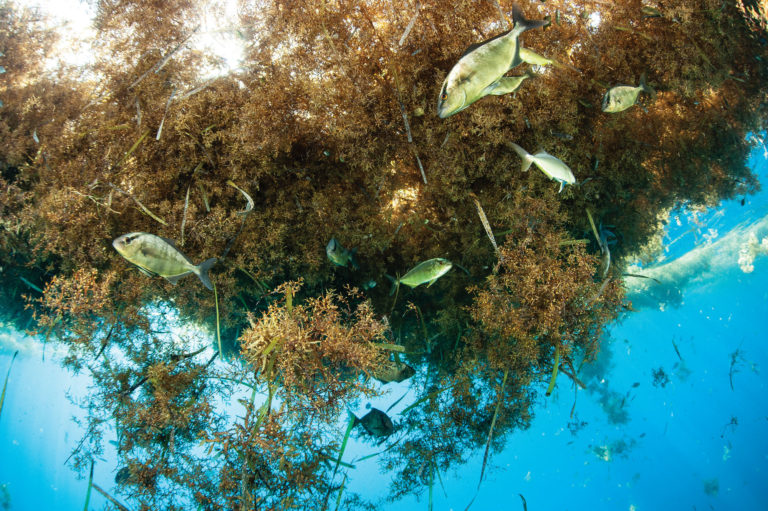
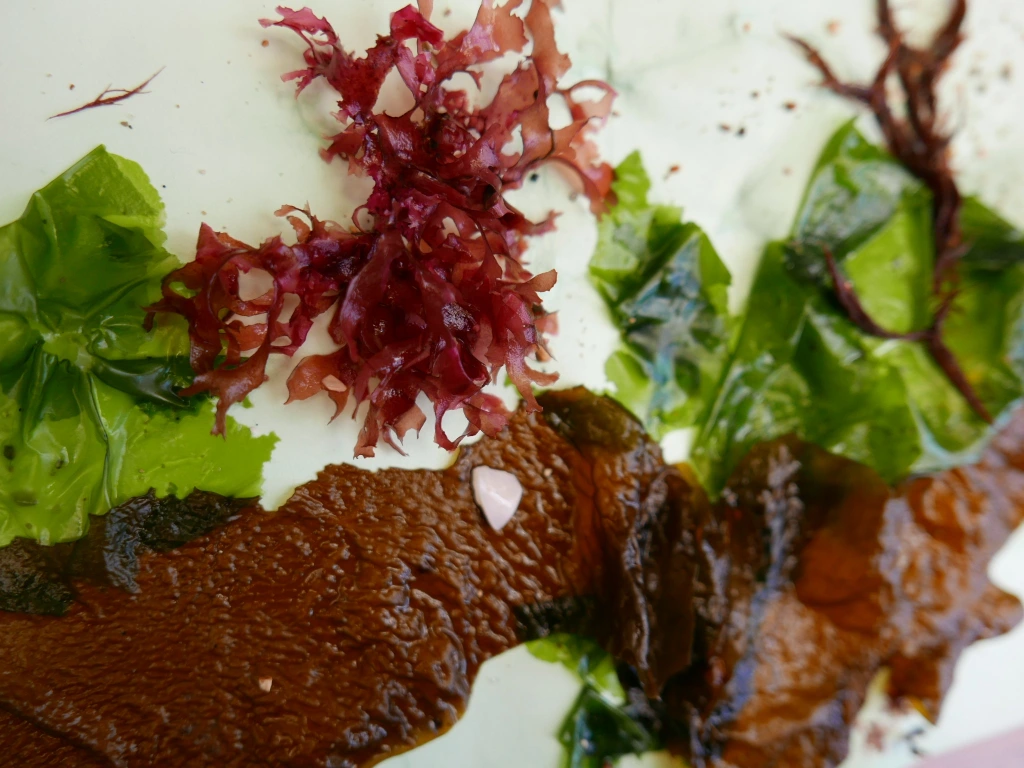
Florida beaches have been littered with large brown sargassum seaweed lately. Sargassum is a type of algae that floats in large groups and never attaches to the seafloor. Animals like to live and camouflage in the floating seaweed islands.
baby fish hiding in sargassum seaweed


Baby fish hiding in the sargassum seaweed. | Credit: sportfishingmag.com
Finding sea life at the beach is one our kids favorite things to do. This activity can keep them busy for hours. We love to learn about them and see what new sea critters we can discover. It’s important to always catch and release the sea animals back into the ocean.
What you need to find cute sea creatures?
  1. A net – these are our favorite
  2. A bucket with sea water. (Tip: the lighter the bucket the better you’ll be able to see the sea life)
What we find in the seaweed:
  • Ghost shrimp
  • Crabs
  • Baby fish
  • Seahorse
How to find sea creature in seaweed
  1. Fill your bucket with sea water.
  2. Net the floating seaweed and put it in your bucket and gently swirl around.
  3. Say hello to your new sea friends!
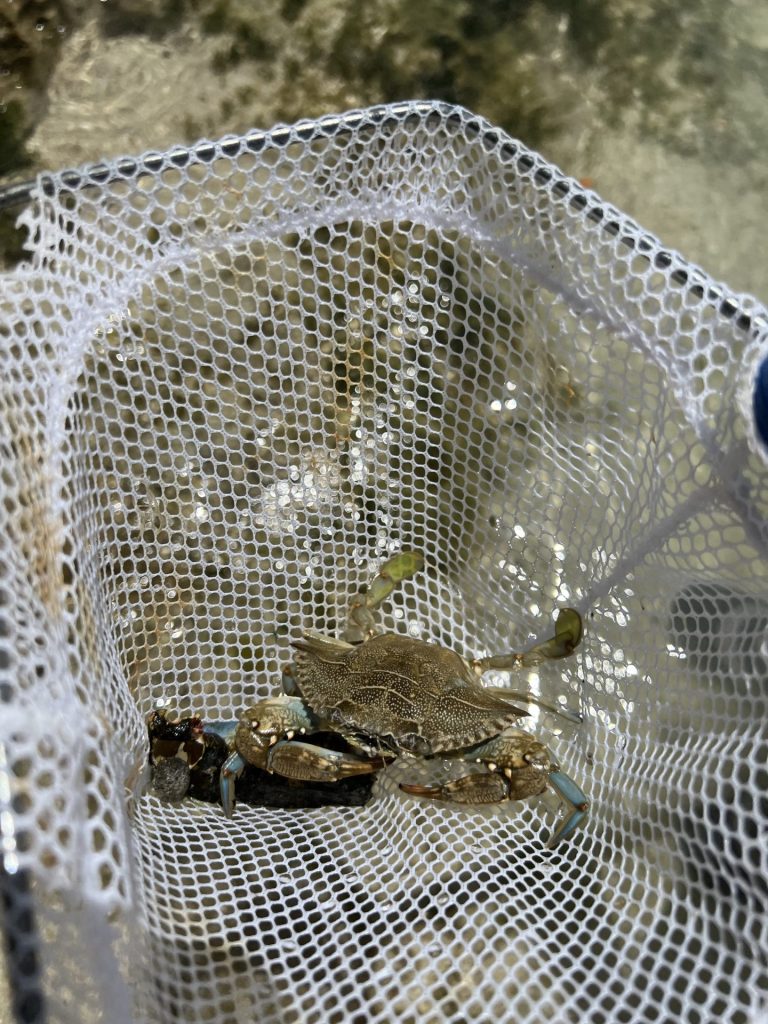
The crabs you find will actually change colors. The start out as grayish color and as they live on the sargassum they will start to turn a yellow brown to match the surroundings.
More ways to find sea life
at the beach
Under the sand you can find Atlantic mole crabs, locals call them sand crabs. We first discovered these during a trip to Siesta Key, Fl.
Tidal pools and during low tide is when you can find starfish, mussels and sea snails the best. Always look near the rocks.
In the seagrass is where seahorses like to hang out. Be very careful when looking here as they’re very fragile. These are our favorite snorkels to find them.
Florida blue crab

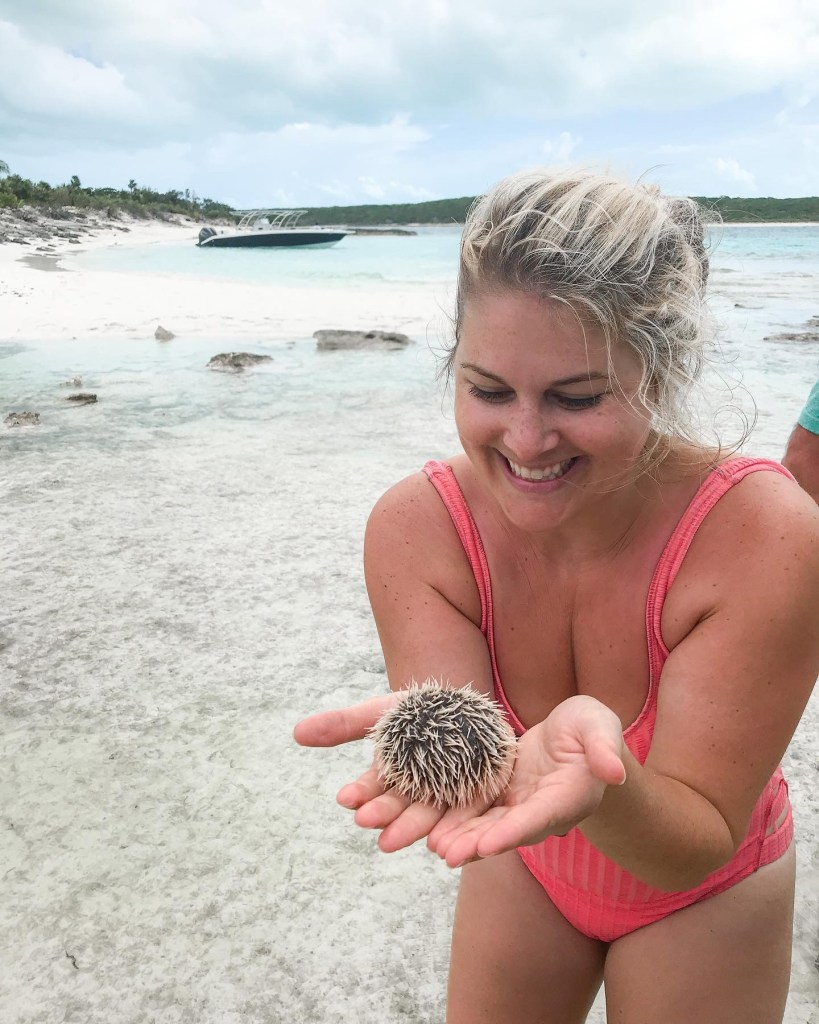
Sea urchin in the Bahamas


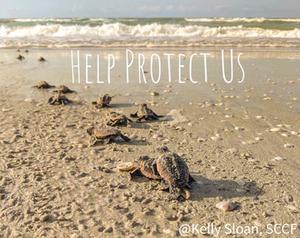
When you think of Florida beaches you think of its turtles and crabs. Hope fell in love with the sea turtles in a St Petersburg Aquarium on our first trip to Florida, But it was hard to catch them in their natural habitat, so when we did, we stopped everything so she had the time to watch them. She became a part of turtle releases of the local conservatory and a protector and advocate for them on every beach during nesting seasons, once we moved to Florida. They are so fragile until they hatch. Here is a section with a couple of articles about the turtles and other marine animals on the seashores.

A baby playing with a ball on the beach

Description automatically generated with low confidence

Who’s sharing the beach with you?

There is all kinds of wildlife at the beach. Here is a list of some of the most endangered animals you may encounter on your seaside trip.
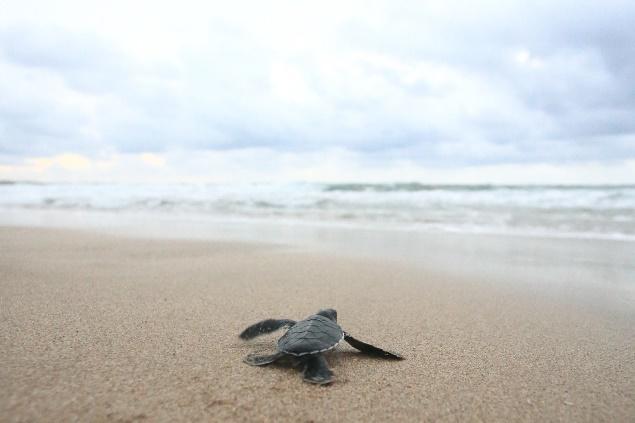
Sea turtles

Sea turtles, including the leatherback, Kemp’s Ridley, loggerhead, and green sea turtles, mate, nest, and hatch along the southern east coast of the US and in Baja California. As each of these species is endangered it is vital that their nesting grounds and their reproductive activities are not disturbed. Females nesting turtles are very sensitive to disturbance, and they may abandon their attempt to nest on the beach, and even abort their eggs at sea.

A bird on a beach

Description automatically generated with medium confidence

Beach Mice

Healthy beach mouse populations equals healthy dunes. And healthy dunes protect the coast from storms and floods. They are also an important food source for other dune and coastal dwellers. Unfortunately this adorable little seed planter is nearly extinct. Please help protect their habitat by preserving dunes.

Isopods and other Sand Dwellers

Isopods, known by their popular name roly polies, are tiny nocturnal crustaceans that spend their days burrowed deep in the sand. They come out at night to feed on kelp. They are an extremely important food source for shorebirds. Do to sand grooming, development, habitat loss, and other sand disturbances these once abundant critters are disappearing at alarming rates.

SEALIFE CATCHERS AND VIEWERS
for magnified viewing.

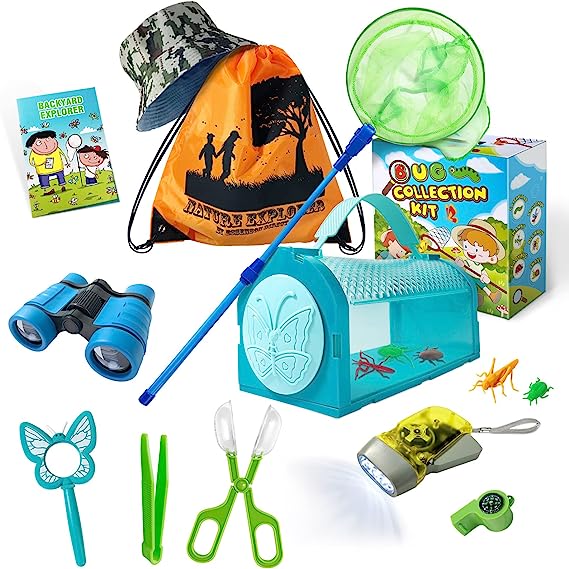
Kids Backyard Critter Catchers Exploration Science and Viewer Microscope – This is a kit that comes with a container with a magnifier for the bugs (or other critters!), a tweezers, and a magnifying glass. My kids had one of these and loved using it in the woods.

Little Backyard Explorer Critter Viewer Collecting Kit (7 Piece) – This kit comes with a bug catcher, multiple containers for holding and observing the insects, two tweezers, and a net.

Fun Insert Bug Viewer Magnifier Backyard Explorer - Viewer Collecting Kit for Children – This is a simple and very inexpensive bug viewer for kids. It has both 3x and 8x magnifying glasses.

Nature Bound Bug Catcher Toy, Eco-Friendly Bug Vacuum – This is a newer version of our family’s favorite – the bug vacuum. It’s perfect for catching, observing, and releasing bugs indoors or outdoors.

Shore and Seabirds

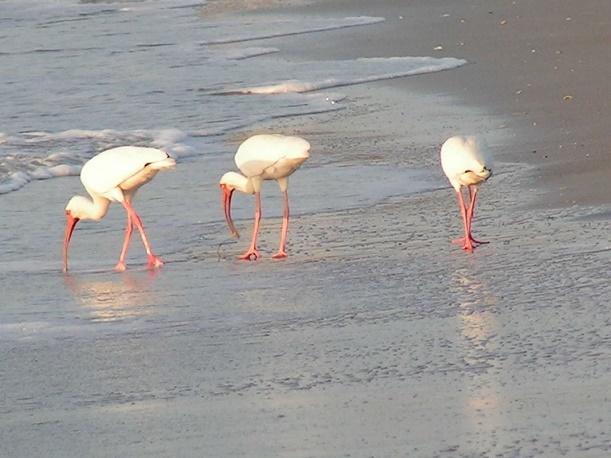
Sea and shore birds. It’s not a trip to the beach without them. Pelicans, cormorants, loons, grebes, gulls, herons, the list goes on. There can be 100 species of shore and sea birds on your beach.

Piping plover and snowy plover are just a few of the endangered birds that use the beaches to nest and feed.

A picture containing aquatic bird, bird, water, outdoor

Description automatically generated

Marine Mammals

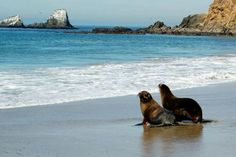
Some marine mammals, such as seals and sealions, need the beach to rest, molt, breed, and give birth. They can also be lolling on the sand because they are warming themselves in the sun. I love sharing the beach with the beautiful creatures.

Beach-spawning fish

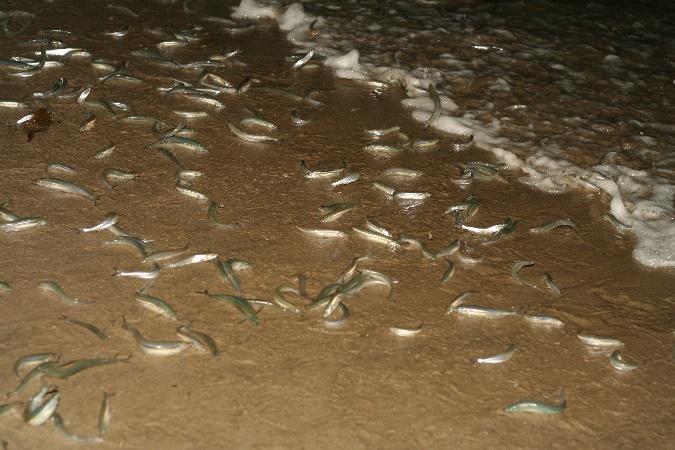
You are probably not expecting to run into a fish ON the beach. There are a number of fish species that you might run into while your feet are still firmly planted on the shore. Grunions are the most famous beach spawners, but there are many species of smelts (Osmeridae) and silversides (Atherinopsidae) that leave the water to mate and lay their eggs. This unique breeding process leaves both the mating fish and the eggs, which develop deep in the sand at the shoreline, incredibly vulnerable.

A group of fish swimming in the water

Description automatically generated with low confidence

Know who’s there

Each beach is its own ecosystem and residents and visitors. The best way to share the beach is by learning what kinds of wildlife live, feed, and reproduce on your beach.
Do not disturb
Who doesn’t love to watch their kids or dog chase a flock of shorebirds into the sky?
And who wouldn’t jump at the chance to see a sea turtle nesting?

Sometimes the most seemingly harmless activities are very stressful and disruptive to the animals who live, reproduce, feed, and travel on the coast.

Avoid disturbing animals, particularly when they are reproducing or feeding.

Don’t create obstacles

We take a lot of things with us to the beach: chairs, beach furniture, umbrellas, nests. Many of these items can potentially entangle or injure animals. They can also prevent certain animals, like sea turtle hatchlings, from reaching the sea.

A picture containing sky, outdoor, sunset, shore

Description automatically generated

Safety note: Please remember that children should be supervised at all times around open water. Please also be aware of the health and safety rules and restrictions of any area you visit.

Beach Combing Walk Activities

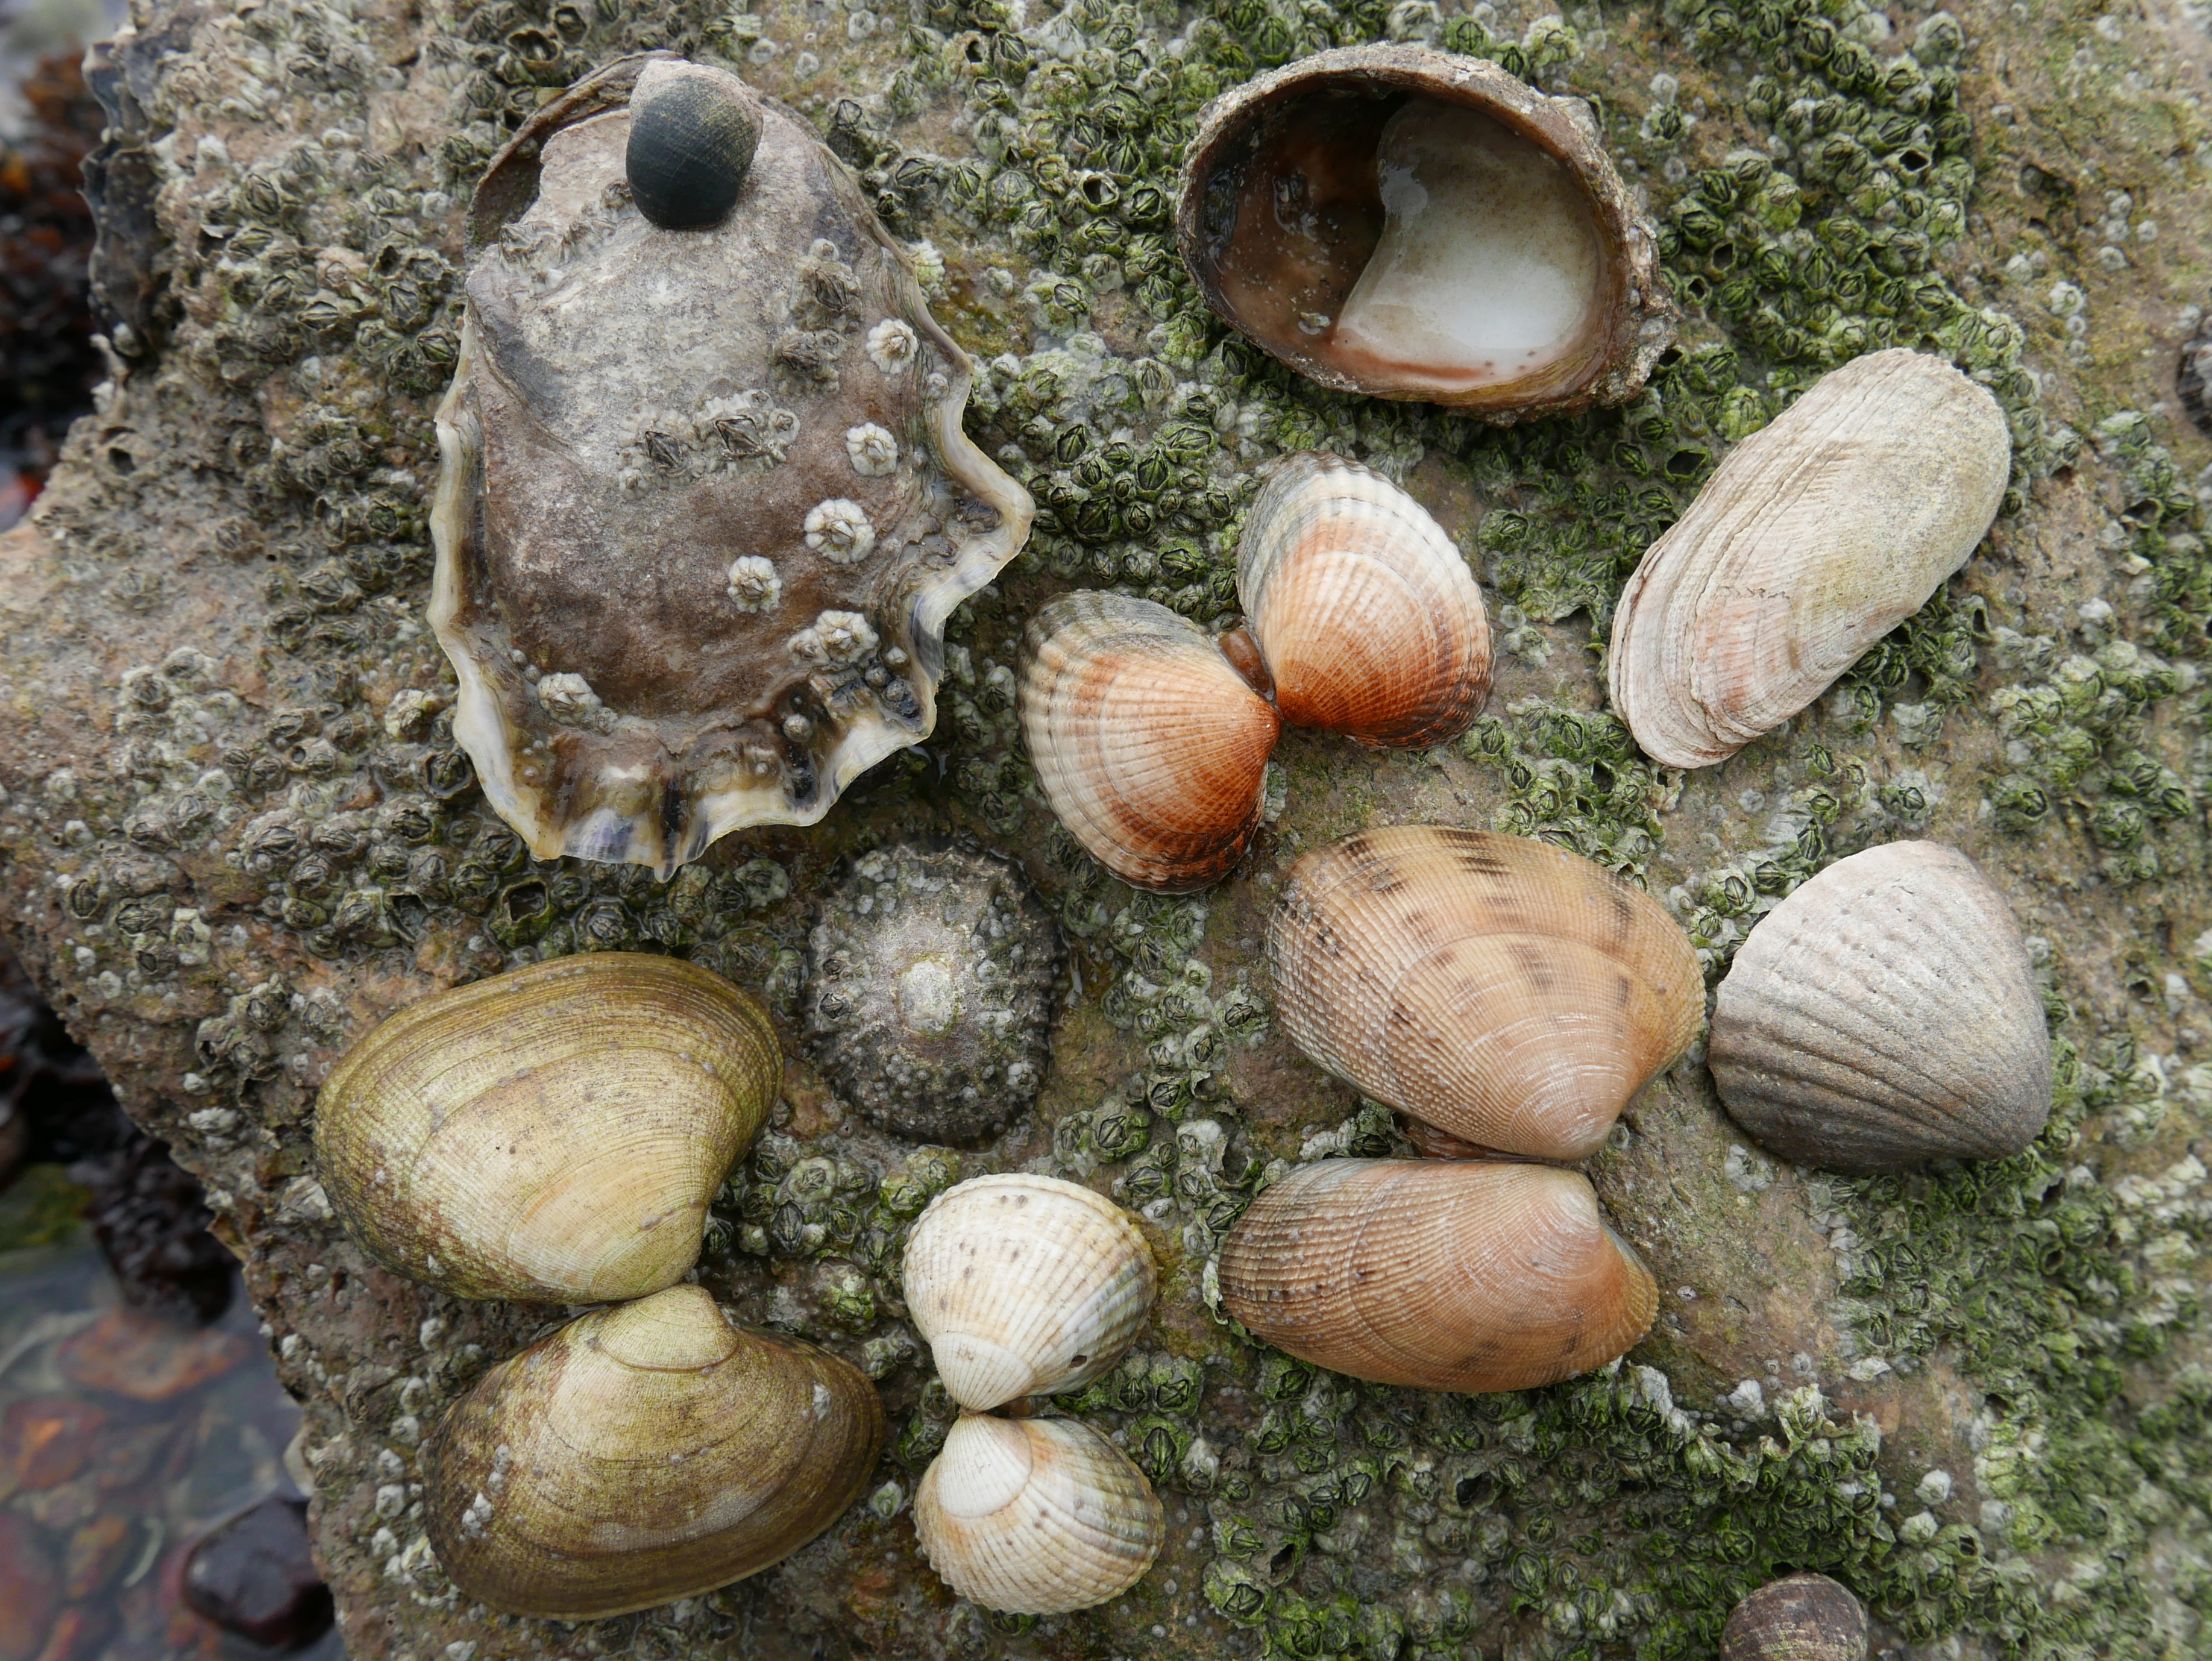
Search for seashells

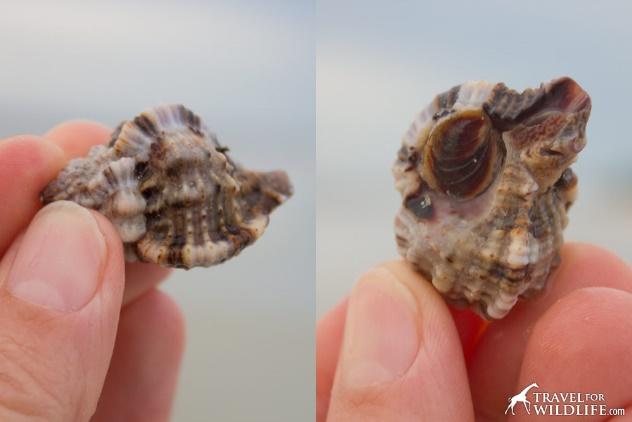
The easiest and most obvious things to find in the intertidal zone are seashells. Seashells come from marine invertebrates like molluscs which are animals without a backbone. Instead of a backbone they have a shell which forms an exoskeleton to support their bodies and protect them from predators. They build the shells when they are young using sea minerals like calcium, carbonate and salt. When the animal dies it leaves behind its shell which can often get washed up into the intertidal zone.

Seashell Hunting and Activities

When you stop to look closely for seashells you might be surprised by the variety of species that you can find. The Marine Biological Association have a brilliant free guide to identifying seashells that you can download here to print off and take with you on your adventures. Don’t forget to look closely at the patterns and textures of the shells as well. Often shells that look very similar in shape size and colour have very different patterns which is a good way to work out the species. You can find some fun activity ideas using seashells below.

IMG_20200614_192556_665

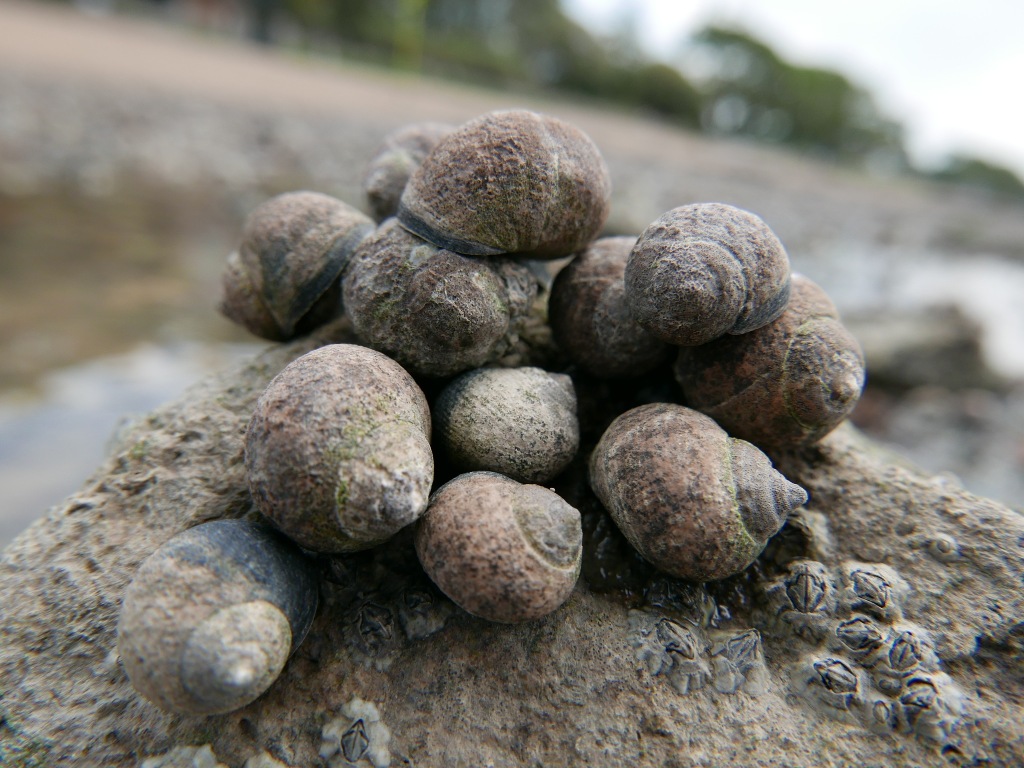
Go on a sea snail safari

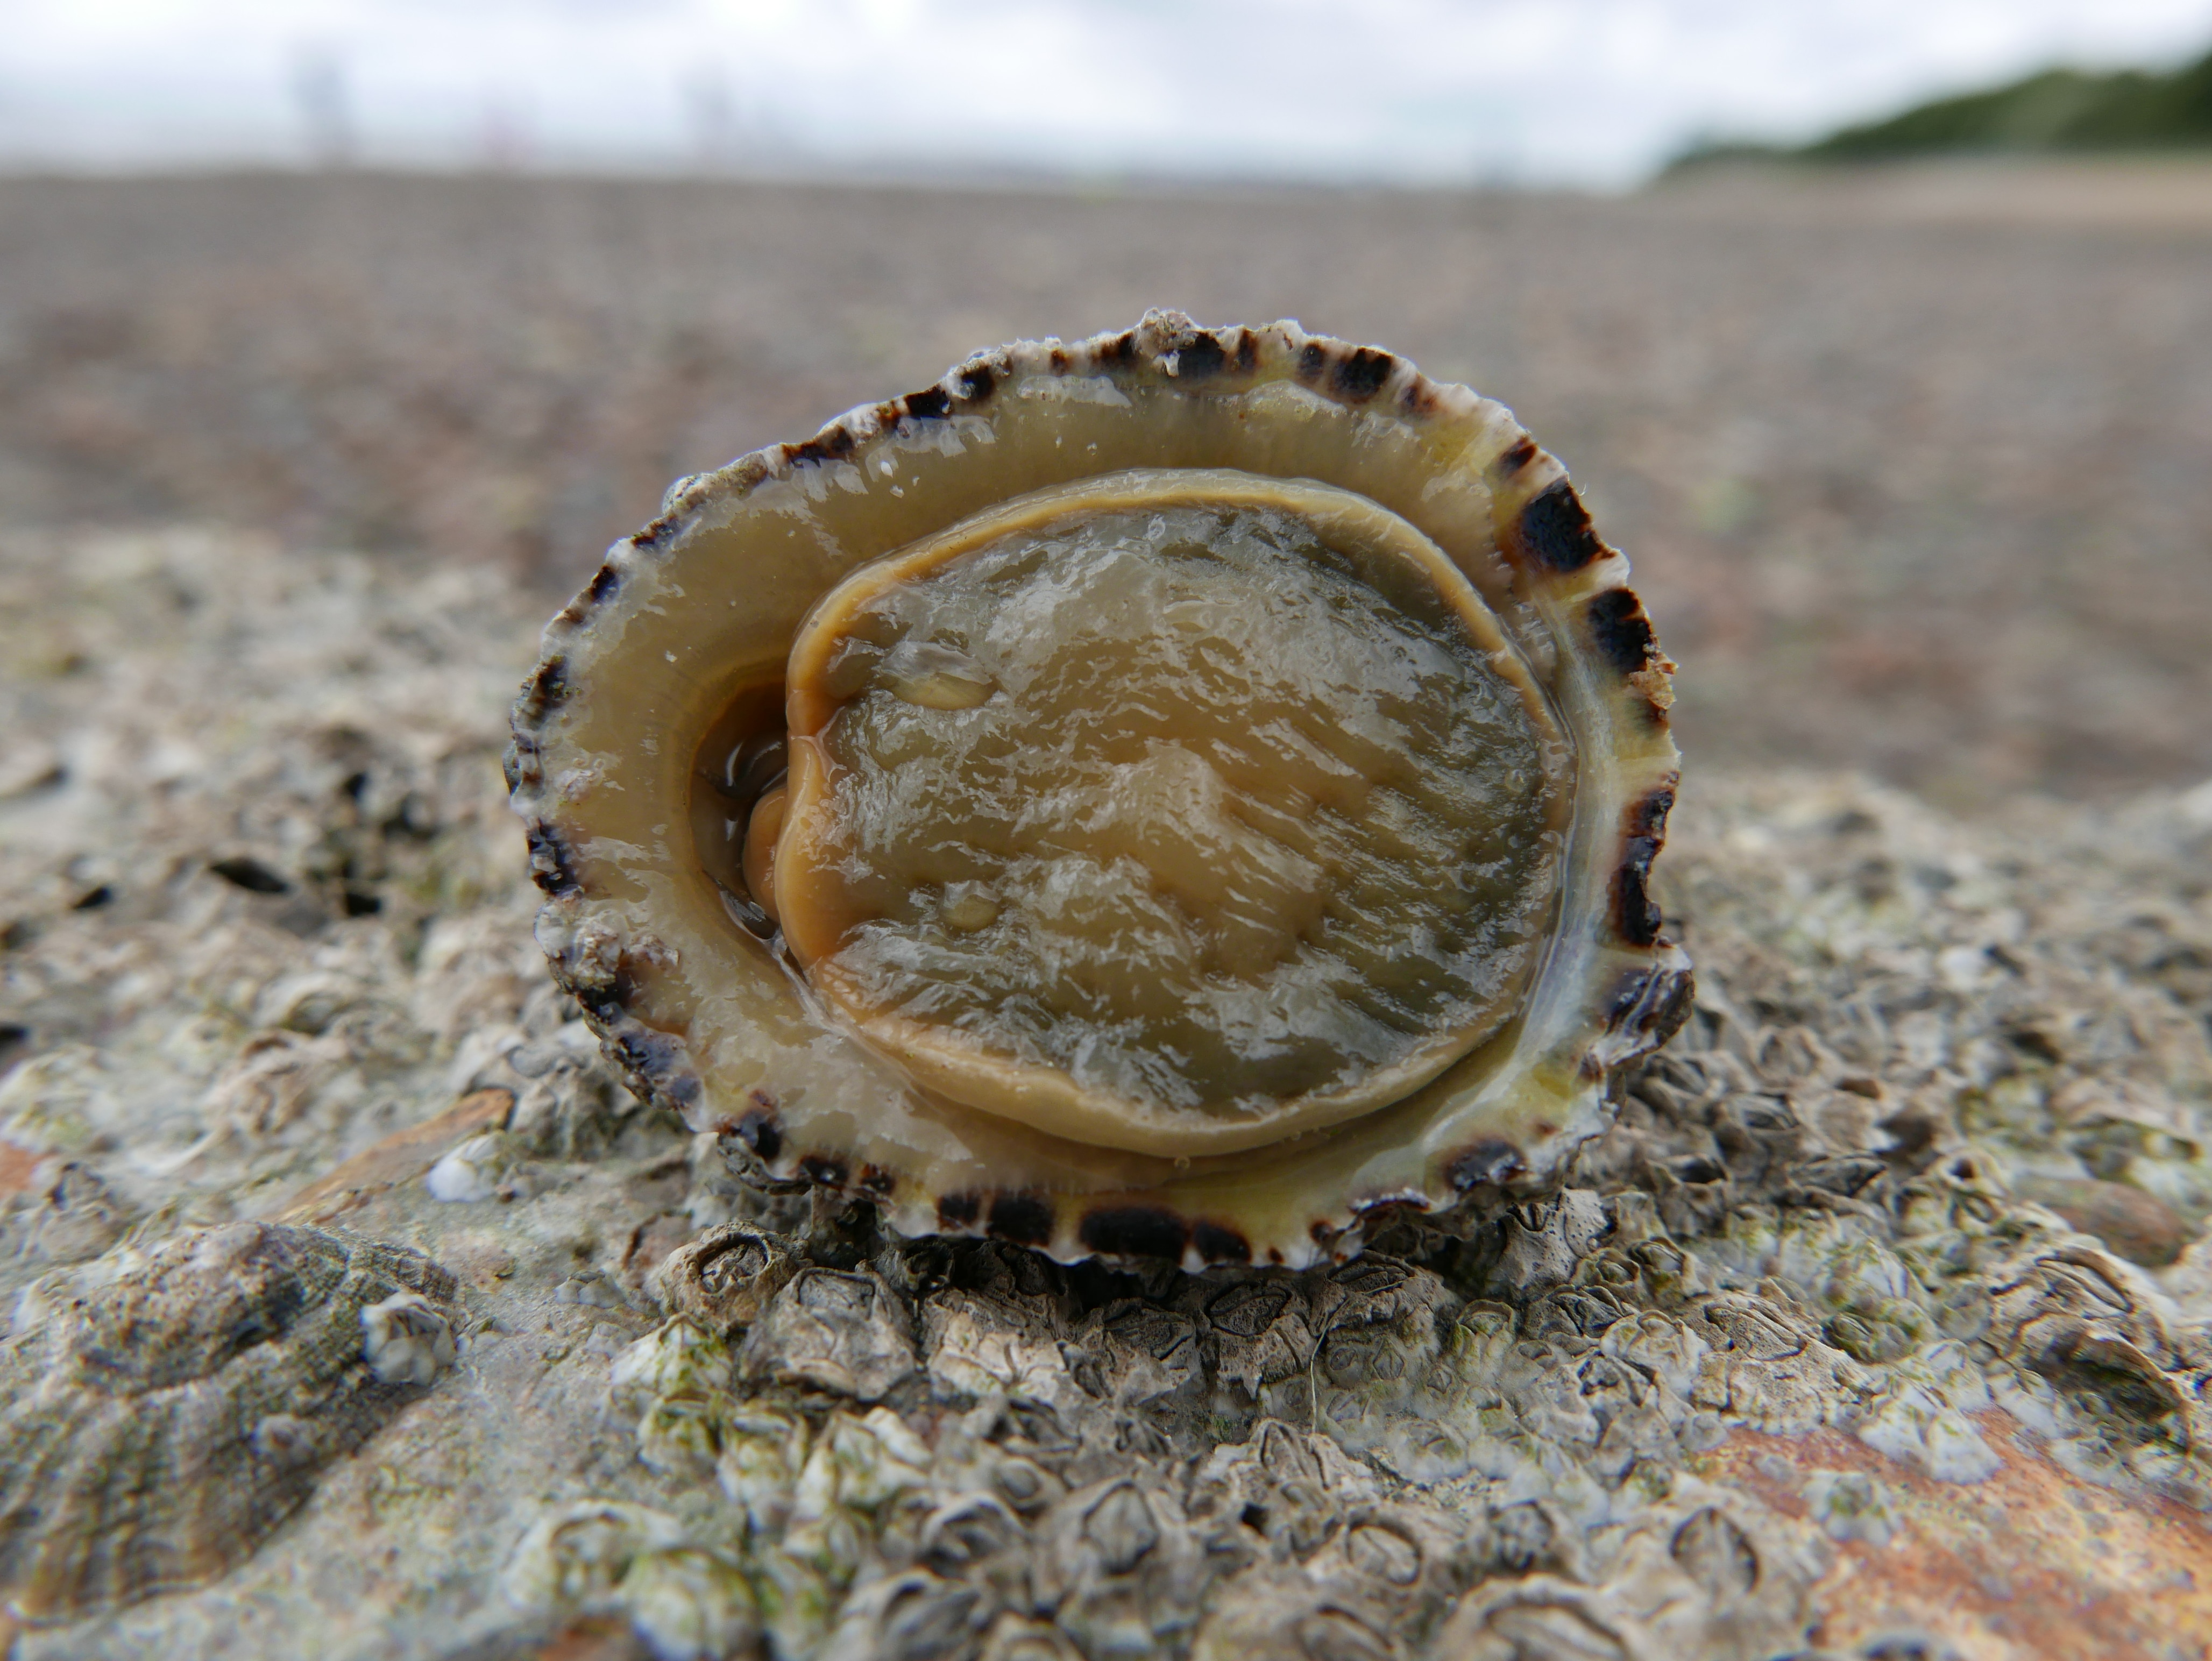
Sea snails can come in all sorts of shapes and sizes and you can normally find them clinging to rocks and other surfaces along the intertidal zone. You might be surprised to find that limpets are a type of sea snail along with periwinkles, whelks and top shells. How about going on a sea snail safari to see how many species you can spot. The Wildlife Trust have great photo guide to identifying sea snails here.
Limpets use their muscular foot (pictured below) to cling tightly to the rocks. They are mainly herbivores and they use a rasping tongue called a Radula (which is one of the worlds strongest biological structures) to scrape algae of the rocks to eat. Limpets sense vibrations if they sense danger they will suction themselves to the rock incredibly tightly in self defence.

IMG_20200614_212956_542

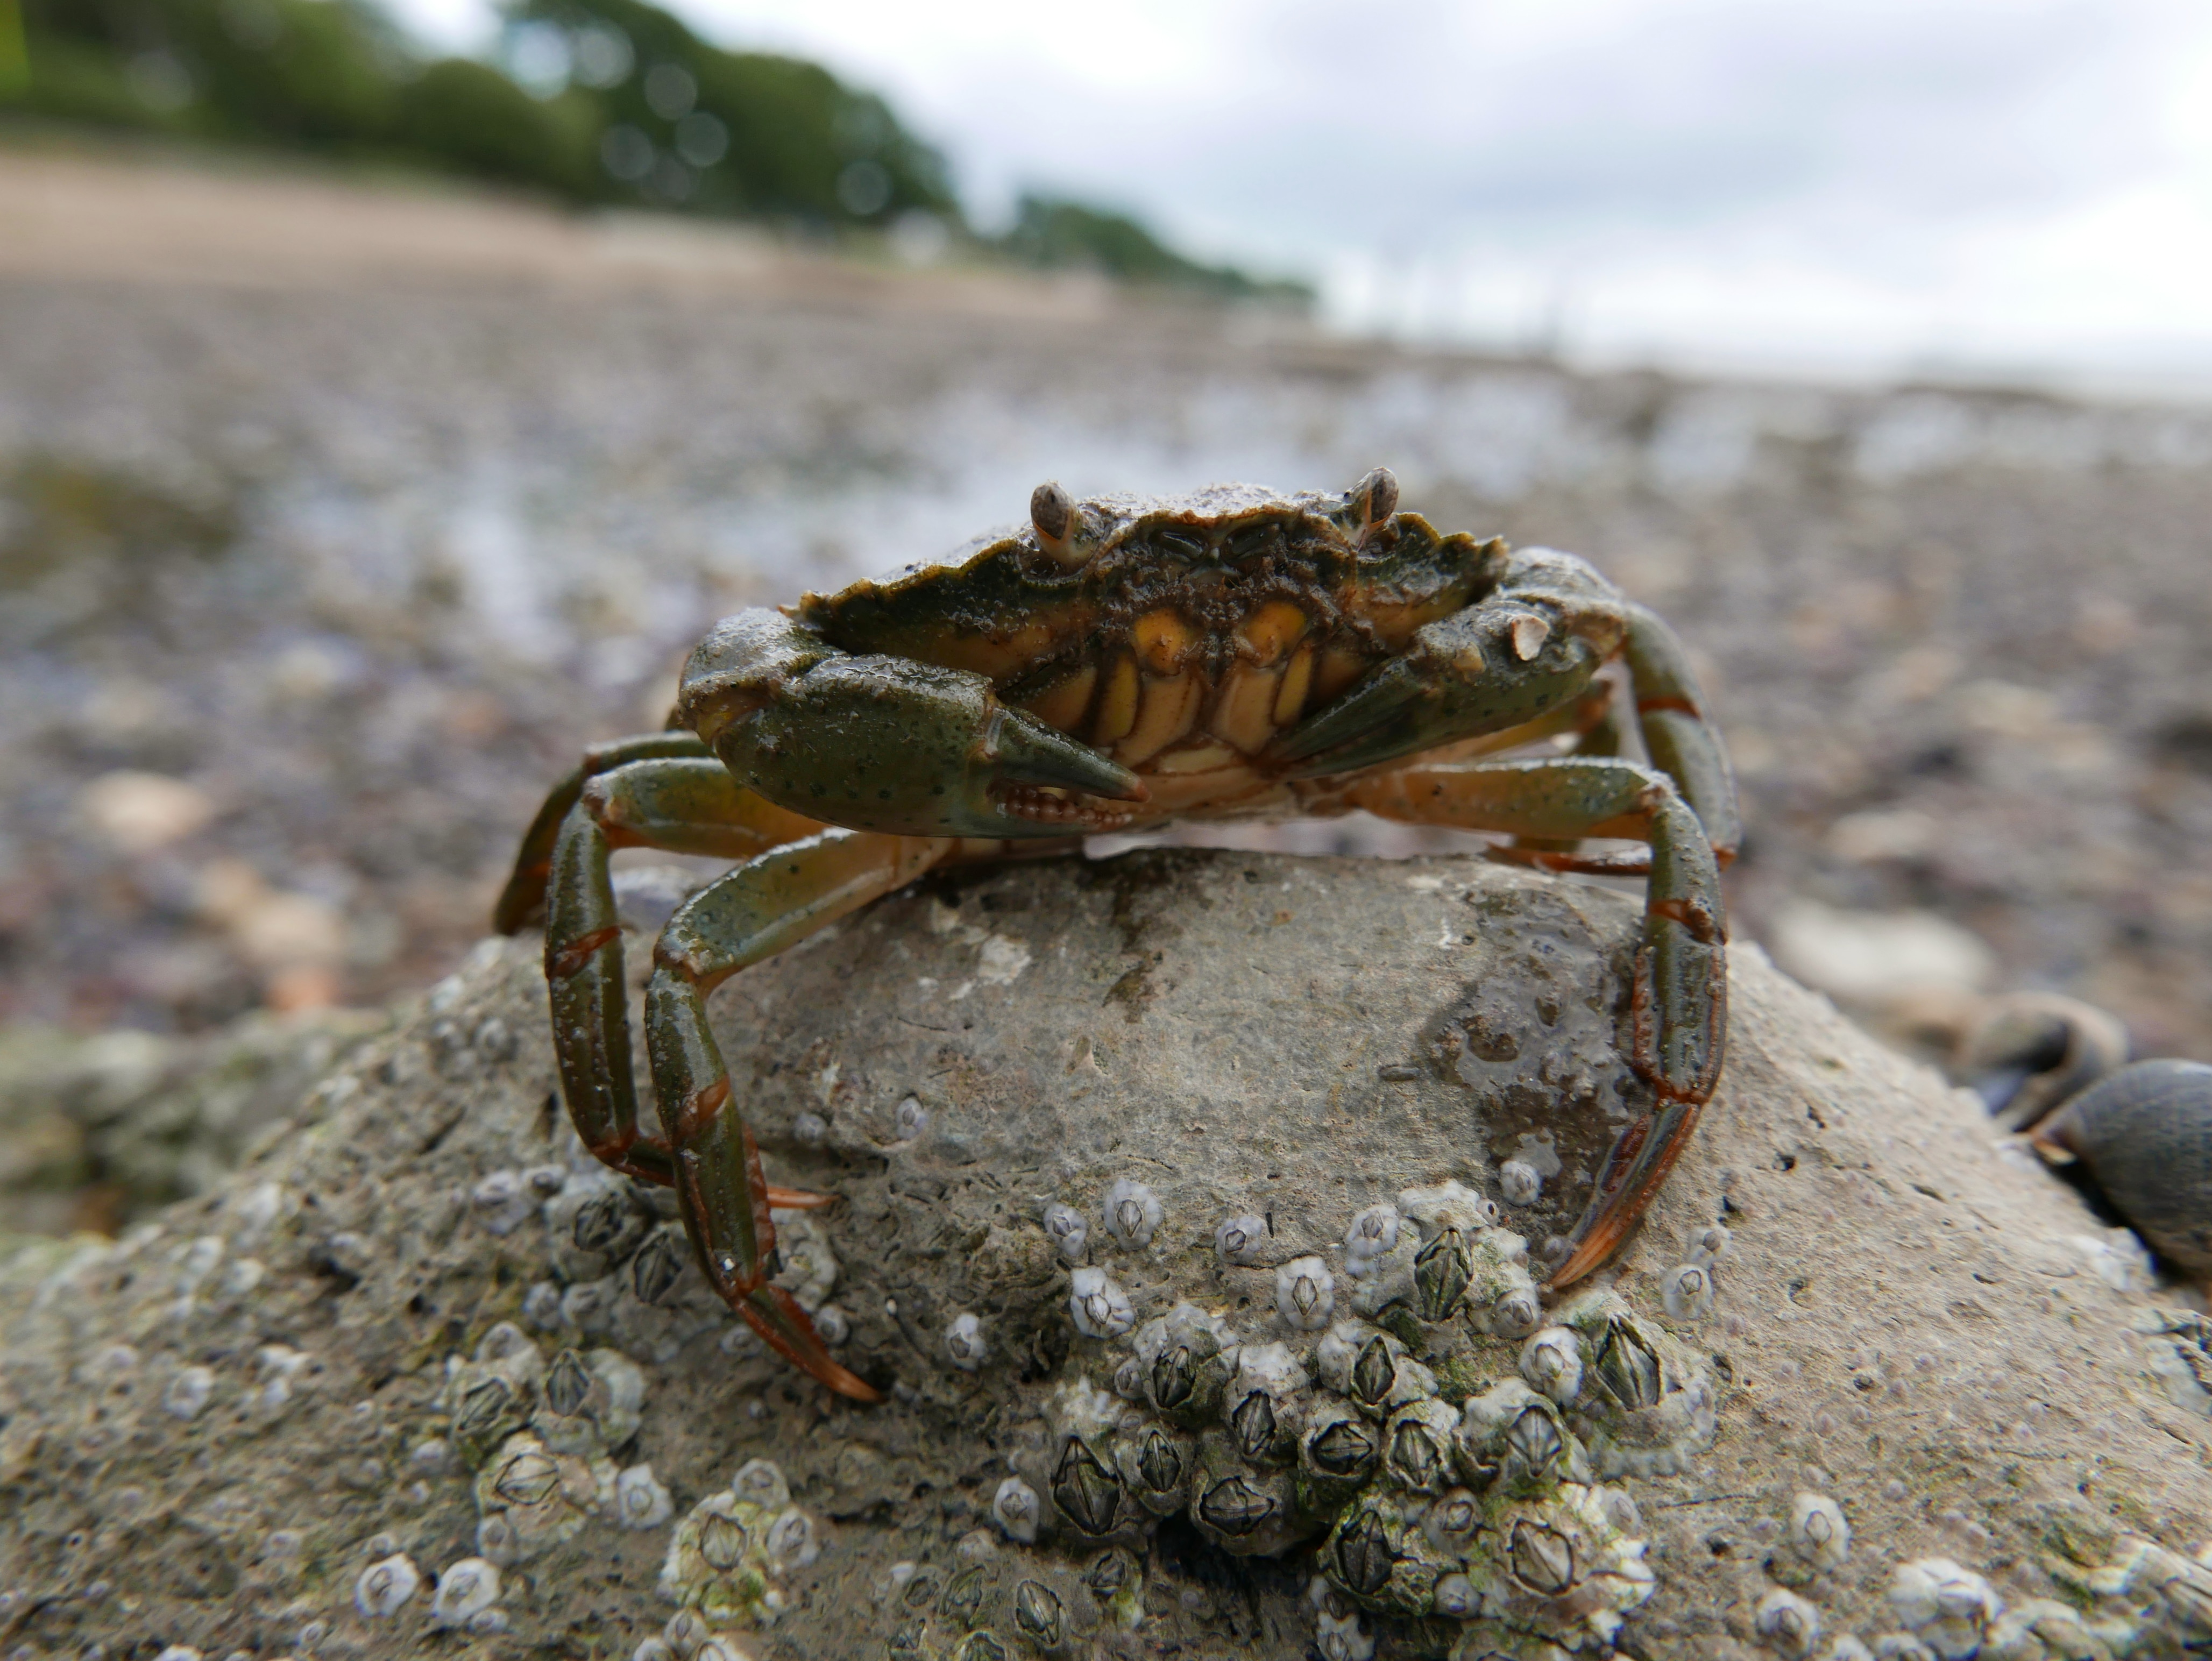
Enjoy crabbing

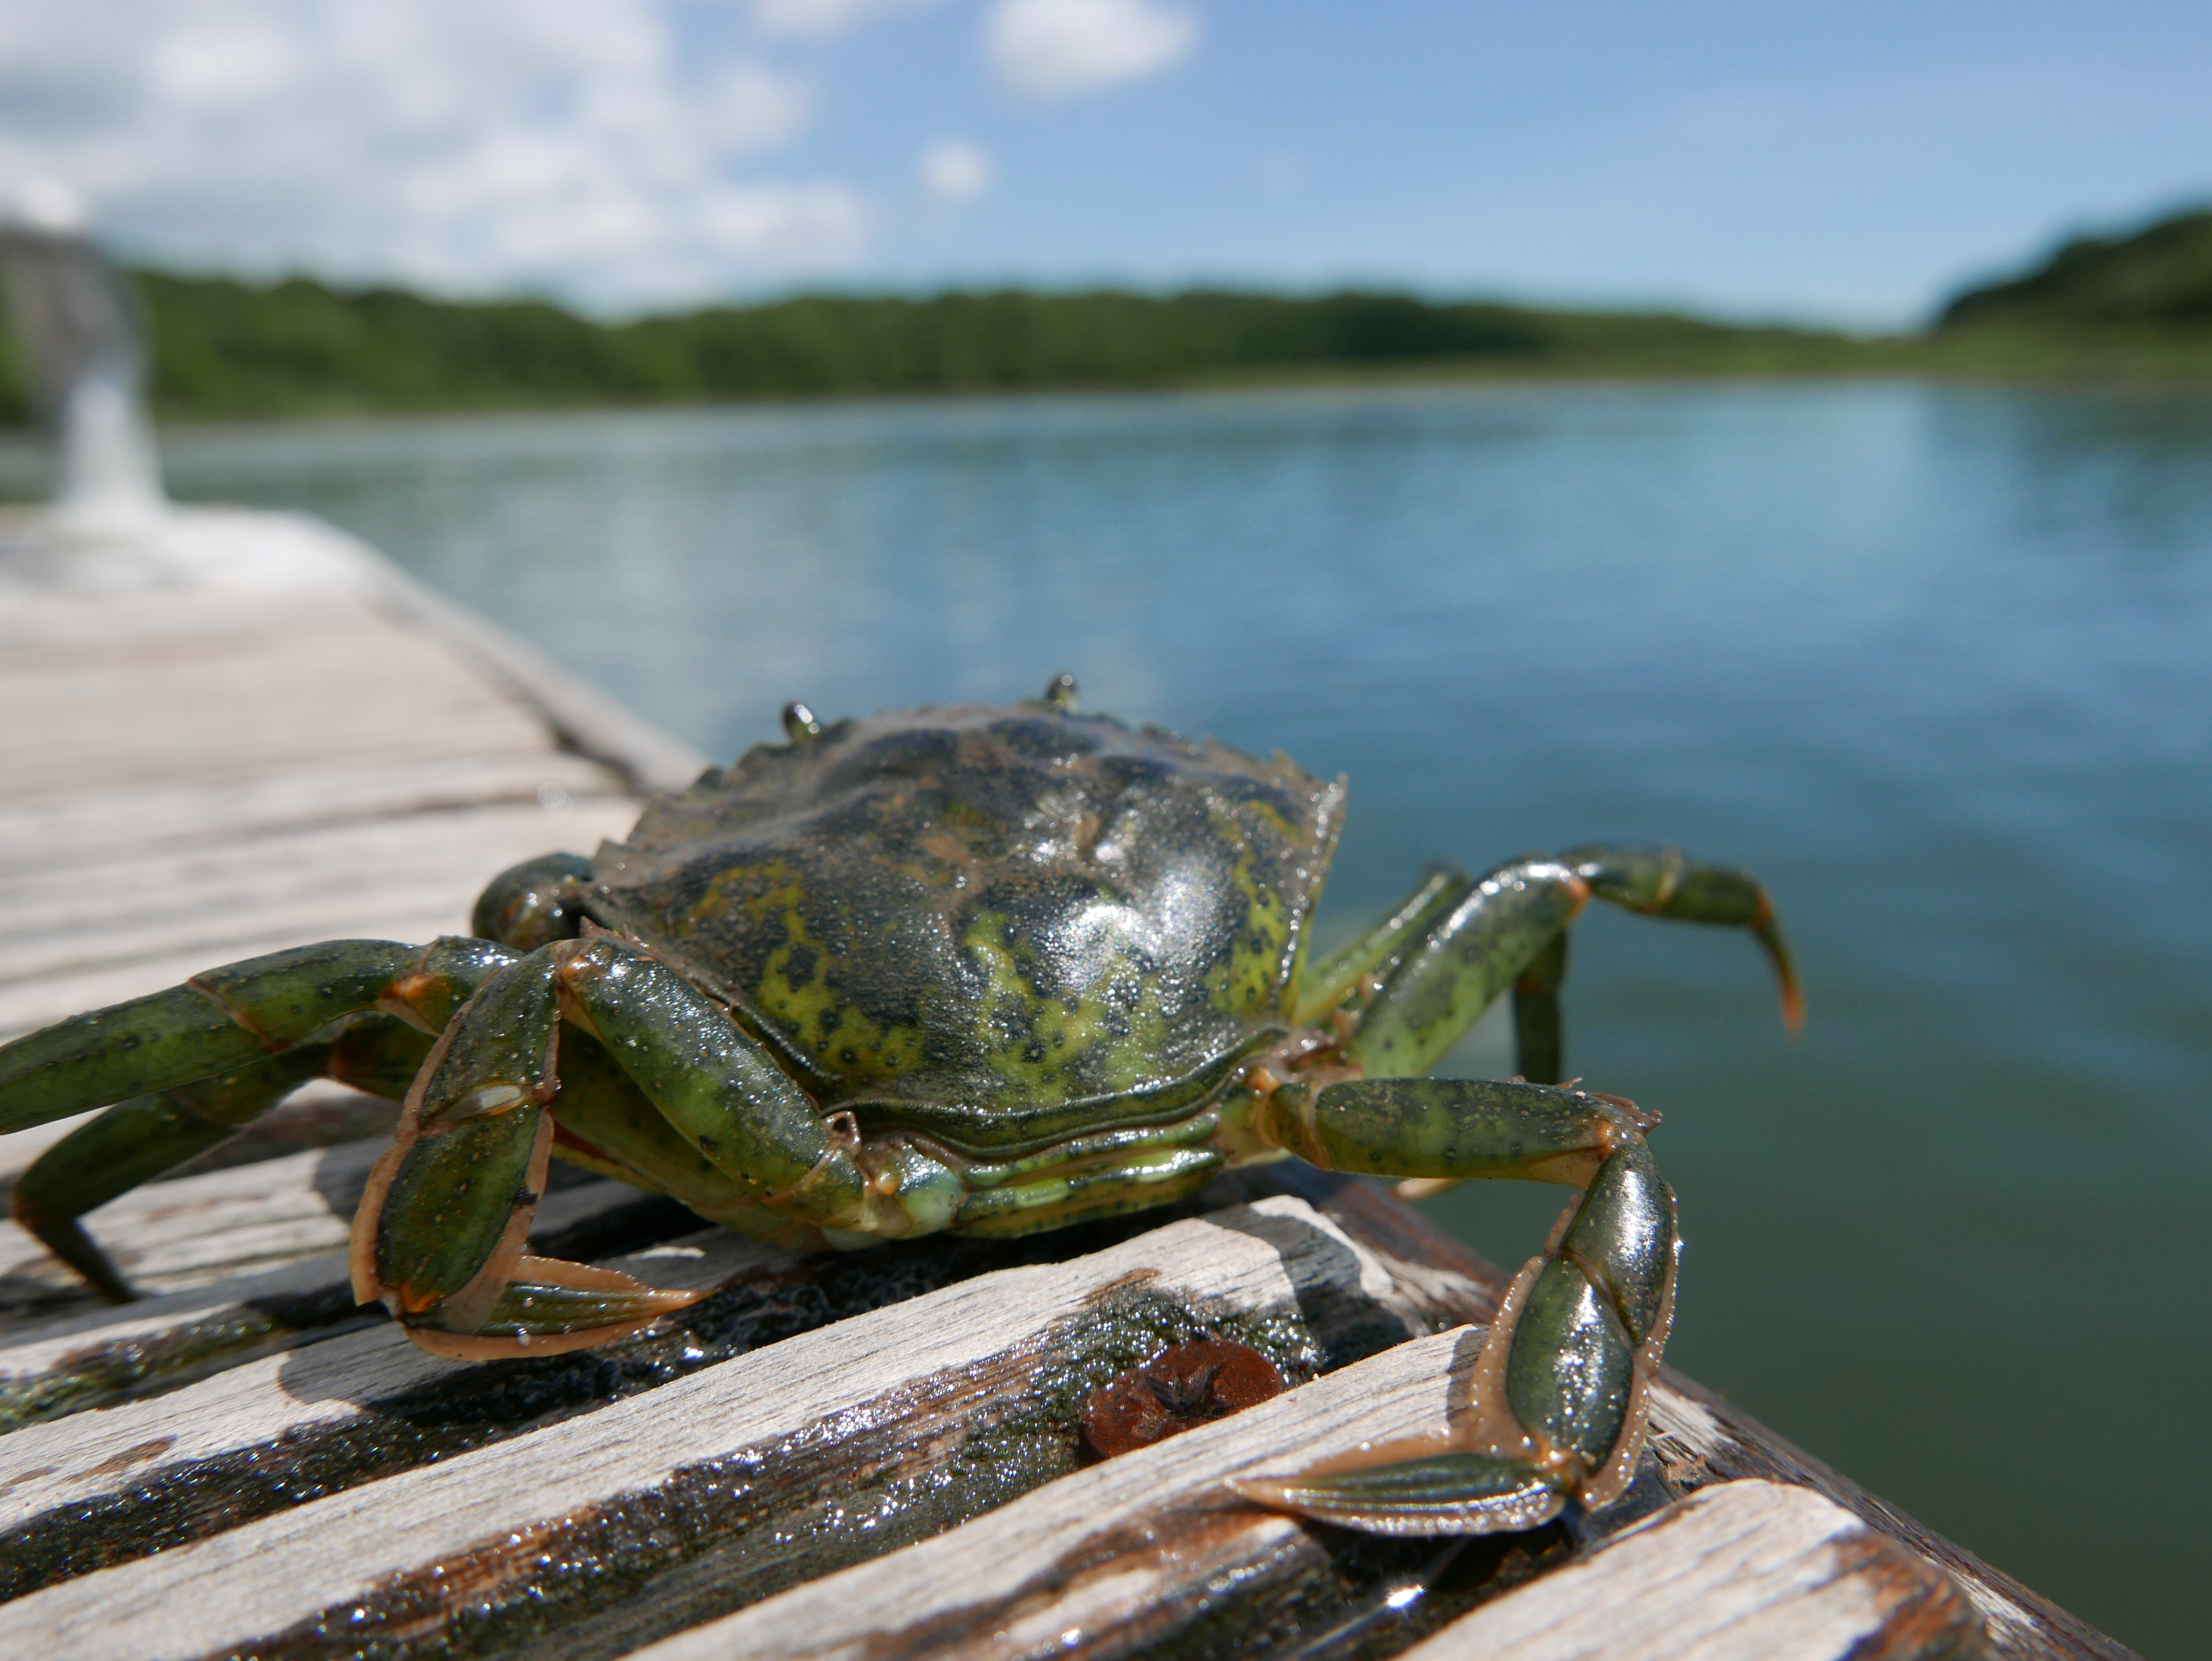
There are more than 4,500 species of crabs in the world, 62 of which live in or around the waters of the UK. However you are most likely to only find the 5-8 most common varieties by the shore. There is great guide to identifying any crabs you find here. *You can also find some fun crab potato print ideas at the bottom of the page.

IMG_20200614_213112_076

Like many crustaceans crabs shells are made chitin which is a hard wearing and tough substance. But you might be surprised to know that a crabs blood is actually blue because of the copper it contains. They also have 10 legs not 8 as many people believe. Crabs belong to a group of animals called Decapods which means 10 legs. Lobsters, shrimps, and prawns are also Decapods.

IMG_20190622_202636_334.jpg

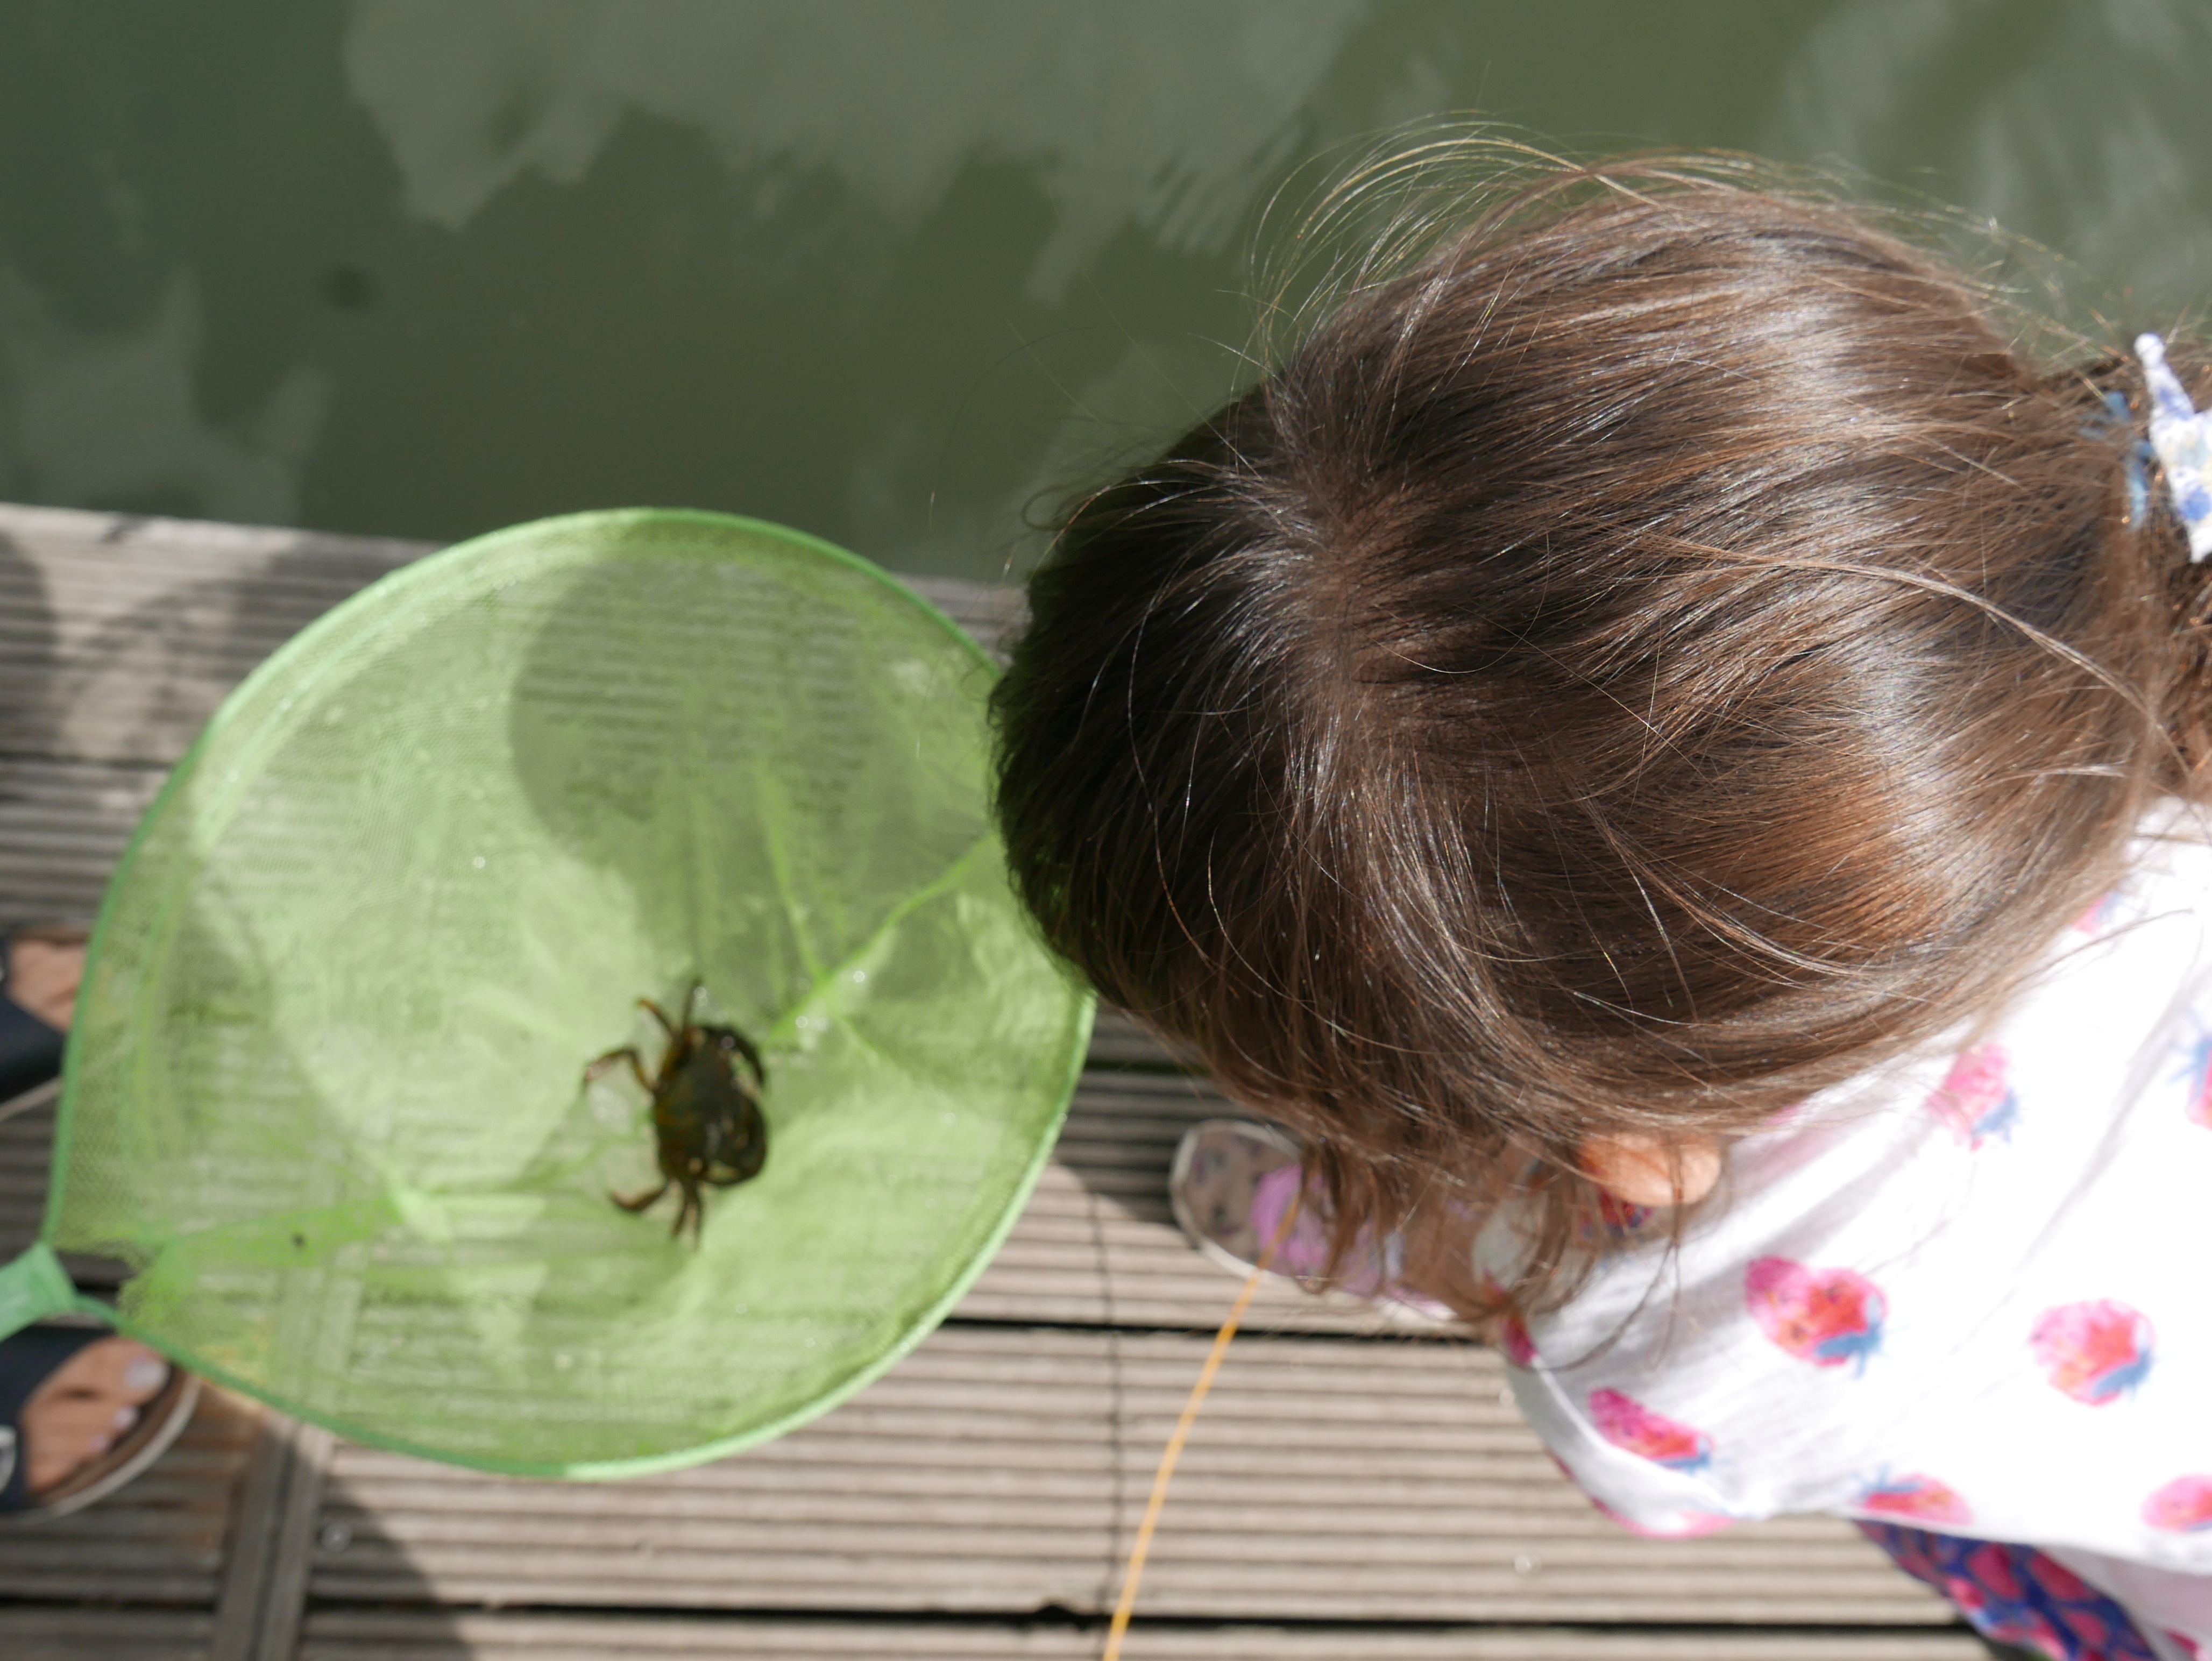
Crabbing is a great activity for children of all ages, they are fascinating creatures to find and there is always a lot of excitement when they scuttle about. You can either hunt for crabs by simply looking in rock pools or under rocks as the tide is going out. Or you can catch crabs in deeper water using a net, a crabbing line (make sure it doesn’t have a hook attached) and some bait. Leftover bacon or bacon rind is the best bait to use as most of the crabs in the UK are omnivorous meaning they eat both animal and plant matter. The best places for crabbing are often well known local spots along shorelines and tidal rivers. You can often can crab off pontoons, bridges, harbour walls, slipways or a jetty.

3200914.jpg

Please always handle crabs with care and let them go after a short while so they didn’t become too distressed (they blow bubbles when they are stressed). Crabs are often feisty and will pinch you in self defence, so if you want to pick one up its best to gently hold it either side of its shell or carefully pinch the back of crab in between too fingers so it doesn’t get hurt and it can’t hurt you. You can keep any of the crabs you catch in a bucket (filled with water from the location you are crabbing from) for a short while to observe. But remember to change the water or let them go every 10 mins or so, otherwise they won’t have enough air to breath. It’s also best not to overcrowd them as they will fight or become distressed if there are too many crabs together in a small space. You could also add in some seaweed or rocks to give them a bit of shelter to hide in.

Go rock pooling

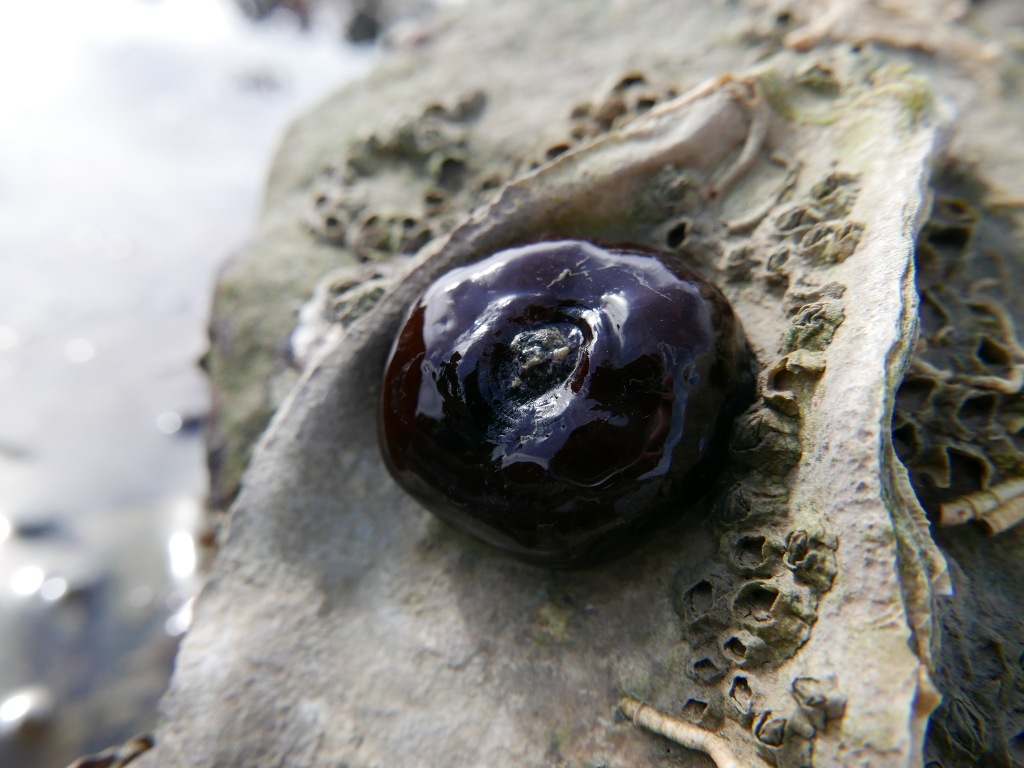
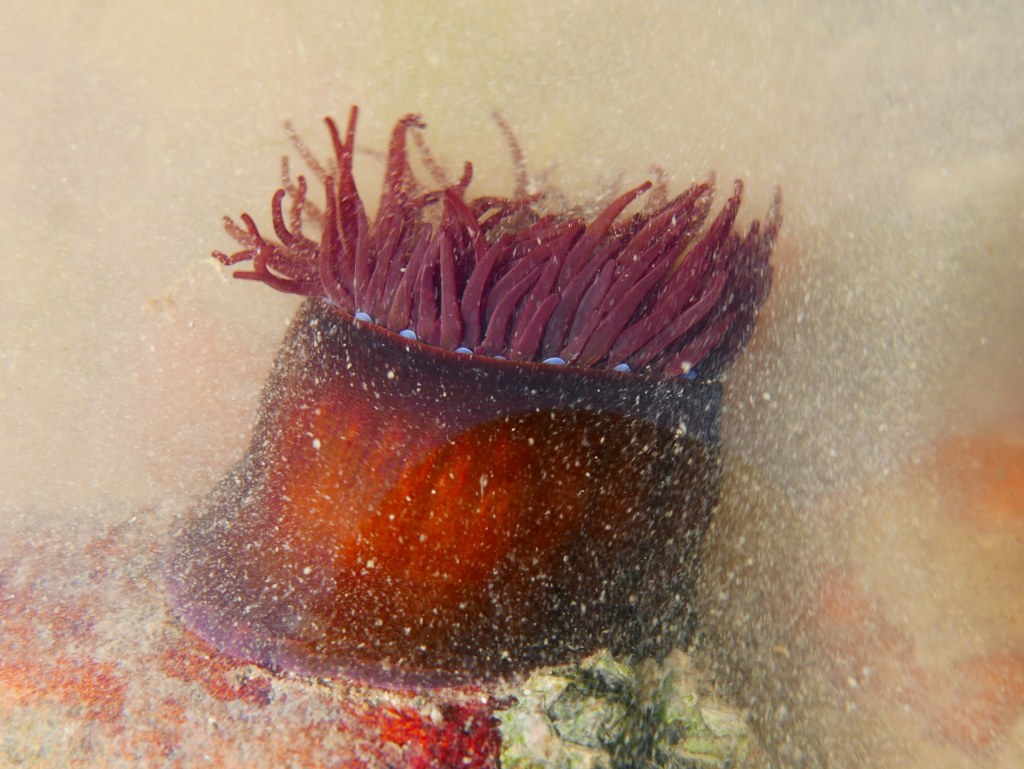
Rock pools are a fantastic place to find a wide array of underwater sea life like goby fish, jelly fish, sea urchins, starfish and sea anemones Any sea anemones you find above the waterline may resemble jelly like blobs. This is because they have folded themselves inwards under a protective layer to shelter from the elements and would be predators.

When they are under water they unfurl their tentacles to catch food, the tentacles have stinging cells which allow them to paralyse prey. Sea anemones are one of the world’s slowest moving creatures, they mostly attach themselves to a surface and remain there. However they are also one of the longest living marine animals and have the ability to clone themselves.

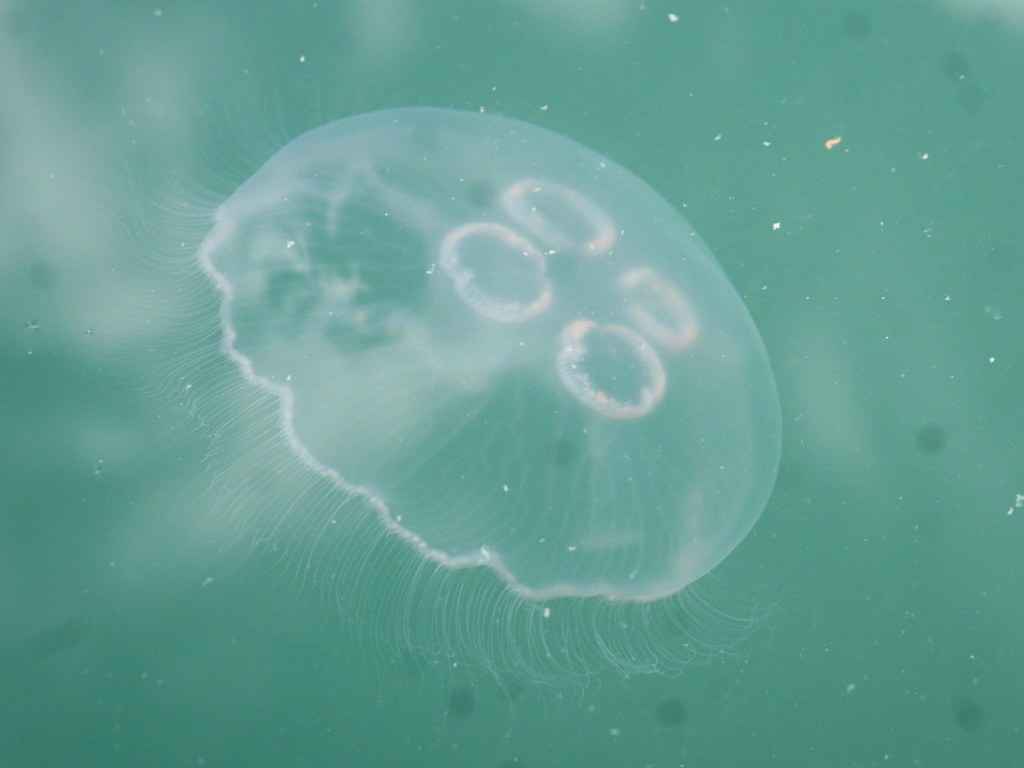
If you get lucky you may even spot some jelly fish. The most common jellyfish to find on UK shores is the Moon jelly fish which mostly drifts with the currants feeding on plankton. You can identify them by the four circles on the under side of the dome, these circles are actually the reproductive organs. Did you know that jellyfish don’t have brains, hearts or blood and they are 95% made of water?

Go fossil hunting

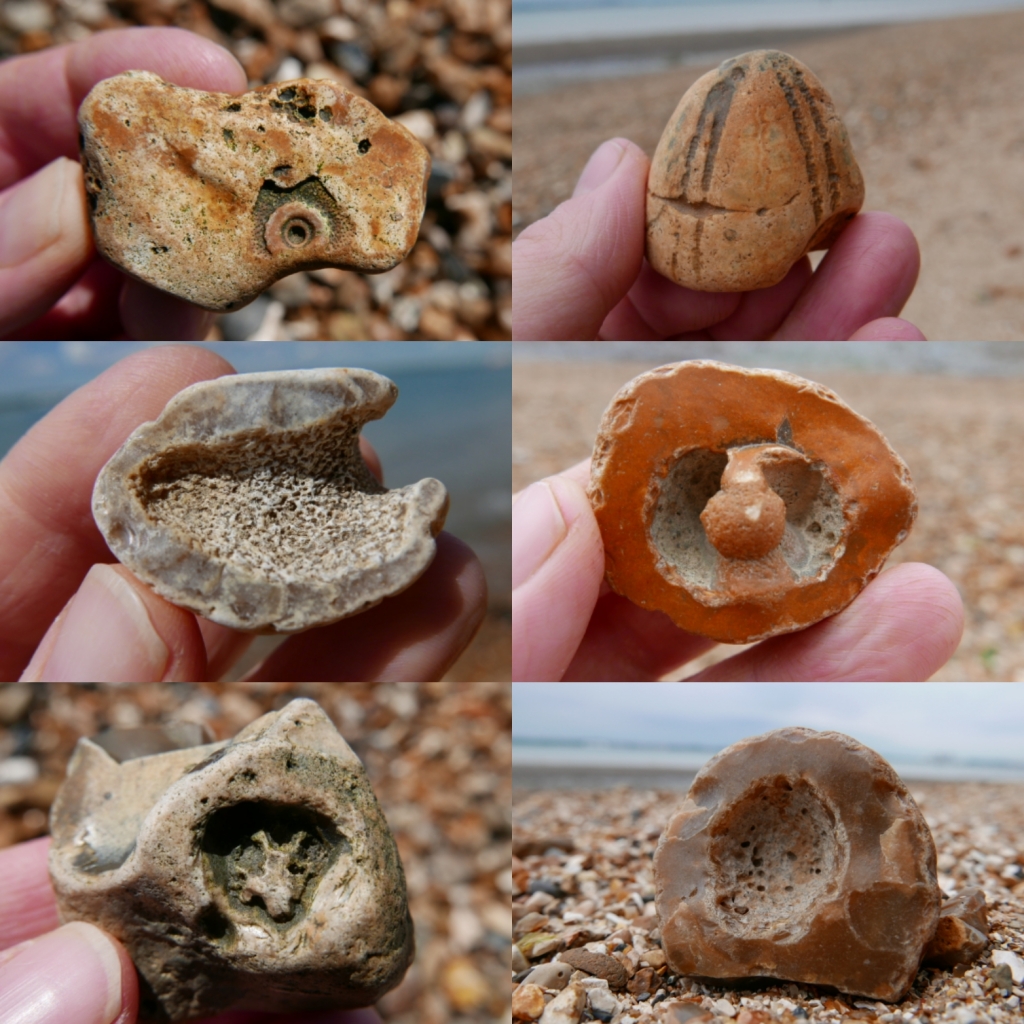
A fossil is the preserved remains, imprints or impression of a once living thing like as animal or plant.  Did you know the word fossil comes from the Latin word ‘fossilis’ which meant “obtained by diggin” A good place to find small sea fossils is in flint. Flint forms in layers of chalk and is easy to find in the South of England and Essex, you will often find that most of the pebbles on beaches and gardens in these areas are made of flint. Chalk itself is formed from layers of mud and tiny sea creatures that have died and fallen to the ocean floor.

Over millions of years these layers of mud and sea creatures are compacted into chalk. As the chalk compacts it squeezes seawater containing silica (dissolved quartz) into any cavities, gaps or spaces around it forming nodules and layers of flint. Sometimes the flint nodules forms around a small sea creature or shellfish like a sponge (above) or sea urchin below), preserving them in the flint as a fossil.

Make nature art

Nature art (also sometimes called land art) is a wonderful nature activity that encourages creativity and fine motor skills in children of all ages and abilities. All you need is some imagination and natural materials like pebbles from the shore to create pictures, shapes and patterns with.

IMG_20200614_215838_653

Or if you are on a sandy beach you could simply draw and write in the sand, using your fingers or a stick to make patterns and pictures or practising writing skills. Or how about using a combination of materials and marks to make your art.

Search for ancient sea glass

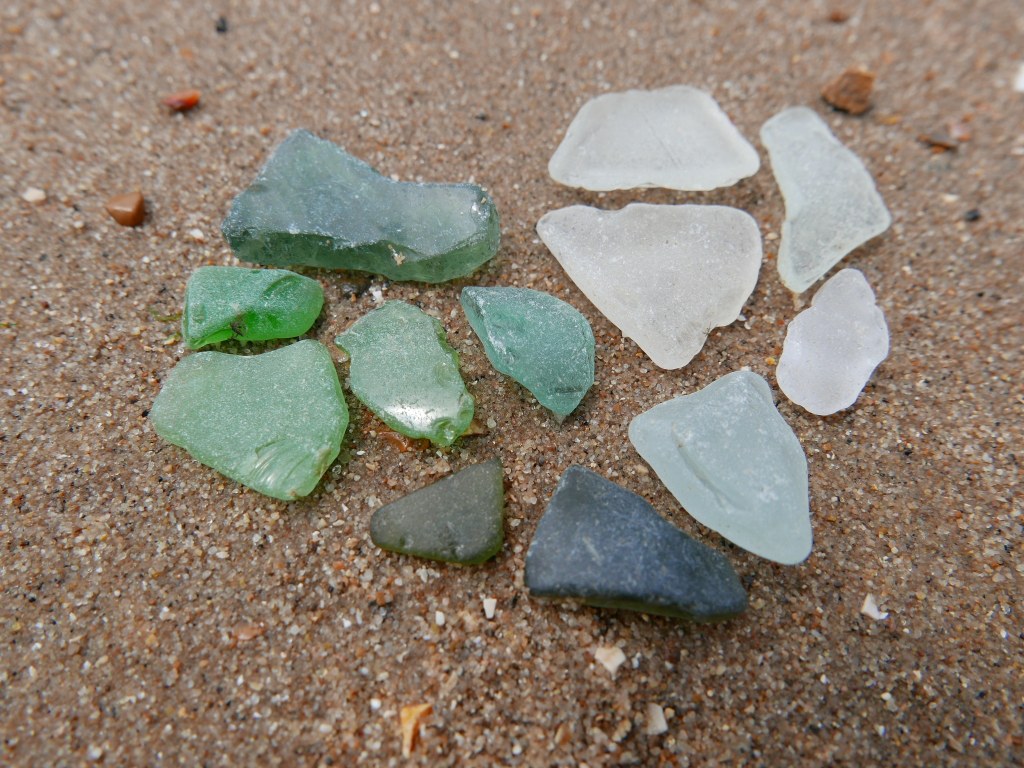
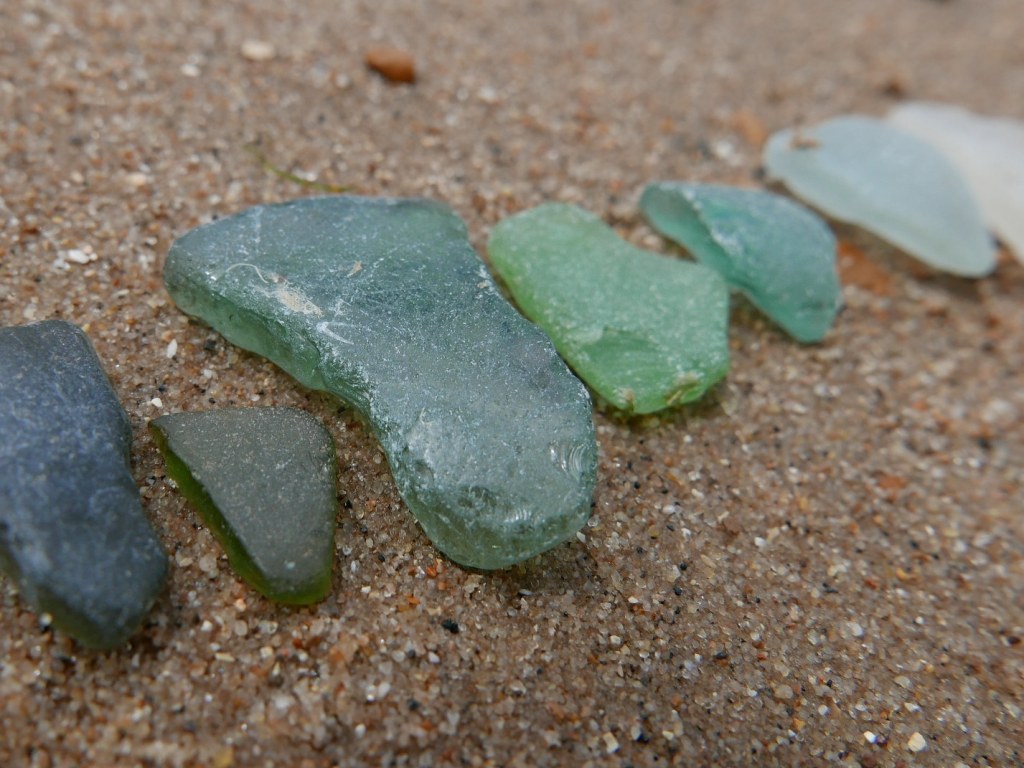
Sea glass is glass that has been weathered an worn down by the sea, a process that can take anything from 20-200 years for the glass to become fully smoothed and frosted by the ocean. The sea glass can come from anything like broken bottles and other rubbish dumped in the ocean to glass windows and tableware from ancient shipwrecks. Safety note: please supervise children when collecting sea glass and make sure they don’t accidently pick up any sharp or newly broken glass.

You can often tell where a piece of sea glass may have come by it’s colour. The most common colours green, brown, white and clear normally come from alcoholic and non alcoholic drinks bottles. Lime green can come from1960’s soda bottles and forest green and soft blues are most likely to be from 19th centaury medicine, ink or soda bottles.

Jade and amber coloured sea glass are more uncommon and are likely to come from old whiskey, spirit and medicine bottles. Other uncommon colours include purple, cobalt and cornflower blues from Milk of magnesia, vicks vapour rub and poison bottles and opaque white which comes from early milk bottles, The rarest colours to find are grey, pink, red, yellow, teal and black. Black sea glass is glass that had iron slag added to it to increases it’s strength and protect liquids sensitive to light damage such as wines. spirits and medicines.

12 Family Beach Games to Have Fun in the Sun

Beach Bag Essentials

Take Great Photos of Your Kids at the Beach

Want to get your kids doing a little beach-hunting? Print out this Beach Scavenger Hunt before you head to the shore!

How To Tell if a Sand Dollar, Starfish, Egg Case, Urchin, or Sea Shell is Alive or Dead

Here are some quick tips on how to determine if a sea creature you find on the beach is alive or dead so you don’t accidentally kill any living animals when you’re trying to collect sea shells! For more great tips on eco-friendly seashell collecting, be sure to also read our other post A Guide To Ethical Shell Collecting!

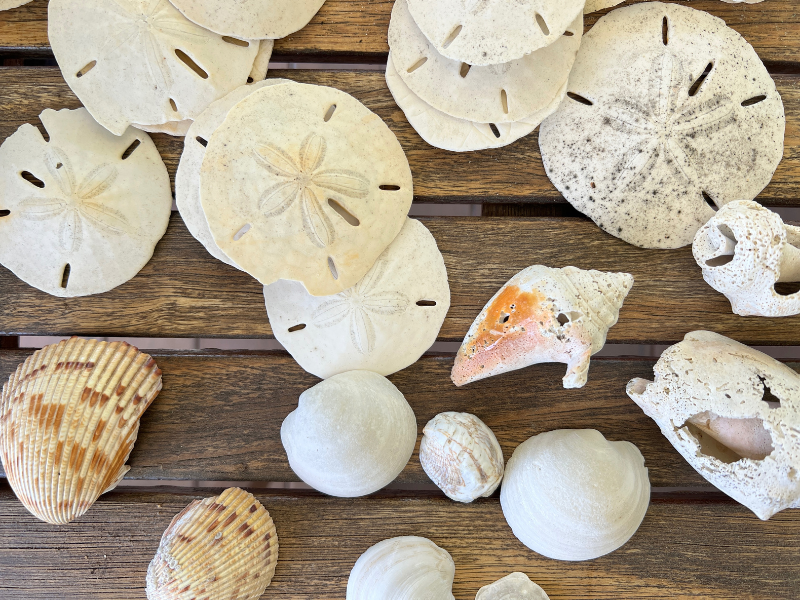
How to tell if a sand dollar is alive or dead.

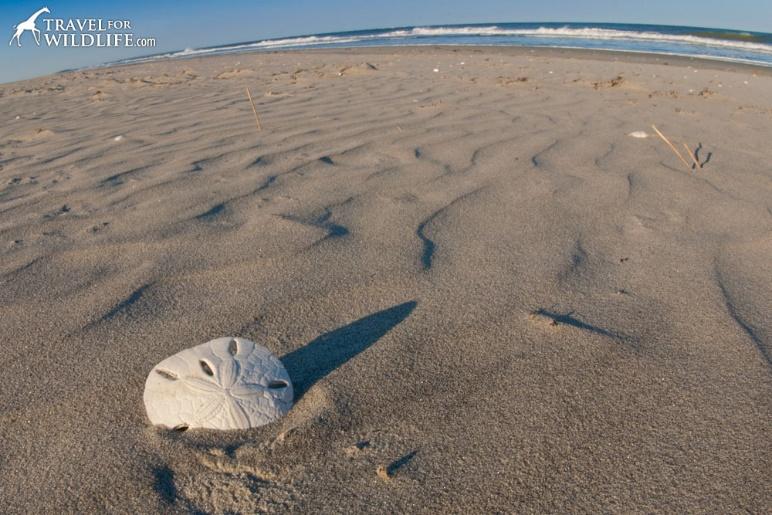
If a sand dollar is bleached white and appears completely bald (has no tiny “hairs” or spines on it) then it is definitely dead.

Dead sand dollar on the beach in Hog Island, Virginia

How to tell if a sand dollar is dead. It is white and completely “bald” with no small bristly hairs then it is definitely dead.

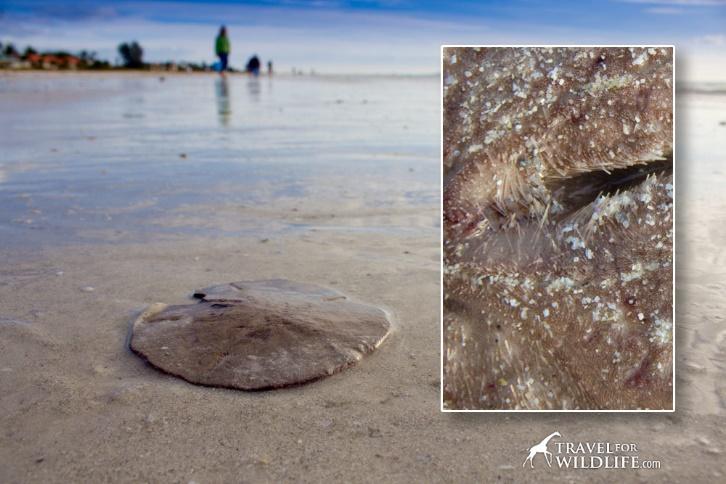
If a sand dollar is brown and velvety-looking, then it is probably alive. Look at the back and see if the tiny little spines are moving. If you’re not sure, let it be or return it to the ocean!

Is this sand dollar alive or dead? If it is white and

How to tell if a sand dollar is alive.

Living sand dollars are brown in color and “hairy” looking with tiny bristles all over. Inset shows tiny spines on underside.

So, to answer the question are sand dollars alive? If the sand dollar is white and “bald” it is dead. If it is brown and hairy, it’s probably alive!

How to tell if a starfish is alive or dead.

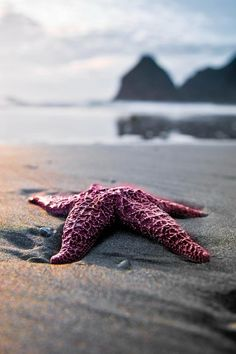
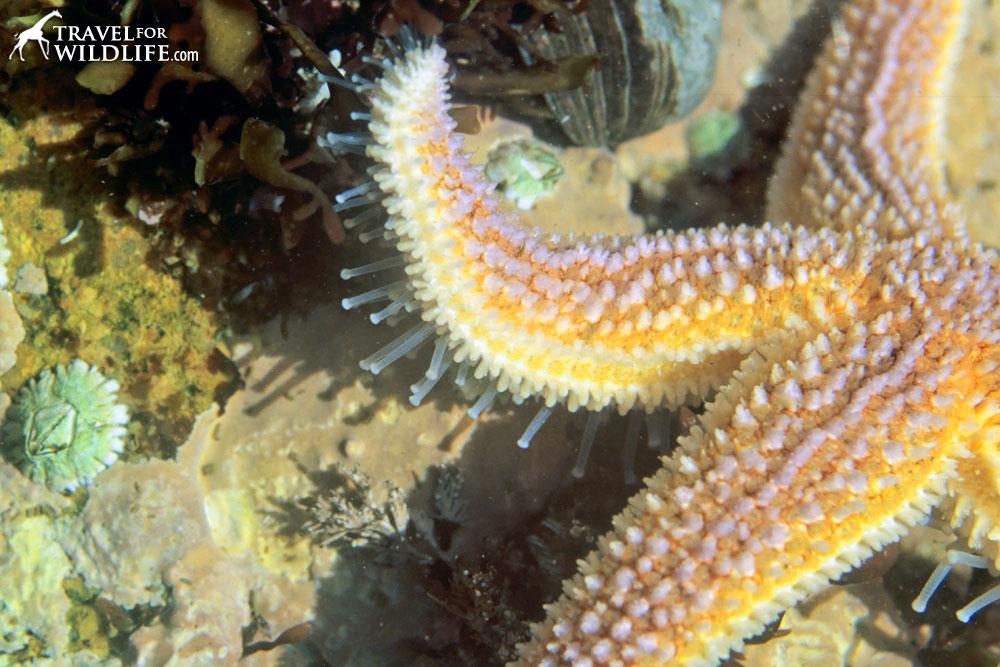
Starfish get around using thousands of tiny tentacles, called tube feet, on the bottom of each arm. If you look closely at the underside of a starfish and see these tiny tentacles moving, then the starfish is definitely alive! If you don’t see movement but want to be sure, try touching the tube feet gently or placing it in the water to see if the tube feet start moving. If you’re not sure, leave it be or gently return it to the ocean! Plus they are notoriously disgusting smelling if you try to dry one for your collection. Why not leave it for the crabs and birds to eat?

Is it alive or dead? Live starfish have tiny moving tentacles called tube feet underneath

How to tell if a sea star (starfish) is alive or dead:
look for moving “tube feet” on the bottom of each arm.

How to tell if a skate egg case is alive or dead.

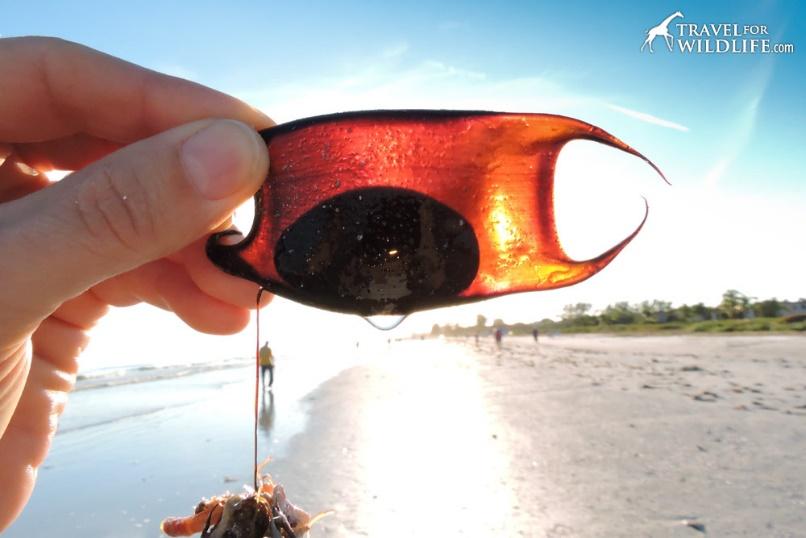
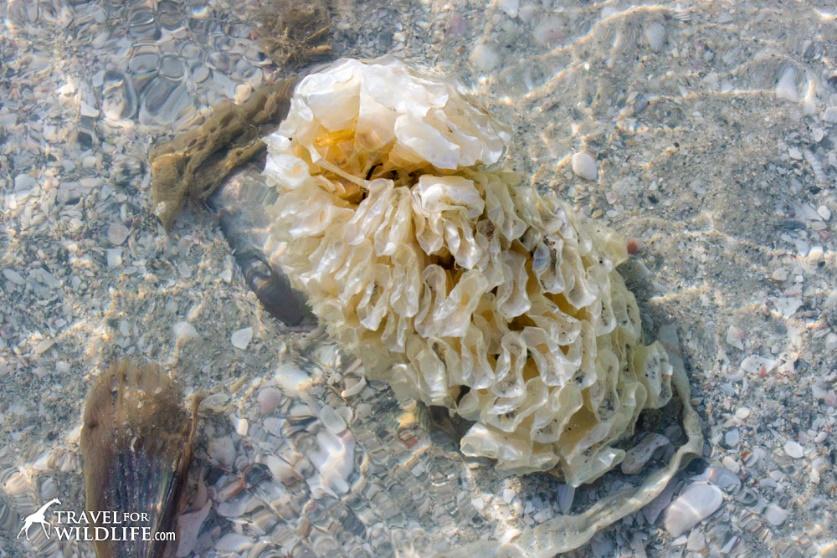
There are many beautiful egg cases that get washed up on beaches. One often found on the Atlantic coast of the U.S. is sometimes referred to as a “Devil’s Purse” or “Mermaid’s Purse”. It is the egg case for a skate (usually a Clearnose Skate) which is a close relative of rays and sharks. If a skate egg case is split open on one end between the “horns” and is empty inside then it is definitely dead and no longer has an embryo inside!

If the case is intact and has fluid inside, then it’s very possible that a living skate embryo is still inside. Try holding it up to the sun and looking through it to see if there is movement. In the photo below you can see a fairly undeveloped embryo, but it will eventually grow to be a perfectly formed small skate before the egg case splits open and releases the baby skate into the sea!

A living skate egg case or mermaid's purse on sanibel island


How to tell if a skate egg case is alive. If it is full of fluid, hold it up to the sun and look for the skate embryo inside!

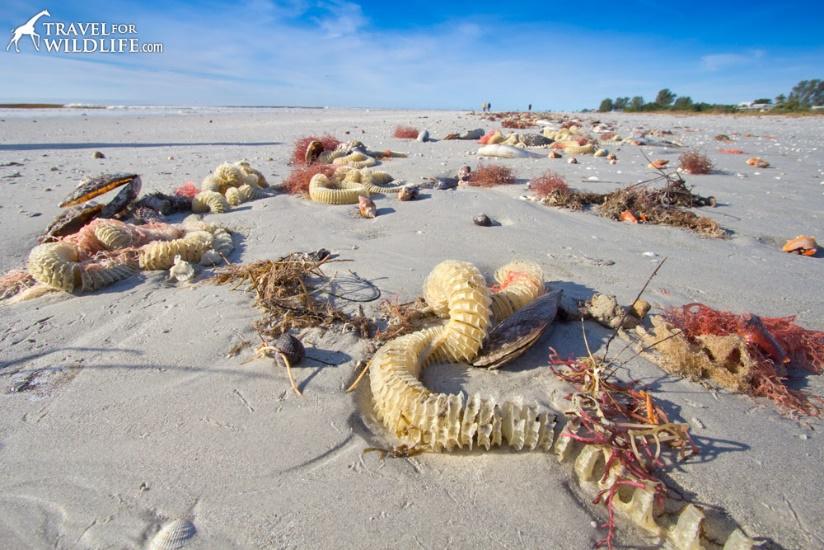
Whether I see movement or not, I always return unopened egg cases back to the sea, just in case. Maybe that skate will save your life one day in return! Other beautiful egg cases include the long spirals of lightning whelks… and the strange masses made by various conchs and tulips.

living lightning whelk egg cases on Sanibel Island, Florida

Lightning Whelk egg cases washed up on the beach on Sanibel Island, Florida

How to tell if an egg case is alive. It's not easy! Horse Conch egg case

A horse conch egg case on Sanibel Island, Florida.

It’s a lot harder to tell if these are still viable so I always return them to the sea.

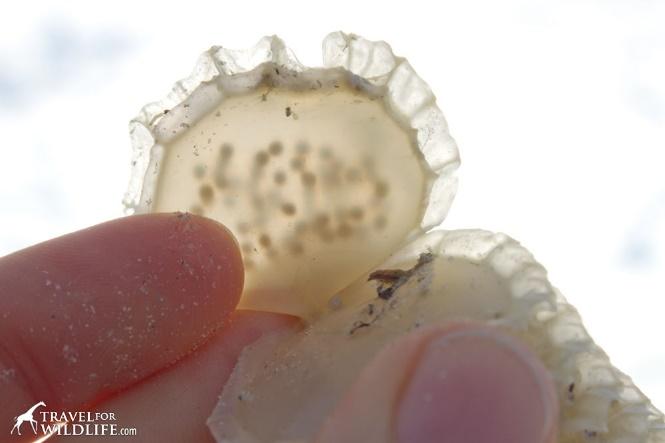
You can try the same trick with whelk egg cases by holding them up to the light to look through them. If you see tiny things floating within a fluid inside, those are perfect miniature baby lightning whelks and probably alive!

baby lightning whelks inside the egg case

If you see tiny blobs inside a Lightning Whelk egg case, those are hundreds of tiny Lightning Whelks inside!

How to tell if a sea urchin is alive or dead.

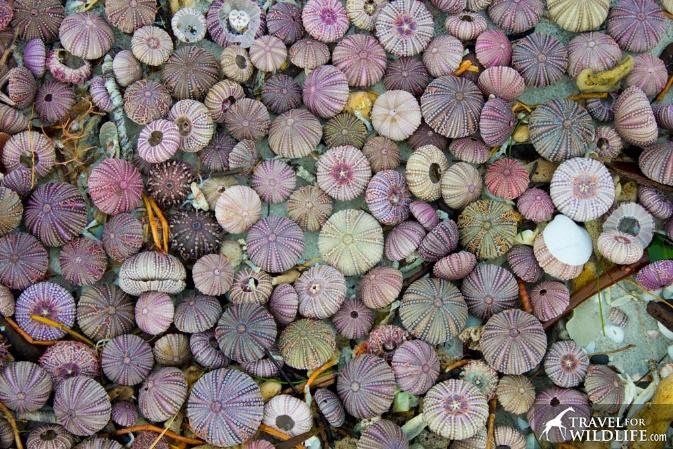
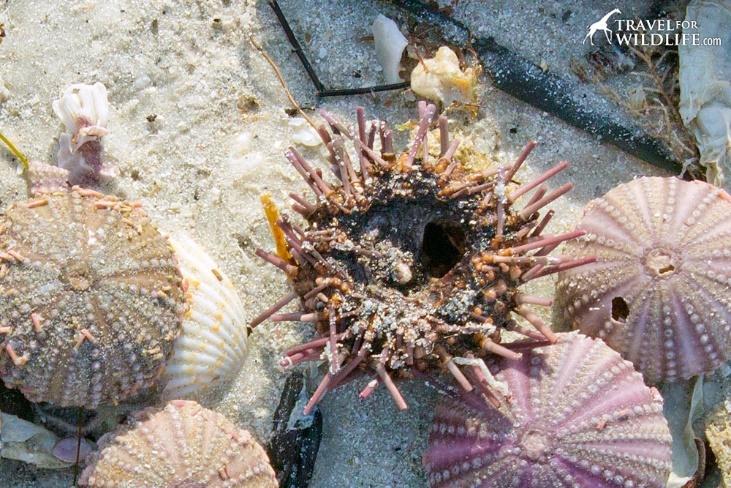
Living sea urchins have short or long spines protruding all over their bodies. If you find an urchin with the spines intact, it may be alive. You can try to carefully return it to the sea with a bucket or shovel. If an urchin shell is “bald” with no spines at all, and empty inside then it is definitely dead.

colorful dead sea urchin shells (or tests) on Sanibel Island, Florida

How to tell if a sea urchin is dead. If it is “bald” with no spines and is hollow inside, like these urchin shells on Sanibel, it is definitely dead.

By popular demand, this photo is now available as a print! (As well as beach towels, mugs, pillows, shower curtains, phone covers, and other cool products!)

If you love this photo you can buy a print of these beautiful sea urchins here!

how to tell if a sea urchin is dead, it has spines but is hollow inside

Living sea urchins are covered with spines, but if it’s hollow inside like this one, then it is dead.

How to tell if a sea shell is alive or dead.

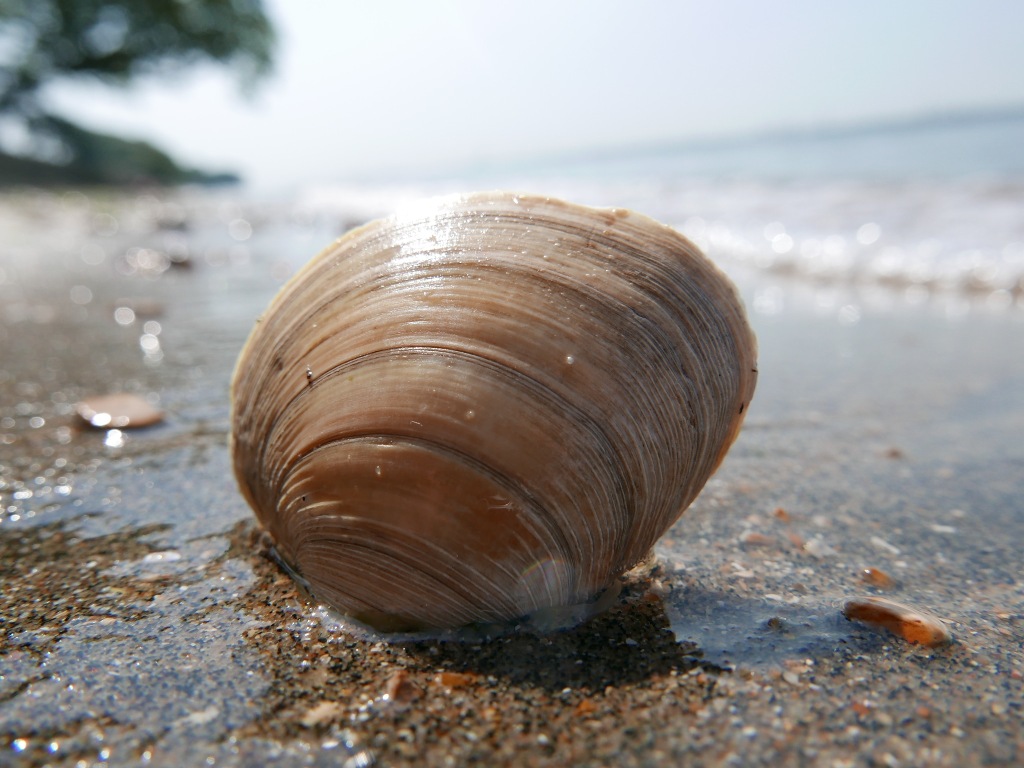
If a bivalve shell is intact, and both halves are tightly closed together, then there is still a living creature inside.

Living Spiny Jewel Box shell washed up on the beach in Sanibel Island, Florida

How to tell if a bivalve sea shell is alive. If the two halves of the shell are tightly closed together, like this Spiny Jewel Box, then it is alive!

You may also encounter living bivalves with their shell open that may be feeding in shallow pools or stranded by storms. If you touch them and they close their shell, then of course they are alive!

A living cockle shell on Sanibel Island, Florida

If you find a bivalve shell open, it may still be alive like this Cockle. If you touch it and it closes then it’s definitely alive!

If you’re not sure then err on the side of caution and place it gently back in the sea.

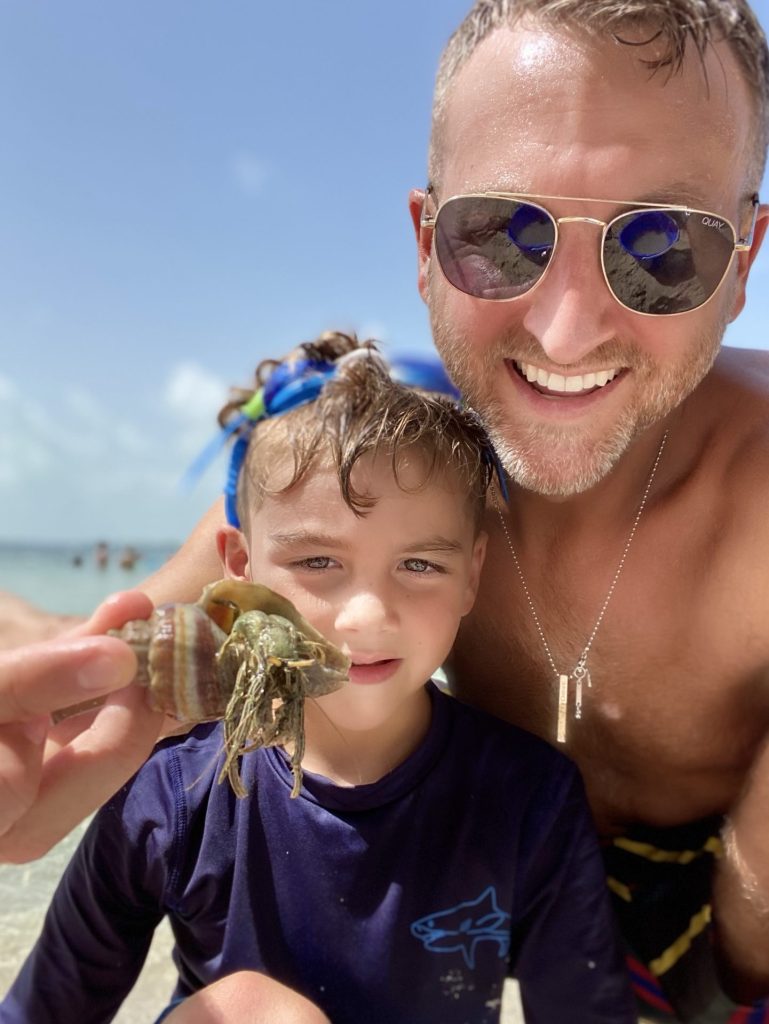
With spiral shells simply look inside! If you see anything in there, whether it’s the original mollusk or a hermit crab tucked deep inside, then it’s probably alive. Feel free to return it gently to the ocean!  (Though if it smells really horrible then it’s probably dead.)

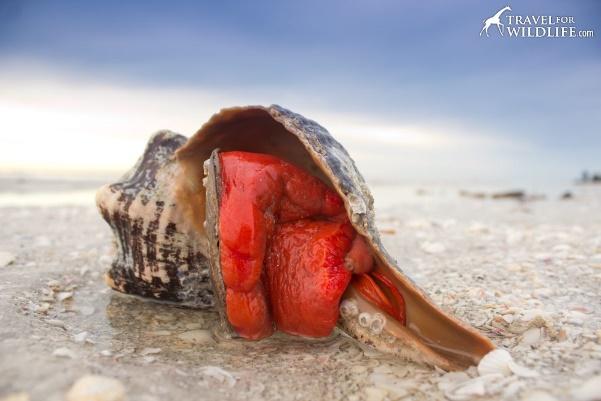
A live horse conch on the beach on Sanibel Island, Florida

How to tell if a spiral sea shell is alive or dead. If you see any animal inside, it’s probably alive. If it’s moving like this Horse Conch then it’s definitely alive!

Many mollusks that live in spiral shells have what is called an operculum. It’s like a hard flat door that they use to close themselves tightly into their shell. If you seen an operculum blocking the entrance, then there is a living animal inside! If you’re not sure, leave it be.

the operculum of a large Lightning Whelk on Sanibel Island, Florida

How to tell if a spiral shell is alive. If there is a “door” closing the shell (the operculum) like this Lightning Whelk, then it is alive!

Live Apple Murex with operculum on Sanibel Island, Florida

You can tell this Apple Murex shell is alive because the operculum (the tiny “door”) is tightly blocking the opening.

For more great eco-friendly shell collecting ideas, be sure to read our article A Guide To Ethical Shell Collecting!

Want to see more of the amazing creatures I found on Sanibel?
Check out  this photo gallery: 
The Living Shells: A Photo Gallery of Sanibel Island Seashore Creatures.  

     Seaweed Activities  

Kids Crafts for the Beach

shells

Photo by Andrea Martelle

1. Shell Collecting, Sorting, & Arranging

Chances are you and your kids already collect seashells when at the beach. This is one of those simple activities that we all seem to be drawn to.

While some might hold out for the perfect (whole) shells or the rarer specimens, most kids are just as excited about the common shells and shell fragments they come across. Wash the shells off, sort them by type, arrange them by color or shape, trade them, whatever you’d like!

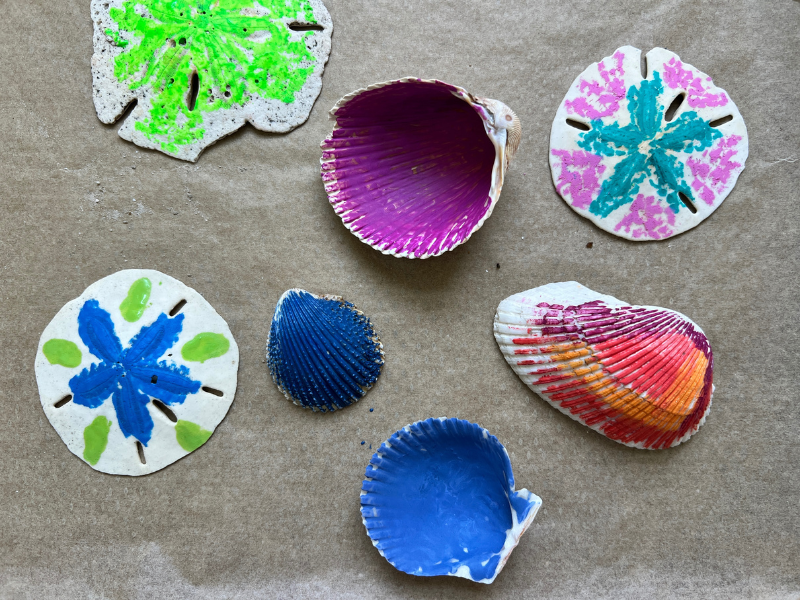
painting shells

2. Paint Shells

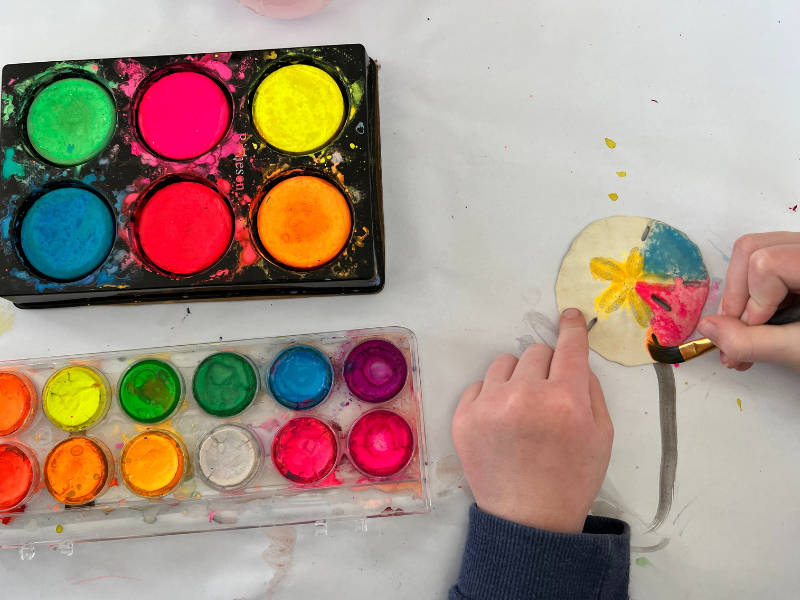
If you bring any shells home, you can paint them! We’ve done this with both tempera cakes and BioColor Paint and they are both great for adding color to your shells.

Not near a beach? You can purchase inexpensive shells and have your very own beach art day wherever you are!

melted crayon shells

Photo by Andrea Martelle

3. Melted Crayon Shells

We’ve made plenty of melted crayon rocks but seashells are even more fun! They look like special treasures when you add the crayon on the inside.

You can also try this with oil pastels on unheated shells. It’s a good option if you don’t want to work with hot shells.

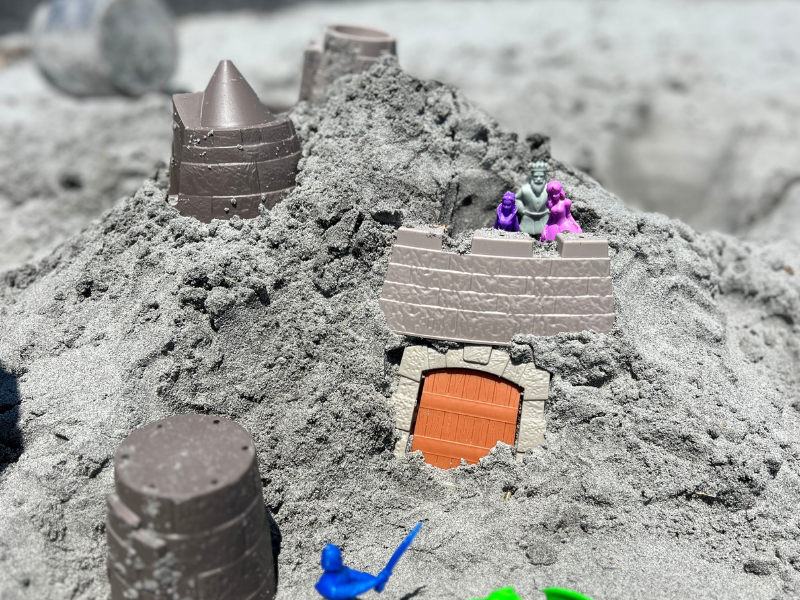
sand castle

Photo by Andrea Martelle

4. Building Sandcastles

Of course! The beach is one giant sandbox and water play table combined, enticing us to shape and mold it into structures that will last just until the tide comes in.

beach mandala

Photo by Andrea Martelle

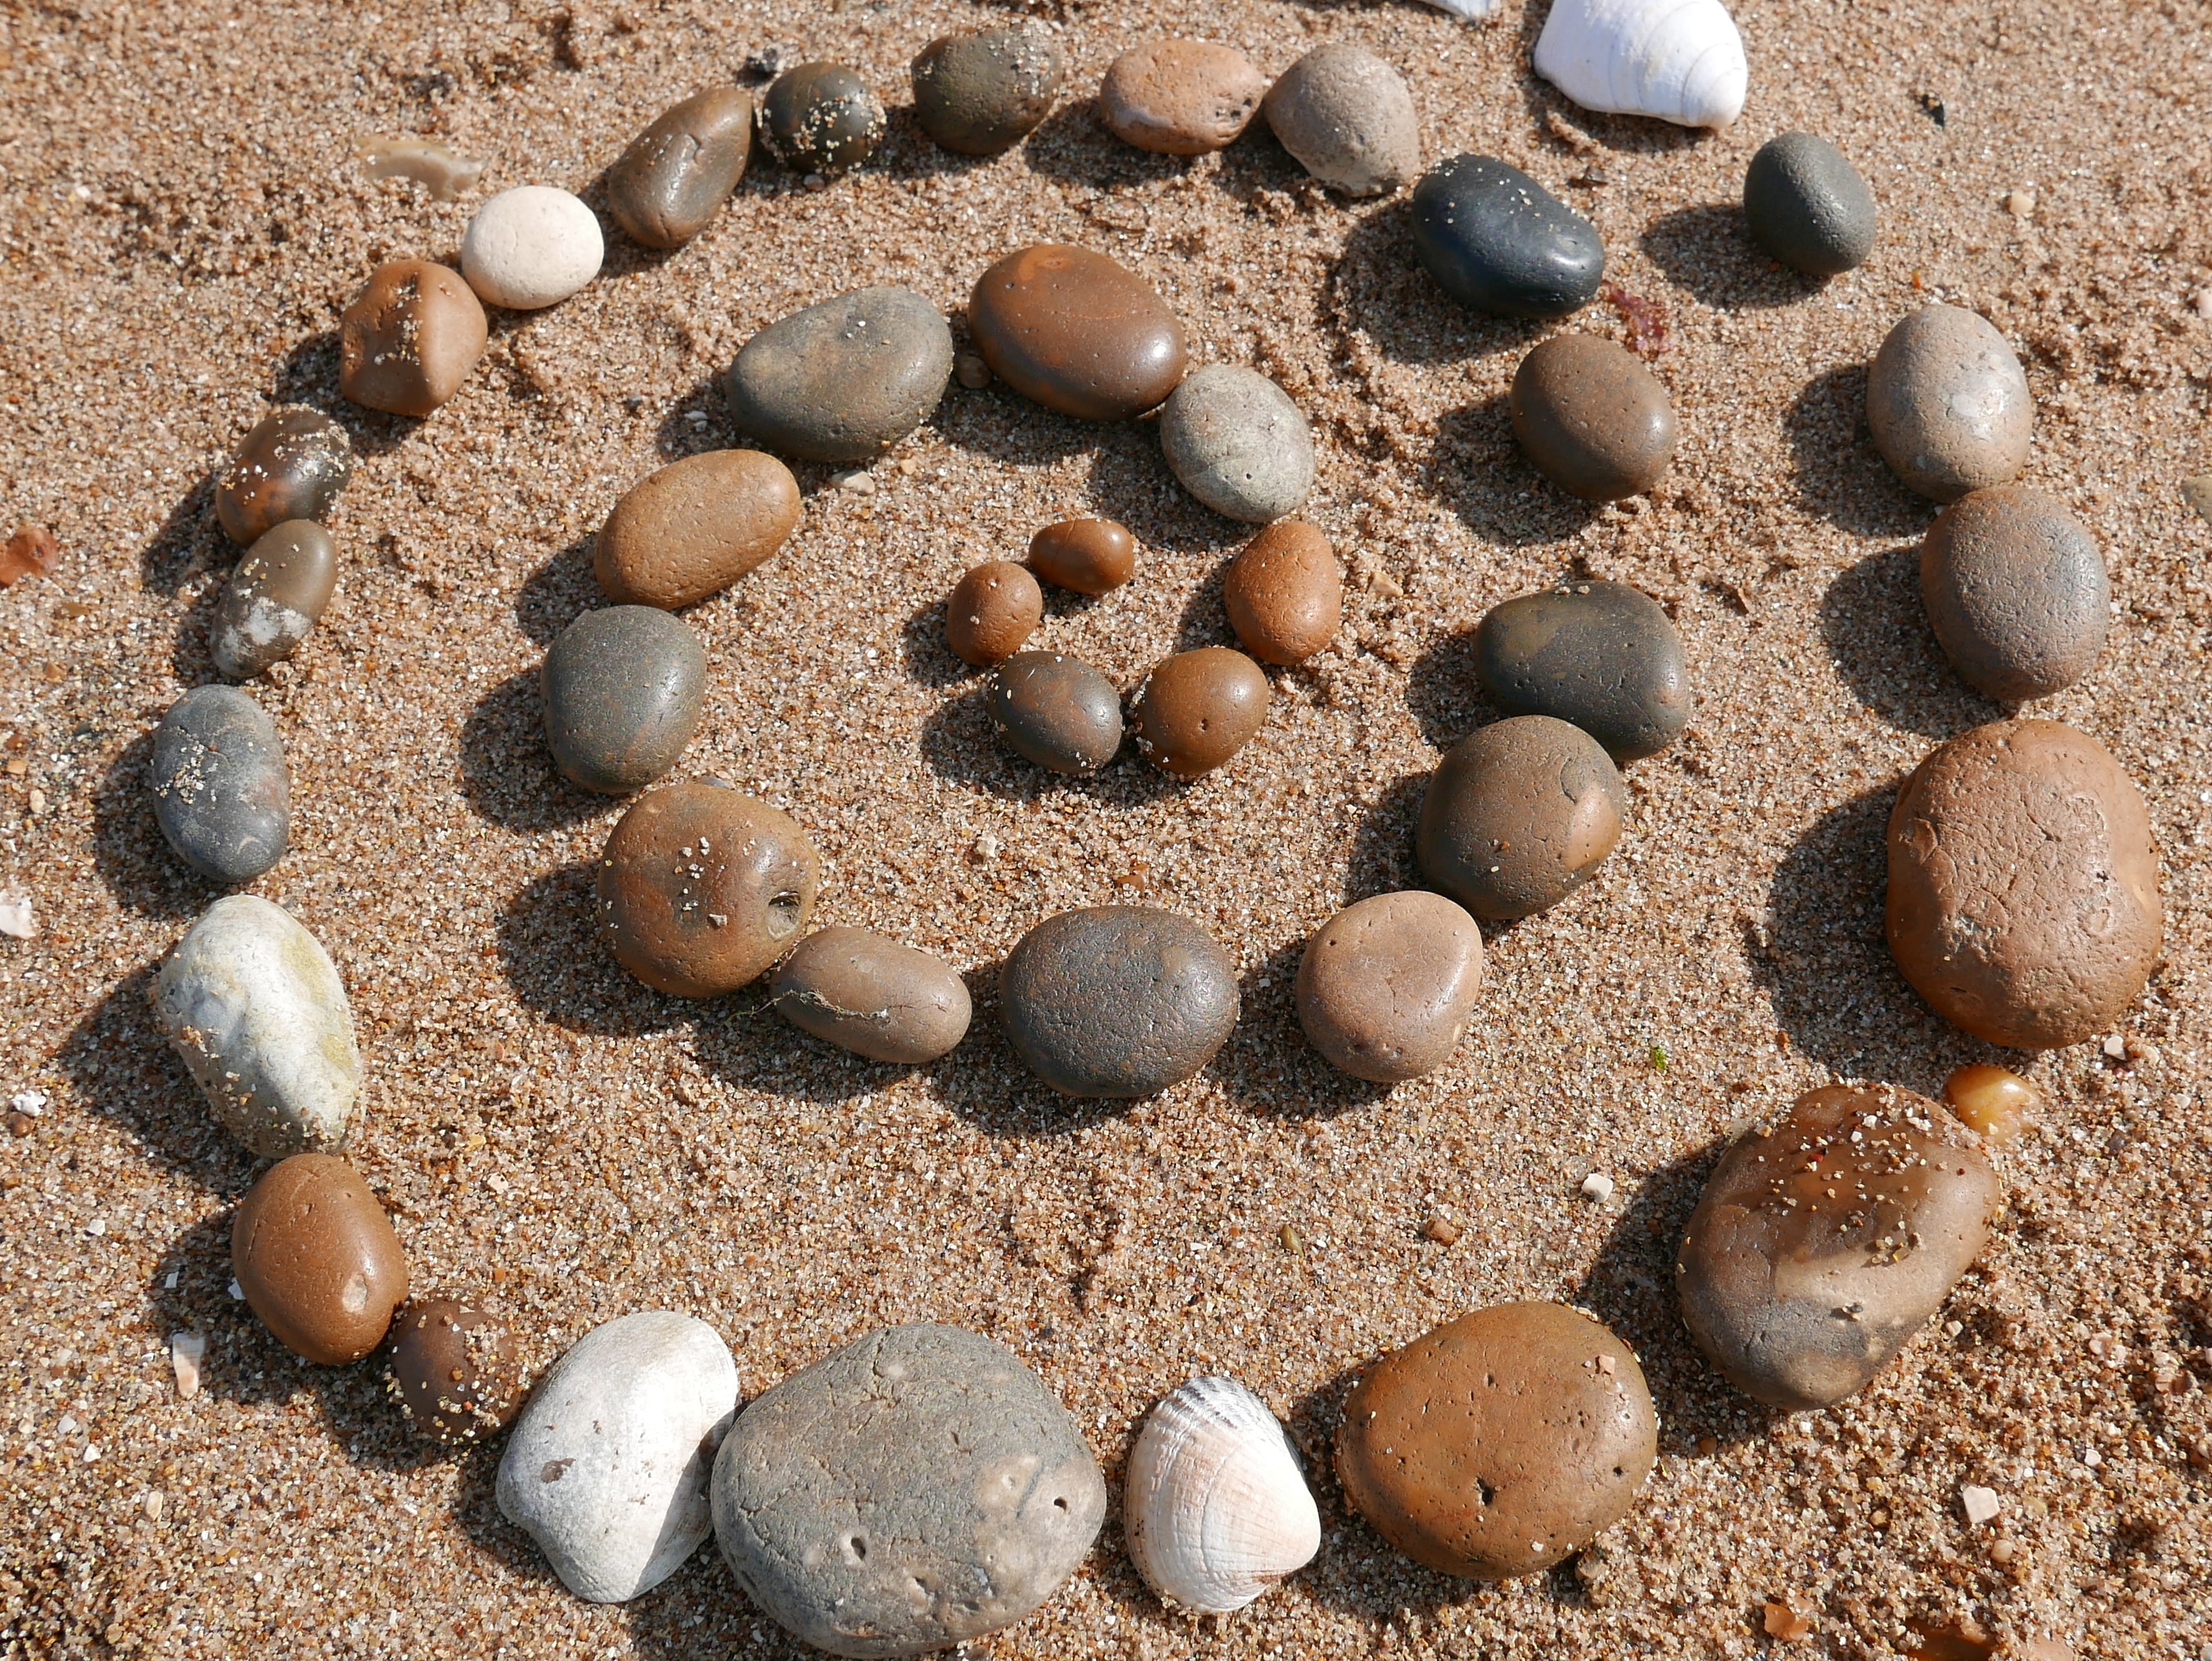
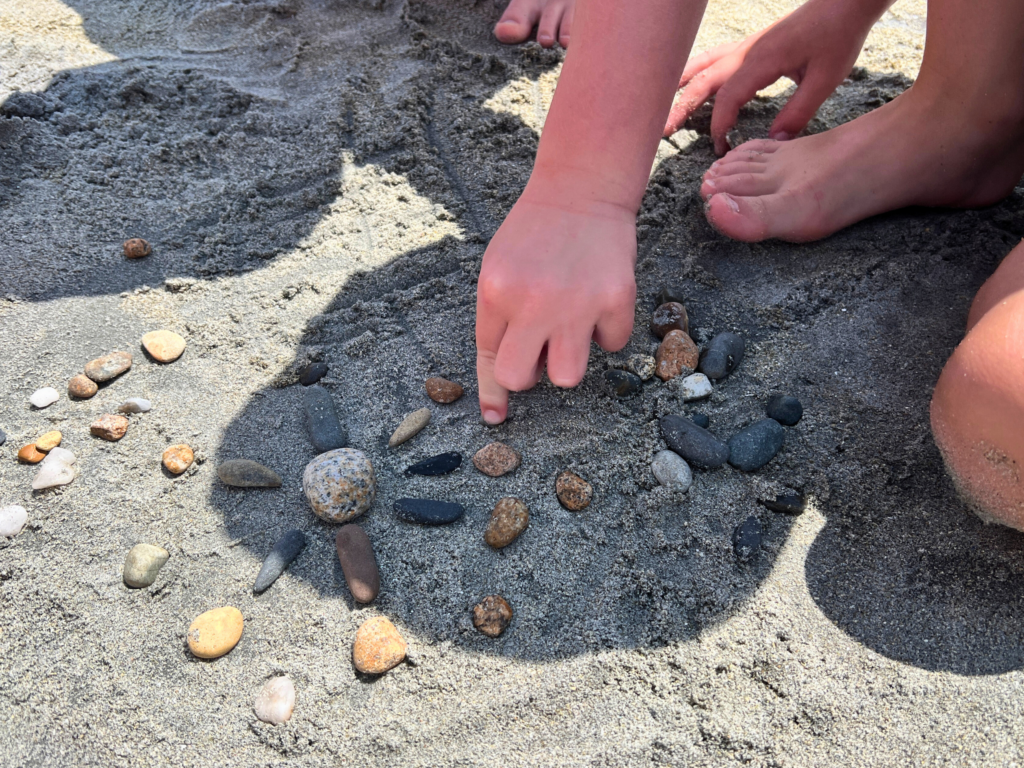
5. Two Dimensional Sandcastles (Drawing with Rocks and Shells)

You can also make large 2-dimensional sandcastles by arranging rocks into walls, doors, windows, and flags. Then add seashell decoration.

sand mandala

Photo by Jean Van’t Hul

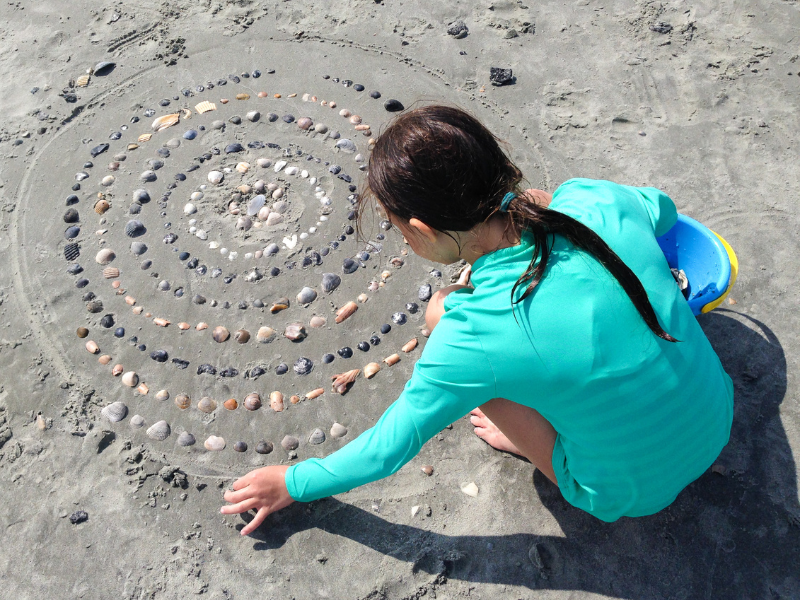
6. Make a Beach Mandala

Try making a mandala on the beach, with concentric circles of different rocks or seashells you find.

We really enjoy the mandala format and have done a lot with it over the years including flower petal suncatchers, a mandala drawing game, and autumn leaf mandalas

drawing in the sand

Photo by Andrea Martelle

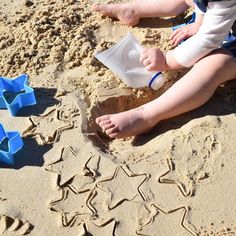
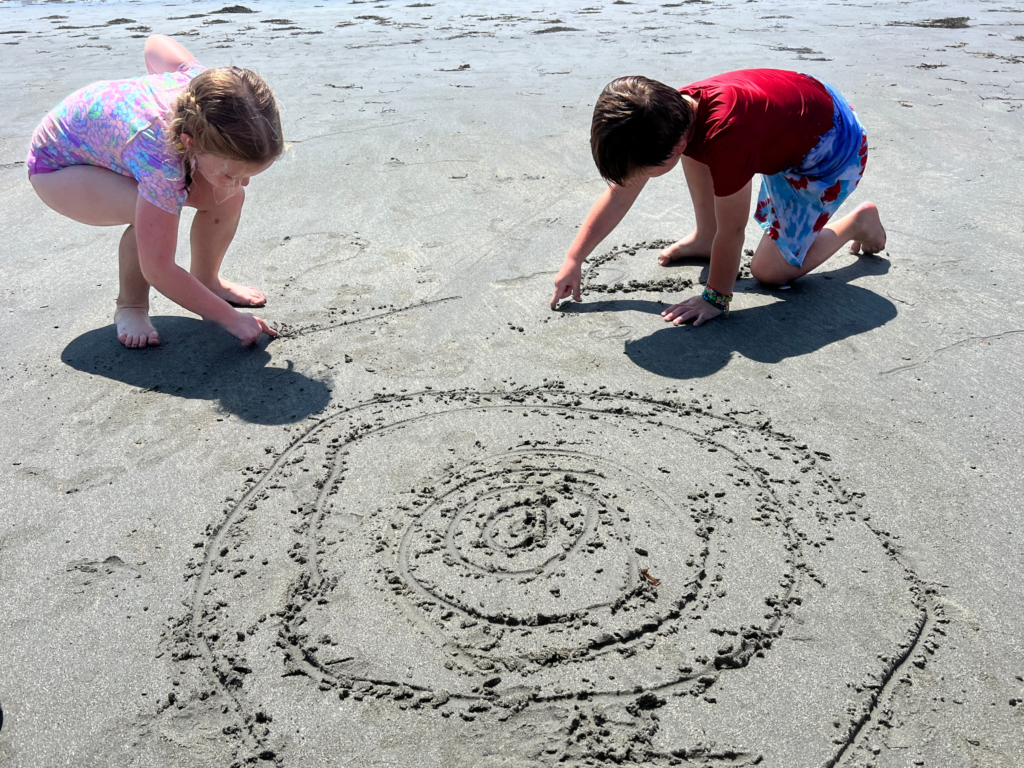
7. Drawing and Writing in the Sand

What is more natural than making marks in the sand? Every kid we know loves to do this at the beach. It can be drawing pictures with their fingers or writing messages and love notes in the sand with feathers and reeds found on the beach.

ocean drawing

Photo by Jean Van’t Hul

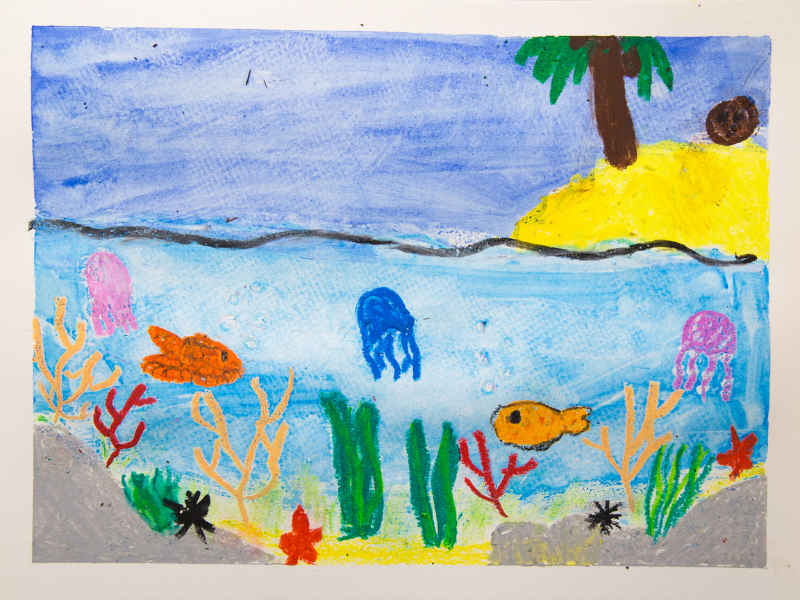
8. Ocean-Inspired Drawing

Let your kids be inspired by the ocean! You can bring a small pad of paper and some drawing materials for when they’re taking a swim break. Maybe they’ll draw what they see on the sand, or maybe they’ll imagine an underwater scene!

sandcasting in the sandbox

Photo by Jean Van’t Hul

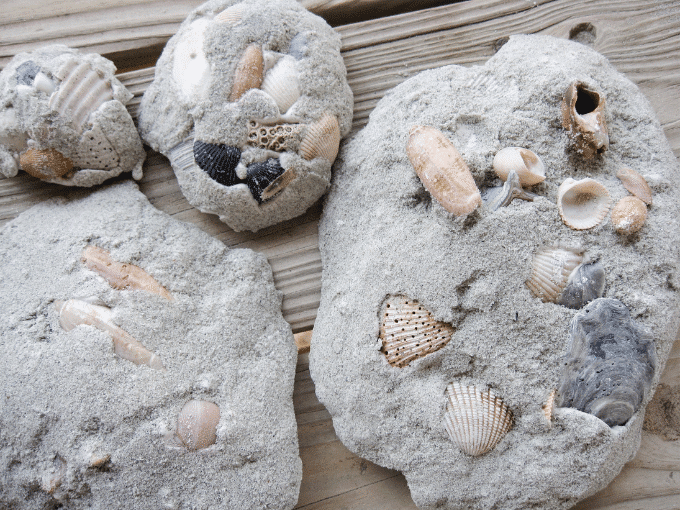
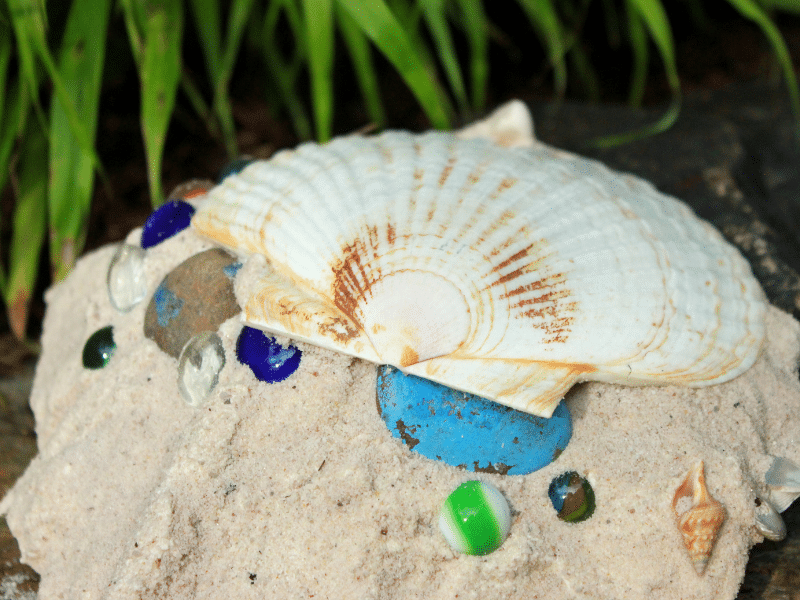
9. Sand Casting on the Beach

We love sand casting and have done it on the beach and in the sandbox. It’s a fun process and the finished sand cast makes a great beach memento.

How to do Sand Casting with Kids

sandcasting featured image

Learn how to do sand casting! This summer project is easy and fun for the whole family!

Have you ever tried casting plaster shapes in sand?

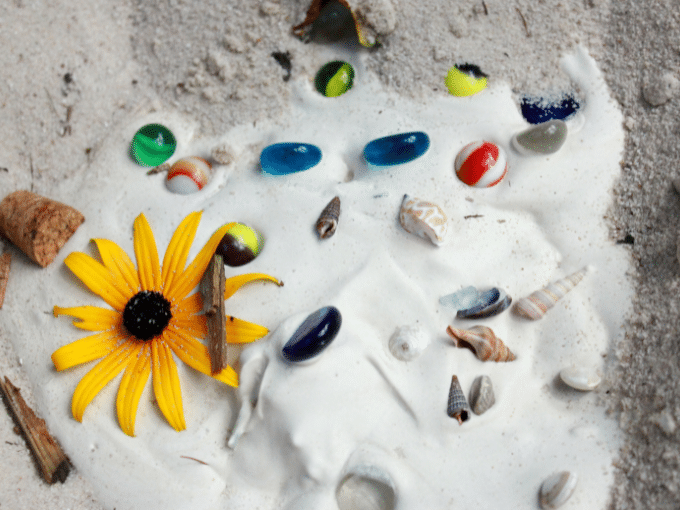
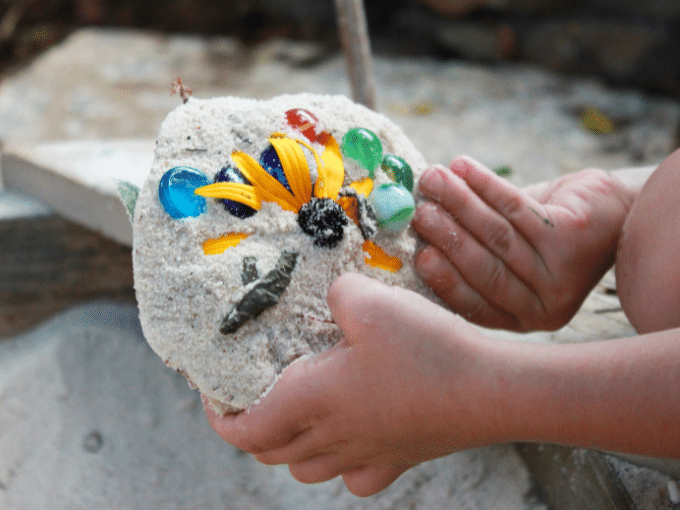
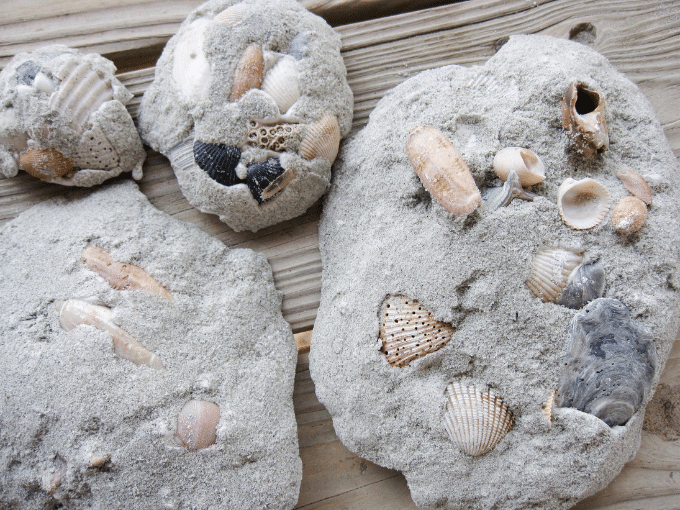
We’ve done sand casting at the beach, digging a hole in the sand, lining it with shells, rocks, and other found treasures, then filling the hole with plaster. It’s fun when you need a break from the water and the result is a pretty awesome memento of your time at the beach.

But if you aren’t able to get to the beach this summer, you can try sand casting in your sandbox.

It works wonderfully! Even better than at the beach, because the conditions are more controlled.

Sand casting

MATERIALS:

*Notes about Plaster of Paris:

  • Be careful not to breathe in the fine, dry plaster dust. We usually measure it out when the kids are in the other room.

  • Do NOT pour wet plaster down the sink. It will clog your drains. Dispose of any extra plaster in the trash.

INSTRUCTIONS

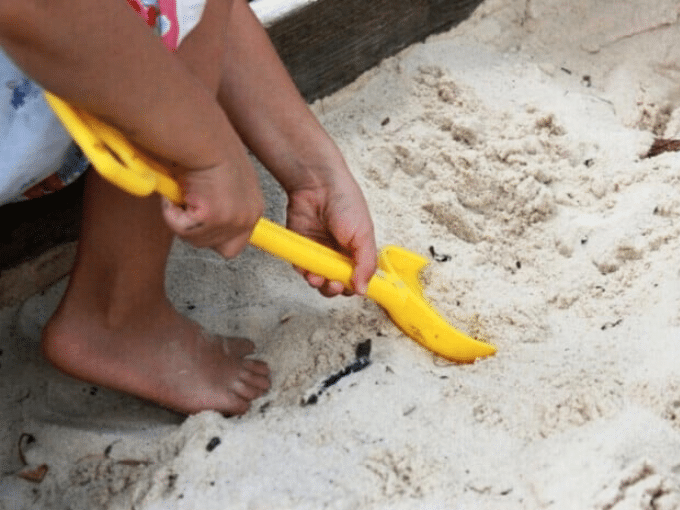
  • Dig a hole
    First, dig a hole in the sand.

digging a sand hole


treasures for sandcasting

Add treasures

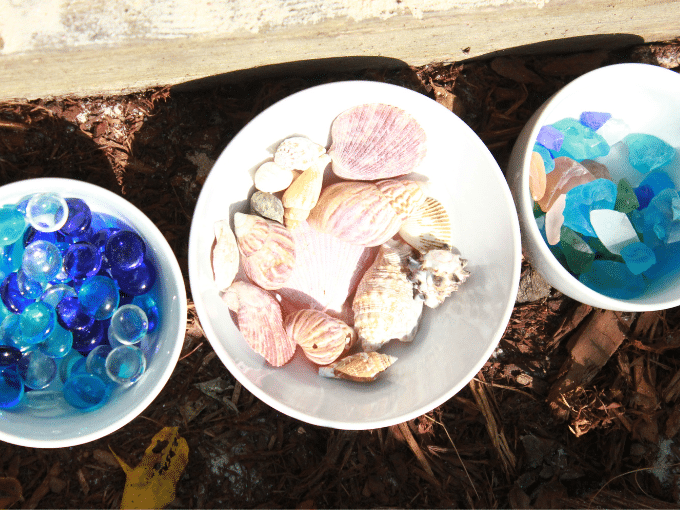
  • Next, line the holes with your treasures. We like to use shells from past beach trips, beach glass, melted crayon rocks, glass beads, marbles, and flowers.

  • Mix up plaster of paris
    We typically mix up 2 parts dry plaster with 1 part cold water. You’ll want to do it in something you can just throw away afterward (not your best kitchen bowls).
    We sometimes measure the plaster and water into gallon ziploc bags and then just use our hands to smush the plaster around until it is mixed. Kids love to do that, too.
    Pour the plaster
    Pour the plaster into the holes, covering the treasures and filling the holes.
    Our kids typically like to decorate the tops, too, so you can poke in another round of flowers, rocks, and treasures.

sandcasting

Let dry

  • Next you have to wait, as the plaster takes about 30 minutes to set.

  • Reveal your sand casting!
    Once the plaster has set, lift it carefully out of the sand, turn it over, and carefully dust off the extra sand.

sandcasting in the sandbox


sandcasting in the sandbox

Place your sand casts in a protected place overnight to continue the drying process.

Admire! We especially love the combination of the seashells, glass beads, and melted crayon rocks. You can display your lovely sand casting on a summer nature table, the mantle, or as part of a tablescape.

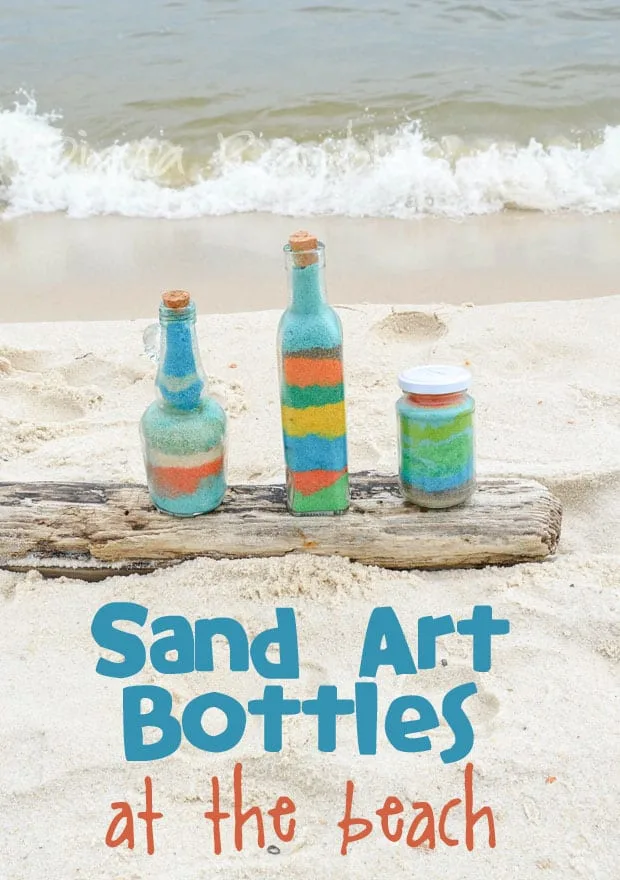
10. How to Dye Beach Sand

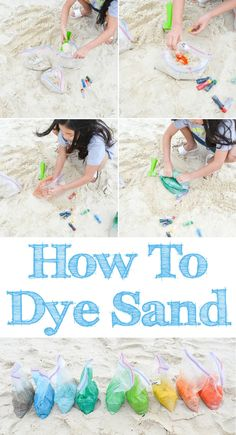
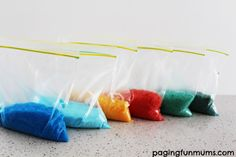
Dye sand to create colorful sandcastles on your next trip to the beach.

Materials
  • Natural Food Coloring

  • Quart or Gallon Zipper Bags

Tools
  • Shovel

  • Sand Toys

Instructions
  1. Place sand into a plastic bag that zips up.

  2. Add your food dye. Start with about 5-10 drops.

  3. Zip up the bag.

  4. Shake up the bag. Squeeze areas that are concentrated with color.

  5. Add more food coloring and shake until you have desired color.

Enjoy making colorful sandcastles!

Create Sand Art Bottles at the Beach

What are your favorite ocean crafts for kids? Any other ideas to add creativity to a family beach vacations?

Superscript

Why Your Child Should Try Nature Photography


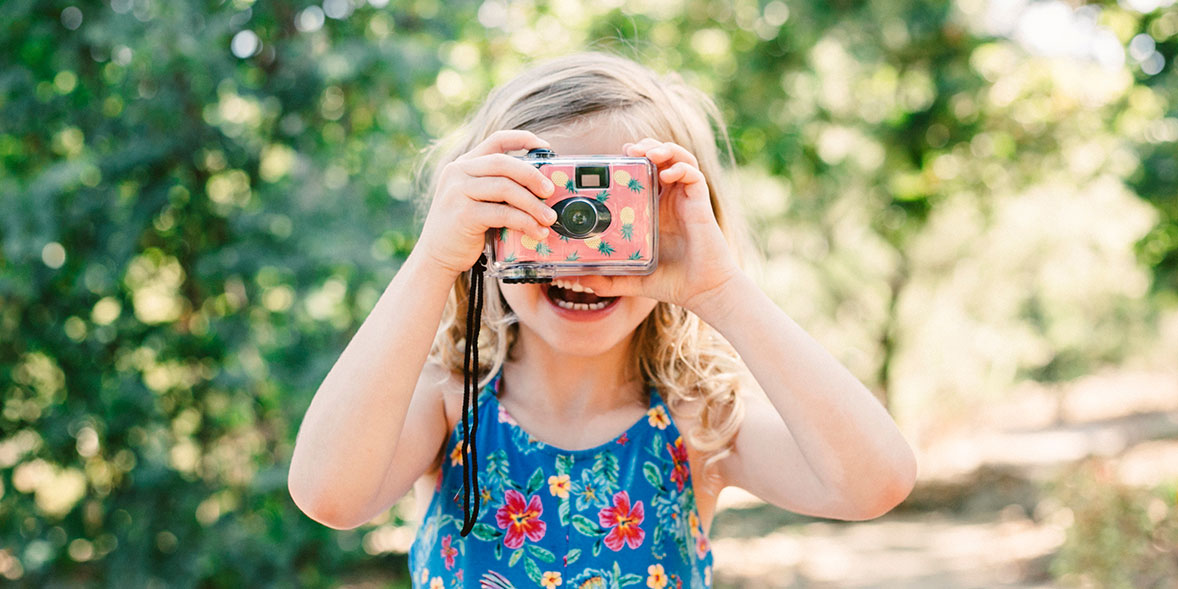
If your child insists on grabbing for your smartphone, put it to your advantage and let them use it to take photos of the natural world in action.

Observing and photographing nature is an enriching hobby that helps your child observe and learn in nature. To be a good nature photographer, your child will have to learn how to be a "quiet observer," practicing patience and bodily control as they look for signs of how wildlife uses habitat for food, water, cover, a place to raise young. This is an excellent way for any child to experience tuning into the natural world and connecting with nature.
With smartphones in abundance in our world, starting photography is a lot easier than it used to be. No need to study aperture, f stop and certainly no need to have access to a dark room (those are of course excellent technical skills and knowledge for more advanced child photographers). Still, if you don't want hundreds of blurry images or thumb shots on your phone, there are some extra steps to take to help your child get the most out of their outdoor sessions. Learning what they can about the wildlife or habitat ahead of time will help them understand what they are seeing.
Also, helping them practice sitting for 10 minutes before snapping any shots is another excellent technique for child photographers. The National Wildlife Federation has put together some excellent tips to help get your kids clicking away.
By helping kids engage with nature photography, adults can learn a few things as well. Children tend to be open-minded, so they often find treasures we overlook. They’re also more willing to lie in a field of flowers or crawl through mud to search for great subjects. So while we might help them take better photos, kids can teach us to see the world in new ways.
If the young people in your life seem glued to mobile devices, let photography give them a window into nature. By learning about how animals behave, budding photographers will be better prepared to capture the moment critters spring into action.
Websites such as bumblebeewatch.org, iNaturalist.org and bugguide.net as well as apps such as eBird Mobile and WildObs can help identify species and explain wildlife behaviors. Some of these tools also enable photographers to become citizen scientists, able to report what they discover on the trail to sharable databases.
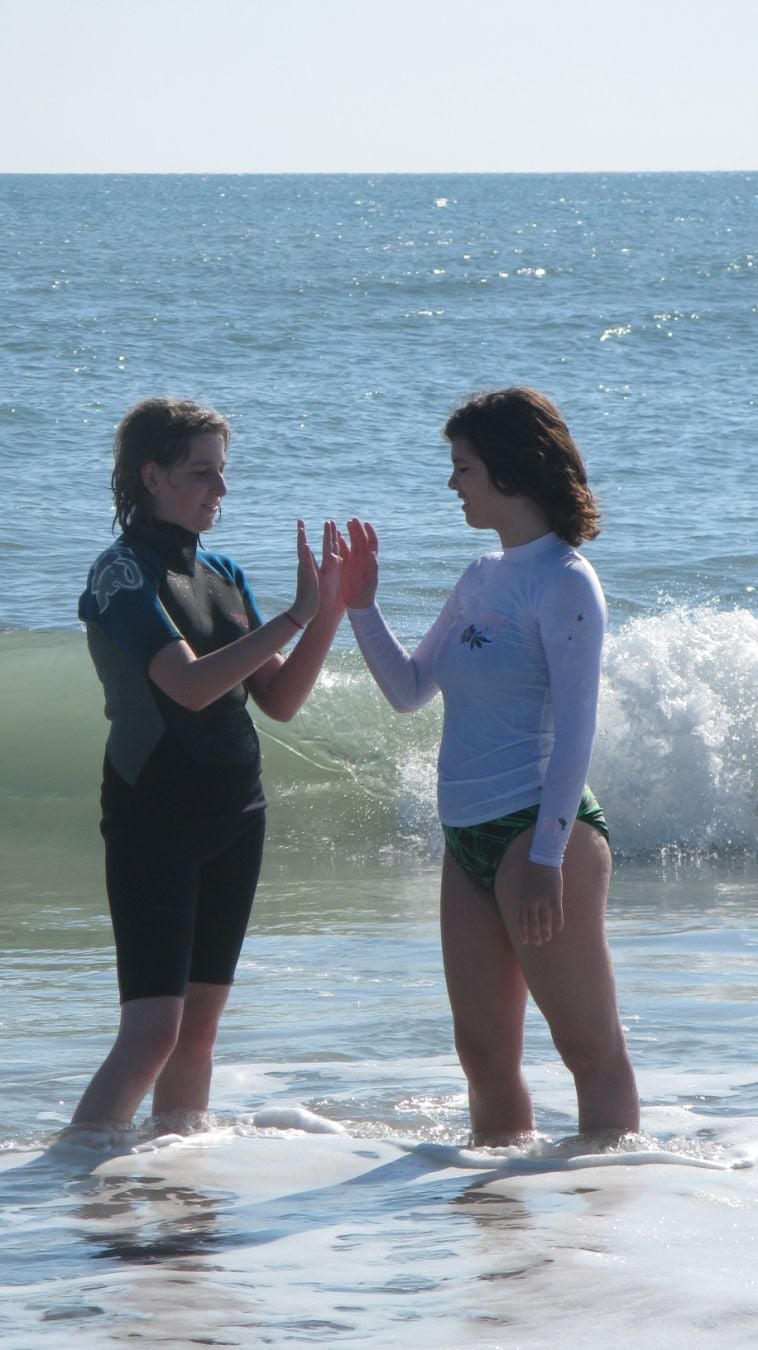
Need an extra incentive besides the benefits of being out in nature and tuning into the natural world? Check out some of the many wildlife photography contests that your child can enter:
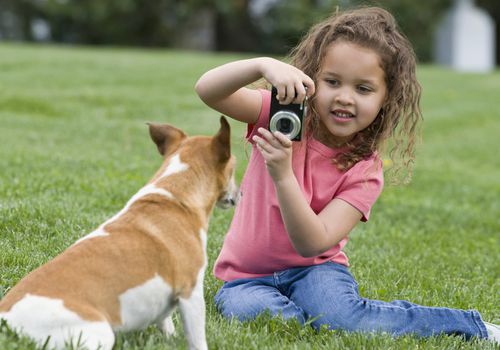
The National Wildlife Federation hosts The National Wildlife® Photo Contest, as well as the 2nd annual Garden for Wildlife™ Photo Contest in the summer. The contest is open for photo submissions that highlight the impact of habitat gardens on wildlife and people alike.
Ranger Rick magazine wants your kids to send them their best original nature photographs. Any photo with a wildlife or landscape theme, taken with a camera or phone is eligible. A winner is selected each month!
As your child’s understanding of photography grows, so may his or her love for wildlife. With a little encouragement, photography may be just the thing to get your kid’s mind out of the virtual “cloud” and into a real forest.

If you all know anything about me it is that I am Dyslexic so drawing is really difficult. When I was exploring nature my alternative was to take pictures. But these days I use smartphone. So here are some ideas and thoughts.
 
Tips to Enjoy Photography With Your Children
By
Liz August 25, 2015
Photography as a hobby is at an all time high right now. With the new affordability of DSLR cameras, many people are getting them and learning to take gorgeous photos. It’s a really fun adventure, but how can we take our love of photography and really share it with our children?
Today’s best blog feature, Peanut Blossom, is sharing a few tips to introduce our kiddos to photography and have fun with it. Remember, be patient!

Photograph your vacation – This is great information on capturing your kids reactions when you’re on vacation. There are so many different things to photograph (scenery, buildings, food, wildlife) but one of the most important is the looks on your children’s faces.

Choosing a camera for your little one – If you have considered getting your child their very own camera to begin learning about photography, here are five guidelines to follow. You will definitely want to get something durable and set up a few rules for using it.

Hide the mess – Have you ever seen a perfect photo-op but were worried about having a huge mess in the background of your photos? Since our homes are never in perfect order, here are some quick ways to capture the moment but hide the mess. You never want to miss out on a great moment!

Photo Walks – A great way to explore your photography is to go outside and take a walk. Here are six tips and ideas for a successful photo walk. First and foremost, relax and enjoy!

More Kids Photography Ideas
11 Photography Projects Kids Can Do
Photography Tips for Kids

Improve Your Photography with your Smartphone in your Own Backyard

Want to get some great nature photos? Just grab a camera and follow these easy tips!

What You Need

  • Camera

What You Do

Fit the SHAPE.
•Think of your camera’s viewfinder as a picture frame. Try to match the frame to the shape of your subject.
•If you have an up-and-down subject, don’t hold the camera in the “normal” way (like the smaller photo on the left). Turn your camera side-ways to fit the shape of your subject.

Get the LIGHT RIGHT.
•If you shoot toward the sun, your subject may come out too dark (like the smaller photo on the left).
•Shoot with the sun behind you or to the side and the subject will come out just right.

Seek cloudy weather.
•If you shoot in bright, midday sun, your photo may have lots of glare and dark shadows (below left).
•Wait for a cloud to come along, or shoot early or late in the day. That will “soften” the glare and shadows for a more pleasing photo (below right).

Fill the frame.
•Small things can “disappear” if you shoot from too far away (below left).
•”Supersize” your subject by using your camera’s zoom or by moving closer (below right).

Cut the clutter.
•Check all parts of your frame before you shoot. Watch for stuff that doesn’t belong—and takes attention away from your subject (below left).
•Move your subject (or yourself) or zoom in to get a simpler, uncluttered background (below right).

Go low.
•Got a subject at ground level? Aiming down (lower left) might be OK, but . . .
•. . . it’s usually better to get down on your knees or even your belly and go eye to eye (lower right).

Catch the moment.
•Think you have a good shot lined up? Go ahead and shoot (lower left). But then wait a moment.
•With patience, you may turn a good shot into a great one (lower right). Try to catch that magical moment!

Once you have a great photo, enter it into a photo contest!
Enter Ranger Rick’s “Your Best Shots” photo contest!

More Tips for Taking Critter Pictures
•Move slowly and quietly.
•Watch your shadow—it can scare your subject.
•Be careful where you walk—don’t step on flowers or other delicate living things.
•Never disturb an animal you’re shooting.

Host a Camera Scavenger Hunt

Gather great outdoor memories at your next special event by getting everyone taking photos.

What You Need

  • Cameras

  • Chalk (optional)

  • Clipboards or temporary ones made from corrugated cardboard

  • Flags, scarves or any brightly colored item (to show boundaries of the hunt)

  • Pencils or crayons

  • Scavenger hunt lists

  • String or yarn

What You Do

Ask everyone to bring a camera or phone that takes photos.

You can use disposable cameras, but they create waste and usually have limited photos you can take.
This is a great activity for birthday parties, so in the invitations, ask each person to bring a camera. You might gather some back-up cameras from friends to help those who forget.

Prepare a scavenger hunt list per guest

If the guests are younger than seven, it’s better if the list shows photos and words, not just words. You could use our Backyard Scavenger Hunt list. (Correct Link?)
It helps the guests if you put the lists on a clipboard and attach a pencil or crayon with a string. If you don’t have enough clipboards, you can make temporary ones from corrugated cardboard.

If you make your own list, be specific and imaginative

Be descriptive winged bug rather than just bug open flower rather than just a flower. You can ask for scavenger hunt photos that let the participants use their imaginations such as: something fuzzy an object that is your favorite colors chalk drawing you just made. You can ask for photos that test their camera skills, such as: something moving a silhouette- shadow something zoomed in but not blurry

Include on the list behaviors of other people

Maybe they can take photos of each other doing various behaviors such as: a person swinging on a swing someone laughing for real someone being kind to people dancing. Maybe they must take three photos of the birthday kid.

Kick off the scavenger hunt

You might pair up smaller children with an adult, or have older kids work in pairs. That way, if they wander out of view, you know everyone is safe.

But that brings up a key point – you must now set the boundaries for the hunt. Do they have to stay in your backyard? If you are at a park, what are the boundaries? If it is not super obvious, you might tie flags on trees or poles to remind them of the boundaries – to keep things safe and fair.
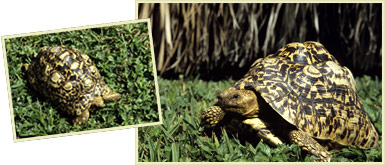
Also, tell them how much time they have, and what will be the signal to come back. Perhaps you will ring a bell or hit a gong!

Let the festivities begin!

While everyone is out hunting, you might have a few adults patrolling to help answer questions. Some kids will be more savvy with cameras than others, so you might need to teach children how to look on the camera to see if their photo was taken.

Call everyone back

It’s great to have some kind of acknowledgement for everyone’s efforts – so this is a good time to pull out a special snack or make medals from recycled metal lids attached to ribbon.

Make a slideshow of everyone’s findings

If you have a tech-savvy person at the party, you could ask them if they could make a funny slideshow for everyone to watch when it is time to eat cake.

Scavenger Hunt

Explore with a Backyard Scavenger Hunt


          Get Ready to Hike

This contains an image of: {{ pinTitle }}

       Top 5 Photo Frame Craft Ideas For

Superscript

Block title

This is a block description. To edit, click and type the text or replace it with your own custom content

This is a frequently asked question?

This is a FAQ description. Add more detail about this service, such as benefits, appearance, components and value

This is a frequently asked question?

This is a FAQ description. Add more detail about this service, such as benefits, appearance, components and value

This is a frequently asked question?

This is a FAQ description. Add more detail about this service, such as benefits, appearance, components and value

This is a frequently asked question?

This is a FAQ description. Add more detail about this service, such as benefits, appearance, components and value