
Superscript
Green Time & Outdoor Play
with Babies to 3 Year Olds
How To Handle Screen Time With Infants and Toddlers
“We know the AAP recommends skipping screens for kids under 18 months and that, over that age, under one hour a day of high-value shows is best,” says pediatrician Dr. Harvey Karp, bestselling author of The Happiest Toddler on The Block. “But like all general guidelines, these are meant to be broken from time to time. An even better parenting rule is that it’s good to have flexible plans and not be overly committed to rigid rules.”
That said, we know how addictive screens can be to adult brains, so it’s always a good idea to assume the “less is more” mentality with children of all ages.
Here are some doable and realistic advice for managing your toddler’s screen time:
Actively watch with your child.
Think of screen time as an opportunity to connect with your child. Researchers call this “interactive co-viewing,” and it simply means asking questions, pointing out objects or characters, and offering your tot explanations or commentary on what you’re watching. This fosters communication and bonding—and research shows that doing this with high-quality programing can even improve a child’s language skills. (Learn more ways to improve your child’s language development.)
Scaffold screen time.
While co-viewing is ideal, it’s not exactly feasible if you’re using screens to temporarily occupy your child while you make dinner. Experts note that you should aim to watch a few episodes of a specific program with your child and then talk about the content. Then once your child becomes more familiar with how media works, step back, take care of what you need to do, but continue to check in.
End your day with books and cuddles, not screens.
Cap your child’s day with warm feelings, not a glowing screen. Turn off screens about 60 minutes before bedtime. “The blue light from TVs, phones, and tablets can overstimulate tired children and postpone the release of melatonin, which makes the kids feel more awake,” says Dr. Karp. Also try music- Sleepy Baby Relax & Daydream
Set clear screen-time limits.
Make sure your kiddo knows how much time they can spend on screens. While your 2-year-old can’t yet tell time, you can say things like, “When the timer goes “ding”, it’s time for the iPad to go night-night.” Or set up routines such as, screen time is always limited to between dinnertime and bathtime.
Be a screen-time role model.
Don’t be fooled: Even babies and toddlers can spot a double standard! It’s up to the adults in the household to set the screen-time tone, which means always turning off the TV and putting away your smartphone during media-free times with your family. Don’t leave screens on in the background. And try your hardest to turn off your phone when you’re with your child.
Do your research!
Not all children’s programming, apps, and games are created equal! Use sites like Common Sense Media to help cut through the clutter and ensure your child is exposed to age-appropriate, high-quality content. It’s also a good idea to preview content before your child engages with it.
Lean on parental controls.
Kids are both tech-savvy and tech-curious. It’s up to you to set parental and privacy controls on all your devices and services. Through parental controls, you’ll be able to block specific websites and apps, filter content, and set time limits. (For more on what’s right for you, check out the AAP’s guide.)
Create a media plan.
Establish clear screen time boundaries like, which rooms are screen-free zones, what time should devices be silenced, and which family activities can we engage in lieu of being on screens. (Use this as a starting point.)
Bottom Line on Babies, Toddlers, and Screens
“So many parents deserve a huge round of applause for doing this demanding, yet delightful, job of parenting without the help of a huge extended family, as was the norm throughout the entire history of humanity,” says Dr. Karp. “Please don’t judge yourself too harshly for a little bit of digital babysitting.”
Like with most things in life, screen time is all about balance. Watching some kids play with toy trains on YouTube or singing along to the Baby Shark video for the millionth is not the end of the world, especially when you’re also spending lots of quality time off-screen with your little one.
Screen-Free Baby and Toddler Activities:
Connecting with a baby through play involves creating engaging and joyful interactions that promote bonding and development. This can be achieved through simple activities like singing, making faces, and using everyday objects, as well as more structured games that encourage interaction and learning. Focusing on eye contact, positive vocal tones, and responding to the baby's cues is key to fostering a strong bond.
PARENTS OR TEACHERS ROLE
Your role is more of an experience builder rather than a teacher: building joy, love, and curiousity into any play experience. Know that your child's playtime should be joyful, sensory based, and cheerful in order to maximize learning. All though babies can not turn a screen on and off, they can pick up on our habits of overdependancy on television, phones, game controllers, and computers and deem that as an acceptable behavior. So becareful what impression you give them because they will do what they see us do sooner or later. So if they ask
Here are some ways to connect with your baby through play:
Singing and Making Faces: Babies love the sound of their parent's voice and are drawn to facial expressions. Sing songs, make silly faces, and use exaggerated emotions to engage your baby. Using Everyday Objects: Create surprising sounds and movements with household items like spoons, plates, or even a cardboard box. These simple activities can be fascinating for a baby. Tours of Your Home: Take your baby on a "tour" of your home, pointing out interesting sights and sounds. This can help them learn about their surroundings and foster a sense of curiosity. Mirror, Mirror: Babies love to look at their own reflection. Hold them in front of a mirror and make silly faces to see their reaction. Reading Together: Reading to your baby is a great way to bond and promote language development. Choose books with colorful pictures and repetitive text to engage their attention. Active Play: As your baby becomes more mobile, encourage them to crawl, roll, and explore. Simple games like rolling a ball or setting up a mini obstacle course can be fun. Copycat Games: Babies learn by imitation. Make a game out of copying their sounds and movements. If they clap, clap back. If they babble, babble back. Mimicking their sounds: Babies enjoy cooing and being responded to. This helps them learn the basics of back-and-forth communication. Reading Cues: Pay attention to your baby's cues to know when they want to interact and play, and when they need a break. Focus on Interaction: Make eye contact, respond to their sounds, and be present during playtime. Positive Reinforcement: Encourage your baby's efforts and praise their accomplishments, building their confidence. Simple Games: Play "So Big!" by lifting their arms and saying "Sooooo big!" or "Where is the baby?" and then hiding them. Sound Exploration: Use different objects that make unique noises, like a bell or a rattle, to introduce new sounds to your baby. Textured Exploration: Create a board with different textured fabrics and papers for your baby to explore. Wrap and Unwrap: Wrap a ball of paper in a scarf and let your baby reach for it, grasp it, and squeeze it.

Milestone MomYouTube · Jun 21, 2023
Bonding with Babies

You are your child’s first and most important playmate. During those early months spending quality time with your children lays a foundation for forming a strong relationship. Science, says that children learn most of their behaviors and interactions through a process called modeling. This means, a child observes the behaviors and actions of those closest to them and then copies those behaviors and actions. If those behaviors get their needs met, then they are more likely to repeat those behaviors which are a key foundation for modeling.
Bonding tips with babies
Singing songs together, pulling faces and naming body parts and faces around them are all great ways to get babies interacting. What truly matters is how you say it and not what you say. The tone of voice, excitement and big facial expressions are far more important than the words themselves. If you’re singing in pitch, just have fun with it, your baby certainly isn’t going to judge you.
Bonding with Toddlers

As babies turn into toddlers, ‘play’ becomes the predominant way they explore the world and people around them. It’s often tempting to try and structure play to be educational, to teach children the ‘correct’ use for toys; however, play should be an exploration with no right or wrong answer.
Bonding tips with toddlers
Instead of trying to structure your toddlers’ play; try and offer lots of different ways to interact with the world around them. You can do this by getting them out in nature, exploring everyday items and letting them take the lead. Give lots of praises and cheers for a job well done and you’ll quickly find your toddler becoming more confident and excited in their own play and accomplishments.
Bonding with Children

Despite every advertisement campaign to ever hit the small screen, you don’t need expensive toys to help children learn, explore and develop an understanding of behaviors and emotions. If we revisit the modeling concept, children learn behaviors and actions through observations and not through the color of plastic or the associated price tag.
Bonding tips with children
Toys are of-course useful tools in play; But the most important thing that matters is the attention you give to your children. This focused attention is what encourages your children to develop, practice, and re-use all the great skills you want them to learn be it patience or a habit of sharing. Whether you’re using homemade toys, doing some coloring or are out on an adventure – continue to let your child lead and consider yourself more of a commentator on the action. Try to not ask a lot of questions to your children, as tempting and fun as it may seem, it can hinder or limit the children’s play; they start focusing more on giving the correct answer and not on play. Instead, comment on those behaviors and actions you want to see more of. For example ‘I really like how carefully you’re putting those blocks on top of each other’ or ‘I love how well you’re working as a team’.
CULTIVATING CURIOSITY

“I have no special talents. I am only passionately curious.”
– Albert Einstein.
Curiosity is a powerful catalyst for learning. Luckily, we are all born curious. It is not something that needs to be taught, but instead, it needs to be nurtured, and supported. Classrooms and other learning environments are the perfect place to cultivate curiosity. The more curious our students are, and the more opportunity they have to explore their curiosities, the more likely they are to be actively engaged in learning and extract meaning from their learning experiences.

Numerous studies have found that infants and young children naturally explore their environments using a systematic approach as a way of reducing uncertainty and constructing knowledge (Gruber & Fandakova, 2021). This natural curiosity plays an important role in brain development and reminds us just how important it is that young children have ample opportunity to wonder, explore, and play.
The connection between curiosity and interest is something researchers in the field continue to explore, and the exact distinction between curiosity and interest is sometimes difficult to determine. Often, curiosity and interest are intertwined. Research studies indicate that both curiosity and interest “positively impact students’ learning, motivation, creativity, and well-being” (Shin et al., 2019). Research studies also show that curious learners are more likely to learn new information, retain information, and remain engaged (Trautner, 2017). These findings are particularly important when we think about how we teach and how we set up our learning environments.

Teaching methods that value the learning process, prioritize student interest, and promote student discovery are more likely to elicit curiosity and engage children in meaningful learning experiences.
There are a number of ways we can cultivate curiosity in our classrooms or home.
Wonder Aloud. Share our own wonders aloud with our students. This helps to model what it means to be a curious learner and invites children to voice their own wonders.
Encourage Exploration. When children are empowered to explore they have an opportunity to build curiosity and investigate things that intrigue them. As children tinker and play they naturally generate questions that lead to further exploration, investigation, and discovery.
Open-Ended Materials. Open-ended materials offer opportunities for exploration. When materials do not have one fixed purpose or function, children can be creative and experiment in ways that are unique to their own interests, ideas, and discoveries. Some examples of open-ended materials are loose parts, natural materials collected from nature, and interesting materials that prompt children to build and engineer like korxx building blocks, wooden stacking discs, and ramps.

Respectfully Follow Thier Interest
When we intentionally observe our students and carefully listen to their thoughts we learn a lot about what they are interested in and we can then tailor learning experiences so they have an opportunity to explore and investigate those specific interests.
This might mean expanding the materials we put out for students, or shifting our focus during a class investigation to follow the specific interests of the students. Remember, not all students are interested in the same thing, and that’s okay! The whole class might be investigating the same overarching theme, while individual students are focusing on specific details that interest them.
Ask Open-Ended Questions. Curiosity is often sparked by an eagerness to gain information and learn more about something. When we ask our students powerful open-ended questions we invite them to think deeper and build their curiosity. Sometimes the open-ended questions we ask do not result in immediate response, and perhaps in the moment we do not even know how to respond to the question. The purpose of open-ended question is to elicit curiosity and prompt investigations that eventually lead to discovery.

Powerful Provocations. Provocations provoke thought, curiosity, and creativity, and invite students to explore and investigate. Provocations can be as simple as a picture that sparks curiosity and interest, or more elaborate in design and set up. Provocations can be a question, or a specific material like an arrangement of flowers or a collection of items collected from nature. No matter the specific set up, or materials selected, all provocations should remain open-ended and place value on process, not product.


“True creativity emerges from the combination of knowledge, skill, inspiration, and persistence.” -Cindy Hansel, NAEYC

The more we focus on cultivating curiosity in our classrooms, the more we will inspire our students to explore and investigate, empower them to be creative and critical thinkers, and spark a true joy and passion for learning!
Kodo materials featured in this blog:
The why and how of exploring nature with babies and infants:
It’s easy to explore nature with infants. Get them into some appropriate clothing for the weather, and head out the door. Nature is a perfectly balanced sensory experience for children. They’ll be able to take in the muted colors and natural sounds without feeling overwhelmed. If you’re holding them against you for these experiences, then all the better as they are also being comforted and connected to you at the same time.

Some tips for exploring nature with infants
Really, this stage is most about your comfort levels with bringing baby outdoors. My first child was born in January. The cold Canadian winter gave me reason to stay indoors and cuddle with him for the first few weeks, but then it was time to get out of the house!
Below you can read all about infant carriers and strollers, but know that you don’t need either of these things to bring your infants outside. If you have a porch or balcony take advantage of that and head outside for nursing and cuddle time throughout the day. It will give you both a change of scenery and a healthy dose of fresh air.
Using Carriers to bring infants outside:
Get yourself a comfortable baby carrier appropriate for infants. Many new moms like to snuggle their babies up in a wrap like this one. I, however, could never get it to work properly and I always felt uncomfortable with baby on. But, I loved wearing my babies in the Ergobaby. There is a special insert to use with infants in this carrier.
If you plan to wear your baby in cool weather think about what you’ll wear to keep both of you warm. You can put baby into a warm bunting prior to getting into the carrier. There are special jackets to be worn over baby carriers. You can use blankets or a stylish shawl to wrap around you both for extra warmth. I found that my maternity jacket or my husband’s jacket could wrap us both up quite nicely. You may need to do some experimenting here.
You’ll also want to take precautions if it is hot out. Some carriers are designed with mesh for cooling in hot climates. Consider too how you’ll keep the sun off baby. A large wide-brimmed hat worn by you will help, or a shade umbrella, baby wearing long light clothing, and a sun hat as well. But, it can be a challenge to get a hat on a tiny baby in a carrier.
Another tip for hot weather is to try timing your outings for early in the morning or later in the evening if it is very sunny where you are.
Using Strollers to bring infants outside:
If you’d rather use a stroller to get outside then make sure it maneuvers well on unpaved trails and snowy paths (if you get snow). Usually this means you’ll want a stroller with larger wheels. We absolutely love our chariot! I can’t say enough good things about these. And I’m not the only one… sometimes it’s a little humorous to arrive at baby activities in Jasper and see a whole row of chariots lined up!

Just a regular day at the daycare bike rack!
Why do I love the chariot? These cougar chariots are perfect for infants right up to 5 year old kids. They have an attached screen cover as well as a rain protector. You can purchase accessories to pull the chariot behind a bike or cross-country skis. You can attach a single wheel in front which is good for rocky and rooty trails or for jogging. Or, you can use the smaller front wheels when tooting around town. If you end up getting an all-terrain stroller (or the chariot), make sure you consider how your infant will use it and if it supports them appropriately. The chariot has a special infant sling attachment you can use for the wee-ones. I don’t know if other all-terrain strollers are appropriate for infants.
I do talk up the chariot (for good reason), but you don’t have to have one to get outside. When my first baby was born, all I had was a regular basic stroller. It did remarkably well on the snowy sidewalks and I could bundle him up nice and warm inside.
If you are using a stroller to get your babies outside you’ll want to make sure they are warm and dry. For whatever stroller you use, try getting a rain and net cover for it. You may also want to look into stroller sleeping bags or stroller inserts for extra warmth. But, if you don’t want to go all fancy, you can use a big warm blanket. Just make sure baby has room to breathe and move.
It can be tricky to keep a baby cool in a stroller. I really appreciated these lightweight muslin blankets in the warm summer months. You might also want to rig up extra shade for your stroller with an attachable umbrella or a blanket thrown over the canopy. I have heard of parents using cooling mats in the stroller, but I am unsure what these are as it doesn’t often get overly hot here.
Enjoying Nature
Being in nature is great for us in so many ways but being in the forest is very special. Spending time in the forest has been found to reduce stress, anxiety, depression, and anger, strengthen our immune system and boost overall wellbeing. Wow!!!
There is a higher concentration of oxygen in the forest, according to Japanese medical doctor and researcher Qing Li, compared to an urban setting. Exposure to the plant chemicals, that are part of their defense system, has measurable health benefits for us. Benefits such as a reduction in physiological stress, lowered blood pressure and heart rate. Evergreen forests are particularly beneficial for our health. You sleep better when you spend time in a forest, even when you don’t increase the amount of physical activity you do. It is simply enough to just be in the forest to take in the health benefits. Nothing additional is required!

INFANTS
Whenever you can arrange outdoor experiences for your little ones, know that you are helping them experience another dimension of living - far different from indoor spaces. So, give them windows on new worlds - visit a park, zoo, flower garden, or a duck pond, or even stroll to the corner store.
Nurturing With Nature
Seeing and smelling - such pleasing experiences for infants outdoors. In mild weather, be sure to push strollers to places where babies can see, touch, and smell flowering plants. They want to feel the rough bark of a tree, the soft brush of wild grasses or grains of sand and explore the many textures of large stones and rocks. You can guide this sensory journey as you help them to notice their natural surroundings, like the gently swaying leaves in a summery tree.
If possible, consider landscaping your outdoors with a flowering hedge of perfumed jasmine to delight babies' sense of smell. And on a warm summer day, babies who sit well relish the experience of a shallow wading pool, where they can splash in a few inches of water while you cheer on their discovery of wet versus dry. Be sure babies wear hats and have sunscreen on exposed skin.
2 Months

At this age, you can lay your child on a blanket outdoors. If you’re a seasoned parent or daring (which I wasn’t when my Baby was this age!), try laying him on the bare ground. Put him on his back to stare up at the sky, trees, and birds, or put him on his belly with some nature items in front of him to try to view. Wear your baby in a carrier while you go for a hike or take a walk with your child while he’s nestled in his stroller.
Here’s what two-month-olds will generally do and what caretakers can do to support their development while outdoors:
Babies start turning head toward sounds. Begins to follow things with eyes and recognize people at a distance. A natural setting is a great place to discover sounds-- it's quiet enough that sounds like bird calls, rustling of leaves, and running water are discernible but not overwhelming. This is also a fun age to play with light: duck in and out of shadows and watch the sun flicker through leaves or bounce off water. Everything is completely new, and watching your child discover these sensations for the first time is a beautiful thing!
Begins to act bored (fussy) if activity doesn’t change. Keep moving for a change of scenery. This is the age when my baby started to LOVE being outdoors—there is so much to see, hear, and feel. Let your child feel the slight breeze on his face or the sun on his head, and let this sensation change for your child as you walk through different environments.
Can hold head up and begins to push up when lying on tummy. Try tummy time outdoors. Place nature items in front of your baby to encourage him to build those muscles. If he’s resistant, like My Baby was, put him on your chest as you lay down on the grass for some parent-child outdoor bonding.
4 Months

At four months or when your baby is able to hold his head up steadily (between 4-6 months generally), your child is ready to face outward in your baby carrier, such as the Ergo 360 (our favorite). We tried this for around 5 months, and My Baby LOVED it. It’s a whole new way for them to see the world. This is also when your child can sit with assistance, such as in your lap or in a Bumbo seat. Although it is certainly not recommended by pediatric physical therapists, we used our borrowed Bumbo for short periods of time, including sitting outside in our yard.
Here’s what four-month-olds will generally do and what caretakers can do to support their development while outdoors:
Copies sounds that are heard. Draw attention to sounds you hear by mimicking them yourself. Name the animal that made them to help your child begin to associate language with concrete items.
Uses hands and eyes together, such as seeing a toy and reaching for it. Can hold and shake a toy. This is a particularly great time to begin to lay nature items out around your baby for him to manipulate and explore: rocks, pinecones, flowers, grass, bugs, seeds, etc. Be aware that it’s also prime time for oral exploration to begin! Pro tip: if you’re lucky/unlucky enough to have a pacifier user on your hands, pop the paci in your child’s mouth before providing him with items to explore. (That’s my two cents; feel free to let your child put items in his mouth if that’s your parenting style! Judgment-free zone over here!)
Recognizes familiar people and things at a distance. Visit the same outdoor environments frequently to build familiarity. Name the items you see and point out some of the same things each time you visit. Point out birds, planes, and critters that make noise, and watch them as they move. Point them out and follow them. When you hear something, stop to investigate what it is. Think aloud: "What was that noise?" or "Why did that tree move?" Then, together search for it. Look for the bird that tweeted or the squirrel that rustled the leaves. This lays the foundation for encouraging curiosity!
6 Months

This is one of my favorite stages—your baby is becoming more and more fun! His personality is beginning to shine through, and he likes to play. Spending time outdoors together is a great way to bond, which is true at every stage, but it’s becoming even more fun for both of you at this point in your child’s development.
Here’s what six-month-olds will generally do and what caretakers can do to support their development while outdoors:
Likes to play with others, especially parents. Tummy time with your child on your belly while you lay on the grass, coupled with giving him an “airplane” ride (or pterodactyl ride, be creative!), can be ridiculously fun.
Responds to sounds by making sounds. Listen for nature sounds and mimic them. You may find your child mimicking them (or you), as well.
Makes sounds to show joy and displeasure. While walking with your child forward-facing in a carrier, try doing gentle hops or twirls along the way. Spinning, even with your child attached to you in a carrier, develops your child's vestibular system, which is responsible for balance, coordination and skills like head and trunk control and rolling. Your child’s understanding of object permanence is developing, so hide behind a tree and pop out to see your friends or have them do the same to you. Bounce and sing songs. What makes your child squeal with delight? Keep doing that!
Looks around at things nearby. There is SO much to see outside. My Baby always calmed down outside because she was taking in everything there is to see, feel, and hear!
Shows curiosity about things and tries to get things that are out of reach. When doing tummy time outside, place items just out of your child’s reach to motivate him to move.
Begins to sit without support. Break out your bubbles! When your child can sit and likes to reach for things, blowing bubbles begins to be super fun!
9 Months

Around nine months is when your child may begin to show curiosity. In my opinion, curiosity is one of the most exciting things about childhood! Nurturing our children’s natural curiosities is one of the important things we can do for their cognitive development.
Here’s what nine-month-olds will generally do and what caretakers can do to support their development while outdoors:
Uses fingers to point at things. When your child points at things while on a walk, name the item and follow his finger to get close up and touch the item (if possible). You’ll be teaching your child how to follow his curiosity.
Watches the path of something as it falls. Leaves, snow, seeds, flower petals, rain: there’s something falling from the sky in every season. Take moments of time to stop and simply watch gravity in action with your child.
Looks for things he sees you hide. We played some epic hide ‘n’ seek with Dad behind trees while hiking at this stage. While sitting on the grass, you can also hide rocks (avoid rocks that are choking sized!) under leaves or cover items with grass or sand.
Puts things in mouth. As in everything. If you’re lucky/unlucky enough to still have a pacifier user on your hands, you can use it as a plug to keep your child from exploring nature items with his mouth. On the other hand, if you know something is safe for consumption, your child is eating table food in the home, and you know your child has no allergies, it could be a fun time to have him taste edible plants. Perhaps you’re into foraging or simply have an herb or vegetable garden. Use your discretion!
Crawls, pulls to stand, sits without support, and stands holding on. Your baby is on the move! Find safe outdoor spaces for your child to practice these skills. Remember that “clean dirt” (soil without chemicals) is healthy and comes off in the bath! This is also a time when your child may begin to play with push toys—why not bring them outside?
1 Year Old

At one year, your child increasingly interacts with the world around him. Hopefully he is stronger now, so you can be outside experiencing the elements in rain, shine, or even snow. If you haven’t yet put your baby on your back while walking about or hiking, try it now. At one year, My Baby loved being on my back while snowshoeing, and she especially loved being pulled in a sled on the snow. This is also the time when your child may begin to be even more mobile; embrace it and let him build his skills on the varying terrain outdoors.
Here’s what one-year olds will generally do and what caretakers can do to support their development while outdoors:
Explore things in different ways, like shaking, banging, and throwing. While hiking with your child on your back, pass things such as dandelions, cattails, or sticks back to your baby to hold and explore. Stand along the shore together and toss rocks into the water. Show your child how two sticks or two rocks knock together to make a sound.
Look at the right picture when it’s named. If you’ve been naming what you see outdoors since he was tiny, now he may be able to find an item (such as a flower or bird) when you say the word. Vocalize interesting things you see using the name (such as, “Look at the beautiful flower!” or “Do you see the pretty bird?” without pointing and follow your child’s gaze as he interprets your words.
Puts things in a container, takes things out of a container. My Baby happily did this for hours on end. Bring a small bucket or bag with you on your outdoor adventure. When you locate a place with rocks or small sticks, show your child how to put them into the bucket. Watch as he then takes them out and puts them back in again. Over. And over. And over again!
Pokes with index finger. Encourage this! Poking at trees and feeling their different types of bark can be an interesting sensory experience for a one-year-old. Build oral language by naming the textures he feels.
Pull up to stand. May take a few steps on own. May stand alone. As soon as your child starts to crawl and walk, let him experience different terrain. Walking on grass, sand, or snow outside is much different from the hardwood floors inside. You cannot replicate outdoor terrain indoors, and the outdoor terrain will help your child naturally develop balance, core strength, and spatial awareness. Allowing your child to walk outdoors without shoes is a physical and occupational therapist suggested activity that supports your child's development of balance, sensory processing, and proper muscle development in the feet.


18 Months
This is just about where My Baby is right now and let me tell you how fun she is at this stage! She is able to engage herself in free outdoor play, she loves to climb, and she’s beginning imaginative play. She wants to walk on her own, but we don’t get too far while hiking because her goals are different from mine. At 18 months, letting your child take the lead outdoors should be priority number one.
Here’s what eighteen-month-olds will generally do and what caretakers can do to support their development while outdoors:
Likes to hand things to others as play. Let your child explore nature items he comes across. When he hands something to you, such as a stick, thank him, hold it, and hand it back. Engage in play by handing him things you find as well. As always, name the items with which you interact in full sentences to promote language growth.
Follows 1-step verbal commands without gestures. Practice this when you get ready to go outside by telling your child to get his socks. Then tell him to get his shoes. Then tell him to get his jacket. When you’re outdoors, there’s plenty of opportunity to use 1-step commands during play. “May I have the stick please?” “Walk over here.” “Look at that bird!”
Play simple pretend experiences, such as feeding a doll. This can be a good time to bring out the mud kitchen! You can fashion one yourself using old wood pallets, visit a nature play area or even a sandbox nearby, or simply bring some bowls and spoons outside for playtime. Finding natural items to put into your concoction is part of the fun. Remember that this is also the age when children follow 1-step demands, so be mindful if you stir up a beautiful dish of sand, crushed leaves, and grass and you say, “This is delicious! Try it!” Your child may actually take a taste! Not that I know from experience…
Explores alone but with parents close by. I can get so much yard work done now! She happily plays in the sandbox, picks up sticks around the yard, or goes down the slide on her own—as long as I’m nearby. I put a fort out in the yard for her to play in, and she loves bringing things inside, sitting in there for a while, and then coming out for more things. I know someone with a child this age who actually reads a book under a tree while her son plays on his own. Milk it, Mama.
Says several single words. Engage in conversation every time he says a word that corresponds with what he sees in order to encourage his language. If he points to a bird uses the word, then tell him all about the bird, its colors, and what it is doing. Engage. Encourage.
Walks alone. May walk up steps and run. Let your child take the lead on “hikes”. I put “hikes” in quotation marks because you should set your expectations accordingly. You will not be traveling far with an 18-month-old taking the lead. My Baby likes to go in the opposite direction of my goal. That’s fine. Embrace it. This is also a good time to encourage safe climbing. Climbing stairs, fallen logs, or natural rock formations is a worthy obstacle for an 18 month old.
How to Encourage Outdoor Sensory Play
Best outdoor sensory activities for babies + toddlersWater tables, sensory bins and tummy time on a blanket in the shade can greatly benefit your child's development.

The benefits of sensory play for babies and toddlers are numerous. An important part of early childhood development, sensory play encourages brain and language development, fine and gross motor skills, cognitive growth and social interaction, to name a few. Babies and toddlers use their senses (touching, tasting, smelling, seeing, moving and hearing) to explore and try to make sense of the world around them, and getting outside in the summertime is a great way to help your little one make new discoveries while getting some fresh air at the same time.
From splashing around at a water table to grabbing bubbles and playing Peekaboo, these sensory play activities for babies and toddlers will start their development off right while providing you with another chance to bond with your new little one.
We've broken down the best summer sensory activities for ages 0-6. Enjoy exploring with sensory play activities this summer!
Most summer sensory activities in baby's first few months will involve finding a shady spot outside to lay on a blanket with your baby. While there:
Practice tummy time (I love the sensory bags that Joyful Bunny created to help encourage baby while on their stomach)
Play Peekaboo
Sing songs with baby to help enhance their listening skills
Bring a rattle for baby to try and hold
Lay next to baby, pointing to different things in nature. Tell baby what you are observing in the world around you.
Best summer sensory activities for babies 6-12 months
Once again, a blanket in a shady spot is a wonderful way for babies 6-12 months to engage in a few sensory activities. I really like Zero to Three's activity suggestions, especially this one: "Place baby on a soft blanket on her tummy. Billow a light scarf in the air above her and say, "Feel the wind!" Let the scarf gently fall on her back and then slowly pull it off her. If she likes this activity, try it again but lying on her back this time. The feel of the scarf builds your baby's tactile and body awareness."
While reading at any age is always a great idea, babies at 6 months and older are starting to understand that "pictures represent objects and may start to show that they like certain pictures, pages, or even entire stories better than others. Your baby will respond while you read, grabbing for the book and making sounds," according to Kids Health. Bring out the board books!
Blowing bubbles will be completely mesmerizing (rather, you blow, and your baby watches the bubbles and tries to grab them).
Best summer sensory activities for 1 yr olds
Try cooling off with a water table, which is a wonderful way to engage in sensory water play for babies. Water tables (or sensory tables) provide babies and toddlers a relatively mess-free way to splash, scoop, pour and explore and set up easily in the backyard or on the patio. Beyond teaching valuable skills like hand-eye coordination and STEM learning, they're also a great way to entertain multiple kids at once, offering an opportunity to work on social skills like sharing and taking turns.
Making edible baby sand and letting your little one feel (and taste!) the consistency is a fun sensory activity for babies. And because it's a little on the messy side, it's best for outside!
More messy food play ideas include: cooking spaghetti, letting it cool so your little one can feel its squishiness, and a Jello "excavation" dig, another squishy activity.
Best summer sensory activities for 2 yr olds
While water tables will still be an amazing source of sensory activity, give a 2 yr old anything to scoop, pour and measure and they will be thrilled to explore. And because they're generally messy, it's perfect for outdoors! Ideas include:
A visit to the beach with sand toys or a sand box at the playground/in your backyard (either one you buy or the edible sand mentioned above)
Finger painting is a great sensory activity for toddlers. Simply choose your safe edible finger paint (vanilla yogurt mixed with food coloring, how genius is that?) and grab a big sheet of paper for your toddler to create art.
THE BENEFITS OF SENSORY PLAY
Sensory play contributes in crucial ways to brain development. From the time of their birth, children have learned everything they know about the world by touching, tasting, smelling, seeing, and hearing.
Stimulating the senses sends signals to children’s brains that help to strengthen neural pathways important for all types of learning. Think of it as “food for the brain.”
As children explore sensory materials, they develop their sense of touch, which lays the foundation for learning other skills, such as identifying objects by touch and learning to use the fine-motor muscles in the hand.
Treasures found in nature have many sensory attributes; they can be warm or cool, rough or smooth, hard or soft, textured or slimy, fragrant or bland, etc. As children play with them they learn more about them.
Nature Sensory Bin Scavenger Hunt for Kids
Nature scavenger hunts are a great way to get the kids outside having
fun. Invite your children to go on a scavenger hunt to find natural
materials to make a nature sensory bin. Learn how to make a nature sensory basket and the benefits of sensory play for kids.Invite children to go on a nature scavenger hunt to collect natural treasures for sensory bin or basket filled with natural materials found in nature.
Related: Outside Activities for Kids
Of course the biggest sensory bin is your outside sand pit or dirt pile.


Gardening – Baby

Gardens are great for engaging babies’ senses.
Did you know?
Babies first learn about the world through sensory play. Visual sensations like brightly coloured flowers or light coming through the trees, the smells of herbs, or touching grass, leaves and petals are all ways your baby can explore their senses in the garden.
Add language
Provide the words to match what your baby is doing, seeing, or touching e.g. “soft grass”, “pretty flower”, “smells nice”, “yucky”.
Variations
The garden is a great space to spend some of your usual activity time with your baby. Try reading a story, singing songs, or encouraging tummy time outside. You can match the story or song to something in the garden and the outdoor noises and sights will help your baby to look up and strengthen their muscles and control.
Safety
Know what kinds of plants are in your garden and if they are ok to touch and/or taste. UV rays can be harmful to babies’ delicate skin so look for shady areas and use sun protection.
Kid Safe has put together a fact sheet on toxic plants and kids, you can view it here.
Across the ages
All the activities listed on this “Play Ideas” page can be applied across different age groups. See how gardening can be a fun activity for toddlers, children and playgroups.
Activities listed under “baby” are suitable for children under 12 months. This age is largely about babies exploring their own bodies and the world around them from the safety of a close relationship with their caregiver.
Activity Sheets
We know that it can sometimes be difficult to think of things to do each week at playgroup. That's why we've put together some ideas and simple recipes to keep you entertained and help develop important skills through play!

Activity Cards
These activity cards show the many learning and developmental benefits that come from simple and fun activities that you can do together with your child at home or playgroup.
You can download the cards here:
We know that it can sometimes be difficult to think of things to do each week at playgroup. That's why we've put together some ideas and simple recipes to keep you entertained and help develop important skills through play!

Baby Play
This activity sheet shows you how to make some fun tummy time toys for babies from things you probably already have in your house.
Download the Baby Play activity sheet.

Physical Play
This activity sheet gives you some ideas to introduce more physical play, including obstacle course, tunnel crawling and newspaper cricket.
Download the Play activity sheet.
Get Messy
This activity sheet introduces you to some messy play ideas including sand painting, blow painting, utensil printing and spaghetti painting.
Download the Messy Play activity sheet.

Recipes
This is your go-to guide for tried and tested playgroup recipes, including playdough, oobleck, home made moon sand and slime.
Download the Recipe sheet.
Baby Play Ideas
Make Your Backyard More Fun:
8 Outdoor Activities for Infants

During the infant stage, babies are learning at a rapid pace. According to the Centers for Disease Control and Prevention (CDC), some of the most important developmental milestones in the first year include establishing clearer vision and developing an ability to explore. This is what makes outdoor activities so valuable during infancy. When you and your baby spend time in the backyard, you are helping grow their thinking and reasoning skills. You will also help them engage in social and emotional bonding. New moms or dads also benefit from the outings. Backyard adventures will give you your daily requirement of vitamin D, as well as plenty of fresh air.

The following ideas are perfect for spending time at home. This list of outdoor activities for infants provides ideas for every time of year, so you can take advantage of engaging play during different types of weather. Once you find a few favorites, you will gain a better appreciation for where you live.
1. Outdoor Tummy Time

When you first visit your pediatrician, they will tell you the importance of tummy time. By placing your baby on their stomach to play, they will strengthen their neck and back muscles. They will also develop motor skills. All of this is essential for learning how to sit up, crawl and walk. Infants will do most of their tummy time on a blanket or pad in their nursery or living room. You can also do the activity outside when you want to enjoy fresh air.
Outdoor tummy time is a perfect activity for warm spring days, mild autumn afternoons and summer mornings in the shade. Bring a comfortable blanket outdoors and put it on the ground in a safe place. The best spots have plenty of thick grass free of bugs and debris. Other ideas include your back patio or deck.
Feel free to take toys with you. This may make things more fun and intriguing for the baby. Just be sure you choose items that can handle moisture, heat and humidity. If it is warm or sunny outside, dress your baby in a hat and protective clothing. If you feel a chill in the air, you can layer a jacket or hoodie over a bodysuit and pants. Our Onesies® Brand bodysuits are the perfect choice for layering during all seasons. Cotton material will keep your little one comfortable and cute all day long.
2. Backyard Lunch

In the first several months of your baby’s life, they will drink only breast milk or formula. Your pediatrician will guide you on when you should introduce solids while your child still nurses or drinks bottles. According to the Mayo Clinic, most infants start solid foods between four and six months of age. The right time to start will depend on your baby’s readiness, as well as your healthcare provider’s recommendations. No matter what feeding phase you are in, you and your child can enjoy a peaceful lunch outside. All you need is a comfortable seat or a high chair.

Newborns and young babies will sit with mom during lunch. Choose an outdoor chair that will support your body if you feed or nurse for a while. No matter what time of year you are having lunch outdoors, make sure you are in the shade. Protecting yourself from the sun with an umbrella or a large tree will prevent sunburn and overheating. Dress your child in layers so that you can add or subtract clothing items if the weather changes. Make sure you also wear comfortable clothing and UV-blocking accessories like a hat or sunglasses.
When the baby is ready for a high chair, feel free to take it outside. Choose a chair that is easy to wipe down afterward so it is clean when it goes back indoors. Some families even have an extra chair for their deck or patio. Bring their lunch in portable containers with matching tops. Airtight vessels will keep snacks fresh while protecting them from bugs. It will also be easier to transport different types of food. Remember to pack something for yourself, too. New parents also need to stay nourished.
3. Nature Naps

If your backyard features a patio or enclosed porch, take advantage of it during the warmer times of year. Taking naps in the sunlight can be relaxing and provide you and your baby with plenty of vitamin D. A portable bassinet or crib is a great choice for this space. Some babies don't sleep when it is too bright. Blackout shades or solar screens can make the environment darker and more comfortable. No matter how you adjust the room, you and baby will still enjoy the change of scenery. Nap nearby on a cot, hammock or futon. You can even sit in a chair and take in the natural scenery.
The quiet sound of birds or a babbling brook can also be soothing to baby. As long as you have an electrical outlet nearby, you can even bring your infant sound machine outdoors. Create a sleep playlist with your smartphone to relax your child anywhere.

4. Swimming and Water Play

If your family has a pool in their backyard, you can start taking baby in the water when they are a few months old. At first, you will need to hold them in a shallow part of the pool. Eventually, you can place them in a special seat or float. Other water play ideas include splashing in a bucket of water or letting baby feel the sensations of a gentle water sprinkler. Some parents like to take a newborn tub outdoors on the grass, sand or another soft foundation. Your baby can play in cool water with their favorite bath toys while you enjoy the weather. Adult supervision is always required when your baby is near the pool to guarantee their safety.
Since your child is unable to regulate their body temperature until their first birthday, it is important to keep them comfortable. Avoid water that is too cold. Dress them in the right baby girl or baby boy swimwear, such as a rashguard set with swim bottoms or trunks. Having a plush towel nearby will also help to keep them cozy as soon as they are done swimming or playing.

5. Short Walks

If you want to stay in the backyard for the afternoon, you can still take a walk. Your baby will love taking in the different sights. Stroll around the perimeter of the yard or explore near the fence. Exciting points of exploration include birds, tree leaves and wind chimes. If you have a garden, show them the different plants. You can also walk the driveway, roam around the exterior of your home or travel the sidewalk in your neighborhood.
While you may only be out for a few moments at a time, it is important to protect your baby’s delicate skin. If they are too young to wear infant sunscreen, dress them in an outfit that will prevent them from getting a sunburn. A lightweight cotton shirt can help to block some sunlight while still keeping the baby comfortable. Bodysuits can be worn with or without pants and are perfect for warmer weather. Hats are a good idea for infants of any age. For parents who like using baby carriers, use a free hand to carry a small umbrella. It is also a good idea to stay under a covered area or in the shade. When it is chilly outside, skip the outdoor walk. Instead, roam around your sunroom or enclosed patio.
6. Exploring with Bubbles

Bubbles are fascinating for infants. While they are exciting enough to watch in the early months of your baby’s life, they will also be fun for them to pop once they start sitting, standing or walking. This outdoor activity will help your baby strengthen their vision. They will also begin to learn more about the world around them.
The best thing about bubbles is they are affordable and can be found at almost any store. Buy a small bottle of bubbles with a matching wand or purchase a large jug and a set of tools. When it is a nice day for playing outdoors, you can take it in the backyard with you. You can also do it in your garage, driveway or on your back deck. First, demonstrate for baby how to blow bubbles with the wand. Watch your child delight in the way they float and disintegrate. The activity can even be stress-relieving for parents.

7. Backyard Story Time

It is always a good time to read a book. Take a few of your favorites outside for backyard story time. You will need only a few more supplies to enjoy a peaceful and relaxing reading session. Pack up a couple of bigger baby blankets, along with a hat and some toys. If your child uses a pacifier, it may also be a good idea to take one with you. Moms should also take a water bottle and hat or pair of sunglasses to keep them comfortable.
When you have everything you need, find a shady spot. Lay a blanket down on a soft patch of grass free of insects or mulch. The other blanket can be used for keeping the baby warm or adding extra padding to your first blanket. Read a couple of short books about animals, nature or the great outdoors. Your child may also have a few favorites from bedtime. Whatever you choose, make the activity vibrant and educational. Finger puppets and toy props can add to the fun. Once you are finished, you may even choose to have a snack or take a short rest.
8. Patio Play

Do you or your baby have another favorite activity? Take it out on the patio! Enclosed patios, sunrooms and porches are the perfect place for relaxing in a rocking chair, stacking blocks or playing with a doll. Other ideas include dancing to music, exploring in a playpen or learning with an activity table.
Since patios have plenty of natural light, they are also an ideal spot for learning to crawl or walk. Just make sure your little one has a carpet or padded area in which to move around. Concrete, wood and tile can be uncomfortable for little knees and feet. Sunrooms can be a good place to play with rattles or learn to use a ball, while their large windows also make for a safe and exciting place to learn more about the world around them.
Woods through the seasons

Our woods are a wonderful place to visit all year round. Visit in spring for swathes of bluebells, summer for sunlit picnics, autumn for bright bold colours and winter for snow-topped trees.
Many of our woods come alive with bluebells during the spring.
Visiting woods

Visiting woods
Go exploring
Primordial landscapes, tangled branches, breathtaking wildlife and miles of woodland trails. From the countryside to cities, we care for thousands of woods- all free to visit.

Teaching Baby the Joy of Outdoor Play

There are so many reasons for you and your baby to play outside. The wellness benefits, like getting plenty of oxygen and vitamin D from sunlight, will be helpful to your child throughout their life.
Outdoor play also encourages your little one to move their body and get mobile. While backyard fun enhances your child’s health, it is also essential to their emotional and social development.
Tummy time, patio play and swimming are all easy and effective ways to bond with your baby and teach them more about how to interact in their home.
While you do not need to plan like you would for an outing, it is still a good idea to be prepared. Taking a small pouch, purse or backpack outside with you will make it easier for you to carry everything you need to spend some time in the yard. Snacks, a bottle or some water for mom may be all you need to get by. When it is warm outside, you will probably need protective clothing, a larger water bottle or an umbrella. If you choose to go outside in cool weather, make sure to layer your baby’s clothing. Hoods and beanies help to keep an infant’s head warm, while socks with booties or shoes will protect their delicate feet from wind and weather. Blankets are also the perfect supply for keeping everyone warm or providing a safe place to play in the grass.
No matter which activity you choose or the items you take with you, you are sure to create lasting memories. Whenever you feel like it, take your smartphone or camera with you. Snap a few shots of your child or a selfie of the both of you together. They will help you remember how fast your baby grew in their first year. Eventually, they will also be able to see just how much fun you had in their first-ever backyard.
Exploring Nature With Your Baby
Flowers, plants, and animals provide your little one with rich learning opportunities.
Introducing your child to all aspects of nature will help her with language development, and will give her an appreciation for the needs of other creatures and a sense of pride at helping wildlife flourish. Enjoy these experiences together!
Exploring Nature With Your Baby
From the first hour of life, when a baby stares into the eyes of his new parents, he is learning all about this brave new world. Babies try to make sense of what they see, touch, taste, grab, hear, hold, and squeeze. Think of a baby clutching a hunk of ripe banana, slowly squeezing it, and watching in wonder as the yellow, creamy fruit slithers between his fingers.
Babies are born primed to learn how the world of people and objects works. That is why they love exploring their outdoor surroundings. Every bug, animal, or bird that your baby sees is a brand-new experience — especially because babies spend so much time indoors. When at the park or in your yard, don't be surprised if your baby wants to touch a nice earthworm as she inspects the grass at the edge of her blanket. Many babies love to feel a caterpillar crawling on their arms.
Natural experiences should come in doses that are understandable for your baby and in ways that keep your baby safe, of course. Babies are forever exploring, whether trying to poke a finger into an electrical socket or attempting to tip over a stand so that they can pull at and maybe taste the shiny green leaves of a plant. Babies are often unaware of dangers, and toddlers can climb with agility and fearlessness into hazardous situations.
Opportunities to experience nature up close stimulate infant senses, provide a sense of loveliness for him to appreciate, and encourage you to label objects — flowers, plants, and animals — and to explain their characteristics using as many of the senses as you can.
Technology has made its way into every aspect of our lives. Children see less and less of nature and the outdoors and more and more of touchscreens and televisions. The following suggestions provide great ways for you and your child to safely experience the outdoors and will lead to rich learning experiences.
Observe animals in their natural habitat. As you walk with your baby in a pack on your back, point out sounds she can listen to, such as a bird chirping or crow cawing at the top of a tree. Point out the insects crawling, the doggies running around sniffing, and the squirrels climbing up trees. As your baby begins to use some language, she may call your attention to a bird flying up and settling on a tree branch. Rejoice with her excitement. The world of animals and birds is a new kind of discovery for her. Spying on Squirrels and More with Ranger Rick For more about other animals, use the Treehugger Site
Encourage touching. In the park, you can introduce your baby to a great variety of nature's textures. Invite him to feel the grass and pinecones; to touch smooth, bumpy, and grainy textures.

Explore a creek or river. Exploring a river, looking for water critters, catching tadpoles, finding special rocks or even arrowheads was a favorite pastime I shared with my Dad. Kids require little direction when it comes to this kind of fun. Give them a river, some water shoes and set them free.
Enjoy Bird Watching Together . Watch birds through binoculars, build a feeder or birdhouse, or just sit on the porch (or behind a window) or on a blanket and listen.
Try to guess which bird is singing that song. Explain male and female colors. In the spring, leave some scraps of material or yarn for the birds to find and use in making their nests. In the winter, drive through areas where there are trees to see the nests they have built.
Get Outside & Connect: Roll Down a Hill
Do you remember rolling down grassy hills as a child? I sure do. I remember rejoicing with my brothers and neighborhood friends whenever we found the perfect spot to go for a roll. We laughed, we squealed with joy, we connected with nature, and we helped our bodies develop properly. What could be better than that?
Children need to move and play outside on a regular basis in order to develop healthy sensory systems. Rolling down hills is a great way to get outside, connect, laugh, and have fun. It is also the perfect activity for the developing sensory system. Get outside and go for a roll down a hill today!
Play in the Leaves: Who doesn’t love jumping in a huge pile of leaves? I know its a fantastic way for the whole family to get involved
Jump in Puddles: I don’t know about you but just the simple act of jumping in puddles can be a blast for any kid. It is bound to bring on the smiles and the laughs, as well.
Feed Ducks Many duck species are as at home on the water as they are on land and in the air. Ducks have two unique features that make them such good swimmers—webbed feet and waterproof feathers. From whistles and coos to yodels and grunts, ducks have a lot of different things to say. If you're wondering what to feed a baby duck without starter feed, consider some fruits and vegetables: cut them very small. For more about ducks and other animals, use the Treehugger Site
Start Nature Treasure Boxes: Babies and toddlers usually really enjoy playing with random loose parts. You can make them a nature-themed bin full of all sorts of natural treasures for them to build and play with.
Consider filling a small tub with smaller containers that they need to open and explore and fill and empty. Think shells, pretty stones, pieces of driftwood, maybe some paint brushes and small scoops too.

For an added task, give them some water to paint these treasures and watch how their colors and textures change.
Visit the zoo. Wheel your stroller close to an exhibit and point out what your baby is looking at, whether it's a seal splashing in the water or a monkey swinging from a branch. You have been reading animal stories to your little one from early on. Now, at the zoo, he gets to see all those creatures that were in the storybooks. Let your toddler tell you that he is watching Horton the elephant lift up his trunk!
Stroll through a garden. Flowers and plants offer your baby sensory and aesthetic pleasures. She will be sensitive to, and admiring of, the colors, sights, and sounds. Trees, flowers, and plants provide opportunities for talking about rough bark, delicate blossoms, and perfume smells. Some flowers are lovely to look at but don't have a smell when you sniff them. You can also pick up your baby to show her a butterfly nosing about to get nectar. (A butterfly bush in your garden will attract more of these beautiful "flying flowers!")
Create a garden sensory bin: It was a great way for him to get a different perspective on everyday items from our backyard. With the garden sensory bin, he explored a lot of other things first, but then, it was time to SPLASH 🙂.

Try Mud Painting and Activities:Mud painting is an easy-to-put-together activity that combines nature exploration with fine motor skill development. Feeling ooey gooey mud between your fingers is a fascinating sensory experience for little ones. Babies can try to finger-paint with mud (or chocolate pudding if you want an edible option) 20 glorious ways to play with mud!
Digging dirt is a favorite:When the weather’s nice, we are outside all day. Because my boys love digging, and I do not want a yard full of holes (especially a yard that sees as many games of tag as ours!), this spring we set up a small area for the kids. It’s a natural play space, where they dig, make mud pies, create natural sculptures – to play.Setting up a play space for digging from
Simple Play Ideas
Cool off with Simple Water Play Ideas: Let's get started with our fun water play ideas for toddlers and babies! The idea of water play is to keep it simple - don't overthink it and you'll find that it becomes a favorite baby activity!

Watering with Watering Can
The humble watering can is great for what it’s intended to be- to water plants! And more!
Watering plants is a great activity for your child to develop his arm muscles! As he lifts the “heavy” watering can, he flexes his cute little biceps. This simple movement helps his overall body development.
In addition, watering plants is a wonderful jumping board for teaching about the importance of plants and water. As early as toddler years, we can already begin teaching them how to conserve water!
2. Scoop and Pour with Gardening Spade

The spade is another gardening item that may be used for scooping and pouring. Two proven favorites by toddlers!
As they scoop and pour dirt, they develop their fine motor skills and they get to practice their eye-hand coordination. I mean, they need to look where they are pouring, right?
And it’s an added bonus if they see an earthworm! It’s instant Science lesson about creepy crawlies!

3. Spraying with Spray Bottle
As we’re still on gardening tools, let’s not forget the sprayer.
If the watering can is for the arms, the water spray is for the hands and fingers. Every time they put pressure on the lever, it strengthens their finger muscles- muscles that are responsible for writing!
Imagine that. A pre-writing activity without using a pencil!
4. Squeeze a Sponge

Let’s head to the garage. In here, you’ll see the sponge used for cleaning the car.
The sponge is also a versatile item that could help your child develop his fine motor skills. The squeezing movement is great for their cute little fingers!
It’s another pre-writing exercise!
Make sure that the sponge hasn’t been used with harsh chemicals before and you’re good to go. Or to be safer, just buy your toddler his own sponge. It will be worth it!
5. Use a Water Dipper

Like the watering can, this item targets the whole arm. And fingers, too! Your toddler’s grip will be exercised here as he takes hold of the water dipper’s handle.
This is also another great item for scooping and pouring. You hand this to a child and I’m sure he’ll be busy in no time.
Not only will you nurture the love of nature in your children or grandchildren, but you will also strengthen your relationship with them through quality time spent together. Let nature be a foundation for wonderful memories that will be cherished and remembered long after you’re gone.
Introducing your child to all aspects of nature will help them with language development and will give her an appreciation for the needs of other creatures and a sense of pride at helping wildlife flourish.
Enjoy these experiences together!


“Nature doesn’t bombard children with too much sensory information at once, which creates a sense of chaos and confusion.” Instead nature is a “perfectly balanced sensory experience” providing just the right amount of stimulation and opportunities for babies and children to learn and grow. (Angela Hanscom, 2016)
Your child’s mind has an easier time learning from sensory experiences in a calm environment like the outdoors. If they are surrounded by overwhelming colors, sounds, and visual distractions, their minds have a harder time learning (processing). Therefore, babies and young children benefit less from whatever they happen to be playing with if the surrounding environment is too overwhelming.
Providing the best baby experiences for sensory development
If you take anything from this article, I hope it is this: young children and babies learn and develop best when offered varied experiences in the outdoor world.
Exploring nature with babies can be as easy or as involved as you’d like to make it from an overnight hiking trip to sitting in the backyard. (For more tips and advice on exploring nature with children you can read more here: exploring nature with babies)
For busy babies who love to put everything in their mouths, you may want to hold them in your arms when outside or lie them on a blanket. Then, proceed to present them with safe items they can explore with their hands (and mouths). This texture exploration increases the chances that children will welcome various textures of foods when they are older.
When your infants are a little older, they can lie on the grass and explore to their liking. You’ll want to stay close, but try to refrain from interrupting or directing their play. Allow them to explore at their own pace.
Often just the natural outdoors have enough for young children to occupy themselves with. They’ll be happy playing with rocks, leaves, sticks, and other found treasures. If you find they need an activity, provide them with just a few items. A pail and shovel (even a bowl and spoon) can lead to a lengthy play at the park, beach, or in the garden.
Here’s a very simple list of sensory rich outdoor activities:
Explore a garden, greenhouse, or park. For variety, try community gardens, botanical gardens, and provincial, state, or national parks.
Lift up babies so they can play with leaves and smell the blossoms of trees. Young children will enjoy throwing a ball up into the leaves or being chased around tree trunks.
Spend time in areas with lots of birds or butterflies, or out in the countryside by a horse coral or ranch.
Dangle babies’ bare feet into water or over the grass. Let older children play barefoot on the grass, in the mud, and shallow waters.
Take your little one out for walks in the stroller or baby carrier. For an even deeper sensory rich experience, carry your baby in your arms.
Bring your rocker outside, have your meals on the porch. Even consider putting your baby’s bassinet outside for nap time.
Try to challenge yourself to do one or more of these things each and every day.
Sensory development and babies… remember this:
The natural outdoor environment provides young babies and children with the perfect amount and variety of sensory stimulation. Every moment children play outside is time spent growing and developing their minds and bodies. Do this often enough and children will have ample opportunity for sufficient nurturing and learning.
Open the door and fill your child’s day with new adventures and calming natural experiences with open play.
Nature Crafts That Help Nurture Their Interests
From a very young age, every child must get the right message about nature. If this is done correctly, then your kids will learn to love the nature. Nowadays, it is very important to love our environment and nature. So let them explore the things that they are intrigued with, at their pace. There are many ways by which you can teach your kids about nature, but one of the best ways is to teach your kid with some natural crafts which also help to sharpen their brain.
I often get asked when we can start process art with nature's treasures. I always respond that if they can feed themselves with a fork and spoon, they can start creating art. Process art includes making collages and painting. However, the ability to draw does not come in until later. Collages can be done on clear contact paper, so glue isn’t required. Shaped sponges, stamps and stencils can be used in paintings to give them form, texture and shape.
Young kids are very watchful in nature, and they will want to know about a lot of new things at once. Make sure you set the pace, so they do not get overstimulated. Especially if you are in the process of looking for certain art and craft supplies. Just about any young child will follow your lead and will also find it very interesting. So first, you will have to teach about how we find these items. So, this is the time where you can teach them how our forest grows and supplies these treasures, as well as the fact that we are to only take what is on the forest floor. We do not take anything from the forest that it needs to survive. Then finally, you will have to teach your children about the craft ideas. So children will be more attached and protective of art made from natural items that they found and chose from nature.
Encourage them to go outside to explore with you as well as gathering the supplies you need. You will get to see firsthand how excited they get about doing it. You will quickly determine that kids naturally love to be outdoors and that they will be eager to learn what they will need to do for that particular nature craft project.
They will really enjoy getting to explore the world around them. They can learn about various new things on the go. This is the process of teaching the kids about crafting with nature. It will also help them to learn about different kinds of things that grow and intensify their love for nature, art and crafts.
We would just head out on a walk on a whim, and talk about or just enjoy whatever we see. But sometimes we have a special theme to our nature walks, to focus on a particular aspect of what we might find. Even the roadsides are constantly changing in the Rocky Mountains. And they weren't always the same as our wildflower garden. It was truly just whatever the wind blew all over our neighborhood.
One thing I did that Hope really enjoyed was to carry a ribbon toy with us on our walks and bike rides. I made a small version of the second one on a key ring and attached it to her carrier and her zipper on jackets. Then she could watch the wind. I will give you links to make a few of her favorite ribbon toys. Just click on the pictures for a link. The wind always startled her. She couldn’t see it and it took her breath away. So the ribbons and wind chimes let her know when the wind was whirling about her. HINT-Oh-another very simple way to demonstrate wind is to blow bubbles and let the wind take them away.


Hope was very determined that her artwork was to be hers from a very young age. She was very into her freedom in creative expression; even when using nature in her artwork. It was lucky that I was versed in open-ended process art. When working with babies and toddlers artistically, the adult needs to be careful to let them create joyfully in their way.
BTW She was not given markers or crayons until she could hold a fork and feed herself.
On to creating art that uses whatever you collect
from nature walks…
Most Hope’s first painting supplies came from our kitchen or outside. Anything liquid or creamy became paint, small utensils became tools to apply the paint with and the floor, her highchair table and Bumbo chair with tray became surfaces to paint on. Anything doughy became playdough and my margarine became her snack. (UGH) None of my friends had babies so they loved that she could create a party of her own in the kitchen. Lower cabinets and drawers were sorted, so they were baby safe. She knocked on what doors she needed opened. She lived and breathed art…. oh, and daddy.
So, when she started doing art outside, everything becoming an art supply or tool came natural to her. HER CREATIVITY WENT WILD.

Preserved leaf wreath from Craftulate

Painting Leaves
Whether you collect some Autumn leaves from the ground or pick some fresh Spring leaves from a tree painting on them can be a fun experience. Why not turn your painted leaves into monsters or creatures. You can use brushes to paint the leaves but using your fingers is far more fun! Read more...

Butterflies and spring also go together. Check out this beautiful springflower butterfly craft from Fun and Fantastic Learning.


Nature prints clay craft

Make colored sand creations like Play at Home Mom

This nature press is easy to make and is perfect to take along on nature walks! Use this flower press to press your favorite nature finds and use them to make a few of these crafts.

Ok we took more than one. We had about six in a baggie in our fanny pack for our outside adventures. It’s funny when I find things, I thought up for my kiddos online. I always get all puffy and wonder...who hacked my computer when Hope was little. LOL
Here’s some projects that use those pressed treasures from your walks
A Beautiful Nature Fram
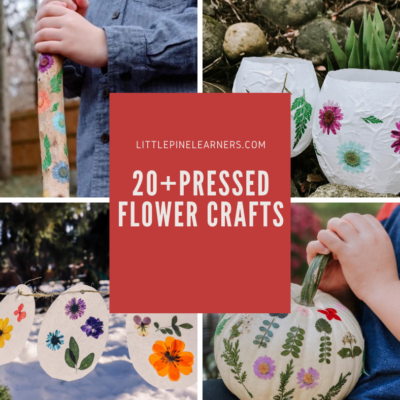
20+ Beautiful Pressed Flower Crafts
Learn easy ways to press flowers and see over 20 crafts to try with these beautiful pieces of …
[READ MORE...]
Best types of flowers to press flat
Over the years, I’ve learned some flowers were born to be pressed, and some weren’t. I might have scorched a flower or two in my ambitious attempts to press them. Whoops!
The best flowers for pressing include ones with a single layer of petals and flat faces. I’ve used everything from flowering shrubs like plumbago to roses, vincas, pansies, Esperanza, zinnias, and delphinium.

For larger bulbs or spherical flowers like peonies or ranunculus, you may have better luck preserving the whole flower. You can do this through various drying methods or by separating the individual petals from the stems. For thicker flowers (like roses), you can also split the flower in half before pressing.
Note: Avoid using flowers with fleshy, water-rich petals (e.g., begonias, portulaca).
They may be prone to mold or scorch when pressed.
How to press flowers in a book
Pressing flowers in a book is one of the oldest, tried-and-true methods. I’m quite fond of the technique if you have the time and patience to wait. (If you don’t, I’ve got a solution for you below.)

Supplies:
Sturdy book (e.g., phone book)
Paper to absorb moisture (parchment, thin cardboard, newspaper, coffee filters or blotting paper)
Heavy weight
Note: For best results, avoid using paper towels. Any paper with texture or embossing may leave an imprint on the flowers.
Step 1: Prepare flowers
Before you begin, separate any petals if needed. Then, arrange your flowers on one sheet of paper with at least 3/4-inch of space in between. Try to press flowers of similar varieties or thickness together.

Step 2: Cover flowers and close the book
Place the second piece of parchment paper on top of the arranged flowers. Take care to flatten the flower face in the shape you’d like to achieve when pressed. I find it easiest to fold my sheet of parchment paper in half. Then, I can sandwich my flowers inside like a book rather than cutting two sheets of paper.
Next, close the book and set a weight on top. You can also pile on more heavy books or a brick, but you’ll want something heavy enough to create even pressure.
Step 3: Wait 2-4 weeks for flowers to dry

Pressed flowers in a book after 2.5 weeks
The drying time will depend on the thickness of the petals. I waited only 2.5 weeks for my flowers to dry in the photo above. They came out paper-thin and had great color retention! For thicker flowers, you may choose to wait closer to four weeks.
Some people suggest replacing the absorbent paper every three days or so. However, I didn’t find that necessary with parchment paper.
Once you’re done, I recommend using these nylon tweezers to handle your dried flowers. Book-pressed flowers can have very delicate structures, and you don’t want to tear your pretty specimen!
Using a homemade wooden press
Much like the book-press method, a homemade or store-bought wooden press can give you fabulous results. (Plus, you can decorate a wooden press or customize it to match your style-BONUS!)

Supplies:
Two 12 x 12-inch pieces of plywood or MDF
Cardboard
Two pieces of paper (blotting or parchment paper)
Four bolts and wingnuts
Step 1: Drill holes in boards
Drill a hole in each corner of the boards, about 1 inch from the edge. Make sure you match the size of your bolts and line up the holes on both boards.
Step 2: Arrange flowers in between cardboard and paper
Cut the cardboard to fit inside the plywood or MDF, working around the four holes where you will insert the bolts. Lay a piece of blotting paper on top of the cardboard and arrange the flowers on top as desired.
Again, you will place the flower between two pieces of blotting paper. Then place a piece of cardboard on either side, followed by the wood or MDF.
Step 3: Screw in the bolts, and wait 2-4 weeks for flowers to dry
Insert the bolts and tighten the wingnuts until secure. Drying times will again depend on the thickness of the flowers used.
Compared to book pressing, the pressure is more evenly distributed with a wooden press. Plus, you don’t risk damaging any books.
Pressing flowers with a microwave
Perhaps my favorite method of pressing flowers for framing is using a microwave. When you’re short on time, this is the ideal option for you!
I wrote extensively about how to use one of these in my post on DIY pressed flower art. Go visit that post to receive a special 10% off promotion to purchase a Microfleur flower press.

Arranging flowers in Microwave flower press
Supplies:
Tweezers (optional)
Step 1: Place flowers on inner lining
You’ll want to arrange your flowers on the fabric liner in the shape you want to achieve in the end. Always try to group similar flowers together.
Step 2: Microwave flowers for an initial burst
With most microwave presses, you’ll want to heat the flowers for one long initial “burst.” I typically start with 25 seconds.

Plumbago flowers after pressing in microwave
Step 3: Continue microwaving in short bursts
Continue to microwave your specimen in 10-second bursts until the flowers feel paper-thin. Always air out the plates in between bursts to prevent browning or scorching. If scorching occurs, you can always reorder refill packs. (Ask me how I know.)
Note: Using succulents or flowers with fleshy petals may cause scorching when microwaving.
Take care when you remove flowers, since petals may stick to the inner liner. It helps to stretch the fabric liner in opposite directions or use nylon tweezers to help release the flower.
You can also use a book in the microwave instead of a press. Just please make sure there are no metal accents on the cover that might create a fireworks show!
Pressing flowers with an iron
You can also apply heat to dry flowers using a household iron. I must admit, this is my least preferred method because I just don’t think the quality compares to the other methods. However, it’s a good one to have if you need pressed flowers ASAP and don’t have another microwave option.

Supplies:
Iron
Parchment paper or other absorbent paper
Step 1: Arrange flowers between paper
I used parchment paper to sandwich the flowers and position them into place before ironing. A good hard surface with a thin towel underneath also helps.
Tip: For a fun kid’s craft, you can use wax paper to create a “suncatcher” with the flowers preserved in between. The wax paper will seal itself around the flowers, and you can
staple thick cardstock as a frame for display.
Step 2: Iron on low heat
Turn off any steam settings, and iron the flowers for about 15-30 seconds at a time on low heat. Let the flowers cool briefly before attempting to press again.
Once the petals have partially dried out, you can choose to finish drying using the book or wooden press method above.

Results of pressing flowers with an iron
As you can see, the results of ironing don’t measure up to the other methods, in my opinion. The parchment paper tends to wrinkle, which causes ripples in the petals of the flowers as well.

Plumeria blossom before and after pressing with iron
What is the best way to press flowers?
I decided to create a little chart for an easy comparison across the methods (nerd alert!).

The best technique to press flowers and keep the color and texture was the book method. The microwave flower press is a close second and definitely wins in terms of convenience. I would not suggest ironing unless you’re in a pinch or need some quick flowers for a kid’s craft.
Nature Collages

Even the smallest child can make something of great beauty with this collage technique. Cut a picture frame out of cardboard ahead of time, sizing it so your child can comfortably carry it.
Turn it plain side down and measure out enough clear contact paper to stick all around the frame. (Some people call it shelf paper instead -- you can find it in the housewares section of a big store.)
Peel off the backing, stick down the contact paper, turn it over, and voila! You have a sticky canvas for your child to decorate.

You could use this technique for any sort of collage, of course -- it needn't have a nature theme. But I love the experience of accompanying my kids as they take their little picture frames along on meadow walks or strolls in the woods. I find it helps them slow down and really look at the natural world around them.
Nature Squishy Bags
Fall is such a beautiful season. Whenever I think of it, I imagine color change, cooler temperatures and the smell of sweet potato pie. Recently, I asked my nieces what their favorite part of the season was, and they both immediately answered: “Playing with leaves!” With this enthusiastic response, I decided to make a Fall-themed sensory activity.

Recently, my nieces and their friends have been extremely interested in anything remotely “squishy.” They search toy aisles for kid-friendly stress-balls, get excited to make slime, etc. They just love the feeling of being able to squeeze their hands into something oozy. I put together my oh-so-easy Fall Squishy Bags to offer them something new to play with. Today, I’ll show you how to make them for your very own!
HOW TO MAKE A FALL-THEMED SQUISHY BAG
The wonderful thing about squishy bags is that you can get extremely creative with its inner contents. For my Fall-themed one, I decided to focus on leaves since my nieces expressed such a liking to them.
Items Needed:
Artificial or natural leaves, preferably in autumn shades
Scissors
Large freezer bag
A bottle of hair gel or Aloe vera gel
Medium-sized bowl (optional)
Colorful duct tape (optional)
Colored Glitter or confetti...if desired.
Directions:
1. If necessary, cut artificial leaves off from their stem. For one large freezer bag, you’ll need about 4 to 6 leaves.

2. If you don’t have anyone helping you to keep the freezer bag open, I suggest opening it up and placing it in a bowl. This will keep it standing upwards and will allow you to fill it up with easy. First, add your leaves then, add your entire bottle of aloe or hair gel.


3. Squeeze out the air from the bag and zip shut. I always like to seal the top of my squishy bags with decorative duct tape for extra protection.
If you have a biter, tape around the edges too.
4. Squish away and have fun!
My nieces had a great time playing with their squishy bags. I was happy to provide them with an activity that they found so satisfying to squish their hands into. We’re just getting into the fall season in my area, so this sensory play was just what we needed to welcome the beautiful season!
Easy Nature Wall Hanging

Using a full sheet of semi transparent waxed sandwich paper, gluing leaves and color tissue paper folding in the middle and adding a stick and ribbon or string for hanging

Painted PineCone Flowers from Emma Owl –
This cheerful “bouquet” won’t wilt after a week, and I’m sure the children will have such fun creating it. HINT: we used sticks from the forest floor instead of dowels.
Dip Pinecones in Paint
Place a small amount of paint on the paper plate and dip pinecone to add color to the petal's edges. Rotate pinecone as you dip it so each tip is covered with paint. Repeat will all pinecones and set aside to allow the paint to dry completely. My idea of fun was the single color. Hope’s was several dabs of bright colored paint on the plate. In fact she ditched the plate and put paint in her hands then wrapped her little hands around the pinecones. Then I grabbed glitter glue. Or you can use good ole Mod-podge to roll them in then sprinkle glitter on them.
Need more Pinecone crafts for you while they are napping?
CLICK HERE


Need more easy craft ideas?! Check out these beautiful ideas:
How to Preserve Flowers for Kids Activities
A Beautiful Nature Frame
Icy Flower Sensory Play-

Air Drying Wildflowers & Herbs

Drying is even better than pressing for preserving wild flowers. It keeps their shape as well as their color, and in some cases dried flowers are hard to tell from fresh ones.
Members of the daisy family, like daisies, thistles, and dandelions all dry well. Thistles, Field Scabious, and roses are good too. Always pick the flowers just before they are in full bloom.
Don't pick any flowers that are beginning to fade or wither, unless of course you wait until they go to seed. Poppies, Teasel, and many other seed heads look very attractive dried. So do grasses.
Continue to see how to air dry your own flowers!
Air-Drying Wildflowers
The easiest way to dry flowers is simply to tie them up in a bunch, hang them upside-down, and dry them for a few weeks.
What you will need to get started
Rubber bands
Dry airy place to hang the flowers

Steps
Tie the flowers into a bunch with a rubber band. Don't put more than 8-10 stems into each bunch.
Hang them upside-down in a dry, airy place for a few weeks. A linen cupboard is ideal because you can hang them easily. An attic, spare room, or garage is also fine, but you will need to fix up a pole or line to hang them from.
Continue to learn another way dry more delicate flowers.
Drying More Delicate Flowers
Some flowers lose some of their shape and color if they are just air-dried. It's better to dry roses, lilies, and anemones using a mixture of cornmeal and borax, which you can buy from a supermarket or grocery store. This way preserves leaves better too.
What you will need to get started
Shoe box
Borax
Cornmeal
Flowers
Paintbrush

Step 1
Find a box, like a shoe box, which is large enough to hold the flowers easily.
Step 2
Mix equal parts of borax and cornmeal together, enough to half fill the box.
Pour some of the mixture into the box to make a layer 1 inch deep.
Step 3
Cut the flower stems so they fit into the box, and carefully arrange the flowers on top of the mixture without overlapping each other.
Gently sprinkle some more of the mixture over the flowers until they are covered by a layer about 1-inch deep.
Step 4
After a week, gently take the flowers from the box and dust off the drying mixture with an artist's paintbrush.
How to Make Homemade Potpourri
When your sweet bouquet of flowers isn't as fresh as it used to be, instead of relinquishing to the trash, give those flowers new life as pretty potpourri. Making this DIY is easier than you think and can be personalized with any scents that you love. Toss in herbs or sliced citrus for filler, and the potpourri can be refreshed repeatedly with a spritz of your favorite scent.
Exploring the flower beds or herb gardens with babies and children to it is an activity in itself!!! So much fun.
Read on for the easy directions.
What You'll Need:
Flowers
Citrus fruits (optional)
Fresh herbs (optional)
Whole spices (optional)
Sheet pan
Parchment paper
Scissors
Scent-Essential oils in a spray bottle or bath salts
Directions:
Gather your flowers, herbs and fruit to use for making the potpourri. Any kind of flower will work, especially ones that already have strong scents, such as roses. Flowers with small, individual petals work great, or whole heads can be used too. Preheat your oven to 200˚F.


Cover a sheet tray with parchment paper. Cut the flowers from the stems right below the heads and place them on the tray or remove individual petals and place in a single layer on the parchment paper.
To add scent to your potpourri, cut and add thin slices of citrus fruits, or tuck in springs of rosemary, lavender, or thyme to the mix. You can also add whole spices, such as cinnamon sticks, cloves, or allspice, which are both pretty and wonderfully scented.
Add 10 to 15 drops of your favorite essential oil to one tablespoon of water in a small spray bottle and spritz the potpourri ingredients. Then pop the potpourri into your oven.
Dry in the oven for at least two hours, or until the flowers are brittle but not burnt. When the potpourri is ready, remove from oven and give another spritz of essential oil.
Drying Fruit slices
Slice fruit crosswise into thin slices about 1/4" or 1/8" thick (approx. 5 mm)
Press slices between paper towels or kitchen towels to blot away excess juice
Place slices on racks in oven and dry for 3 hours at 140°C (280°F), or 120°C (250°F) if fan forced. Check on them regularly to make sure they don't burn!
Also, you can place the orange slices on top of your radiators for a few hours after baking to get the last drops of moisture out with no fear of burning the slices.


Once it's room temperature, gently mix the potpourri and place it in a bowl or small satchel. To refresh the scent, simply spritz with the oil mixture. ( I used bath salts mixed in for fragrance)
NATURE PAINTING TEXTURE COLLAGE FOR KIDS
The kids always collect nature treasures when we step outside the house so we decided to use their finds and some natural craft supplies to paint some nature collages. Little Tiger came up with this art activity after I presented her with the supplies. She loved exploring textures, colors, and brushstrokes during this Painting Activity.

Supplies:
Craft paint
Craft paper
Paint brush (optional)
Nature treasures (leaves, sand, dirt, flowers…)
Glue
Directions:
Mix some glue into the paint, spread paint on the paper using paint brush or fingers, and then sprinkle, drag, or smash nature treasure into the paint. You can also dip the nature treasures in the paint and throw, swirl, or drop them on the paper.
FUN WITH PINECONES

October 6, 2013
Since becoming Forestry Commission Bloggers, we’ve been a lot more aware of nature and all the fun we can have in the forest.
This week H and I took a stroll through the woods and collected sticks, acorns and pinecones. I really wanted conkers, but someone had beaten us to it and they were all broken on the floor.
S decided the acorns were her friends and wouldn’t make anything with them, which left us with pinecones.
I gave the girls some crafty bits and left them to it.
What do you think?


Our collecting of bits from the forest, has led the kids to ask lots of questions about trees, which I don’t have the knowledge to answer, I will have to take this forest guide out with me next time.
More Pinecone crafts
Bird FeedersPhotos provided by Run Wild My Child
Checkout these easy bird feeders to make with kids by Run Wild My Child. These are perfect for toddlers to help make and great for attracting birds to your backyard (which can provide many benefits for you, the birds, and the ecosystem as a whole).
This versatile craft can be created using many items found in your home, including apples, orange peels, or a bundt pan. These DIY bird feeders help inspire creativity and make a great hands-on way for toddlers to learn about the different species of birds, what birds eat, and how they eat.
Photo provided by Simple Moments Stick

You could even attract birds with something as simple as a toilet paper roll bird feeder. I know I’m always looking for ways to repurpose those never-ending toilet paper rolls.
My toddler had a blast making this feeder by Simple Moments Stick. Such a perfect little craft for little animal lovers.
Painting Seashells
Photo provided by Love Peace Beauty

This painting seashells craft is a great one to add to your bucket list if you live near the beach. It’s also a great way to add in some art while you’re on vacation with the little ones.
I’m so glad I found this simple craft over at Love Peace Beauty,because I confess, I’ve got quite the collection of seashells just lying around in storage getting dusty. This will be such a fun nature craft that my toddler can do independently. And I won’t feel so bad about my seashell hoarding!
Spring Flower Keyring
Photo provided by Thimble & Twig

Your toddler will have a blast making these little nature trinkets by Thimble & Twig.These spring flower keyrings turn out gorgeous and are super simple to make.
Your toddler will get to get outside, pick some pretty flowers (be sure to leave the protected plants be), and make their very own keyring that they can proudly display on their backpack.
Tree Placemat Photo provided by Penlights to Pacifiers

This tree placemat craft by Penlights to Pacifiers is a great way to display falling leaves in autumn or blooming, colorful tress in the spring. Bonus points, it doesn’t involve any glue and hardly any mess. It’s even easy prep for non-crafty moms.
This nature craft makes an excellent opportunity to teach your toddler about the changing seasons and different parts of the tree. It even makes mealtime more enticing!
Nature Suncatcher

This stunning nature craft is another one inspired by The Artful Parent. Nature suncatchers are such a perfect way to explore nature and create some art out of it.
We love making these suncatchers out of findings from our nature hikes or scavenger hunts in our backyard. My toddlers spend a good amount of time decorating their plates and fine-tuning their nature arrangements.
These make such a beautiful display in the window.
Flower Printing

Photo provided by The Artful Parent
These flower prints by The Artful Parent are so beautiful. Plus, they’re easy enough for even a 1 year old to do.
This craft uses liquid watercolors, stamp pads, sturdy paper, and of course, flowers. Leaves are also great to print with, as their veins make awesome detail.
Your toddler will have a blast collecting their flowers and pressing them onto the paper to create their new piece of art.
Nature walks with Hope have always been one of our favorite activities together. She calls it “exploring.” It’s amazing how a little exercise and fresh air lifts both of our moods. Granted I don’t get much of a workout at the pace she keeps, but the memories are so much more important! We discuss creation, the science behind the leaves turning, how animals and bugs use camouflage, what makes rain, and anything else she thinks of to ask. I encourage her to use all five senses (except maybe taste…yuck) to experience nature. She creates characters for us to be and stories for us to play out.
Most of all we collect treasures. I never leave a walk without at least one thing in my pocket! Acorns and flowers are a favorite of Hope’s, I like to grab pretty or interesting leaves and rocks, and pine cones are beginning fall.
Here are some ideas for a nature craft to make with all those collected treasures.
Nature Treasure Collage and Suncatcher


Supplies:
Collected Nature Treasures (flat and light weight items work best)
Cut two pieces of contact paper. Place one sticky side up on a flat surface. Allow child to arrange their nature treasures on the paper. Place the second piece sticky side down over the artwork. Hang your nature craft in a window or other sunny place!
Leaf Faces

Supplies:
Googly eyes
Glue
Sharpie
Collected Leaves
This nature craft is so simple, glue eyes to the collected leaves and draw mouths and other facial features with the sharpie! Do not press too hard.
Leaf Impressions

Supplies
Collected Leaves
Paint Pad Paper or Canvas
Pour a small amount of paint into a paper plate or other container. Have the child dip the leaves into the paint and then press them onto the canvas. Encourage them to lift gently to reveal the leaf’s impression.
Simple Flower Pressing

Supplies:
Collected Flowers
Tissue or White Paper Towel
Heavy Books
Place flower on the tissue or paper towel and either fold the paper around it or place a second tissue over the flower. Place the flower sandwich in the middle of a heavy book. Depending on the thickness of the flower, you may need to stack more heavy books on top of the first book. Leave for 2-4 weeks. The pressed flowers can be placed in a scrapbook to start a nature craft collection, or used in your nature treasure collage craft above!
Rock Painting

Supplies:
Collected Rocks (smooth and flat river rocks work best)
Acrylic Washable Paint and Paintbrushes
Glitter (optional)
Clean your collected rocks and make sure they are completely dry before beginning. Allow your child to paint the rocks. Sprinkle on glitter if desired while the paint is still wet. Once the paint is dry, coat the rock in modge podge to avoid chipping and flaking. You can paint with them and create some Story Stones like we did!
Dipped Pine Cones

Supplies:
Collected Pine Cones
Glitter (optional)
Pour paint into a small bowl. Have the child dip one side of the pine cone into the paint. Sprinkle on glitter while the paint is still wet. Allow to dry and use this nature craft to decorate your festive bowls!
Pine Cone Decorating

Supplies:
Collected Pine Cones
Pom poms
String, Ribbon, Yarn
School Glue
Sequins and Glitter
This nature craft is suitable for toddlers and preschoolers. It is super easy and requires almost no help from the grownups except assembling the supplies and cleaning up afterwards. Just let them go to work on their creation!
Autumn Suncatchers Using Leaves

Save the best leaves from your leaf collection to make a stunning Autumnal Suncatcher by The Gingerbread House. It's such a lovely way to preserve some of your child's finds from your nature walk. The leaves will change a little over time, but it will make a nice window decoration through the autumn season.
Leaf Suncatcher

Collect some gorgeous fall leaves to make a nature-inspired Autumn Leaf Suncatcher. This craft is easy enough for toddlers and preschoolers and will make an excellent addition to your autumn decor this season. The leaves look beautiful, hanging in the window with the light streaming through.
Monster Leaf Puppets

Speaking of leaf puppets, you'll also want to make these Monster Leaf Puppets as Halloween approaches. Go crazy with the eyes, paint, and feathers. Perhaps you can draw some teeth on them to make them look a little scarier. Experiment and have fun!
8 Simple Ways to Create with Natural Materials from Buggy and Buddy
Crafting a Walking Stick from Crafting Connections
Flower Petal Sensory Play from Fantastic Fun and Learning
Building Towers with Natural Materials from Nurture Store
Nature’s Stampers with Play dough from Dayna Banya
Fun Things to Make with Natural Materials from Twodaloo
Playing and Learning with Natural Materials
from Fun-A-Day
Sensory Science Play at Home
A few years ago, I ran a very successful baby and toddler play program. Each week, about 80-100 parents and little ones joined us for a variety of interactive activities. For the purpose of training parents, w e used the activities as stations in the large group room. You can use these stations and present them one at a time or put 2 or 3 scattered around the play area (inside or outside) for them to find through out the day.
They can all be used inside or outside.

Each week, Cindy (my coworker) and I developed some DIY play activities, made from objects commonly found around the house.
My share of the content can be found below:
Cereal Boxes & Straws Instruction Sheet
Tissue Box Play Instruction Sheet
Tape Play Instruction Sheet
Card Slot Drop Instruction Sheet
Check out the links below about how to make:
At-Home Baby Science Play
I wanted to highlight some of my favorite at-home baby play activities that can easily be replicated with around the house objects. These are perfect for taking play outide or on the patio for fresh air.


Card Slot Drop (deck of cards, empty box or container with a lid)
Cereal Boxes and Straws (cereal boxes, straws)
Mirror Play (use a bathroom mirror)
Muffin Tin Play (muffin tin, any object to sort)
Pipe Cleaners & Colanders (pipe cleaners or thick ribbon, colander)
Sensory Bottles (empty water bottle, random objects that fit inside)
Spider Web Baskets (laundry basket, yarn, baby toys)
Sticky Paper (contact paper, scraps of paper)
Taped Toys (masking tape, flat surface, toys)
Tugging Box (empty box, various types of yarn, ribbon, scarves, or fabric)
Water Painting (paint brush, construction paper, water)
Water Play (water, empty bin, anything that floats or sinks)


Other awesome play ideas with everyday objects:
Baby Ball Drop
Baby Drum Circle
Bubble Wrap Mat
Cardboard Box Play
Cardboard Tube Beading
Exploring Sound Basket
Food Sensory Play
Frozen Egg Play
Kitchen Whisk Play
Tissue Box Play
Tummy Time Clock Game
Water Bottle and Straws
Zip Lock Bag Painting

What at-home baby play ideas am I missing? Post other ideas in the comments, and I will add them to the lists above.
Baby Play: Sensory Bottles
After each of my baby storytimes, I include a Discovery Time free-play session that encourages parents to talk to one another and to interact with their children. I include a variety of fine motor, gross motor, and sensory activities that appeal to 0-2-year-olds.

Sensory play is very important for all ages but especially for babies. Babies are exploring concepts (like gravity and motion) and textures for the first time. Their brains are growing at exponential rates as they learn how they can manipulative the world around them.
There are so many ways to encourage sensory play in a storytime setting. I regularly use textured tiles, liquid tiles, sensory boards, sensory bags, and, more recently, sensory bottles. Unless the program is designed and advertised as play only, I avoid sensory bins (except for water play) since objects inside those bins are often choking hazards (and there isn’t enough time to clean up beans, rice, sand, or water beads from the floor between story times).

Sensory bottles allow little ones to manipulate liquids without getting wet or manipulate small objects that would be a choking hazard or dangerous if left out for free play.
My most recent set of bottles included:
Mixtures of oil and water with food coloring
Water Beads
Water with small plastic spoons
Hair gel with suspended items
Oil with chunks of floating glitter glue
You can also add objects to create sound bottles like:
Paperclips
Thumbtacks
Googly Eyes
Keys

How to Make Sensory Bottles
Materials: Voss water bottles (the best type of bottle), materials to fill bottles, clear packing tape
Steps:
Empty Voss water bottle. Carefully peel off all labels. These should come off cleanly with no leftover residue.
Fill bottle with desired items or mixture.
Wrap 2-3 layers of clear tape around bottom of cap.
Cost: $12+ (depends what you have on hand)
Voss Water Bottles (about $1 a bottle in bulk packs)
Items to put in bottles
Time to Make: 5 minutes
Tips: Voss bottles are the way to go. These are the perfect size for small hands and the labels peel off perfectly, creating a clear, smooth surface.
You can hot glue the bottle closed as well, but babies will not try to peel off tape they can’t see. Clear packing tape around the clear bottle is essentially not visible to little ones, so they don’t try to open the bottle. We’ve never had a child successfully get into a taped bottle.
Conversation Starters

Start conversations as babies play with this tool by asking questions like:
What happens when you shake the bottle?
What sound does the bottle make if you shake it?
What happens if you turn the bottle upside down?
Do the items in the bottle float?
What colors are in the bottle?
How many items are in the bottle?
What would you put in a bottle?
Stretch Vocabulary
When talking with little ones, use big words and small words. The more new words a child hears, the larger their vocabulary will be when they start to learn to read.
Consider using some of the following vocabulary words when using this activity:
Bounce
Drip
Faint
Fast
Float
Hash
Jolt
Knock
Loud
Muffled
Pleasant
Quickly
Quiet
Rattle
Shake
Slow
Soft
Wiggle
Baby Play: Liquid Tiles
I love preparing for my Discovery Time free-play session that encourages parents to talk to one another and to interact with their children. I include a variety of fine motor, gross motor, and sensory activities that appeal to 0-2-year-olds.

Sensory play is very important for all ages but especially for babies. Babies are exploring concepts (like gravity and motion) and textures for the first time. Their brains are growing at exponential rates as they learn how they can manipulative the world around them.
I’ve been using textured tiles for a while. These are liked by all and allow babies to explore different surfaces in a safe environment. The foam puzzle tiles allow for adults or kids to create a path, a large block of textured squares, or any other shape they can think of.

However, my textured tiles have been put to shame by my coworker’s amazing liquid tiles. These have gone through many iterations, and, unfortunately, are not leak-proof.

We recently purchased factory-made liquid tiles that have also been fan favorites. These have been well-loved in the last three weeks with no signs of breaking. They are especially loved by the larger kids and adults, who can safely step on these without being concerned about them breaking.
Both types of tiles have different advantages–read on to see my pros and cons of each style, plus how to make those awesome handmade liquid tiles.

DIY Liquid Tiles
This method is developed by the talented Sarah Simpson, who I would make write this post except she is at home with her own new baby at the moment.
Materials: lamination pouches (the thicker the better; example is 5 mil), iron, baby oil (4-6 oz. a tile), food coloring, various items to add into bags, duct tape
Optional: Foam Puzzle Tiles (any size, extra large in images), Industrial Hole Punch, Zip Ties
Steps:
Trim lamination pouch to your ideal size. If you are planning to attach it to a foam puzzle tile or other surface, measure to fit that surface while leaving some space around the edges for eventual attachment.
Iron three sides of the pouch shut, at least 1.5″ around each edge.
Insert 4-6 oz. of baby oil into the open end of the pouch.
Insert a mixture of other items. Consider water with food coloring, plastic bingo chips, large foam shapes, googly eyes, or tissue paper squares.
Remove as much air from the pouch as possible while ironing the last side closed.
Wrap colorful duct tape around all edges. Leave a margin of duct tape around the edges (at least 0.5″ thick) that does not have any lamination bag in between the duct tape.
You can stop here, unless you want to attach your bag to a tile. The tiles create a different sensory experience for babies, but, be warned, we have never had a tile last more than 3-6 months (sometimes 3-6 days) before some part starts leaking. We think the leaking has to do with the industrial hole punch in the steps below, since bags not attached to tiles have not had this issue.
Use an industrial hole punch to punch a hole through the duct tape towards the edge of the bag. Do your best to only punch through the extra duct tape flap you created above, NOT through duct tape and lamination pouch.
Use the industrial hole punch to punch a hole in the foam puzzle tile.
Attach your lamination pouch using zip ties.
Cost: $25+ (depends what you have on hand)
Foam Puzzle Tiles
Lamination Pouches
Baby Oil
Duct Tape
Time to Make: 15 minutes
Pros: From watching interactions, I think this bag style is better for really little ones than the purchased tiles. Babies can see the movement inside the tiles and can use their hands and body weight to move objects around.
Cons: We have never successfully made one of these tiles that has not eventually leaked. Mostly, those leaks don’t occur until after 2-3 months of regular use. These bags can also take a while to make, especially if you refresh your collection after they start to break.

Purchased Liquid Tiles
We recently purchased the Excellerations Large Liquid Tile set from Discount School Supply. While pricey ($142 for the four tiles), these are sturdy to the point of being heavy to pick up. Each tile has a different color inside, and it takes some weight (or gravity if you pick them up and lean them against a wall) to make the liquid move. Adults can stand and jump on them with no sign of any wear.
There are very similar looking tiles available from sellers on Amazon, though those generally have questionable reviews.
We have only had these for about a month, with consistent use 2-3 times a week for only about three weeks, but there is no sign of leaking or damage.
Pros: These are sturdy and require no staff time to make or setup. Cleaning is a breeze–I just use cleaning wipes on them after each story time.
Cons: They are costly. Depending the materials you have on hand, you may be able to make quite a few liquid tiles yourself for less than $10. I also don’t think these are as exciting for the babies, as it takes a lot more force to move the liquid. The adults and walking kids really like this style.
Conversation Starters

Start conversations as babies play with this tool by asking questions like:
What do you see in the tile?
What does the tile feel like?
What colors are inside the tile?
Can you stomp on the tile?
Can you make the colors move?
Stretch Vocabulary
When talking with little ones, use big words and small words. The more new words a child hears, the larger their vocabulary will be when they start to learn to read.
Consider using some of the following vocabulary words when using this activity:
Bend
Dry
Examine
Explore
Find
Flexible
Grasp
Hunt
Inspect
Investigate
Mushy
Search
Shape
Smooth
Spot
Squeeze
Squishy
Wet
Baby Sensory Science!
The Baby Sensory Science program opened my eyes to how much more babies can do than what many baby storytime outlines imply. Babies are so much more than passive observers–their brains are developing faster than they ever will for the rest of their lives–combined. STEM concepts do not need to be limited to older children. In fact, babies are the perfect example of little scientists as they learn everything about the world:

Poster from Nerdy Baby
My own Science Baby! program finally became a reality during our winter storytime break in late December. Seventy babies and adults joined me for a morning of baby play with a STEM twist.

Activities were broken down into a few rough categories. They included:
Light & Color Play
Scarf Play
Magna Tiles
Mirror Play
Sensory Bottles
Black & White Box
Bubbles
Gravity and Engineering
Pom Pom Drop
Building Blocks
Motion
Wheeled Vehicles
Sink or Float (water play)
Tugging Boxes
Sound
Instrument Play
Math
Sensory Shape Board
Pool Noodle Counter
Muffin Tin Sorting
Observation & Exploration
Textured Tiles
Baby Pool Play
Sticky Paper
Sensory Boards
Some of these stations just involved putting out an item, like mirrors for mirror play. Others involved some ahead of time creation, like the sensory bottles. Still more involved in-room setup, like attaching sticky contact paper to the wall and building the pool noodle counter by stringing pool noodle pieces to string tied between two chairs.


Each station included a front and back laminated handout explaining the value of the particular activity, what little ones are learning, conversation starters, and vocabulary to stretch conversations with little ones.

Screen Time for Two-Year-Olds and Toddlers
If you landed here because you are interested in what the expert-recommended screen time is for two-year-olds and toddlers, I can link the 2020 American Academy of Child and Adolescent Psychiatry (AACAP) recommendations here. But I would like to caution you before you immediately accept that recommendation. From my experience, there is rarely a clear-cut answer…

Ultimate List:
110 Fun Things for Do in Your Own Backyard
Updated December 28, 2023 Looking for fun things to do outside in your backyard? I’m sharing 110 ideas for interactive outdoor play for kids of all ages. From playing with ice to exploring nature, there are endless possibilities for fun. And the best part is, you don’t even have to leave home. Classic Outdoor Activities…

Best Plant Activities for Kids:
Updated: December 28, 2023 Hello, caregiver of a budding botanist! If you’re looking for hands-on learning about plants, I share 40 of my favorites in this blog post. Each of these activities is open-ended and meant for older toddlers and preschoolers. And if you’re here for worksheets, I’m sorry you’re in the wrong place. I…

100+ of the Best Ice Sensory Activities for All Ages
Playing with ice is a low-cost, sensory-rich, and open-ended learning activity. Plus, playing with ice is a wonderful way to support development in learning areas like fine motor skills, cognitive skills, and language development. This blog post will share over 100 different ways to play with ice. I’m also sharing instructions for making different types…

Sorting and Classifying:
How to Make STEM Skills Fun
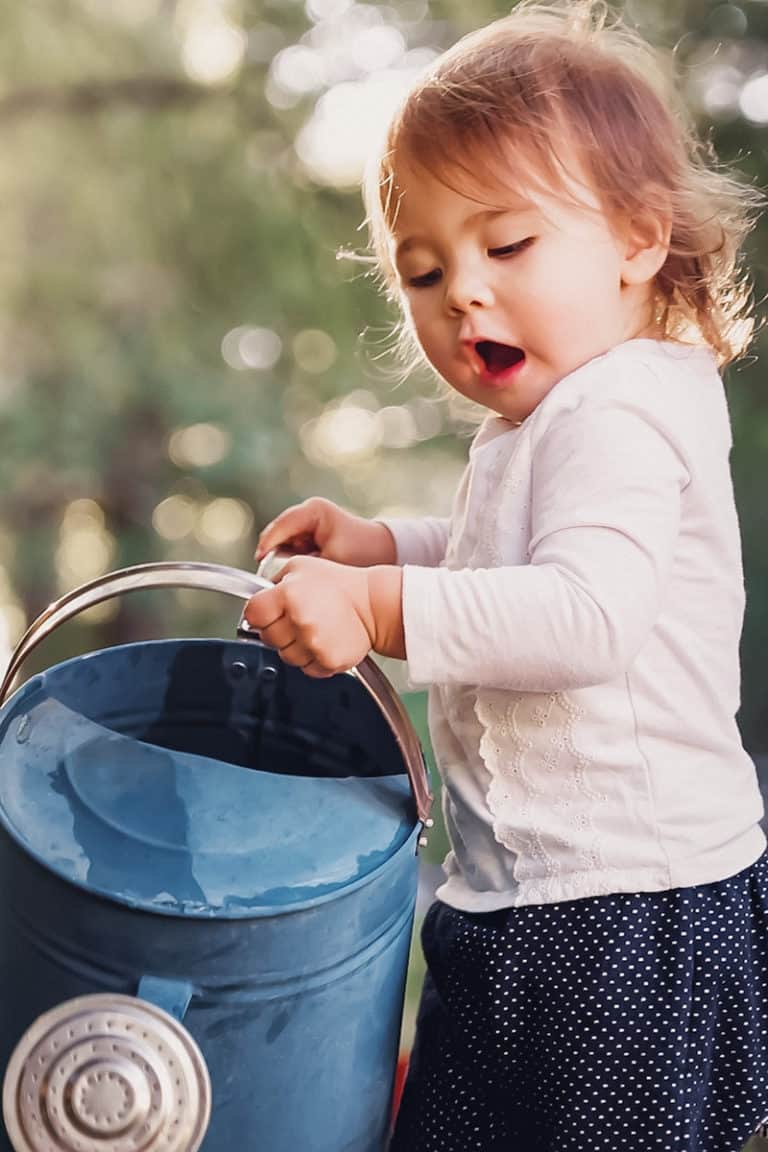
Water Activities for Babies and Toddlers:
Updated December 23, 2023 Water activities are a wonderful way for babies and toddlers to explore and learn about their world. These sensory-rich experiences support development while fostering creativity and cognitive skills in the early years. Below are some of my favorite tested activities from my time as a toddler teacher. Water Activities #1 Sponge…

Easy Play Dough Activities for Toddlers:
Nurture Their Creativity
I’m sharing 12 fun play dough activity ideas that your toddler will adore. These activities are open-ended, so toddlers can play and explore as long as they want. Do you have a toddler who seeks out creative and sensory play? Play dough is the perfect way for them to explore their creativity. It helps with…
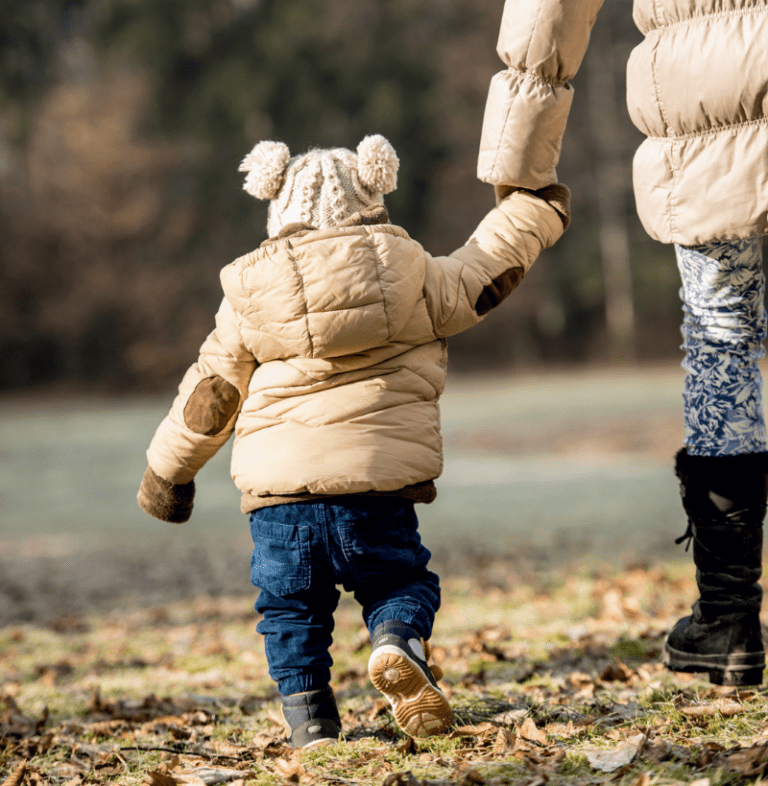
The Best Outdoor Cognitive Activities for Toddlers
Outdoor cognitive activities for toddlers are engaging, sensory-stimulating ways to build essential thinking skills. Here are dozens of outdoor cognitive activities based on the cognitive skills: Types of Outdoor Cognitive Activities: Outdoor play has a significant impact on cognitive development for early learners. Toddlers begin learning about the relationship between themselves and the natural world….
BABY BINS WITH
PLAY & LEARN ACTIVITIES
Baby Bins are designed specifically for the 12-24 month old child. Every activity can be used at home with one or more children or adapted for use in a day care/preschool classroom. Baby Bins are all about exploring and learning together while exposing children to rich language, fine motor skills, sensory learning, and a variety of basic concepts. All activities have been designed as taste safe (but not always TASTY) for curious little learners that still put everything in their mouths.
Here is the most current calendar of baby bin themes:

All themes highlighted in pink are currently in the process of being added to the baby bin curriculum during the 2020-2021 school year. Click the images below to be taken to the blog posts or downloadable curriculum.
See all of our baby activities in action in our themed blog posts! Each theme consists of 5 engaging activities and one 5 book suggestion for the week. Activities include a mix of fine motor, gross motor, and sensory bin/sensory play suggestions every week.
BABY STEAM PLAY: SEASONAL STEAM


LINKS FOR: Fall , Winter , Earth Day , Spring , Summer
BABY BIN: ANIMAL THEME BLOG POSTS


ANIMAL THEMED PLAY: Insects, Frogs, Butterflies, Zoo, Farm, Ocean
This is a frequently asked question?
Make Your Backyard More Fun: 8 Outdoor Activities for Infants
During the infant stage, babies are learning at a rapid pace. According to the Centers for Disease Control and Prevention (CDC), some of the most important developmental milestones in the first year include establishing clearer vision and developing an ability to explore. This is what makes outdoor activities so valuable during infancy. When you and your baby spend time in the backyard, you are helping grow their thinking and reasoning skills. You will also help them engage in social and emotional bonding. New moms or dads also benefit from the outings. Backyard adventures will give you your daily requirement of vitamin D, as well as plenty of fresh air.
The following ideas are perfect for spending time at home. This list of outdoor activities for infants provides ideas for every time of year, so you can take advantage of engaging play during different types of weather. Once you find a few favorites, you will gain a better appreciation for where you live.
1. Outdoor Tummy Time
When you first visit your pediatrician, they will tell you the importance of tummy time. By placing your baby on their stomach to play, they will strengthen their neck and back muscles. They will also develop motor skills. All of this is essential for learning how to sit up, crawl and walk. Infants will do most of their tummy time on a blanket or pad in their nursery or living room. You can also do the activity outside when you want to enjoy fresh air.
Outdoor tummy time is a perfect activity for warm spring days, mild autumn afternoons and summer mornings in the shade. Bring a comfortable blanket outdoors and put it on the ground in a safe place. The best spots have plenty of thick grass free of bugs and debris. Other ideas include your back patio or deck.
Feel free to take toys with you. This may make things more fun and intriguing for the baby. Just be sure you choose items that can handle moisture, heat and humidity. If it is warm or sunny outside, dress your baby in a hat and protective clothing. If you feel a chill in the air, you can layer a jacket or hoodie over a bodysuit and pants. Our Onesies® Brand bodysuits are the perfect choice for layering during all seasons. Cotton material will keep your little one comfortable and cute all day long.
2. Backyard Lunch
In the first several months of your baby’s life, they will drink only breast milk or formula. Your pediatrician will guide you on when you should introduce solids while your child still nurses or drinks bottles. According to the Mayo Clinic, most infants start solid foods between four and six months of age. The right time to start will depend on your baby’s readiness, as well as your healthcare provider’s recommendations. No matter what feeding phase you are in, you and your child can enjoy a peaceful lunch outside. All you need is a comfortable seat or a high chair.
Newborns and young babies will sit with mom during lunch. Choose an outdoor chair that will support your body if you feed or nurse for a while. No matter what time of year you are having lunch outdoors, make sure you are in the shade. Protecting yourself from the sun with an umbrella or a large tree will prevent sunburn and overheating. Dress your child in layers so that you can add or subtract clothing items if the weather changes. Make sure you also wear comfortable clothing and UV-blocking accessories like a hat or sunglasses.
When the baby is ready for a high chair, feel free to take it outside. Choose a chair that is easy to wipe down afterward so it is clean when it goes back indoors. Some families even have an extra chair for their deck or patio. Bring their lunch in portable containers with matching tops. Airtight vessels will keep snacks fresh while protecting them from bugs. It will also be easier to transport different types of food. Remember to pack something for yourself, too. New parents also need to stay nourished.
3. Nature Naps
If your backyard features a patio or enclosed porch, take advantage of it during the warmer times of year. Taking naps in the sunlight can be relaxing and provide you and your baby with plenty of vitamin D. A portable bassinet or crib is a great choice for this space. Some babies don't sleep when it is too bright. Blackout shades or solar screens can make the environment darker and more comfortable. No matter how you adjust the room, you and baby will still enjoy the change of scenery. Nap nearby on a cot, hammock or futon. You can even sit in a chair and take in the natural scenery.
The quiet sound of birds or a babbling brook can also be soothing to baby. As long as you have an electrical outlet nearby, you can even bring your infant sound machine outdoors. Create a sleep playlist with your smartphone to relax your child anywhere.
4. Swimming and Water Play
If your family has a pool in their backyard, you can start taking baby in the water when they are a few months old. At first, you will need to hold them in a shallow part of the pool. Eventually, you can place them in a special seat or float. Other water play ideas include splashing in a bucket of water or letting baby feel the sensations of a gentle water sprinkler. Some parents like to take a newborn tub outdoors on the grass, sand or another soft foundation. Your baby can play in cool water with their favorite bath toys while you enjoy the weather. Adult supervision is always required when your baby is near the pool to guarantee their safety.
Since your child is unable to regulate their body temperature until their first birthday, it is important to keep them comfortable. Avoid water that is too cold. Dress them in the right baby girl or baby boy swimwear, such as a rashguard set with swim bottoms or trunks. Having a plush towel nearby will also help to keep them cozy as soon as they are done swimming or playing.
5. Short Walks

If you want to stay in the backyard for the afternoon, you can still take a walk. Your baby will love taking in the different sights. Stroll around the perimeter of the yard or explore near the fence. Exciting points of exploration include birds, tree leaves and wind chimes. If you have a garden, show them the different plants. You can also walk the driveway, roam around the exterior of your home or travel the sidewalk in your neighborhood.
While you may only be out for a few moments at a time, it is important to protect your baby’s delicate skin. If they are too young to wear infant sunscreen, dress them in an outfit that will prevent them from getting a sunburn. A lightweight cotton shirt can help to block some sunlight while still keeping the baby comfortable. Bodysuits can be worn with or without pants and are perfect for warmer weather. Hats are a good idea for infants of any age. For parents who like using baby carriers, use a free hand to carry a small umbrella. It is also a good idea to stay under a covered area or in the shade. When it is chilly outside, skip the outdoor walk. Instead, roam around your sunroom or enclosed patio.
6. Exploring with Bubbles
Bubbles are fascinating for infants. While they are exciting enough to watch in the early months of your baby’s life, they will also be fun for them to pop once they start sitting, standing or walking. This outdoor activity will help your baby strengthen their vision. They will also begin to learn more about the world around them.
The best thing about bubbles is they are affordable and can be found at almost any store. Buy a small bottle of bubbles with a matching wand or purchase a large jug and a set of tools. When it is a nice day for playing outdoors, you can take it in the backyard with you. You can also do it in your garage, driveway or on your back deck. First, demonstrate for baby how to blow bubbles with the wand. Watch your child delight in the way they float and disintegrate. The activity can even be stress-relieving for parents.
7. Backyard Story Time

It is always a good time to read a book. Take a few of your favorites outside for backyard story time. You will need only a few more supplies to enjoy a peaceful and relaxing reading session. Pack up a couple of bigger baby blankets, along with a hat and some toys. If your child uses a pacifier, it may also be a good idea to take one with you. Moms should also take a water bottle and hat or pair of sunglasses to keep them comfortable.
When you have everything you need, find a shady spot. Lay a blanket down on a soft patch of grass free of insects or mulch. The other blanket can be used for keeping the baby warm or adding extra padding to your first blanket. Read a couple of short books about animals, nature or the great outdoors. Your child may also have a few favorites from bedtime. Whatever you choose, make the activity vibrant and educational. Finger puppets and toy props can add to the fun. Once you are finished, you may even choose to have a snack or take a short rest.
8. Patio Play
Do you or your baby have another favorite activity? Take it out on the patio! Enclosed patios, sunrooms and porches are the perfect place for relaxing in a rocking chair, stacking blocks or playing with a doll. Other ideas include dancing to music, exploring in a playpen or learning with an activity table.
Since patios have plenty of natural light, they are also an ideal spot for learning to crawl or walk. Just make sure your little one has a carpet or padded area in which to move around. Concrete, wood and tile can be uncomfortable for little knees and feet. Sunrooms can be a good place to play with rattles or learn to use a ball, while their large windows also make for a safe and exciting place to learn more about the world around them.
Woods through the seasons
Our woods are a wonderful place to visit all year round. Visit in spring for swathes of bluebells, summer for sunlit picnics, autumn for bright bold colours and winter for snow-topped trees.
Many of our woods come alive with bluebells during the spring.
Discover woods in winter
Screen Time for Two-Year-Olds and Toddlers
If you landed here because you are interested in what the expert-recommended screen time is for two-year-olds and toddlers, I can link the 2020 American Academy of Child and Adolescent Psychiatry (AACAP) recommendations here. But I would like to caution you before you immediately accept that recommendation. From my experience, there is rarely a clear-cut answer…

Easy Toddler Language Activities (by a Developmental Therapist)
Updated: October 21, 2023 As an infant/toddler developmental therapist, I understand the crucial role adults play in shaping toddlers’ language development. Early on, we have the power to influence their communication skills in meaningful ways. I’m excited to share my favorite play-based, nurturing language activities that will not only enrich your toddler’s language journey but…
EASY TODDLER LANGUAGE ACTIVITIES (BY A DEVELOPMENTAL THERAPIST)
100+ Ice Activities: The Best Playing with Ice Ideas
Playing with ice is a low-cost, sensory-rich, and open-ended learning activity. Plus, playing with ice is a wonderful way to support development in learning areas like fine motor skills, cognitive skills, and language development. This blog post will share over 100 different ways to play with ice. I’m also sharing instructions for making different types…
100+ ICE ACTIVITIES: THE BEST PLAYING WITH ICE IDEAS

Water Activities for Babies and Toddlers:
Easy & Teacher-Tested
Updated December 23, 2023 Water activities are a wonderful way for babies and toddlers to explore and learn about their world. These sensory-rich experiences support development while fostering creativity and cognitive skills in the early years. Below are some of my favorite tested activities from my time as a toddler teacher. Water Activities #1 Sponge…
WATER ACTIVITIES FOR BABIES AND TODDLERS: EASY & TEACHER-TESTED
Easy Play Dough Activities for Toddlers:
Nurture Their Creativity
I’m sharing 12 fun play dough activity ideas that your toddler will adore. These activities are open-ended, so toddlers can play and explore as long as they want. Do you have a toddler who seeks out creative and sensory play? Play dough is the perfect way for them to explore their creativity. It helps with…
EASY PLAY DOUGH ACTIVITIES FOR TODDLERS: NURTURE THEIR CREATIVITY

Easy, Mess-Free Activities for 2-Year-Olds (By a Teacher)
While some caregivers don’t mind messy, sensory play. Others prefer mess-free, low-prep activities. I see you all, so I’m sharing indoor and outdoor activities that include no-mess and low-mess activities for 2-year-olds. For the parents and educators wondering “how to do I entertain a two-year-old,” I am sharing dozens of sensory-rich, play-based learning activities. These activities will keep your…
EASY, MESS-FREE ACTIVITIES FOR 2-YEAR-OLDS (BY A TEACHER)

Greatest Play-Based Learning Activities for 8-Month-Olds
Parents and educators often wonder how to play with an 8-month-old baby. These are 18 of my favorite play-based ideas that I use in developmental therapy sessions. Discover interactive and sensory-rich learning experiences to promote babies’ cognitive, language, social, emotional, and physical development skills. Activities by Learning Domain Gross Motor: Lumpy Bumpy Obstacle Course Create…
GREATEST PLAY-BASED LEARNING ACTIVITIES FOR 8-MONTH-OLDS

The Best Outdoor Cognitive Activities for Toddlers
Outdoor cognitive activities for toddlers are engaging, sensory-stimulating ways to build essential thinking skills. Here are dozens of outdoor cognitive activities based on the cognitive skills: Types of Outdoor Cognitive Activities: Outdoor play has a significant impact on cognitive development for early learners. Toddlers begin learning about the relationship between themselves and the natural world….
THE BEST OUTDOOR COGNITIVE ACTIVITIES FOR TODDLERS

Simple Sensory Activities for Babies (Newborn to 14 Months Old)
For babies, almost everything is sensory play. That’s because, at this stage of play development, they constantly learn about their bodies and environment through the senses. Small changes to tummy time or an extra few minutes at a meal can turn into sensory play. You don’t need to spend too much time planning or setting up sensory…
SIMPLE SENSORY ACTIVITIES FOR BABIES (NEWBORN TO 14 MONTHS OLD)
This is a frequently asked question?
This is a FAQ description. Add more detail about this service, such as benefits, appearance, components and value
This is a frequently asked question?
This is a FAQ description. Add more detail about this service, such as benefits, appearance, components and value
This is a frequently asked question?
This is a FAQ description. Add more detail about this service, such as benefits, appearance, components and value